

Content:
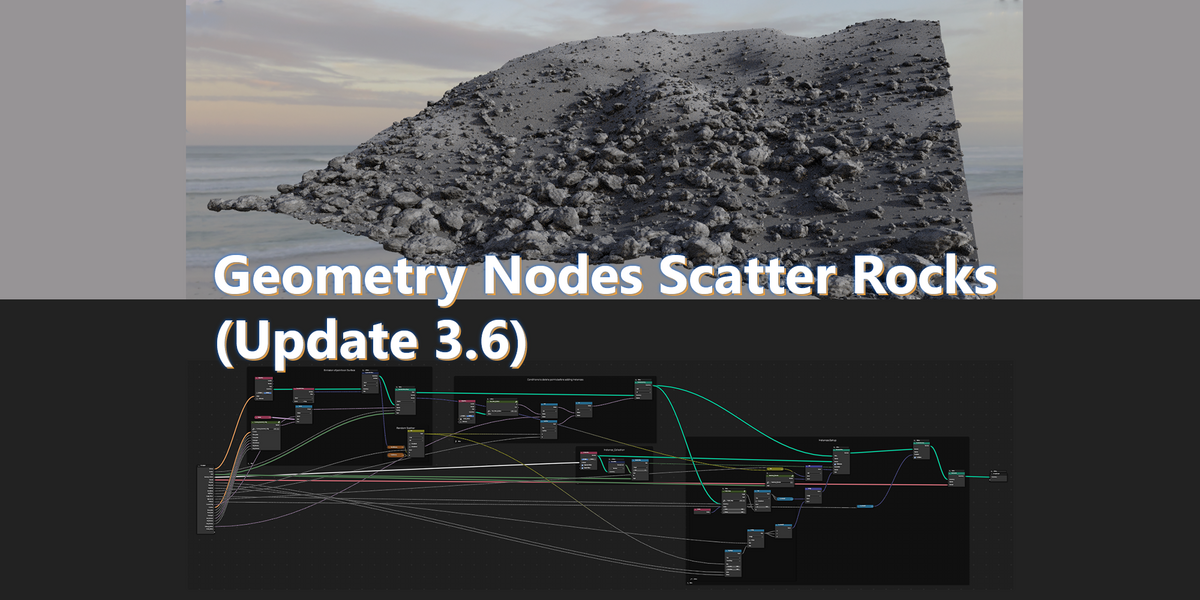
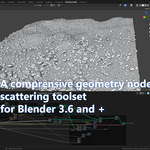
A geometry node setup to scatter rocks instances on a given geometry. I have been using those rocks many times for space and sci-fi pictures. All instances come with UVs, plus 3 procedural shaders with bump\displacement options. Of course This setup can be tweaked to scatter plants or grass for instance.
Blender version is 3.6.4 and 4.x
This is a major update for this product since the two years old 3.4 version. It has been improved in many ways, various optimization tools allow better results and control than before.
How to use it:
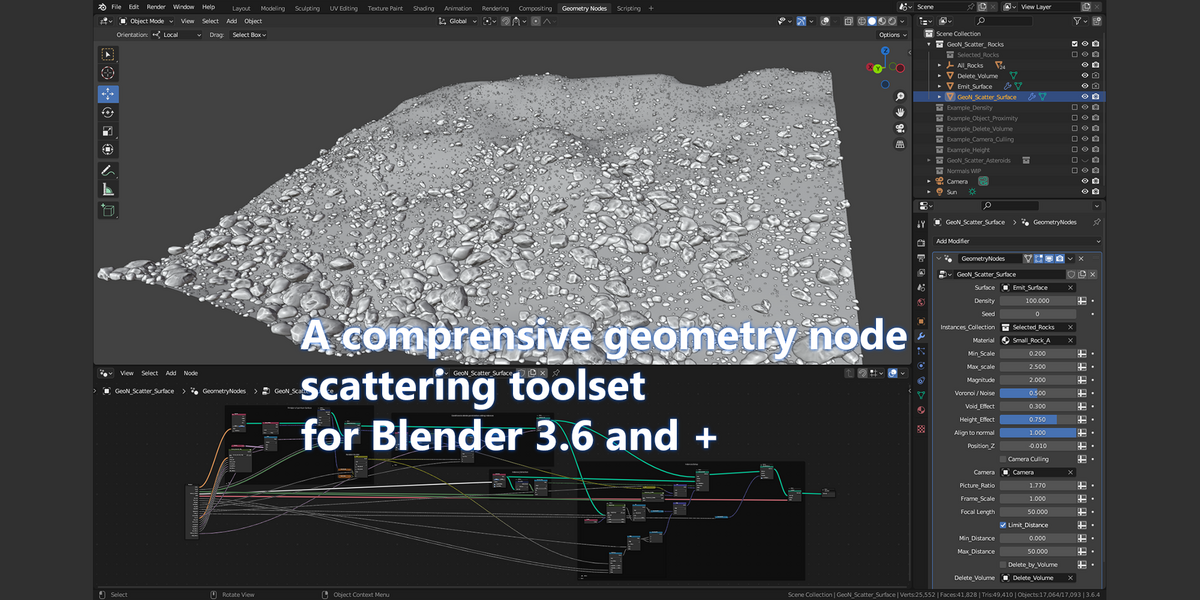
I suggest to start from the GeoN_Scatter_Surface modifier menu. Pick surface geometry, camera and delete volume if needed
Move up or remove the instances you want into the Selected_Rocks collection. They will be scattered on your geometry surface.
Parameters:
Surface: object on which the points will be emitted
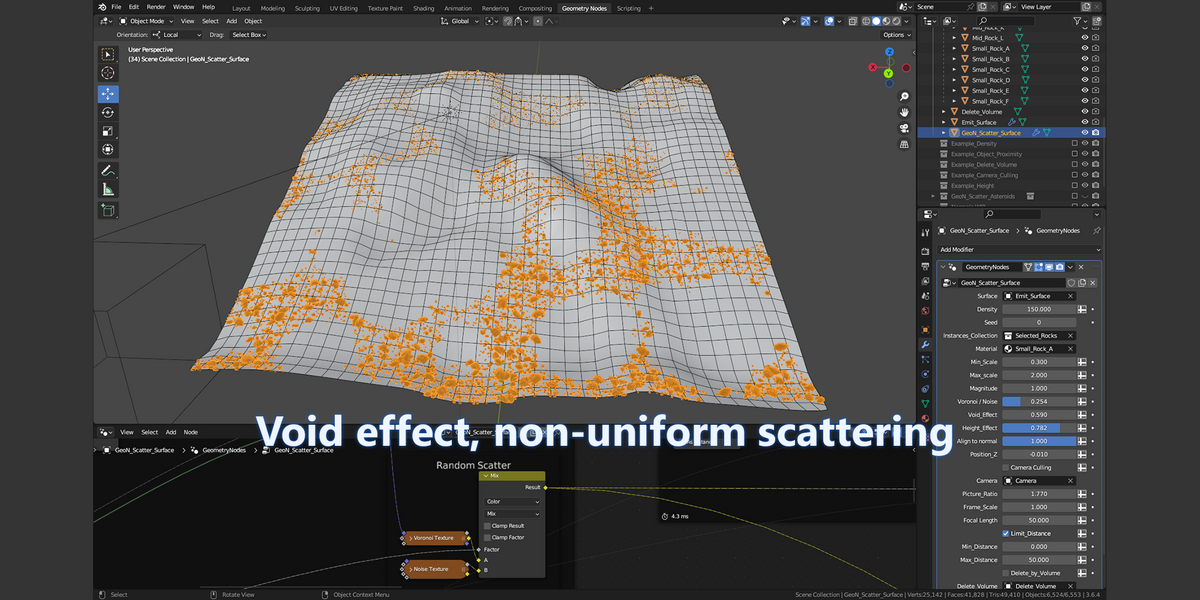
Density: density is relative to the actual surface so if you raise or shrink it, the total of instances will follow. Note: point distribution is set with "Random" by default. "Poisson Disk" gives better control by setting a minimal distance between points, but also heavier to process. You can switch the node to Poisson disk but you should lower the density before, to avoid crashing Blender.
Seed: Change all random values
Instances_Collection: as the name is saying (usually Selected_Rocks). If you want one instance more frequently than others, duplicate it the appropriate number of times to increase its probability and add it to the selected_Rocks collection.
Material: instances material
Min_Scale: Minimum size of instances
Max_Scale: Maximum size of instances
Magnitude: Global scale factor
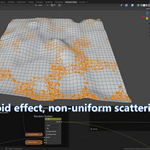
Voronoi / Noise: random formula. Voronoi will give more neat reasults while noise is more diffuse.
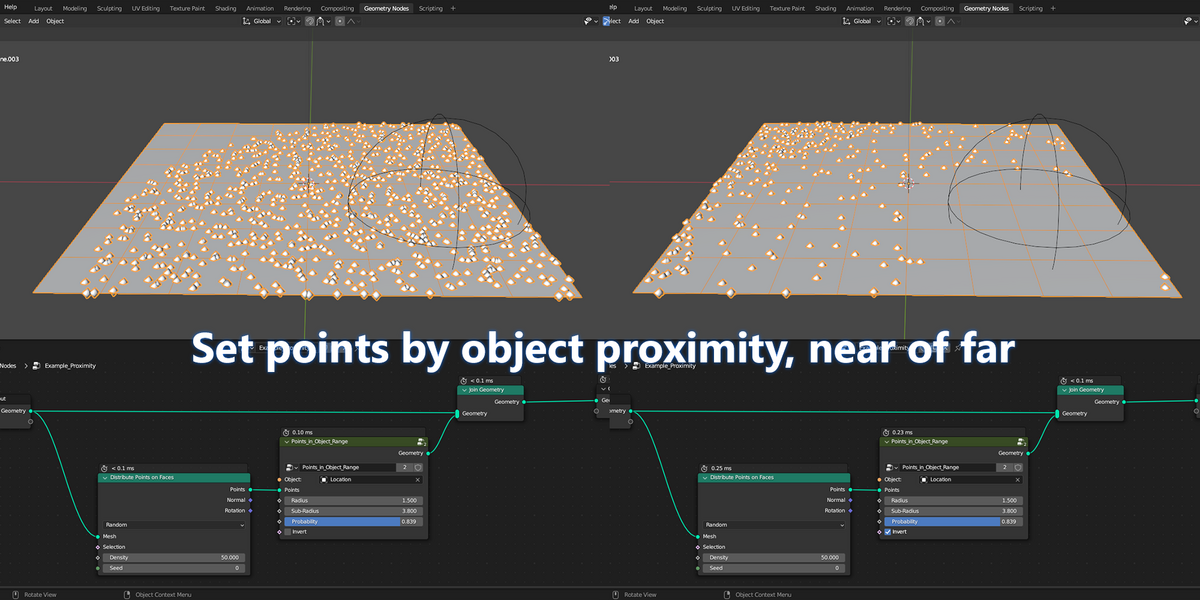
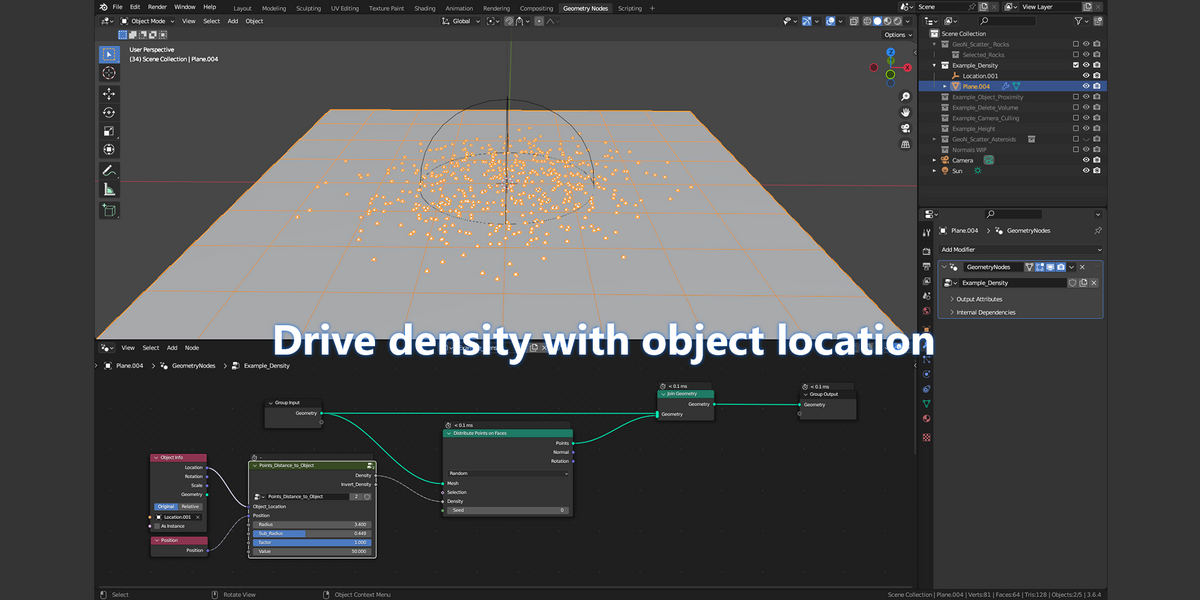
Void_Effect: drives a non-uniform random pattern
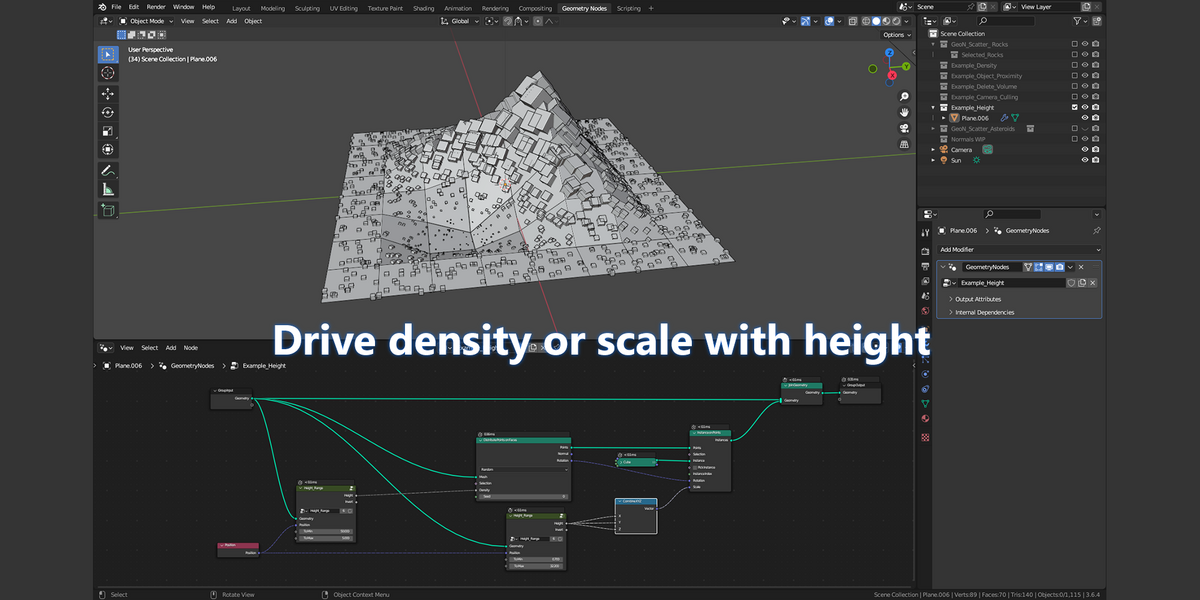
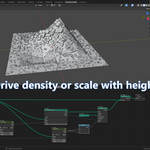
Height_Effect: reduce the number of instances and their scale to reproduce the fact that the stones tend to block the hollows and shift the heights.
Align to normal: align instances to the nearest face normal.
Position_Z: offset up and down instances, it can be done on the local (normal) or global (Z) axis depending on the "align to normal" value.
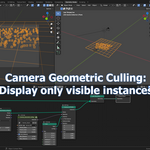
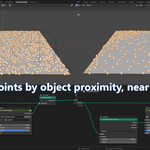
Camera Culling: enables Camera Geometric Culling
Camera: pick session for Camera
Picture_Ratio: The node group need to be driven by the actual camera image ratio (is width divided by height, this can be calculated with drivers either).
Frame_scale: usefull to adjust the culling effect outside the camera's edges to avoid instances popping on screen edge during animations.
Focal_Length: enter camera focal length
Limit_Distance: enables removing instances by their distance from camera
Min_Distance: removes instances before this distance
Max_Distance: removes instances beyond this distance
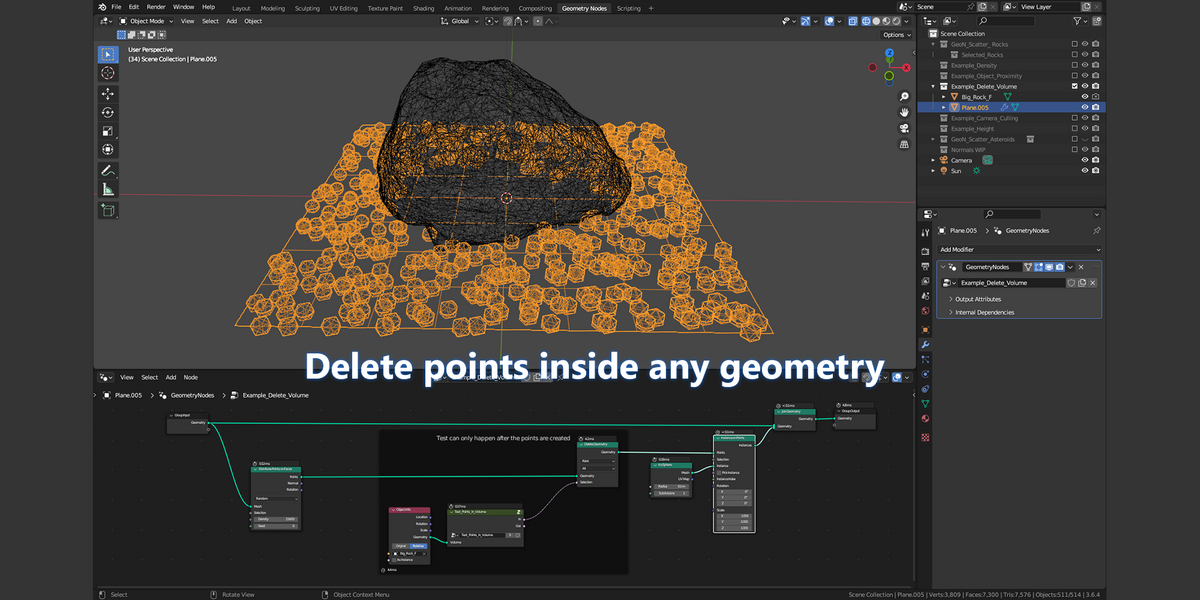
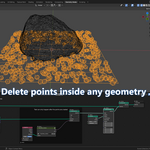
Delete by volume: all instances inside the given volume are deleted. This effect can be inverted at the node tree level.
Delete_Volume: pick session for the Object
Updates:
- Camera geometric culling is now included in the main node tree.
- Surface's UV are now linked to the Voronoi node.
Fixes:
- Void effect is now effective.
- Align to normal is working.
- Instances scale and rotation are now computed at the same time, no undesired change when updating.
License: for any use, personal, educational or commercial.