Addon Translator - Traductor De Complementos - 애드온 번역기 - 插件翻译器
 Alex Quill



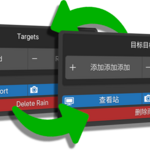
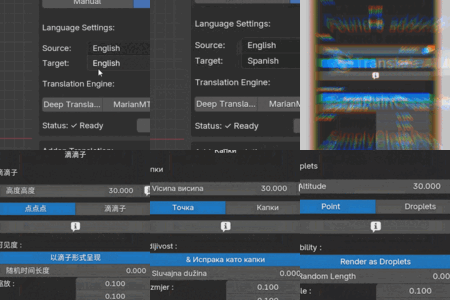
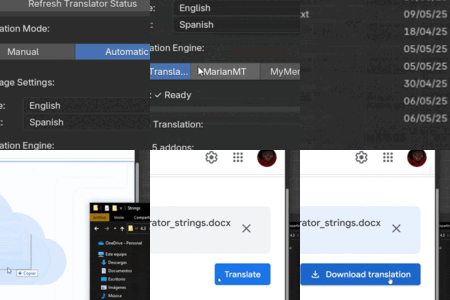
The Addon Translator Documentation
The Addon Translator is a powerful translation tool aimed to make your Blender experience more comfortable. This guide will first show you how to use the automatic method and then will explain how to use some of the more advanced features.
Questions or Concerns
If none of the information here helps you solve your issue, please don't hesitate to contact me though Blendermarket:
Part 1: Automatic Usage
This is the recommended procedure that you will most likely be using. Please don't get intimidated by the amount of text! The actual procedure is really fast and easy; the extra explanations you will find here are simply meant to give you the full picture.
Step 1: Initialize the addon
After you download the zip file, install it like any other Blender addon.
Every time you will open Blender, you will be prompted to initialize the addon:
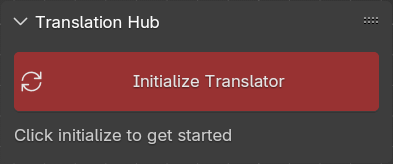
This is necessary only to translate new addons. Otherwise you can even disable the Addon Translator after you are done translating addons to free up space in your N-Panel.
Did you know?
The Translator addon UI itself will always match your Blender language. This includes buttons, tooltips, menus, etc.
Step 2: Select the desired language
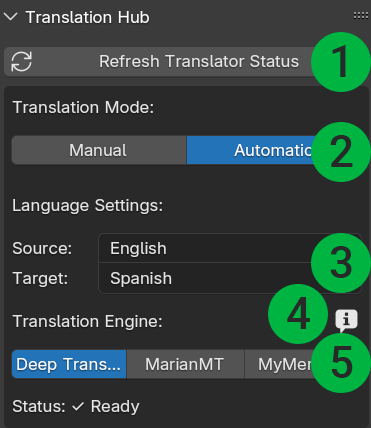
Interface Elements
- Refresh Translator Status: Mostly a debug button. Use it only if you are experiencing any issues with the engines.
- Translation Mode: 'Automatic' is usually the mode you want to go for. Use 'Manual' only if you want to use a different translation engine.
- Language Settings: Select the source and target language to translate your addon(s) to. If you don't know the source language you might want to use the 'Manual' mode as described below.
- Info Icon: Hover your mouse over this icon and wait for a second to see detailed information on the translation engines.
- Translation Engine: Lets you select one of the three engines used to translate your addon. Some engines work better for some language pairs and situations and it's up to you to try them out and pick a winner for your addon.
Step 3: Engine Configuration
The Addon Translator depends on external files for it to work properly. Different translation engines have their own requirements:
Deep Translate: As long as you have an active internet connection, this engine should install itself automatically. You might have to wait a few seconds until you see the "status: Ready" text under it.
MarianMT: This engine takes the longest to install. When you will first open its settings, you will be prompted to locate the 'MarianNT_dependencies.zip' file. You can download this file in the addon files section. Once you select it, it will make the engine ready. After this, you will be able to start translating.
Offline Usage
The MarianMT engine doesn't require you to have an internet connection AS LONG as you previously downloaded the right language model for it. A language model is a ~280Mb file that supports a single translation pair (such as English - French or Spanish - Chinese).
To install a language pair, simply translate any addon or text a single time while using the desired language settings. This will freeze Blender for a minute. After that, you will be able to translate with this language pair offline as much as you want to. You can have as many language pairs installed as you need.
MyMemory: This is a very fast and accurate engine, however it is limited to up to 5000 characters a day or 10000 characters a day if you introduce your email address in its settings (you will have to create a free MyMemory account for that first).
Step 4: Addon Translation
Once you decide the required language pairs and engine, you can click on "Scan installed addons". It will display a list of addons that are currently present in your Blender. Here is what you will see:
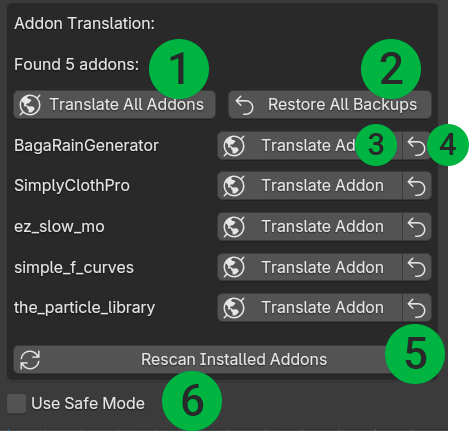
Available Options
- Translate All Addons: This will translate all addons to your desired language using the selected engine. This will take a long time, up to 10 or even 20 minutes depending on the amount of addons you have installed and the selected engine.
- Restore All Backups: Every time an addon is translated, a back up of its original files is being created. This button will restore the backups for every addon in the list. Notice that this will overwrite any translations you already have.
- Translate Addon: This will translate the addon using the selected language and engine.
- Restore Backup: This will restore this single addon to its original language.
- Rescan Installed Addons: Click here if you installed any new addons or extensions AFTER you scanned the addons with the Addon Translator.
- Use safe mode: Enable it only if the translated addon stopped working after the translation. You will have to re-translate it with this mode ON to make it work. This mode will most likely skip some parts of the addon and leave them in their native language.
Note
If you get any issues with a translated addon please send me a screenshot of the error so I can assist you!
Part 2: Manual Usage
Manual mode lets you access more advanced features of the addon. Here is when you might want to use the manual mode:
- Alternative translation engines: None of the three translation engines gave you satisfying results and you want to use an engine such as Google Translate, Doc Translate, Claude Sonnet, etc.
- Unsupported languages: The language you want to translate your addon to isn't supported by the Addon Translator.
- Unknown source language: You don't know the source language of the addon to translate.
- Backup translations: You want to manually back up the translated strings so you can use them later elsewhere.
Step 1
Here is what you will see once you switch to Manual Mode:
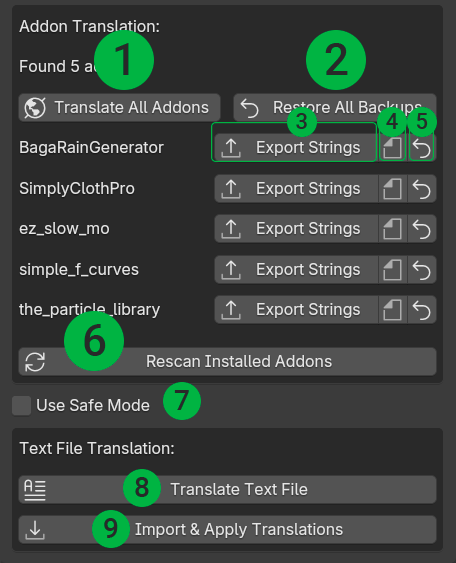
Manual Mode Options
- Translate All Addons: Same as in automatic mode.
- Restore All Backups: Same as in automatic mode.
- Export Strings: This will export all the UI text from the addon into an external text file. Do note that this will only extract the strings that are meant to be translated. This will also create a 'json' file that you'll want to keep in the same folder as the text file.
- Export docx: This button will do the same as the previous one except that it will export a docx file instead of a text one. Websites such as Google Translate only work with docx files, which is why this option is here.
- Restore Backup: Same as in automatic mode.
- Rescan Installed Addons: Same as in automatic mode.
- Use safe mode: When ON, it will only export 'Safe' text. In other words, it will only export UI text that is least likely to cause any issues after translation.
- Translate Text File: This will use one of the three selected engines to translate a text file you've created using the 'Export Strings' function.
- Import & Apply Translations: Will prompt you to select the translated text or docx file. Then, it will apply the translated text into the addon.
Things to consider
- The translated strings need to be located in the same folder with the json file
- Do not rename any of the files you are working with: the docx, text and json file should all keep their original names.
- The addon that will have the translations applied to is determined by the json file
Have questions?
Please do not hesitate to ask! I usually respond to private messages within an hour or two.
Have questions about this product?
Login to message
| Sales | 10+ |
| Dev Fund Contributor | |
| Published | over 1 year ago |
| Blender Version | 3.6 - 4.5 |
| Extension Type | N/A |
| License | GPL |