**IMPORTANT:**
You will need a Windows 10 or Windows 11 machine and an NVIDIA GPU with a minimum of 6 GB of VRAM to use this add-on with the Kimodo AI model.

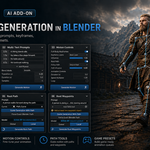
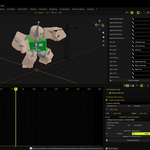
AI Animate Forge is a Blender add-on for generating character motion directly inside your animation workflow. It connects Blender to a local Kimodo installation so you can create motion from text prompts, guide results with existing animation, generate reusable game clips, and constrain locomotion to curves or waypoint objects.

The add-on is split across two Blender workspaces so setup and generation stay clear:

- The 3D View Sidebar is used for Forge AI readiness, rig spawning, and retarget setup.
- The Dopesheet or Action Editor Sidebar is used for prompt entry, mode selection, generation settings, and output.

AI Animate Forge is built for artists who want fast motion ideation inside Blender without leaving the scene, while still keeping control over rigs, actions, root motion, and retargeting.

## What You Can Do

- Generate a single motion clip from one text prompt.
- Build longer actions from multiple prompt segments.
- Guide motion using an existing Blender action as full-body pose constraints.
- Generate a queue of separate game animation clips such as idle, walk, run, jump, and turns, etc.
- Drive locomotion along a Blender curve path.
- Drive locomotion through ordered waypoint objects.
- Spawn Kimodo skeleton rigs for SOMA, G1, and SMPL-X workflows.
- Retarget generated motion from a Kimodo rig onto your own character rig.

## How To Use The Add-on

### 1. Install Or Point To Kimodo

Open Blender Preferences, find AI Animate Forge, and set the Kimodo Folder.

- If Kimodo is already installed locally, point the add-on to that folder.
- If not, choose an empty folder and click Install Kimodo.
- The installer is launched from blender and takes about 10 GB of space and 10-15 minutes depending on your specs

### 2. Prepare A Target Rig

You can work in two ways:

- Generate directly onto a selected Mixamo armature.
- Spawn a Kimodo rig first, then retarget the motion to your own character rig.

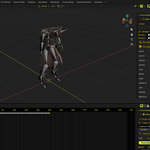
Inside the 3D View Sidebar under Rigs:

- Choose the skeleton type: SOMA, G1, or SMPL-X.
- Click Spawn Kimodo Rig to create a matching source rig.
- Set Kimodo Rig and Character Rig for retargeting.
- Adjust bone mapping if your character bone names do not match automatically.
- Click Setup Retarget to create motion-copying constraints on the character rig.

### 3. Generate Motion

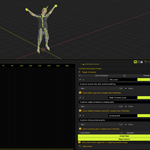
Open the Dopesheet or Action Editor, then open the AI Animate sidebar panel.

- Select the generation Method.
- Select the armature you want to animate on your viewport.
- Enter prompts or constraints depending on the mode.
- Choose your model and generation settings.
- Click Generate, this will take some time at first the better your GPU is the faster it will generate.

## What Each Mode Is For

### 1. Single Text Prompt

Use this mode when you want one motion clip from one prompt.

Best for:

- quick ideation
- one-shot motions
- testing prompt wording
- generating a base clip before retargeting or editing

How to use it:

- Select the armature you want to animate.
- Choose Single Text Prompt as the method.
- Enter a motion prompt starting "A person" followed by the action you want them doing.
- Set Duration and Samples.
- Adjust shared settings like model, diffusion steps, CFG, seed, and motion space, hand pose.
- Click Generate Motion.

### 2. Multi Text Prompt

Use this mode when you want one continuous action that changes over time.

Best for:

- multi-beat performances
- actions with clear transitions
- longer clips with changing intent
- combining several motion ideas into one take

How to use it:

- Choose Multi Text Prompt as the method.
- Add prompt segments.
- Give each segment its own text and duration.
- Set Transition Frames to control how strongly clips blend between segments.
- Set Samples if you want variations.
- Click Generate Sequence.

Example use case:

- Segment 1: A person walks forward casually
- Segment 2: A person turns right and move cautiously

The add-on sends the combined prompt sequence to Kimodo as one continuous generation job.

### 4. Game Animation Preset

Use this mode when you want a library of separate actions for Game Dev animatins.

Best for looping animations, and video game animations.

How to use it:

- Choose Game Animation Preset as the method.
- Add animations manually or load the built-in preset list.
- For each row, set the action name, prompt, duration, and whether the clip should loop.
- Keep Motion Space set to Local for in-place locomotion loops.
- Set Loop Blend, Samples, Linear Keys, and Keep Actions as needed.
- Click Generate Game Queue.

Each queue item is generated as a separate Blender action unless the append to active Action is enabled
then it will add all the animations on to the same action timeline.

### 5. Root Path

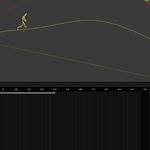
Use this mode when you want the character to travel along a specific Blender curve.

Best for:

- locomotion along a planned route
- cinematic blocking
- hallway, road, or camera-path movement
- keeping travel consistent in world space

How to use it:

- Select the armature you want to animate.
- Choose Root Path as the method.
- Enter the motion prompt.
- Set the duration.
- Pick a Blender curve object in Curve Path.
- Enable Guide Generation With Path if you want the path sent to Kimodo as a root constraint.
- Enable Force Exact Blender Path if you want the final baked result to follow the Blender path exactly.
- Click Generate Root Path.

This mode is useful when you care about both the style of the motion and the physical route through the scene.

### 6. Root Waypoints

Use this mode when you want the character to move through a series of scene objects in order.

Best for:

- blocking travel beats with empties
- loose route planning without a curve
- choreographing movement through landmarks
- navigation-style motion planning

How to use it:

- Select the armature you want to animate.
- Create or place waypoint objects such as empties.
- Choose Root Waypoints as the method.
- Select waypoint objects and click Add Selected.
- Reorder or remove waypoint entries as needed.
- Enter the motion prompt and duration.
- Decide whether to guide Kimodo with the waypoint path or enforce it mainly during Blender bake.
- Click Generate Root Waypoints.

This is the fastest way to sketch directional travel through the scene without building a spline.

## Shared Settings Explained

### Model

- SOMA RP is the recommended default for general human motion work.
- SOMA SEED is an alternate SOMA dataset option.
- G1 models target the Unitree G1 humanoid skeleton.
- SMPL-X targets SMPL-X body model workflows.

### Motion Space

- Global preserves root travel and scene movement.
- Local removes horizontal root travel to keep the animation in place.

Local is usually the better choice for loops and game-ready clips. Global is the better choice for scene locomotion.

### Append To Active Action

When enabled, the generated motion is baked into the selected armature's active action after its last keyframe instead of creating a separate action. The transition into the new section is blended using Transition Frames.

### Diffusion Steps, CFG, Seed, and Samples

- Diffusion Steps controls the denoising pass count. More steps can improve quality but take longer.
- Text CFG controls how strongly the result follows the text prompt.
- Constraint CFG controls how strongly the result follows constraints such as key poses or path data.
- Seed lets you reproduce or vary results.
- Samples controls how many motion variations are requested.

### Skip Post-Processing

This disables foot-skate cleanup and constraint enforcement. It is useful for testing raw results or debugging generation behavior.

## Retargeting Workflow

If you want to drive your own character rig:

- Spawn a Kimodo rig that matches the generated motion skeleton.
- Set that rig as Kimodo Rig.
- Set your character as Character Rig.
- Review the bone mapping list.
- Click Setup Retarget.

The add-on matches bones by Kimodo names and also supports common aliases such as Mixamo-style names. For aliased rigs, the add-on may prefer a safer baked retarget flow instead of direct live constraints.

## Recommended Workflow For New Users

1. Install or point the add-on to a local Kimodo folder.
2. Open the 3D View Sidebar and validate Forge AI readiness.
3. Start with SOMA RP for the smoothest first test.
4. Select a target armature.
5. Open the Dopesheet panel and try Single Text Prompt first.
6. Switch Motion Space to Local for loops or Global for scene travel.
7. When the base workflow feels solid, move on to Multi Text Prompt, Full Body Keyframes, or path-driven modes.
8. If needed, spawn a Kimodo rig and set up retargeting for your production character.

## Notes And Current Limitations

- The bundled installer and launcher scripts are currently Windows-focused.
- The add-on is designed around a local Kimodo installation, not a cloud service.
- Forge AI readiness validates the runtime but does not keep model weights loaded between jobs.
- For the smoothest generate-and-import workflow, use a SOMA model. Current BVH re-import behavior is centered on SOMA BVH output.
- If a model does not export a BVH file, Kimodo output may still be written as NPZ data, but Blender will not auto-import that result as a motion action.
- Root Path and Root Waypoints work best when the destination armature is actively selected before generation.
 DevBud Games