Anypass
 ANYMACTION STUDIO


# ANYpass - Blender Render Pass Manager
## Overview
ANYpass is a powerful Blender add-on for managing multiple render passes within a single scene. Each pass can have independent settings for environment, output format, color management, samples, and more. The add-on streamlines your rendering workflow by eliminating the need to duplicate scenes or manually switch configurations.
## Installation
1. Download the ANYpass add-on package
2. Open Blender and go to **Edit > Preferences > Add-ons**
3. Click **Install...** and select the downloaded ZIP file
4. Enable the add-on by checking the box next to "ANYpass"
5. The ANYpass panel will appear in the 3D Viewport sidebar (press `N` to toggle)
## Getting Started
### Basic Workflow
1. **Enable Preview Mode**: Click the "Passes Off" button in the ANYpass panel header to enable preview mode (it will change to "Passes On")
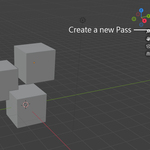
2. **Create a Pass**: Click the `+` button to add a new render pass
3. **Configure Settings**: Select a pass from the list and configure its settings
4. **Preview**: The viewport will automatically update to show the pass preview
5. **Render**: Use the "Render Queue" button to automatically render all enabled passes
## UI Panel Guide
The ANYpass panel is located in the 3D Viewport sidebar (press `N` to toggle). The panel is divided into several sections:
### Header Controls
- **Passes On/Off**: Toggle button to enable or disable preview mode
- **Passes Off**: Preview mode is disabled, scene uses default settings
- **Passes On**: Preview mode is active, current pass settings are applied
- Click the `X` button to exit preview mode
### Pass List
The pass list shows all render passes in your scene:
- **Add Pass** (`+`): Creates a new render pass with default settings
- **Duplicate Pass** (duplicate icon): Creates a copy of the selected pass
- **Remove Pass** (`-`): Deletes the selected pass
- **Move Up/Down** (arrow icons): Reorders passes in the list
### Pass Settings
When a pass is selected, the following settings are available:
#### Basic Settings
- **Name**: The name of the render pass (displayed in the pass list)
- **Enabled**: Checkbox to enable/disable this pass for rendering (unchecked passes are skipped in the render queue)
#### Environment Override
When enabled, allows you to override the scene's environment settings for this pass:
- **Use Solid Color**: Toggle between solid color and environment texture
- **Solid Color**: Use a solid color for the environment
- **Color**: Color picker to select the environment color
- **Environment Texture**: Use an image texture for the environment
- **Texture Selection**: Dropdown to select from loaded images
- **Browse** (folder icon): Opens file browser to load an image
- **Use Scene Environment** (refresh icon): Automatically uses the scene's current environment texture
- **Current Texture**: Displays the name of the selected texture
- **Strength**: Controls the intensity of the environment (0.0 to 10.0)
#### Transparent Background Override
When enabled, allows you to override transparent background settings:
- **Transparent Background**: Enable/disable transparent background for this pass
- **Transparent Glass**: Enable/disable transparent glass effect (for Cycles render engine)
#### Output Format Override
When enabled, allows you to set independent output format settings for this pass:
- **Format**: Select output format (PNG, JPEG, OPEN_EXR, OPEN_EXR_MULTILAYER, TIFF, TARGA, BMP)
- **Color Mode**: Select color mode (BW, RGB, RGBA - availability depends on format)
- **Color Depth**: Select bit depth (8, 16, or 32 bit - availability depends on format)
**Format-Specific Settings:**
- **PNG**:
- **Compression**: PNG compression level (0-100, slider)
- **JPEG**:
- **Quality**: JPEG quality (0-100, slider)
- **EXR** (OPEN_EXR, OPEN_EXR_MULTILAYER):
- **Codec**: Compression codec selection
- **NONE**: No compression (largest files)
- **ZIP**: ZIP compression (recommended, lossless)
- **PIZ**: PIZ compression (good for noisy images, lossless)
- **RLE**: RLE compression (good for CG images, lossless)
- **ZIPS**: ZIPS compression (good for scan-line images, lossless)
- **B44**: B44 compression (lossy, smaller files)
- **B44A**: B44A compression (lossy, adapts to content)
- **DWAA**: DWAA compression (lossy, very small files)
- **DWAB**: DWAB compression (lossy, better quality than DWAA)
- **PXR24**: Pxr24 compression (lossy, Pixar format)
- **Z Buffer**: Enable/disable Z buffer in EXR output
- **Preview**: Enable/disable preview in EXR output
- **TIFF**:
- **Compression**: TIFF compression method
**Scene Default Indicator**: Shows the scene's default format when different from pass format
#### Color Management Override
When enabled, allows you to override color management settings:
- **Display Device**: Select display device (sRGB, Display P3, etc.)
- **View Transform**: Select view transform (Standard, Filmic, etc.)
- **Look**: Select color look (None, Medium High Contrast, etc.)
- **Exposure**: Adjust exposure value (-10.0 to 10.0)
- **Gamma**: Adjust gamma value (0.0 to 10.0)
- **Use Curves**: Enable/disable curve mapping
**Scene Default Indicator**: Shows the scene's default color management settings when different
#### Samples Override
When enabled, allows you to override sample settings (Cycles render engine only):
**Viewport Settings:**
- **Use Denoise**: Enable/disable denoising for viewport
- **Noise Threshold**: Denoise noise threshold (0.0 to 1.0, only shown when denoise is enabled)
- **Max Samples**: Maximum samples for viewport (1 to 4096)
- **Min Samples**: Minimum samples for viewport (1 to 4096)
**Render Settings:**
- **Use Denoise**: Enable/disable denoising for final render
- **Noise Threshold**: Denoise noise threshold (0.0 to 1.0, only shown when denoise is enabled)
- **Max Samples**: Maximum samples for render (1 to 4096)
- **Min Samples**: Minimum samples for render (1 to 4096)
- **Time Limit**: Maximum render time in seconds (0 = unlimited)
**Scene Default Indicator**: Shows the scene's default sample settings when different
#### Blender Passes Override
When enabled, allows you to configure which Blender native passes are included in the render output:
**Include Group:**
- **Z**: Z-depth pass
- **Mist**: Mist pass
- **Position**: Position pass
- **Normal**: Normal pass
- **Vector**: Vector pass
- **UV**: UV pass
- **Denoising Data**: Denoising data pass
**Indexes Group:**
- **Object Index**: Object index pass
- **Material Index**: Material index pass
**Light Group:**
- **Diffuse**: Diffuse lighting passes
- **Direct**: Direct diffuse
- **Indirect**: Indirect diffuse
- **Color**: Diffuse color
- **Glossy**: Glossy lighting passes
- **Direct**: Direct glossy
- **Indirect**: Indirect glossy
- **Color**: Glossy color
- **Transmission**: Transmission passes
- **Direct**: Direct transmission
- **Indirect**: Indirect transmission
- **Color**: Transmission color
- **Volume**: Volume passes
- **Direct**: Direct volume
- **Indirect**: Indirect volume
- **Subsurface Color**: Subsurface color
- **Other**: Other light passes
- **Emission**: Emission pass
- **Environment**: Environment pass
- **Shadow**: Shadow pass
- **Ambient Occlusion**: Ambient occlusion pass
- **Shadow Catcher Pass**: Shadow catcher pass
### Partitions
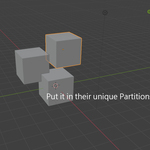
Partitions allow you to organize objects and lights into groups for each pass:
#### Partition List
- **Add Partition** (cube icon): Creates a new object partition
- **Add Light Partition** (light icon): Creates a new light partition
- **Remove Partition** (`-`): Removes the selected partition
- **Move Up/Down** (arrow icons): Reorders partitions
**Default Partitions:**
- **Default_Objects_Partition**: Contains all mesh objects by default
- **Default_Lights_Partition**: Contains all lights by default
- These cannot be removed
#### Partition Settings
When a partition is selected:
- **Name**: The name of the partition
- **Visibility Toggle** (eye icon): Show/hide the entire partition
- **Objects/Lights List**: Shows all objects or lights in this partition
- **Add Object** (`+`): Adds selected objects to this partition
- **Remove Object** (`-`): Removes selected object from partition
- **Visibility Toggle** (eye icon): Show/hide individual objects
- **Object Name**: Click to select object in scene
**Object Partition Settings:**
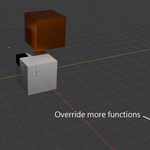
- **Override Ray Visibility**: Enable to override ray visibility settings
- **Camera**: Visible to camera rays
- **Diffuse**: Visible to diffuse rays
- **Glossy**: Visible to glossy rays
- **Transmission**: Visible to transmission rays
- **Shadow**: Casts shadows
- **Volume**: Visible to volume scatter rays
- **Override Mask Settings**: Enable to override mask settings
- **Shadow Catcher**: Object acts as shadow catcher
- **Holdout**: Object acts as holdout
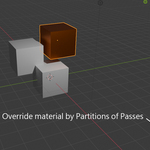
- **Override Material**: Enable to override materials
- **Material Selection**: Dropdown to select material
- **Create New Material** (`+`): Creates a new material for override
- **Add Material Slots**: Adds material slots to objects that don't have any
**Light Partition Settings:**
- **Override Ray Visibility**: Same as object partitions (without Shadow option)
### Output Settings
Global output settings for all passes:
- **Path**: Global output directory path for all passes
- Pass-specific paths can be set in the pass name field (use `//` for relative paths)
- **Enable Render Log**: Enable/disable render logging
- Logs are saved in the output directory
### Render Queue
- **Render Queue** button: Starts automatic rendering of all enabled passes
- Passes are rendered sequentially
- Each pass uses its own settings and output path
- Progress is shown in the panel
## FAQ
### General Questions
**Q: How do I enable the ANYpass panel?**
A: The panel appears automatically in the 3D Viewport sidebar. Press `N` to toggle the sidebar if it's not visible. Look for the "ANYpass" tab.
**Q: Why don't I see any changes when I modify pass settings?**
A: Make sure "Passes On" mode is enabled. Click the "Passes Off" button in the panel header to enable preview mode.
**Q: Can I use ANYpass with Eevee render engine?**
A: Yes, but some features like Samples Override are Cycles-specific. Most other features work with both Cycles and Eevee.
**Q: How do I render multiple passes automatically?**
A: Enable "Passes On" mode, configure your passes, ensure they are enabled (checkbox checked), then click the "Render Queue" button. All enabled passes will be rendered sequentially.
### Pass Management
**Q: How do I create a new pass?**
A: Click the `+` button in the pass list section of the panel.
**Q: Can I duplicate a pass?**
A: Yes, select a pass and click the duplicate icon button in the pass list controls.
**Q: How do I change the order of passes?**
A: Use the up/down arrow buttons in the pass list controls to reorder passes.
**Q: What happens if I disable a pass?**
A: Disabled passes are skipped during automatic rendering but remain in the scene for later use.
### Settings and Overrides
**Q: What's the difference between enabling an override and not enabling it?**
A: When an override is disabled, the pass uses the scene's default settings. When enabled, the pass uses its own independent settings.
**Q: Can I use different output formats for different passes?**
A: Yes, enable "Override Output Format" for each pass and set the desired format independently.
**Q: How do I set different environment textures for different passes?**
A: Enable "Override Environment" for each pass, then select or load different environment textures for each one.
**Q: What happens to my original scene settings?**
A: Original scene settings are automatically saved when you enter preview mode and restored when you exit. Your scene is protected.
### Partitions
**Q: What are partitions used for?**
A: Partitions allow you to organize objects and lights into groups, making it easier to control visibility, materials, and other settings per pass.
**Q: Can I add the same object to multiple partitions?**
A: No, each object can only be in one partition per pass. Adding an object to a new partition removes it from the previous one.
**Q: What are the default partitions?**
A: "Default_Objects_Partition" contains all mesh objects, and "Default_Lights_Partition" contains all lights. These are created automatically and cannot be removed.
**Q: How do I control which objects are visible in a pass?**
A: Use the visibility toggles (eye icons) in the partition and object lists. You can control visibility at both the partition level and individual object level.
**Q: What is Ray Visibility?**
A: Ray Visibility controls how objects interact with different types of light rays (camera, diffuse, glossy, transmission, shadow, volume). This allows for advanced compositing effects.
**Q: What are Shadow Catcher and Holdout?**
A: Shadow Catcher makes objects receive shadows but remain transparent. Holdout makes objects create holes in the render. Both are useful for compositing.
### Rendering
**Q: How does the render queue work?**
A: The render queue automatically renders all enabled passes sequentially. Each pass uses its own settings and output path. You don't need to manually switch between passes.
**Q: Can I render passes individually?**
A: Yes, you can manually render by selecting a pass, enabling preview mode, and using Blender's standard render command (F12).
**Q: Where are rendered images saved?**
A: Images are saved to the path specified in "Output Settings" or the pass-specific path if set. Check the output path field in the panel.
**Q: What is render logging?**
A: Render logging records information about each render pass including status, time, and errors. Logs are saved as text files in the output directory.
### Troubleshooting
**Q: The panel doesn't appear after installation.**
A: Make sure the add-on is enabled in Edit > Preferences > Add-ons. Try restarting Blender.
**Q: Changes to pass settings don't apply.**
A: Ensure "Passes On" mode is active. The button in the header should say "Passes On".
**Q: Objects don't appear/disappear when I change visibility.**
A: Make sure you're in preview mode ("Passes On"). Also check both partition and object visibility settings.
**Q: Materials don't change when I enable material override.**
A: Ensure the partition has "Override Material" enabled and a material is selected. Also make sure objects in the partition have material slots (use "Add Material Slots" if needed).
**Q: Render queue doesn't start.**
A: Make sure at least one pass is enabled (checkbox checked). Also ensure you're not already in a render queue process.
**Q: Output files are saved to the wrong location.**
A: Check the "Output Settings" path in the panel. You can also set pass-specific paths in the pass name field.
## Support
For issues, questions, or feature requests, please contact the developer through the Blender Market support system.
## Version
Current version: 2.0.0
## License
This add-on is licensed under the GNU GPL v3. See LICENSE.txt for details.
## Overview
ANYpass is a powerful Blender add-on for managing multiple render passes within a single scene. Each pass can have independent settings for environment, output format, color management, samples, and more. The add-on streamlines your rendering workflow by eliminating the need to duplicate scenes or manually switch configurations.
## Installation
1. Download the ANYpass add-on package
2. Open Blender and go to **Edit > Preferences > Add-ons**
3. Click **Install...** and select the downloaded ZIP file
4. Enable the add-on by checking the box next to "ANYpass"
5. The ANYpass panel will appear in the 3D Viewport sidebar (press `N` to toggle)
## Getting Started
### Basic Workflow
1. **Enable Preview Mode**: Click the "Passes Off" button in the ANYpass panel header to enable preview mode (it will change to "Passes On")
2. **Create a Pass**: Click the `+` button to add a new render pass
3. **Configure Settings**: Select a pass from the list and configure its settings
4. **Preview**: The viewport will automatically update to show the pass preview
5. **Render**: Use the "Render Queue" button to automatically render all enabled passes
## UI Panel Guide
The ANYpass panel is located in the 3D Viewport sidebar (press `N` to toggle). The panel is divided into several sections:
### Header Controls
- **Passes On/Off**: Toggle button to enable or disable preview mode
- **Passes Off**: Preview mode is disabled, scene uses default settings
- **Passes On**: Preview mode is active, current pass settings are applied
- Click the `X` button to exit preview mode
### Pass List
The pass list shows all render passes in your scene:
- **Add Pass** (`+`): Creates a new render pass with default settings
- **Duplicate Pass** (duplicate icon): Creates a copy of the selected pass
- **Remove Pass** (`-`): Deletes the selected pass
- **Move Up/Down** (arrow icons): Reorders passes in the list
### Pass Settings
When a pass is selected, the following settings are available:
#### Basic Settings
- **Name**: The name of the render pass (displayed in the pass list)
- **Enabled**: Checkbox to enable/disable this pass for rendering (unchecked passes are skipped in the render queue)
#### Environment Override
When enabled, allows you to override the scene's environment settings for this pass:
- **Use Solid Color**: Toggle between solid color and environment texture
- **Solid Color**: Use a solid color for the environment
- **Color**: Color picker to select the environment color
- **Environment Texture**: Use an image texture for the environment
- **Texture Selection**: Dropdown to select from loaded images
- **Browse** (folder icon): Opens file browser to load an image
- **Use Scene Environment** (refresh icon): Automatically uses the scene's current environment texture
- **Current Texture**: Displays the name of the selected texture
- **Strength**: Controls the intensity of the environment (0.0 to 10.0)
#### Transparent Background Override
When enabled, allows you to override transparent background settings:
- **Transparent Background**: Enable/disable transparent background for this pass
- **Transparent Glass**: Enable/disable transparent glass effect (for Cycles render engine)
#### Output Format Override
When enabled, allows you to set independent output format settings for this pass:
- **Format**: Select output format (PNG, JPEG, OPEN_EXR, OPEN_EXR_MULTILAYER, TIFF, TARGA, BMP)
- **Color Mode**: Select color mode (BW, RGB, RGBA - availability depends on format)
- **Color Depth**: Select bit depth (8, 16, or 32 bit - availability depends on format)
**Format-Specific Settings:**
- **PNG**:
- **Compression**: PNG compression level (0-100, slider)
- **JPEG**:
- **Quality**: JPEG quality (0-100, slider)
- **EXR** (OPEN_EXR, OPEN_EXR_MULTILAYER):
- **Codec**: Compression codec selection
- **NONE**: No compression (largest files)
- **ZIP**: ZIP compression (recommended, lossless)
- **PIZ**: PIZ compression (good for noisy images, lossless)
- **RLE**: RLE compression (good for CG images, lossless)
- **ZIPS**: ZIPS compression (good for scan-line images, lossless)
- **B44**: B44 compression (lossy, smaller files)
- **B44A**: B44A compression (lossy, adapts to content)
- **DWAA**: DWAA compression (lossy, very small files)
- **DWAB**: DWAB compression (lossy, better quality than DWAA)
- **PXR24**: Pxr24 compression (lossy, Pixar format)
- **Z Buffer**: Enable/disable Z buffer in EXR output
- **Preview**: Enable/disable preview in EXR output
- **TIFF**:
- **Compression**: TIFF compression method
**Scene Default Indicator**: Shows the scene's default format when different from pass format
#### Color Management Override
When enabled, allows you to override color management settings:
- **Display Device**: Select display device (sRGB, Display P3, etc.)
- **View Transform**: Select view transform (Standard, Filmic, etc.)
- **Look**: Select color look (None, Medium High Contrast, etc.)
- **Exposure**: Adjust exposure value (-10.0 to 10.0)
- **Gamma**: Adjust gamma value (0.0 to 10.0)
- **Use Curves**: Enable/disable curve mapping
**Scene Default Indicator**: Shows the scene's default color management settings when different
#### Samples Override
When enabled, allows you to override sample settings (Cycles render engine only):
**Viewport Settings:**
- **Use Denoise**: Enable/disable denoising for viewport
- **Noise Threshold**: Denoise noise threshold (0.0 to 1.0, only shown when denoise is enabled)
- **Max Samples**: Maximum samples for viewport (1 to 4096)
- **Min Samples**: Minimum samples for viewport (1 to 4096)
**Render Settings:**
- **Use Denoise**: Enable/disable denoising for final render
- **Noise Threshold**: Denoise noise threshold (0.0 to 1.0, only shown when denoise is enabled)
- **Max Samples**: Maximum samples for render (1 to 4096)
- **Min Samples**: Minimum samples for render (1 to 4096)
- **Time Limit**: Maximum render time in seconds (0 = unlimited)
**Scene Default Indicator**: Shows the scene's default sample settings when different
#### Blender Passes Override
When enabled, allows you to configure which Blender native passes are included in the render output:
**Include Group:**
- **Z**: Z-depth pass
- **Mist**: Mist pass
- **Position**: Position pass
- **Normal**: Normal pass
- **Vector**: Vector pass
- **UV**: UV pass
- **Denoising Data**: Denoising data pass
**Indexes Group:**
- **Object Index**: Object index pass
- **Material Index**: Material index pass
**Light Group:**
- **Diffuse**: Diffuse lighting passes
- **Direct**: Direct diffuse
- **Indirect**: Indirect diffuse
- **Color**: Diffuse color
- **Glossy**: Glossy lighting passes
- **Direct**: Direct glossy
- **Indirect**: Indirect glossy
- **Color**: Glossy color
- **Transmission**: Transmission passes
- **Direct**: Direct transmission
- **Indirect**: Indirect transmission
- **Color**: Transmission color
- **Volume**: Volume passes
- **Direct**: Direct volume
- **Indirect**: Indirect volume
- **Subsurface Color**: Subsurface color
- **Other**: Other light passes
- **Emission**: Emission pass
- **Environment**: Environment pass
- **Shadow**: Shadow pass
- **Ambient Occlusion**: Ambient occlusion pass
- **Shadow Catcher Pass**: Shadow catcher pass
### Partitions
Partitions allow you to organize objects and lights into groups for each pass:
#### Partition List
- **Add Partition** (cube icon): Creates a new object partition
- **Add Light Partition** (light icon): Creates a new light partition
- **Remove Partition** (`-`): Removes the selected partition
- **Move Up/Down** (arrow icons): Reorders partitions
**Default Partitions:**
- **Default_Objects_Partition**: Contains all mesh objects by default
- **Default_Lights_Partition**: Contains all lights by default
- These cannot be removed
#### Partition Settings
When a partition is selected:
- **Name**: The name of the partition
- **Visibility Toggle** (eye icon): Show/hide the entire partition
- **Objects/Lights List**: Shows all objects or lights in this partition
- **Add Object** (`+`): Adds selected objects to this partition
- **Remove Object** (`-`): Removes selected object from partition
- **Visibility Toggle** (eye icon): Show/hide individual objects
- **Object Name**: Click to select object in scene
**Object Partition Settings:**
- **Override Ray Visibility**: Enable to override ray visibility settings
- **Camera**: Visible to camera rays
- **Diffuse**: Visible to diffuse rays
- **Glossy**: Visible to glossy rays
- **Transmission**: Visible to transmission rays
- **Shadow**: Casts shadows
- **Volume**: Visible to volume scatter rays
- **Override Mask Settings**: Enable to override mask settings
- **Shadow Catcher**: Object acts as shadow catcher
- **Holdout**: Object acts as holdout
- **Override Material**: Enable to override materials
- **Material Selection**: Dropdown to select material
- **Create New Material** (`+`): Creates a new material for override
- **Add Material Slots**: Adds material slots to objects that don't have any
**Light Partition Settings:**
- **Override Ray Visibility**: Same as object partitions (without Shadow option)
### Output Settings
Global output settings for all passes:
- **Path**: Global output directory path for all passes
- Pass-specific paths can be set in the pass name field (use `//` for relative paths)
- **Enable Render Log**: Enable/disable render logging
- Logs are saved in the output directory
### Render Queue
- **Render Queue** button: Starts automatic rendering of all enabled passes
- Passes are rendered sequentially
- Each pass uses its own settings and output path
- Progress is shown in the panel
## FAQ
### General Questions
**Q: How do I enable the ANYpass panel?**
A: The panel appears automatically in the 3D Viewport sidebar. Press `N` to toggle the sidebar if it's not visible. Look for the "ANYpass" tab.
**Q: Why don't I see any changes when I modify pass settings?**
A: Make sure "Passes On" mode is enabled. Click the "Passes Off" button in the panel header to enable preview mode.
**Q: Can I use ANYpass with Eevee render engine?**
A: Yes, but some features like Samples Override are Cycles-specific. Most other features work with both Cycles and Eevee.
**Q: How do I render multiple passes automatically?**
A: Enable "Passes On" mode, configure your passes, ensure they are enabled (checkbox checked), then click the "Render Queue" button. All enabled passes will be rendered sequentially.
### Pass Management
**Q: How do I create a new pass?**
A: Click the `+` button in the pass list section of the panel.
**Q: Can I duplicate a pass?**
A: Yes, select a pass and click the duplicate icon button in the pass list controls.
**Q: How do I change the order of passes?**
A: Use the up/down arrow buttons in the pass list controls to reorder passes.
**Q: What happens if I disable a pass?**
A: Disabled passes are skipped during automatic rendering but remain in the scene for later use.
### Settings and Overrides
**Q: What's the difference between enabling an override and not enabling it?**
A: When an override is disabled, the pass uses the scene's default settings. When enabled, the pass uses its own independent settings.
**Q: Can I use different output formats for different passes?**
A: Yes, enable "Override Output Format" for each pass and set the desired format independently.
**Q: How do I set different environment textures for different passes?**
A: Enable "Override Environment" for each pass, then select or load different environment textures for each one.
**Q: What happens to my original scene settings?**
A: Original scene settings are automatically saved when you enter preview mode and restored when you exit. Your scene is protected.
### Partitions
**Q: What are partitions used for?**
A: Partitions allow you to organize objects and lights into groups, making it easier to control visibility, materials, and other settings per pass.
**Q: Can I add the same object to multiple partitions?**
A: No, each object can only be in one partition per pass. Adding an object to a new partition removes it from the previous one.
**Q: What are the default partitions?**
A: "Default_Objects_Partition" contains all mesh objects, and "Default_Lights_Partition" contains all lights. These are created automatically and cannot be removed.
**Q: How do I control which objects are visible in a pass?**
A: Use the visibility toggles (eye icons) in the partition and object lists. You can control visibility at both the partition level and individual object level.
**Q: What is Ray Visibility?**
A: Ray Visibility controls how objects interact with different types of light rays (camera, diffuse, glossy, transmission, shadow, volume). This allows for advanced compositing effects.
**Q: What are Shadow Catcher and Holdout?**
A: Shadow Catcher makes objects receive shadows but remain transparent. Holdout makes objects create holes in the render. Both are useful for compositing.
### Rendering
**Q: How does the render queue work?**
A: The render queue automatically renders all enabled passes sequentially. Each pass uses its own settings and output path. You don't need to manually switch between passes.
**Q: Can I render passes individually?**
A: Yes, you can manually render by selecting a pass, enabling preview mode, and using Blender's standard render command (F12).
**Q: Where are rendered images saved?**
A: Images are saved to the path specified in "Output Settings" or the pass-specific path if set. Check the output path field in the panel.
**Q: What is render logging?**
A: Render logging records information about each render pass including status, time, and errors. Logs are saved as text files in the output directory.
### Troubleshooting
**Q: The panel doesn't appear after installation.**
A: Make sure the add-on is enabled in Edit > Preferences > Add-ons. Try restarting Blender.
**Q: Changes to pass settings don't apply.**
A: Ensure "Passes On" mode is active. The button in the header should say "Passes On".
**Q: Objects don't appear/disappear when I change visibility.**
A: Make sure you're in preview mode ("Passes On"). Also check both partition and object visibility settings.
**Q: Materials don't change when I enable material override.**
A: Ensure the partition has "Override Material" enabled and a material is selected. Also make sure objects in the partition have material slots (use "Add Material Slots" if needed).
**Q: Render queue doesn't start.**
A: Make sure at least one pass is enabled (checkbox checked). Also ensure you're not already in a render queue process.
**Q: Output files are saved to the wrong location.**
A: Check the "Output Settings" path in the panel. You can also set pass-specific paths in the pass name field.
## Support
For issues, questions, or feature requests, please contact the developer through the Blender Market support system.
## Version
Current version: 2.0.0
## License
This add-on is licensed under the GNU GPL v3. See LICENSE.txt for details.
$15
Have questions about this product?
Login to message
| Blender Extension Compatible | Yes |
| Published | 8 months ago |
| Blender Version | 3.3 - 4.5 |
| Extension Type | Add-on |
| Render Engine Used | Cycles |
| License | Mit |