Architect Layout Utility Tools
 CelladorProject


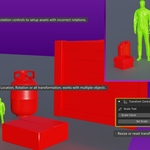
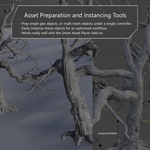
# Architect Tool Documentation
## Table of Contents
1. [Overview](#overview)
2. [Installation](#installation)
3. [Material Control](#material-control)
4. [Center Control](#center-control)
5. [Utility Control](#utility-control)
6. [Transform Control](#transform-control)
7. [Smart Asset Prep](#smart-asset-prep)
8. [Smart Asset Instancer](#smart-asset-instancer)
9. [Use Case Scenarios](#use-case-scenarios)
10. [Best Practices](#best-practices)
11. [Troubleshooting](#troubleshooting)
## Overview
The Architect Tool is a comprehensive Blender add-on designed for environmental artists and architectural visualization professionals. It provides streamlined workflows for material management, object organization, transformation operations, and asset preparation.
### Key Features
- **Material Control**: Batch rename and apply materials with Pascal_Snake_Case formatting
- **Center Control**: Precise origin manipulation for objects
- **Utility Control**: Object renaming, collection management, and smart visibility controls
- **Transform Control**: Batch scaling, rotation, and transformation application
- **Smart Asset Prep**: Automated asset preparation with empty hierarchy creation (cluster and individual modes)
- **Smart Asset Instancer**: Efficient asset instancing at origin with CTL control empties
### Add-on Compatibility
**Works Seamlessly with Smart Asset Placer**
The Architect Tool is designed to work exceptionally well with the **Smart Asset Placer** add-on (separate installation required). This powerful combination creates a complete asset preparation and placement workflow:
- **Architect Tool**: Prepares, organizes, and instances your assets with proper hierarchies and controls
- **Smart Asset Placer**: Places and distributes your prepared assets throughout your scene with precision
**Recommended Workflow:**
1. Use Architect Tool's Smart Asset Prep to create organized asset hierarchies
2. Use Smart Asset Instancer to create animation-ready instances at origin
3. Use Smart Asset Placer to distribute and place instances throughout your scene
4. Use Architect Tool's visibility controls to manage complex populated scenes
This combination is particularly powerful for architectural visualization, environment art, and large-scale scene population projects.
### Version Information
- **Current Version**: 1.3.4
- **Blender Compatibility**: 4.2.0+
- **Location**: View3D > N-Panel > Architect
## Installation
1. Download the Architect Tool add-on files
2. In Blender, go to Edit > Preferences > Add-ons
3. Click "Install..." and select the add-on folder
4. Enable "Architect" in the add-ons list
5. Access the tool via the N-Panel in the 3D Viewport under the "Architect" tab
## Material Control
### Rename Materials in Hierarchy
Automatically renames all materials in an object's hierarchy using a consistent naming convention.
**Features:**
- Converts base names to Pascal_Snake_Case format
- Sequential numbering (001, 002, 003...)
- Processes entire object hierarchies including children
- Prevents duplicate names and conflicts
**Usage:**
1. Select the root object of your hierarchy
2. Enter a base name (e.g., "Building Wall")
3. Click "Rename Materials"
**Example:**
```
Input: "building wall"
Output: Building_Wall_001_Shader, Building_Wall_002_Shader, etc.
```
**Use Cases:**
- Standardizing material names across imported models
- Preparing assets for material library organization
- Batch renaming materials for consistent project naming
### Apply Material to Selected
Applies a specified material to all selected mesh objects, creating the material if it doesn't exist.
**Features:**
- Automatic material creation if non-existent
- Pascal_Snake_Case name formatting
- Applies to first material slot or creates new slot
**Usage:**
1. Select target mesh objects
2. Enter material name (e.g., "Concrete Basic")
3. Click "Apply Material"
**Use Cases:**
- Quick material assignment during blocking phases
- Standardizing materials across multiple objects
- Rapid prototyping with placeholder materials
## Center Control
### Set Origin to Center Base
Sets object origins to the center of X and Y axes and the bottom (minimum Z) of the object.
**Features:**
- Preserves object positioning in world space
- Processes multiple objects simultaneously
- Only affects mesh objects
- Maintains object hierarchy relationships
**Usage:**
1. Select mesh objects to modify
2. Click "Set Origin to Center Base"
**Use Cases:**
- Preparing objects for precise placement
- Standardizing object origins for consistent scaling/rotation
- Preparing assets for libraries where bottom-center origins are preferred
## Utility Control
### Sequential Object Renaming
Renames objects with sequential numbering and maintains a history of used base names.
**Features:**
- Pascal_Snake_Case conversion to lowercase for objects
- Intelligent numbering (continues from existing highest number)
- History dropdown for previously used names
- Clear history functionality
**Usage:**
1. Select objects to rename
2. Enter base name or select from history dropdown
3. Click "Rename Objects"
**Example:**
```
Input: "Street Light"
Output: street_light_001, street_light_002, street_light_003
```
**Use Cases:**
- Organizing large scenes with many similar objects
- Preparing assets for game engines with specific naming requirements
- Maintaining consistent naming conventions across projects
### Collection Management
Manages the special "Architect_Asset_Collection" for organized asset storage.
**Features:**
- Creates collection if it doesn't exist
- Moves entire object hierarchies to collection
- Visibility toggle for quick show/hide
- Object count display
**Usage:**
1. Select objects and their hierarchies
2. Click "Add to Asset Collection"
3. Use visibility toggle to show/hide collection
**Use Cases:**
- Organizing working assets separately from scene elements
- Quick isolation of prepared assets
- Maintaining clean outliner organization
### Smart Visibility Control
Intelligent hide/show system that adapts based on selection and current state.
**Features:**
- Context-aware button behavior
- Batch hiding with hierarchy support
- Smart unhide all functionality
- Status indicators for hidden object counts
**Logic:**
- No selection + hidden objects = "Unhide All"
- Selection + no hidden = "Hide Selection"
- Selection + some hidden = "Hide Remaining"
- Selection + all hidden = "Unhide All"
**Use Cases:**
- Focusing on specific objects during modeling
- Progressive scene cleanup during optimization
- Quick isolation workflows during asset preparation
## Transform Control
### Scale Tool
Applies uniform scaling to selected objects with support for various object types.
**Features:**
- Uniform X, Y, Z scaling
- Supports meshes, empties, curves, and other scalable objects
- Precise decimal input
- Batch processing
**Usage:**
1. Select objects to scale
2. Set scale value (1.0 = no change)
3. Click "Set Scale"
**Use Cases:**
- Quickly resizing imported assets to scene scale
- Uniform scaling for consistency across similar objects
- Rapid prototyping with scaled placeholder objects
### Rotation Tool
Rotates objects by specified degrees on selected axes.
**Features:**
- Multi-axis rotation support (X, Y, Z)
- Preset degree options (45°, 90°, 180°)
- Additive rotation (adds to existing rotation)
- Batch processing with scene update
**Usage:**
1. Select objects to rotate
2. Choose degree amount and axes
3. Click "Set Rotation"
**Use Cases:**
- Aligning objects to grid or specific orientations
- Creating variations of the same object
- Correcting import orientation issues
### Apply Transformations
Applies current transformations to object data, resetting transform values.
**Features:**
- Selective application (scale, rotation, location)
- Preserves visual appearance while resetting values
- Works with various object types
- Essential for export preparation
**Usage:**
1. Select transformed objects
2. Choose which transformations to apply
3. Click "Apply Transformations"
**Use Cases:**
- Preparing objects for export to game engines
- Cleaning up transform values after modeling
- Standardizing objects for consistent behavior
## Smart Asset Prep
### Asset Preparation
Automatically creates organized asset hierarchies with empty controllers in two distinct modes.
**Features:**
- Individual or cluster mode options
- Smart naming based on selection
- Center-bottom empty placement at origin
- Custom collection creation with color coding (red)
- Hierarchy preservation
**Modes:**
- **Individual Mode**: Creates separate SAP empties for each selected object (SAP_{ObjectName}_Asset)
- **Cluster Mode**: Groups multiple objects under one SAP empty (SAP_{ClusterName}_Asset)
**Usage:**
1. Select mesh objects or existing empties
2. Choose Individual Mode toggle (ON = individual empties, OFF = cluster mode)
3. Enter cluster name (used when multiple objects in cluster mode)
4. Enter collection name for organization
5. Click "Prep Asset"
**Naming Logic:**
- Individual Mode: Each object gets `SAP_{ObjectName}_Asset`
- Cluster Mode Single: `SAP_{ObjectName}_Asset`
- Cluster Mode Multiple: `SAP_{ClusterName}_Asset`
- Collection: `SAP_{CollectionName}_Collection` (red color tag)
**Selection Behavior:**
- **Single mesh**: Creates `SAP_{ObjectName}_Asset` (mode doesn't matter)
- **Multiple meshes + Individual Mode**: Creates separate empties for each
- **Multiple meshes + Cluster Mode**: Groups all under one empty
- **Single empty**: Processes hierarchy, creates new SAP empty
- **Multiple empties**: Combines all hierarchies under one new SAP empty
**Use Cases:**
- Individual Mode: Preparing separate assets with there own placeholder empties.
- Cluster Mode: Preparing seperate assets with one placeholder empty.
- Organizing complex models with multiple components
### Asset Cleanup
Removes SAP empties without effecting original object placement.
**Features:**
- Selective or scene-wide cleanup ("Clean All" toggle)
- Preserves mesh-to-mesh parent relationships
- Maintains object world positions
- Safe deletion with position restoration
**Usage:**
1. Select SAP empties or enable "Clean All" toggle
2. Click "Clean Asset"
**Use Cases:**
- Reverting asset preparation for different workflows
- Cleaning up after asset modifications
- Preparing for alternative export methods
## Smart Asset Instancer
### Instance Creation
Creates positioned instances of objects at origin with CTL control empties for animation.
**Features:**
- Automatic sequential instance numbering
- CTL empty creation for each instance with proper naming
- Proper bottom-alignment at origin (0, 0, 0)
- Custom collection with color coding (blue)
- Complete hierarchy preservation with all parent-child relationships
- Linked duplication preserving materials
**Process:**
1. Analyzes selected objects and their complete hierarchies
2. Creates instances at origin with proper bottom positioning
3. Generates CTL empties (`CTL_{ObjectName}_Inst_{Number}`) for animation control
4. Maintains all parent-child relationships within instances
5. Places CTL empty at bottom of object bounds, parents object with proper offset
**Usage:**
1. Select objects to instance
2. Set instance count (1-50)
3. Enter collection name
4. Click "Create Instances at Origin"
**Naming Convention:**
- CTL Empty: `CTL_{ObjectName}_Inst_{InstanceNumber}`
- Object Instance: `{ObjectName}_Inst_{InstanceNumber}`
- Child Objects: `{ChildName}_Inst_{InstanceNumber}`
- Collection: `SAI_{CollectionName}_Collection` (blue color tag)
**Use Cases:**
- Creating multiple copies of the original object
- Preparing assets for distributed placement systems
- Generating variations with individual CTL controls
## Use Case Scenarios
### Scenario 1: Importing and Preparing CAD Architecture
**Goal**: Import CAD building and prepare for visualization
**Workflow**:
1. Import CAD model (often has messy materials and transforms)
2. **Material Control**: Rename all materials with "Building_Exterior" base name
3. **Center Control**: Set origins to center-base for all building components
4. **Transform Control**: Apply transformations to clean up import scales
5. **Utility Control**: Rename objects sequentially (wall_001, wall_002, etc.)
6. **Smart Asset Prep**: Create organized hierarchy with SAP empties (Cluster Mode for grouping)
### Scenario 2: Game Asset Library Creation
**Goal**: Prepare multiple objects for game engine export
**Workflow**:
1. **Transform Control**: Scale all objects to consistent game units
2. **Center Control**: Set origins to center-base for proper placement
3. **Transform Control**: Apply all transformations for clean export
4. **Utility Control**: Rename with game-friendly naming convention
5. **Material Control**: Apply standardized materials
6. **Utility Control**: Organize in Asset Collection for batch export
### Scenario 3: Animation Scene Setup
**Goal**: Prepare objects for complex animation workflow
**Workflow**:
1. **Smart Asset Prep**: Convert objects to SAP hierarchy for rigging (Individual Mode for separate controls)
2. **Smart Asset Instancer**: Create multiple instances at origin with CTL empties
3. **Utility Control**: Use visibility controls to manage scene complexity
4. **Transform Control**: Apply rotations for initial pose variations
### Scenario 4: Environment Art Workflow
**Goal**: Create varied environment from base assets
**Workflow**:
1. **Smart Asset Instancer**: Create multiple instances of base objects with CTL controls
2. **Transform Control**: Apply random rotations and scales for variation
3. **Utility Control**: Use Smart Visibility to focus on specific areas
4. **Material Control**: Apply environmental materials in batches
5. **Utility Control**: Organize final assets in collections
### Scenario 5: Complete Asset Pipeline with Smart Asset Placer
**Goal**: Create a complete asset preparation to scene population workflow
**Workflow**:
1. **Architect Tool - Asset Prep**: Use Smart Asset Prep (Individual Mode) to create organized hierarchies
2. **Architect Tool - Instancing**: Use Smart Asset Instancer to create multiple variations at origin
3. **Smart Asset Placer**: Use to distribute instances throughout scene with placement tools
4. **Architect Tool - Organization**: Use visibility controls and collection management for final scene organization
5. **Architect Tool - Cleanup**: Use transform application and material standardization for final export
**Benefits of Combined Workflow:**
- Consistent asset preparation with proper origins and hierarchies
- Animation-ready instances with CTL controls
- Efficient scene population and distribution
- Organized collections and naming conventions
- Performance-optimized final scenes
## Best Practices
### Material Management
- Use descriptive base names that indicate material purpose
- Maintain consistent naming conventions across projects
- Apply materials before final transform applications
### Object Organization
- Set origins before major transformations
- Use sequential naming for objects that will be exported
- Maintain clean hierarchies with meaningful parent-child relationships
### Asset Preparation
- Always backup your scene before using Smart Asset Prep
- Test workflows on simple objects before complex scenes
- Use Individual Mode for objects that need separate control
- Use Cluster Mode for objects that should be grouped together
### Smart Asset Instancer
- Use for creating animation-ready instances with CTL controls
- CTL empties are positioned at object bottom for proper animation pivots
- Instances maintain complete hierarchies for complex objects
### Performance Considerations
- Use visibility controls to manage complex scenes
- Apply transformations when finished modeling to improve performance
- Keep collections organized to maintain scene clarity
### Workflow Integration
- Use Rename History to maintain consistency across sessions
- Combine tools in logical sequences for efficient workflows
- Test export pipelines with prepared assets early in projects
- Prepare assets with Smart Asset Prep before using Smart Asset Placer for distribution
- Use Smart Asset Instancer to create variations that can be placed with Smart Asset Placer
- Combine visibility controls from both add-ons for complex scene management
- Use consistent naming conventions across both tools for better organization
## Troubleshooting
### Common Issues
**Materials not renaming properly:**
- Ensure the root object is selected (not child objects)
- Check that objects have materials assigned
- Verify the hierarchy contains mesh objects
**Origins not setting correctly:**
- Confirm objects are mesh type
- Ensure objects are not in Edit mode
- Check that objects have actual geometry
**Smart Asset Prep not working:**
- Verify selection contains mesh objects or empties with mesh children
- Check that object names don't conflict with existing SAP empties
- Ensure you're in Object mode
**Smart Asset Instancer creating incorrectly:**
- Confirm original objects have proper hierarchies
- Check that objects aren't already instances themselves
- Verify collection permissions and scene access
- Ensure objects have valid bounding boxes for bottom positioning
**Individual Mode vs Cluster Mode confusion:**
- Individual Mode: Each selected object gets its own SAP empty
- Cluster Mode: All selected objects share one SAP empty
- Single object selection behaves the same in both modes
### Error Messages
**"No active object selected"**
- Select an object before using hierarchy-based tools
- Ensure the active object (bright orange outline) is set
**"No mesh objects found"**
- Tools require mesh objects for most operations
- Convert curves/text to mesh if needed
- Check object types in selection
**"Material already exists"**
- The tool detected naming conflicts
- Use different base names or manually rename existing materials
- Check for hidden characters in material names
**"Mixed selection detected"**
- Smart Asset Prep found both empties and meshes selected
- Select either only empties or only meshes for cleaner results
### Performance Tips
- Process objects in batches for large scenes
- Use visibility controls to reduce viewport complexity
- Apply transformations periodically to maintain scene performance
- Keep collection hierarchies shallow for better performance
### Recovery Procedures
**If Smart Asset Prep creates unwanted results:**
1. Use Smart Asset Clean to revert changes
2. Check that "Clean All" is enabled if needed for scene-wide cleanup
3. Manually delete SAP empties if automated cleanup fails
**If Smart Asset Instancer creates too many instances:**
1. Use Undo (Ctrl+Z) immediately after operation
2. Delete the SAI collection if cleanup is needed
3. Restart with lower instance count
**If transformations are applied incorrectly:**
1. Use Undo (Ctrl+Z) immediately after operation
2. Check object data for corruption
3. Reload backup file if major issues occur
**If materials are renamed incorrectly:**
1. Materials retain their actual shader data
2. Manually rename materials in Material Properties
3. Use Find/Replace in Outliner for batch corrections
---
*For additional support or feature requests, contact the development team.*
$14.99
Have questions about this product?
Login to message
| Dev Fund Contributor | |
| Published | 11 months ago |
| Blender Version | 4.2 - 4.5 |
| Extension Type | N/A |
| Render Engine Used | Blender-Internal, Cycles, Eevee |
| License | Mit |
Discover more products like this
Workflow Optimization gamedev blenderaddons architecture visualization blender3d environment art arch-viz