AutoRigPro-to-Rigify
 IsraelBrown


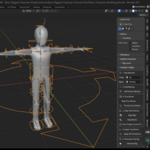
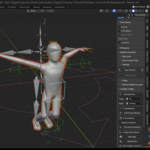
AutoRig-To-Rigify Pro Documentation
Table of Contents
- Overview
- Installation
- Getting Started
- User Interface
- Step-by-Step Workflow
- Advanced Features
- Troubleshooting
- FAQ
- Technical Reference
- Support
Overview
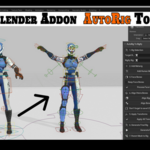
AutoRig-To-Rigify Pro is a Blender addon that seamlessly converts Auto-Rig Pro armatures to Rigify metarigs, allowing you to leverage the benefits of both rigging systems. The addon provides intelligent bone mapping, automatic alignment, and multi-mesh parenting capabilities.
Key Features
- Automatic Bone Alignment: Maps 150+ bones from Auto-Rig Pro to Rigify naming conventions
- Multi-Mesh Support: Parent multiple meshes to the rig with automatic weights
- Face Bone Management: Choose to keep or remove face bones based on your needs
- Transform Preservation: Maintains scale, rotation, and position during conversion
- One-Click Generation: Streamlined workflow from setup to final rig
System Requirements
- Blender Version: 4.0 or higher
-
Required Addons:
- Rigify (bundled with Blender)
- Auto-Rig Pro (for source armatures)
- Operating System: Windows, macOS, Linux
Installation
Method 1: Standard Installation
-
Download the
autorig_to_rigify.pyfile -
Open Blender and go to
Edit > Preferences -
Navigate to the
Add-onstab -
Click
Install...and select the downloaded file - Enable the addon by checking the box next to "AutoRigPro-To-Rigify"
- Save Preferences to keep the addon enabled
Method 2: Manual Installation
-
Locate your Blender addons folder:
- Windows:
%APPDATA%\Blender Foundation\Blender\4.x\scripts\addons\ - macOS:
~/Library/Application Support/Blender/4.x/scripts/addons/ - Linux:
~/.config/blender/4.x/scripts/addons/
- Windows:
-
Copy the
autorig_to_rigify.pyfile to this folder - Restart Blender
- Enable the addon in Preferences > Add-ons
Verification
After installation, you should see the "ARP to Rigify" panel in the 3D Viewport's N-panel under the "Tool" category.
Getting Started
Prerequisites
Before using the addon, ensure you have:
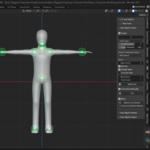
- An Auto-Rig Pro armature in your scene (source rig)
- Rigify addon enabled in Blender preferences
- Basic understanding of Blender's armature system
Quick Start (5 Minutes)
- Open a Blender file with an Auto-Rig Pro character
- Access the addon panel (N-panel > Tool > ARP to Rigify)
- Select your Auto-Rig Pro armature in "Target Rig"
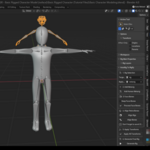
- Add a Human Metarig using the button in section 2
- Select the newly created metarig in "Rigify Rig"
- Follow the numbered workflow in the panel (sections 3-7)
User Interface
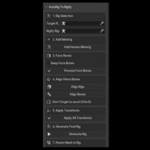
The addon interface is organized into 7 logical sections in the 3D Viewport N-panel:
Panel Location
- 3D Viewport > N-Panel > Tool Tab > ARP to Rigify
Section Overview
1. Rig Selection
- Target Rig (AutoRig Pro): Select your source Auto-Rig Pro armature
- Rigify Rig: Select the destination Rigify metarig
2. Add Metarig
- Add Human Metarig: Creates a new Rigify human metarig
3. Face Bones
- Keep Face Bones: Toggle to preserve or remove facial bones
- Process Face Bones: Executes the face bone handling
4. Align Metarig
- Align Rigs (Object Mode): Aligns the metarig to the Auto-Rig Pro armature
- Align Bones (Edit Mode): Precisely aligns individual bones
5. Apply Transforms
- Apply All Transforms: Applies location, rotation, and scale to the metarig
6. Generate Final Rig
- Generate Rig: Creates the final Rigify rig from the metarig
7. Parent Meshes to Rig
- Rig Controls: Select the generated Rigify rig for parenting
- Mesh List: UI list for managing meshes to parent
- Parent Meshes w/ Auto Weights: Parents all listed meshes to the rig
Step-by-Step Workflow
Step 1: Rig Selection
- Import or create your Auto-Rig Pro character
- Select the Auto-Rig Pro armature in the "Target Rig" field
- Verify the armature contains the expected bone structure
Tip: The Auto-Rig Pro armature should have bones with names like arm_ref.l, thigh_ref.l, etc.
Step 2: Add Metarig
- Click "Add Human Metarig" to create a new Rigify metarig
- Select the newly created metarig in the "Rigify Rig" field
- Position the metarig near your character if needed
Note: This creates a standard Rigify human metarig that will be modified to match your Auto-Rig Pro character.
Step 3: Face Bones Management
- Decide whether you need facial animation controls
- Check "Keep Face Bones" if you want facial controls (default: unchecked)
- Click "Process Face Bones" to apply your choice
Face Bones Include: jaw, chin, cheek, nose, lip, eye, lid, brow, ear, forehead, temple, teeth, tongue bones
Step 4: Align Metarig
This is the core conversion step with two alignment phases:
Phase A: Object Alignment
- Click "Align Rigs (Object Mode)"
- Verify the metarig moves to match the Auto-Rig Pro armature's position
- Check that rotation and scale are also matched
Phase B: Bone Alignment
- Click "Align Bones (Edit Mode)"
- Wait for the alignment process to complete
- Verify bones are properly positioned (you can check in Edit Mode)
Important: The alignment process maps over 150 bones automatically, including:
- Limbs (arms, legs, fingers, toes)
- Spine chain with special handling for intermediate vertebrae
- Facial bones (if kept)
Step 5: Apply Transforms
- Click "Apply All Transforms"
- Verify the metarig's transforms are zeroed out
- Check that the rig maintains its position and proportions
Why This Matters: Rigify requires clean transforms for proper rig generation.
Step 6: Generate Final Rig
- Ensure the metarig is selected and active
- Click "Generate Rig"
- Wait for Rigify to create the final control rig
- Verify a new armature appears (usually named "rig")
Result: You now have a fully functional Rigify control rig based on your Auto-Rig Pro character proportions.
Step 7: Parent Meshes to Rig
Setting Up the Mesh List
- Select the generated Rigify rig in "Rig Controls"
- Select mesh objects in the 3D viewport
- Click the "+" button to add selected meshes to the list
- Repeat for all character meshes (body, clothing, accessories)
Parenting Process
- Review the mesh list to ensure all required meshes are included
- Click "Parent Meshes w/ Auto Weights"
- Wait for the automatic weight painting process
- Test the rig by moving control bones in Pose Mode
Advanced List Management:
- Remove Selected: Remove highlighted mesh from list
- Clear List: Remove all meshes from list
- Empty Slots: Automatically skipped during parenting
Advanced Features
Bone Mapping System
The addon uses a comprehensive bone mapping dictionary that translates Rigify bone names to Auto-Rig Pro equivalents:
Rigify Bone → Auto-Rig Pro Bone
"thigh.L" → "thigh_ref.l"
"shin.L" → "leg_ref.l"
"foot.L" → "foot_ref.l"
Special Bone Handling
Spine.004 Special Case
The addon automatically handles the intermediate spine bone (spine.004) which doesn't have a direct Auto-Rig Pro equivalent:
- Positioned between
spine.003andspine.005 - Adjusted for proper spine chain flow
- Maintains natural curvature
Finger Mapping
Complete finger bone mapping for both hands:
- Palm bones (base positions)
- Three segments per finger
- Thumb with proper positioning
- Index, middle, ring, and pinky fingers
Multi-Mesh Parenting
The addon supports complex character setups with multiple mesh objects:
- Body meshes: Main character geometry
- Clothing: Separate clothing pieces
- Accessories: Weapons, jewelry, etc.
- Hair: Separate hair meshes
Error Handling
The addon includes comprehensive error checking:
- Missing armatures: Warns if required rigs aren't selected
- Invalid bone structures: Alerts for unexpected bone hierarchies
- Failed operations: Provides clear feedback on what went wrong
- Empty mesh slots: Automatically skips invalid entries
Troubleshooting
Common Issues
"Rigify addon must be enabled"
Problem: Rigify is not enabled in Blender preferences Solution:
- Go to
Edit > Preferences > Add-ons - Search for "Rigify"
- Enable the Rigify addon
- Restart the operation
"Please select both Auto-Rig Pro and Rigify metarig"
Problem: One or both armatures are not selected Solution:
- Verify both armatures exist in your scene
- Select the correct armatures in the dropdown fields
- Ensure objects are actually armatures, not other object types
"Failed to generate rig"
Problem: Rigify generation failed Solution:
- Ensure the metarig has proper bone structure
- Check that all required bones are present
- Verify the metarig has applied transforms
- Try generating manually with the selected metarig
Bones not aligning properly
Problem: Some bones appear in wrong positions Solution:
- Check that your Auto-Rig Pro rig uses standard bone names
- Verify the rig is in rest position
- Ensure both rigs have the same world orientation
- Try the alignment process again
Meshes not parenting correctly
Problem: Automatic weights not working Solution:
- Ensure meshes are manifold (no holes or non-manifold geometry)
- Check that the rig is the active object during parenting
- Verify mesh objects are actually mesh type
- Try parenting manually with
Ctrl+P > Armature Auto
Performance Issues
Slow bone alignment
Cause: Large numbers of bones being processed Solution:
- Remove unnecessary bones before alignment
- Use "Keep Face Bones" = False if facial animation isn't needed
- Work with proxy/simplified meshes during setup
Memory usage during parenting
Cause: High-resolution meshes with automatic weights Solution:
- Reduce mesh resolution during rigging phase
- Parent meshes one at a time for very complex characters
- Use manual weight painting for hero characters
FAQ
General Questions
Q: Can I use this addon with non-humanoid characters? A: Currently, the addon is optimized for humanoid characters. Non-humanoid characters may require manual adjustment of the bone mapping.
Q: Does this work with custom Auto-Rig Pro setups? A: The addon works best with standard Auto-Rig Pro human rigs. Custom bone names or structures may require manual adjustment.
Q: Can I modify the bone mapping?
A: Advanced users can modify the bone_mapping dictionary in the addon code to customize mappings.
Workflow Questions
Q: Do I need to keep the Auto-Rig Pro armature after conversion? A: No, once the Rigify rig is generated and working properly, you can delete the Auto-Rig Pro armature.
Q: Can I use this with existing animations? A: This addon is primarily for rig conversion. Animation transfer between different rig types requires additional tools.
Q: What if I need to make changes after generation? A: You can modify the metarig and regenerate the Rigify rig. However, you'll need to re-parent meshes afterward.
Technical Questions
Q: Why do I need to apply transforms? A: Rigify requires clean transforms (0,0,0 location/rotation and 1,1,1 scale) to generate properly.
Q: Can I undo the conversion process? A: The conversion creates new objects, so your original Auto-Rig Pro setup remains unchanged. You can always delete the generated rigs.
Q: How do I know if the conversion was successful? A: Test the generated rig in Pose Mode. All major body parts should deform the mesh properly when you move control bones.
Technical Reference
Supported Bone Names
Auto-Rig Pro Bones (Source)
# Limbs
thigh_ref.l/r, leg_ref.l/r, foot_ref.l/r, toes_ref.l/r
arm_ref.l/r, forearm_ref.l/r, hand_ref.l/r

# Spine
root_ref.x, spine_01_ref.x, spine_02_ref.x, spine_03_ref.x
neck_ref.x, head_ref.x

# Fingers (per hand)
thumb1_ref.l/r, thumb2_ref.l/r, thumb3_ref.l/r
index1_ref.l/r, index2_ref.l/r, index3_ref.l/r
middle1_ref.l/r, middle2_ref.l/r, middle3_ref.l/r
ring1_ref.l/r, ring2_ref.l/r, ring3_ref.l/r
pinky1_ref.l/r, pinky2_ref.l/r, pinky3_ref.l/r
Rigify Bones (Target)
# Limbs
thigh.L/R, shin.L/R, foot.L/R, toe.L/R
upper_arm.L/R, forearm.L/R, hand.L/R

# Spine
spine, spine.001, spine.002, spine.003, spine.004, spine.005, spine.006

# Fingers (per hand)
thumb.01.L/R, thumb.02.L/R, thumb.03.L/R
f_index.01.L/R, f_index.02.L/R, f_index.03.L/R
f_middle.01.L/R, f_middle.02.L/R, f_middle.03.L/R
f_ring.01.L/R, f_ring.02.L/R, f_ring.03.L/R
f_pinky.01.L/R, f_pinky.02.L/R, f_pinky.03.L/R
Face Bones List
The addon can remove the following facial bones if "Keep Face Bones" is disabled:
face_bones = [
    "face", "jaw", "jaw.L", "jaw.L.001", "jaw.L.002", "jaw.R", "jaw.R.001",
    "chin", "chin.001", "chin.002", "chin.R", "chin.L", "chin.L.001",
    "cheek.T.L", "cheek.T.L.001", "cheek.T.R", "cheek.T.R.001",
    "cheek.B.R", "cheek.B.R.001", "cheek.B.L", "cheek.B.L.001",
    "nose", "nose.L", "nose.L.001", "nose.R", "nose.R.001",
    "lip.T.L", "lip.T.L.001", "lip.B.L", "lip.B.L.001",
    "eye.L", "eye.R", "lid.T.L", "lid.T.L.001", "lid.B.L", "lid.B.L.001",
    "brow.B.L", "brow.B.L.001", "brow.T.L", "brow.T.L.001",
    "ear.L", "ear.L.001", "ear.R", "ear.R.001",
    "forehead.L", "forehead.L.001", "forehead.R", "forehead.R.001",
    "temple.L", "temple.R", "teeth.T", "teeth.B",
    "tongue", "tongue.001", "tongue.002", "tongue.003"
    # ... and more
]
Operator Reference
Core Operators
-
object.add_metarig: Adds Rigify human metarig -
object.handle_face_bones: Processes face bone options -
object.align_rigs: Aligns armatures in object mode -
object.align_bones: Aligns individual bones in edit mode -
object.apply_transforms: Applies all transforms to metarig -
object.generate_rig: Generates final Rigify rig -
object.parent_with_weights: Parents meshes with automatic weights
List Management Operators
-
mesh.add_selected_to_parent_list: Adds selected meshes to parenting list -
mesh.remove_selected_from_parent_list: Removes selected mesh from list -
mesh.clear_parent_list: Clears all meshes from list
Property Groups
RigSelectionProperties
auto_rig: PointerProperty          # Auto-Rig Pro armature
rigify_rig: PointerProperty        # Rigify metarig
rig_controls: PointerProperty      # Generated Rigify rig
keep_face_bones: BoolProperty      # Face bone handling option
meshes_to_parent: CollectionProperty  # List of meshes to parent
active_mesh_index: IntProperty     # Active mesh in list
Support
Getting Help
- Check this documentation for common issues and solutions
- Review the FAQ section for frequently asked questions
- Test with simple setups to isolate complex issues
- Verify addon and Blender versions are compatible
Reporting Issues
When reporting issues, please include:
- Blender version (4.0, 4.1, etc.)
- Addon version (check addon preferences)
- Auto-Rig Pro version (if applicable)
- Step-by-step description of the issue
- Error messages (if any)
- Sample file (if possible)
Feature Requests
We welcome suggestions for new features! Consider:
- Specific use cases that aren't currently supported
- Workflow improvements that would save time
- Additional rigging systems for integration
- Custom bone mapping requirements
Community Resources
- Blender Artists Forum: Community discussions and tips
- YouTube Tutorials: Video walkthroughs and examples
- GitHub Issues: Bug reports and feature requests
- Discord Communities: Real-time help and discussion
Changelog
Version 2.1 (Current)
- Initial release with core functionality
- 150+ bone mapping support
- Multi-mesh parenting system
- Face bone management
- Comprehensive error handling
- Intuitive UI panel organization
Planned Updates
- v2.2: Custom bone mapping editor, performance improvements
- v2.3: Non-humanoid character support, animation transfer tools
- v2.4: Integration with additional rigging systems
License
This addon is released under the GNU General Public License v3.0 (GPL v3).
You are free to:
- Use the addon for any purpose
- Modify the source code
- Distribute copies
- Distribute modified versions
Under the conditions that:
- You provide the source code
- You include the license notice
- You state any changes made
For the full license text, see: https://www.gnu.org/licenses/gpl-3.0.html
Copyright (C) 2025 Israel Andrew Brown
Created by Israel Andrew Brown, Jamaica
This documentation is part of the AutoRig-To-Rigify Pro addon for Blender.
Have questions about this product?
Login to message
| Sales | 10+ |
| Published | over 1 year ago |
| Blender Version | 4.0 - 4.4 |
| Extension Type | N/A |
| Render Engine Used | Cycles, Eevee |
| License | GPL |
