 MeshMind


Bake Manager Documentation
Version 1.1.0 · Blender 4.2+
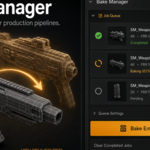
Batch texture baking with pre-bake diagnostics, LOD support, and portable recipes.
Table of contents
- Overview
- Installation
- Interface
- Quick start
- Jobs and the queue
- Map types
- Cage and ray distance
- Diagnostics
- LOD-aware baking
- Naming and output
- Recipes (save / load)
- Preferences
- Recommended workflows
- Troubleshooting
- Limitations
- FAQ
1. Overview
Bake Manager is a Blender extension for production texture baking. It is built for artists who need more than a single bake from the default bake panel:
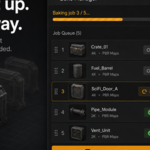
- Job queue — set up many objects, bake them in sequence
- Pre-bake diagnostics — catch ray misses and UV overlap before you bake
- PBR + native maps — Diffuse, Metallic, Roughness, Normal, AO, and more
- LOD baking — generate and bake LODs in one job
- Recipes — save and reload full queue setups as JSON
Where to find it: 3D Viewport → press N → Bake Manager tab.
Requirements: Blender 4.2 or newer · Cycles (used automatically during bake) · Windows / macOS / Linux.
2. Installation
As a Blender extension (recommended)
- Download the BakeManager_x.x.x.zip package.
- In Blender: Edit → Preferences → Get Extensions.
- Open the dropdown (top right) → Install from Disk….
- Select the zip and enable Bake Manager.
Superhive remote install
If you bought Bake Manager on Superhive and connected Superhive as a remote repository, you can install or update from Preferences → Get Extensions, or drag the product from your orders page into Blender.
After installing
- Open a 3D Viewport.
- Press N and confirm the Bake Manager tab is present.
- If the tab is missing, disable/re-enable the extension or restart Blender.
3. Interface
All controls live in the Bake Manager sidebar tab.
| Section | Purpose |
|---|---|
| Job list | Queue of bake jobs with status icons |
| + / − / Duplicate / Up / Down | Manage jobs |
| Bake Entire Queue | Run every job in order |
| Save / Load Recipe | Export or import the queue as JSON |
| Job Settings | Target, source, resolution, paths, single-job bake |
| Map Types | Which maps to bake |
| Cage / Ray Distance | High-to-low bake settings |
| LOD-Aware Baking | Auto LOD generation |
| Diagnostics | Pre-bake checks and face selection |
Status icons in the list:
- Pending · Running · Done · Warning · Failed
4. Quick start
- Save your .blend (needed if you use // relative output paths).
- Select a mesh object.
- In Bake Manager, click +.
- A job is created and the active mesh is set as Target.
- (Optional) Set a high-poly object as Source for Normal / AO.
- Under Map Types, enable the maps you need (Diffuse and Normal are on by default).
- Set Resolution and Output folder if needed.
- Click Run Diagnostics and fix any reported issues.
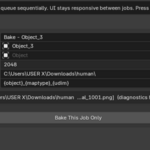
- Click Bake This Job Only or Bake Entire Queue.
Baked images are written as PNG files. The status line shows the output folder and filenames when the bake succeeds.
5. Jobs and the queue
Each job is one bake setup: one target (plus optional LODs), one optional source, map toggles, and path/naming settings.
Adding a job
- Click +.
- If a mesh is active, it becomes the Target and the job is named Bake - <object>.
- Map toggles and naming defaults come from Preferences.
Editing a job
Select it in the list, then use Job Settings:
| Property | Description |
|---|---|
| Job Name | Label in the queue |
| Target (Low-Poly) | Object that receives the textures (must be a mesh) |
| Source (High-Poly) | Optional high poly for Normal / AO. Leave empty for self-bake |
| Resolution | 512 / 1024 / 2048 / 4096 / 8192 |
| Output Folder | Blank = Preferences default |
| Naming Pattern | See Naming and output |
Queue actions
- Bake This Job Only — runs the selected job
- Bake Entire Queue — runs all jobs in order; UI stays responsive between jobs; Esc cancels
- Duplicate — copies settings and map toggles
- Move up/down — reorder execution
6. Map types
Enable any combination per job.
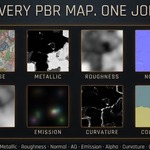
| Map | Method | Notes |
|---|---|---|
| Diffuse / Base Color | Emission-wire from Principled Base Color | sRGB |
| Metallic | Emission-wire | Non-Color |
| Roughness | Emission-wire | Non-Color |
| Normal | Native Blender NORMAL bake | Tangent space; uses Source if set |
| Emission | Emission-wire from Emission Color | sRGB |
| Alpha | Emission-wire | Non-Color |
| Ambient Occlusion | Native AO bake | Uses Source if set |
| Curvature | Bevel + geometry normals, remapped 0–1 | Non-Color; approximation |
| Colour ID | Flat color per material name | Stable hash per material name |
Emission-wire maps temporarily connect the chosen Principled input to an Emission shader, bake with type EMIT, then restore the material. This works even when the material graph is more than a single Principled node (one Mix/Add Shader level is supported).
Normal and AO use Blender’s built-in bake types and support selected-to-active, cage, and ray distance.
7. Cage and ray distance
Used for selected-to-active bakes (Normal, AO) and for the ray-coverage diagnostic.
| Setting | Description |
|---|---|
| Ray Distance | Max distance a ray may travel from the low poly to hit the high poly |
| Cage Extrusion | Inflates the low-poly surface along normals before casting rays |
| Use Cage Object | Optional custom cage mesh |
| Cage Object | Mesh used as cage when the option above is on |
Tips
- Start with Ray Distance ~0.05–0.1 (scene units) and adjust.
- If diagnostics report RAY_MISS, increase ray distance / cage extrusion, or fix gaps between low and high.
- Source and Target must be different objects for a true high-to-low bake. If they are the same, Normal/AO run as a self-bake and a warning is shown.
8. Diagnostics
Diagnostics run before baking so you can fix problems instead of discovering them after a long bake.
Checks
- UV overlap — faces that share UV space (warning; intentional mirrors also trigger this).
- Cage / ray coverage — low-poly faces that do not hit the high poly within ray distance + cage extrusion (error when faces miss).
- Source equals target — warning when high-to-low was probably intended but Source = Target.
- No target / no source — reported when relevant.
Workflow
- Select a job with Target (and Source if needed).
- Click Run Diagnostics.
- Read issues in the Diagnostics panel.
- Use Select Faces on an issue to enter Edit Mode with those faces selected.
- Fix topology, UVs, or cage settings, then run diagnostics again.
When Auto-Run Diagnostics Before Queue Bake is enabled in Preferences (default on), the queue aborts jobs that still have blocking diagnostic errors. You can force a bake by ignoring diagnostics (e.g. Shift+click Bake This Job Only, depending on keymap).
9. LOD-aware baking
When Generate LOD Bakes is enabled:
- Bake Manager creates temporary decimated copies of the Target (Decimate modifier).
- The same map set is baked for the original and each LOD.
- Temporary LOD objects are removed after the job finishes.
| Setting | Description |
|---|---|
| LOD Levels | Number of extra LODs (1–4) |
| Decimate Ratio Step | Each level multiplies poly count by this ratio (e.g. 0.5) |
LOD baking is meant for game pipelines that need matching textures per LOD. It does not preserve UVs via advanced LOD algorithms; it uses Blender’s Decimate for speed and simplicity.
10. Naming and output
Tokens
| Token | Replaced with |
|---|---|
| {object} | Object name (sanitized for filenames) |
| {maptype} | Map type in lowercase (e.g. diffuse, normal) |
| {resolution} | e.g. 2048 |
| {udim} | UDIM tile, currently 1001 unless extended later |
Example pattern: {object}_{maptype} → Suzanne_diffuse.png
Convention presets (Preferences)
- Generic — {object}_{maptype}_{udim}
- Unity — {object}_{maptype}
- Unreal — T_{object}_{maptype}
- Godot — {object}_{maptype}
New jobs pick up the active convention from Preferences. Existing jobs keep their own Naming Pattern until you change it.
Output folder
- Empty → Preferences Default Export Folder (default //textures/).
- //... paths are relative to the saved .blend.
- Absolute paths are supported (recommended if you often work unsaved).
On success, the status message includes the full folder path and filenames so you can find the files quickly.
11. Recipes (save / load)
Save Recipe writes the current queue to a JSON file (objects stored by name, plus settings and map toggles).
Load Recipe rebuilds jobs and resolves objects by name in the current file.
Use recipes to:
- Reopen the same bake setup after a restart
- Share a standard setup with teammates
- Version-control bake configuration next to the .blend
If an object name in the recipe is missing from the file, that job’s pointer will be empty until you assign it again.
12. Preferences
Edit → Preferences → Add-ons → Bake Manager (or Get Extensions → Bake Manager).
| Preference | Default | Description |
|---|---|---|
| Default Export Folder | //textures/ | Used when a job’s output is blank |
| Naming Convention | Generic | Default pattern for new jobs |
| Default Bake Samples | 32 | Cycles samples during bake |
| Default Bake Margin | 16 px | Island margin to reduce bleeding |
| Auto-Run Diagnostics Before Queue Bake | On | Abort jobs with blocking diagnostic errors |
13. Recommended workflows
A. Simple self-bake (albedo / roughness only)
- Target only, no Source.
- Enable Diffuse, Roughness, Metallic as needed.
- Bake This Job Only.
B. High-to-low normal + AO (game asset)
- Target = low poly (UVs done).
- Source = high poly.
- Enable Normal and AO.
- Set ray distance / cage; Run Diagnostics; fix RAY_MISS.
- Bake.
C. Full PBR set
- Same as B, plus Diffuse, Metallic, Roughness, etc.
- Confirm Principled BSDF inputs are what you expect.
- Bake once diagnostics are clean.
D. Batch session
- Add one job per asset.
- Run diagnostics on each (or rely on auto-run).
- Bake Entire Queue; use Esc only if you must cancel.
- Save Recipe when the setup is good.
14. Troubleshooting
| Problem | What to try |
|---|---|
| No Bake Manager tab | Enable the extension; restart Blender; confirm Blender ≥ 4.2 |
| Job add crashes / prefs error | Reinstall the latest zip; ensure Preferences load (see extension id) |
| “Baked successfully” but folder empty | Read the status path carefully; use an absolute output folder; avoid locked/cloud-only folders |
| Relative path error | Save the .blend or set an absolute output path |
| No material slots | Assign at least one material with nodes / Principled BSDF |
| No maps enabled | Enable at least one map under Map Types |
| Black normal / AO | Run Diagnostics; fix RAY_MISS; increase ray distance / cage; confirm Source ≠ Target for high-to-low |
| Wrong colors on Diffuse | Check Base Color on Principled; confirm sRGB on the PNG viewer |
| Materials look broken after bake | Should auto-restore; undo or reload file if a crash interrupted restore |
| Bake is slow | Lower resolution or samples in Preferences; bake fewer maps per test |
Open Window → Toggle System Console (Windows) or start Blender from a terminal to see full Python errors.
15. Limitations (v1.1)
- One target per job — no multi-object packing into a single atlas.
- UDIM — toggle exists; engine currently focuses on the primary tile (1001).
- Complex shader graphs — Principled should feed Material Output directly or through a single Mix/Add Shader. Deep multi-BSDF trees may need simplification.
- Queue is sequential — not multi-threaded; Blender’s bake operator runs on the main thread.
- Curvature — Bevel-based approximation with 0–1 remap; not a calibrated laboratory curvature map.
- LOD — Decimate-based; not UV-preserving specialized retopo LODs.
These are intentional scope limits, not incomplete half-features.
16. FAQ
Does Bake Manager replace the default Bake panel? For production batch work, yes. You can still use Blender’s built-in bake for one-offs.
Which engine is used? Cycles is set for the duration of the bake and then restored.
Can I bake only Normal maps from high to low? Yes. Set Target + Source, enable Normal, run diagnostics, bake.
Will it work with multi-material objects? Yes. All materials on the target are prepared for the bake image.
Are materials permanently modified? No. Temporary Emission (and related) nodes are restored after each map.
Is it GPL? Yes — GPL-3.0-or-later, extension-ready with blender_manifest.toml.
Where do files go? Wherever the job’s Output Folder (or Preferences default) points. The success message lists the full path.
Support
Include with any support request:
- Blender version
- Bake Manager version
- Exact status message or console traceback
- Whether Target/Source and output path were absolute or // relative
Have questions about this product?
Login to message
| Blender Extension Compatible | Yes |
| Published | about 2 months ago |
| Blender Version | 4.2 - 5.2 |
| Extension Type | Add-on |
| Render Engine Used | Cycles, Eevee |
| License | GPL |
