Blender Git Manager
 David Gomez



Blender Git Manager – User Guide
Blender Git Manager is a Blender extension that lets you manage Git repositories, Git LFS files, GitHub authentication, commits, branches, synchronization, and Git history without manually using a terminal.
1. System Requirements
- Blender 4.2 or later.
- Windows 10 or Windows 11 is the primary supported platform.
- Git installed and available in the system
PATH. - Git LFS installed if your project uses large binary files such as
.blend, textures, videos, or exported models. - GitHub CLI installed for GitHub browser authentication and GitHub repository actions.
- An Internet connection for GitHub authentication, cloning, pushing, pulling, and synchronizing.
- A valid GitHub account if you want to use GitHub remotes.
2. Required Software
- Blender
Install Blender 4.2 or newer from the official Blender website. - Git
Git is required for repositories, commits, branches, history, pull, push, and fetch. - Git LFS
Git LFS is recommended for large binary assets, especially.blend,.fbx,.glb,.psd, videos, and high-resolution textures. - GitHub CLI
GitHub CLI, also calledgh, is required to authenticate through the browser and create GitHub repositories from Blender.
After installation, restart Blender and open Blender Git Manager. Press Refresh to verify that Git, Git LFS, and GitHub CLI are detected.
3. GitHub Account
A GitHub account is not required for local Git repositories. However, you need a valid GitHub account if you want to:
- Authenticate from Blender.
- Create repositories on GitHub.
- Clone private GitHub repositories.
- Push commits to GitHub.
- Pull, fetch, or synchronize a GitHub remote.
- Open repositories and commits on GitHub.
You do not need to enter your GitHub password or personal access token into Blender Git Manager. Authentication is handled by GitHub CLI through your browser.
4. Installing the Extension
- Download the Blender Git Manager ZIP file.
- Open Blender.
- Go to Edit > Preferences > Extensions or Add-ons.
- Select Install from Disk.
- Select the ZIP file without extracting it.
- Enable Blender Git Manager.
- Open the top menu: Git > Open Git Manager.
- Press Refresh to check your installed dependencies.
5. First-Time Git Configuration
Git commits need an author name and email address. During repository initialization, Blender Git Manager can use your existing Git identity or allow you to configure one.
Your commits will normally contain information similar to:
Author: Your Name You can apply this identity only to the current repository or globally, depending on the selected setup option.
6. Connecting to GitHub
- Open Blender Git Manager.
- Click Connect in Browser or GitHub Authentication.
- GitHub CLI opens a browser authentication flow.
- Sign in with your GitHub account.
- Authorize GitHub CLI.
- Return to Blender.
- Wait for Blender Git Manager to confirm the connected GitHub user.
If GitHub shows a one-time device code, Blender Git Manager copies it automatically and provides a button to display or copy it again if necessary.
7. Starting a New Repository
Use this workflow when your Blender project does not already use Git.
- Save your Blender file.
- Open Git > Initialize Repository.
- Select the repository folder.
- Choose the initial branch name, usually
main. - Configure your Git author name and email if required.
- Keep Create Blender .gitignore enabled.
- Enable Git LFS if your project contains large binary assets.
- Select patterns such as
*.blend,*.fbx, or*.glbwhen appropriate. - Select the files to stage.
- Create the initial commit.
- Optionally connect or create a GitHub repository.
The recommended Blender .gitignore excludes automatic backups, temporary files, Python cache files, operating-system files, and sensitive files such as .env, private keys, and credentials.json.
8. Opening an Existing Repository
Use Open Existing Repository when the project already contains a Git repository.
- Select any folder inside the repository.
- Blender Git Manager detects the repository root.
- Press Refresh if needed.
- Review the active branch, remote URL, latest commit, changes, and synchronization state.
Once a repository is active, the Initialize, Open Existing, and Clone menu actions are disabled to prevent accidental repository changes.
9. Cloning a Repository
- Select Clone Repository.
- Enter a repository URL or a GitHub
owner/repositoryvalue. - Select a destination folder.
- Choose whether to use GitHub CLI when available.
- Start the clone operation.
- If the repository uses Git LFS, allow the extension to download LFS content.
- Open the desired
.blendfile after cloning.
10. Managing Changes
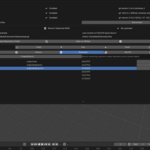
The Changes tab shows modified, new, staged, and conflicted files.
- Stage Selected: Adds selected files to the next commit.
- Stage All: Adds all changes to the next commit.
- Unstage Selected: Removes selected files from the staging area.
- Unstage All: Removes all staged files from the staging area.
- Discard Selected: Restores selected files and removes their uncommitted changes.
Discarding changes is destructive. Confirm that you do not need the changes before using it.
11. Creating Commits
- Stage one or more files.
- Enter a commit message.
- Optionally enter an extended description.
- Keep Save Blender file before commit enabled when you want the current scene saved first.
- Select Commit to create a local commit.
- Select Commit and Push to create the commit and publish it to the configured remote.
Do not create commits with empty messages. Save your .blend file before committing important scene changes.
12. Quick Save
Quick Save is available from the top Git menu when a repository is active.
It automatically performs the following workflow:
- Stages all repository changes.
- Creates an automatic commit named
Quick Save 1. - Uses the next available number for later Quick Saves, such as
Quick Save 2andQuick Save 3. - Pushes the active branch to its remote.
13. Fetch, Pull, Push, and Sync
- Fetch: Downloads remote references and commits without changing your working files.
- Pull: Downloads and applies remote changes using a safe fast-forward-only workflow.
- Push: Uploads commits from the active branch to the remote repository.
- Sync: Runs Fetch, Pull, and Push in sequence.
For a new branch without an upstream, the extension configures the upstream when publishing the branch.
14. Branches
The Branches tab lets you inspect local and remote branches and create or switch branches.
- Save the current Blender file.
- Ensure the repository has no uncommitted changes before switching branches.
- Select a branch and use Switch, or create a new branch.
- When the branch changes, Blender Git Manager reloads the relevant
.blendfile so the scene reflects the selected branch.
Branch switching can change project files. The extension uses safety checks and backups before reloading Blender scenes.
15. Git LFS
Use Git LFS for large binary files that should not be stored as normal Git objects.
Common patterns include:
*.blend*.fbx*.obj*.gltf*.glb*.abc*.usd*.usdc*.usdz*.psd*.exr*.hdr*.tif*.tiff*.mp4*.movAfter changing LFS patterns, stage and commit .gitattributes. The Git LFS tab can track and untrack patterns and display LFS-recognized changed files.
16. History and Git Graph
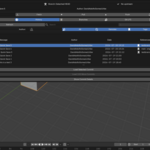
The History tab displays commits and a visual Git Graph.
- Colored lanes identify parallel branch history.
- Nodes are aligned with their matching commit rows.
- Merge commits and branch connections are displayed visually.
- HEAD, local branches, remote branches, and tags are identified.
- Use Search to filter by commit message, author, or hash.
- Use filters for branches, remotes, and tags.
- Use Load More to request additional commit history.
In a linear repository history, only one lane is expected. Multiple colored lanes appear when the repository has parallel branches or merges.
17. Loading a Historical Commit
Select a commit in History and click Load Selected Commit.
This checks out the complete repository tree at that commit and reloads the Blender scene. Blender enters Detached HEAD mode because the selected commit is a historical snapshot rather than an active branch.
To continue working from that commit, create or switch to a branch before making new commits.
18. Commit Details and Actions
Expand Show Commit Details to inspect:
- Full commit hash.
- Commit message and description.
- Author and email address.
- Date and parent commits.
- Associated branches, remotes, and tags.
- Changed files.
- Addition and deletion statistics when available.
Available actions include copying the commit hash, creating a branch from a commit, creating a tag, reverting a commit, and opening the commit on GitHub.
19. Output and Troubleshooting
The Output tab records Git, Git LFS, and GitHub CLI operations. Use it when an action fails.
On Windows, open Window > Toggle System Console in Blender to view detailed process information, including commands, standard output, standard error, duration, and exit codes.
Common issues:
- Git is missing: Install Git and restart Blender.
- Git LFS is missing: Install Git LFS if the repository uses LFS.
- GitHub CLI is missing: Install GitHub CLI to use browser authentication and GitHub features.
- Authentication failed: Confirm that a browser can open and that your GitHub account is valid.
- Push failed: Check the Output tab, remote URL, authentication state, branch upstream, and remote changes.
- Branch switch is blocked: Save the Blender file and commit, stash, or discard working changes first.
- History is empty: Confirm that the selected folder is a Git repository with commits, then press Refresh.
20. Security and Important Limitations
- The extension does not store GitHub passwords, personal access tokens, or private keys.
- Commands are executed through safe argument lists with
shell=False. - Sensitive values in logs, including tokens, passwords, credentials, and OAuth codes, are redacted.
- Git LFS stores large files efficiently, but it cannot merge the internal contents of two Blender binary files.
- Git cannot show geometry, material, or animation differences inside a binary
.blendfile. - Two users editing the same
.blendfile can create conflicts. Use branches, frequent commits, and clear collaboration rules. - GitHub and Git LFS providers may apply storage or bandwidth limits.
21. Recommended Workflow
- Save the Blender project in a dedicated project folder.
- Initialize Git and enable Git LFS for
*.blend. - Create an initial commit.
- Create a GitHub repository when remote backup or collaboration is needed.
- Commit focused changes with clear messages.
- Use Quick Save for fast backup commits when appropriate.
- Push regularly to protect work outside the local computer.
- Create a branch before testing major changes.
- Use History and Load Selected Commit to inspect previous project versions safely.
Have questions about this product?
Login to message
| Blender Extension Compatible | Yes |
| Published | about 2 months ago |
| Blender Version | 4.2 - 5.2 |
| Extension Type | Add-on |
| Render Engine Used | Cycles, Eevee |
| License | Mit |