Bone Engraver
 Shane Rider



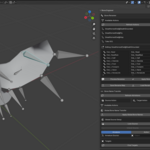
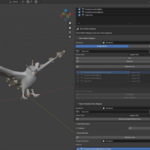

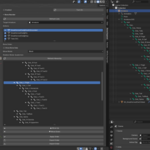
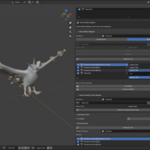

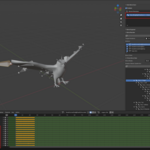
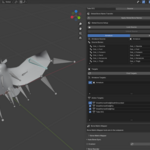
Bone Engraver Blender Add-on - Installation and Overview Guide
1. Installation Instructions To install the 'Bone Engraver' add-on in Blender, follow these steps carefully:
Step 1: Launch Blender Open Blender and ensure you are using a version compatible with the plugin (recommended: Blender 3.0+).
Step 2: Open Preferences Go to the top menu bar and navigate to: Edit > Preferences > Add-ons tab
Step 3: Install the Add-on In the Add-ons tab:- Click the "Install" button in the top-right.- Navigate to the location where you saved the 'bone_engraver.zip' file.- Select the ZIP file and click "Install Add-on".
Step 4: Enable the Add-on Once installed:- Use the search bar to find "Bone Engraver".- Check the box next to the add-on name to enable it.
Step 5: Verify Activation The add-on will now be active and ready for use. You may close the Preferences window.
2. Where to Find Bone Engraver in Blender Once installed and enabled, the Bone Engraver tools are located in the 'N-Panel' (the sidebar that appears on the right side of the 3D Viewport):
- Enter Pose Mode or Object Mode with an Armature selected.
Bone Engraver Blender Add-on - Installation and Overview Guide- Press 'N' to open the right-hand side toolbar.- Navigate to the 'Bone Engraver' tab, which contains several tool sections organized in collapsible panels. Each tool module such as Bone Renamer, Bone Name Transfer, and others will have its own dedicated section with controls.
BONE ENGRAVER TOOLKIT — TECHNICAL FUNCTIONALITY OVERVIEW
1. Bone Renamer
What it is:
A tool that allows users to create a rename mapping for bones in the active Armature, and apply this mapping either locally (to a single armature) or globally (across multiple actions and rigs).
What it does:
Presents a UI list of bone names for manual editing.
Allows importing/exporting rename maps via JSON.
Offers a dry-run preview mode before applying changes.
Has options to rename bones within actions (
F-Curves) and other animation-linked data.
What it affects:
Armature bone names
Actions' F-Curves (
fcurve.data_pathlinked to bones)Drivers (if referencing renamed bones)
NLA tracks (when enabled for global apply)
Optionally other Armatures and their related actions when the global mode is used.
How it affects those targets:
The tool identifies bone rename mappings via a UI list or JSON map.
-
When applied, it:
Renames
PoseBone.nameandEditBone.namein the active Armature.Scans through all
Action.fcurves, adjustingdata_pathstrings that reference"pose.bones[\"\"]"to the new name.It checks for the presence of Drivers and replaces path references using regex-based string replacement.
If “Apply to All” is enabled, it repeats this logic across all actions and NLA tracks found in the scene.
What it changes internally:
Bone names in
bpy.data.armaturesF-Curve data paths (
Action.fcurves.data_path)Driver target data paths
JSON export contains a dictionary of old:new bone names
-
Scene-linked reference properties (for repeatable batch processing)
How to use it:
You type or import a list of name changes (old ➝ new).
Click preview to see what will change.
Apply it to rename the bones in the Armature.
-
Optionally update all connected animations and drivers so nothing breaks.
2. Bone Name Transfer
What it is:
A utility designed to transfer bone names from a source to a target—either from another Armature or an Action that contains matching keyframe data.
What it does:
Creates a mapping from a source (Armature or Action) and applies that to a selected target Armature.
Supports individual remapping of bones, or full one-to-one transfers based on name/index order.
Offers UI checklists to manage mappings before applying.
What it affects:
Target Armature bone names
Optionally: Animations (Actions) if rename propagation is enabled
Action F-Curves, Drivers, and NLA Tracks if global rename flag is set
How it affects those targets:
Compares the source and target bones (by index or name).
Generates a
source_name ➝ target_namemapping table.-
When applied, it:
Renames the bones in the target armature.
Updates any associated F-Curve
data_pathreferences inside actions that are linked to the Armature.Adjusts any driver expressions or targets that reference renamed bones.
Optionally processes all actions if “Global Transfer” is enabled.
What it changes internally:
Active Armature bone names
Updates linked actions’ F-Curves
Path references in Drivers
Mapping data is stored in scene properties temporarily for re-use
-
Checks for hidden and stashed NLA strips to ensure consistent renaming
How to use it:
Pick a source (like a working rig or a well-named animation).
The tool matches names by order or similarity.
You review and confirm the mapping.
It renames your current rig to match the source.
-
It can also update animations and drivers if needed.
3. Global Rename Across All Actions
What it is:
An advanced batch tool to rename bones across all actions in the entire Blender file, targeting consistency in animation names and channel paths.
What it does:
Scans the scene for all actions (including hidden, NLA, stashed).
Applies rename mappings to all animation data.
Ensures animation consistency across rigs that share bone naming patterns.
What it affects:
All
bpy.data.actionsArmatures and their bones
Action F-Curves, Drivers, and Constraints
Optionally includes non-selected rigs
How it affects those targets:
Parses all animation F-Curves for any data paths targeting
"pose.bones[\"\"]".Applies regex string replacements to these data paths using the defined mapping.
Can propagate renames to stashed actions and hidden rigs.
Updates Drivers and Constraints with bone reference paths when applicable.
What it changes internally:
Renames bone keys across all animations
Updates F-Curve references scene-wide
Handles interlinked animation strips (stashed, NLA, linked duplicates)
Optionally caches the mapping for repeat jobs
-
Ensures the mapping is non-destructive via dry-run mode
How to use it:
Load or define a rename map.
Enable global rename.
-
It will go through all animations (even stashed or hidden ones) and fix the bone references to match your new names.
4. Auto Sync Bone Rename
What it is:
A synchronization utility to ensure that renaming operations are mirrored across Actions, Drivers, and NLA tracks in real-time.
What it does:
When bone renaming operations are triggered, this module ensures live synchronization across all linked animation data.
Keeps F-Curves and Drivers in sync during rename operations without needing manual re-linking.
What it affects:
Drivers
Actions
F-Curves
Animation Strips
Bone visibility and naming logic in UI
How it affects those targets:
-
Hooks into the operator logic that modifies bone names and simultaneously tracks down every usage of those names in:
Drivers (
object.animation_data.drivers)Constraints (
constraint.target_bone)Actions and F-Curve paths
Replaces the bone name in all these references, ensuring Blender does not break animation bindings or constraint links.
What it changes internally:
Intercepts
bpy.types.Bone.namechanges and propagates them to all known consumersMaintains a temporary mapping structure in scene properties or operator properties
Uses a combination of direct and regex-based replacements
-
Avoids affecting the original Action’s logic if “Exclude Source” is enabled in Global Rename
How to use it:
This runs in the background when using other tools.
It detects which animations and driver paths use your bones, and updates them when names change.
Final Notes
The Bone Engraver tools are modular but tightly integrated.
All renaming tools handle F-Curve data_path updates using precise matching (not just naive text replacement).
Drivers and Constraints are updated when possible, using Blender’s Python API to ensure no orphaned references.
The add-on supports safe preview (dry-run) before applying changes to avoid unintended destruction of animation data.
-
All tools are accessible from the Bone Engraver tab in the 3D Viewport N-panel, and are context-sensitive depending on whether you are in Object or Pose mode with an Armature selected.
BONE ENGRAVER — BONE REORDERING TOOLKIT
OVERVIEW
The Bone Reordering Toolset provides a full user interface inside the N-Panel under the “Bone Engraver” tab. It is specifically designed to allow users to manually reorder bones inside an Armature data-block, using a familiar outliner-style hierarchy viewer and a controlled export-import workflow.
This reordering system is useful when dealing with:
Broken bone orders from imported files (e.g., FBX/NIF)
Mismatched rigs
Game-engine compatibility constraints (e.g., bone index dependence)
Manual override of auto-sorted Blender bone trees
It is not just cosmetic — Blender stores bone order in a fixed internal list, which can affect:
Export behavior
Parenting logic
Animation data consistency
CORE TOOLS & UI COMPONENTS
1. Outliner Bone List (UIList)
Shows the hierarchical structure of all bones in the selected Armature.
Displays bones in a tree format with icons and indentations indicating parent-child relationships.
-
Visual Highlighting:
The active bone is typically indicated with a focus icon.
Branch arrows show which bones are children.
2. Movement Modes
The tool includes three distinct movement modes, each designed for a different reordering strategy. These modes define how selected bones move in the list and how they influence or preserve hierarchy relationships.
a. Bone Only Mode
What it does:
Moves a single bone without affecting any children or branches.
Just changes the order of one bone relative to others at the same level.
Use Case:
Ideal for minor tweaks where only one bone needs to shift position.
Preserves all hierarchy and transforms.
Effects:
Internal bone order is updated.
Parenting and animations remain unaffected.
b. Block Mode
What it does:
Moves the selected bone and all of its direct children as a fixed unit.
Preserves relative order of the group.
Use Case:
Used when a segment of the hierarchy needs to shift as a group.
Safer than Bone Only for rigs with tightly coupled child structures.
Effects:
Repositions the bone and its child block.
Keeps child-parent connections intact.
Animation data referencing the moved bones is not disrupted since bone names and paths remain unchanged.
c. Branch Mode
What it does:
Moves the entire subtree starting from the selected bone, including all nested children.
Use Case:
Best when reorganizing complex rigs or reshaping the full skeletal tree.
Effects:
Full hierarchy remains intact.
Only affects internal bone index ordering.
Compatible with animations, drivers, and constraints, as no bone names or parenting are changed.
APPLY & UNDO OPERATIONS
Apply Button
What it does:
Commits the new bone order to the Armature’s internal structure.
Rewrites the
boneslist order inbpy.data.armatures['Armature'].bones.
How it affects Blender:
Blender does not allow reordering of bones via the UI. This tool circumvents it by rebuilding the internal bone list order.
-
Animations and drivers are not broken, because:
All bone names remain the same.
All parenting remains intact.
No transformation or renaming is applied.
However, exporters and engine-side tools that rely on bone index order (like some game formats) will now use the updated order.
Undo Support
Full undo is supported for reordering actions.
The Apply operator is wrapped in a registered undo block.
If a mistake is made during reordering, the user can simply undo (
Ctrl+Z).
EXPORT / IMPORT
Export Bone Order
Saves the current bone order to a JSON file.
-
Includes:
Bone names
Their original index order
Their hierarchical depth
Rotation mode
Roll angle
Import Bone Order
Allows re-import of a saved structure and applies it to a compatible armature.
Reconstructs the order exactly, including sub-hierarchy layout and roll.
Use Case:
Useful for transferring a clean bone order to multiple rigs.
Great for restoring preferred order after Blender auto-sorts imported bones.
DEBUG PANEL & CHECKBOX
“Show Debug Depths” Checkbox
What it does:
-
Adds extra columns to the bone list UI showing:
Depth: How deep the bone is in the hierarchy.Roll: The bone’s roll value.Rotation Mode: The bone’s rotation interpolation type (QUATERNION,XYZ, etc.)World HeadandTail: The global positions of the bone’s endpoints (used to visualize the bone's actual position in world space).Vector: Direction vector from head to tail (normalized)Distance: Length between head and tail
Why it matters:
Offers insight into the structure and layout of the armature.
Debugs non-uniform bone spacing or roll problems.
Reveals inconsistencies that could cause issues in export or in-game deformation.
WHAT IT AFFECTS
Armature
The Armature data-block is directly modified when "Apply" is used.
The new order is preserved on file save and used by exporters that read internal bone order.
Animations
Actions and F-Curves remain fully functional.
-
No animation data is destroyed or invalidated, because:
Bone names are not changed.
Data paths like
"pose.bones['Bone']"remain valid.
Drivers and Constraints
These are unaffected by default.
The tool does not currently rewrite driver expressions, but since names and hierarchy stay the same, no breakage occurs.
If a driver uses bone indices (rare), manual checking may be required, but most drivers rely on bone names.
KEY TAKEAWAYS
This tool does not rename or move bones in 3D space.
It strictly updates the internal bone order, which Blender usually hides.
It’s safe for use on animation-ready rigs, as it leaves actions, constraints, and drivers untouched.
Exporters that rely on bone index (like some game engines or Havok pipelines) will now respect the user-defined order.
-
Bone reordering can be saved and restored across projects using JSON files.
BONE ENGRAVER — BONE MATRIX MAPPER TOOLKIT
OVERVIEW
The Bone Matrix Mapper is a specialized toolset inside the Bone Engraver add-on, created for the capture, analysis, remapping, and restoration of bone transformation matrices in Blender armatures. It is especially tailored for workflows involving FBX imports, pose correction, and animation transfer, where the transform state of bones needs to be consistently preserved or restored.
It is designed for technical animators, riggers, and pipeline developers working with imported assets (such as FBX from Maya or game engines) where bone orientations are incorrect, axis misalignments occur, or animation channels become corrupted due to mismatched transforms.
PRIMARY TOOL CATEGORIES
1. Snapshot Pose Matrix (This happens when pressing fix)
What it is:
Captures the exact transformation state (matrices) of all bones in an Armature.What it does:
Records local and world-space transformation matrices for each pose bone.
Stores the data into a property cache for later use by remapping tools or animation fixers.
What it affects:
Scene memory only (non-destructive).
Records data into
POSE_CACHE, a persistent data structure inside the script.
How it works:
Iterates through
pose.bones.-
Stores matrices including:
pose_matrixpose_matrix_inversebone.matrix_basisbone.matrix_channelWorld-space transforms via
matrix @ armature.matrix_world
Used later during the Fix or Remap process.
What it changes:
No changes to the Armature or Actions at this stage.
Purely stores data for downstream operations.
2. Fix Pose With Snapshot (Single and Multi)
What it is:
Applies the previously captured snapshot to an armature or its duplicated versions, restoring bone transformations to a corrected state.What it does:
Rebuilds each bone’s transformation based on the captured matrix.
Can apply to one armature or multiple duplicate armatures at once.
Re-applies pose transformations visually using matrix math.
What it affects:
Pose Bones in the target Armature.
Animations if keyframed after the fix.
Drivers or Constraints only indirectly (if they depend on final pose positions).
How it works:
-
For each bone in the armature:
Looks up the bone name in the
POSE_CACHE.Applies the snapshot matrix to reset the bone’s orientation.
Writes the result into
pose.bones[bone].matrix_basis.
In Multi mode:
Duplicates the selected Armature for each animation selected.
Applies snapshot to each duplicate.
Assigns one action per duplicate.
Optionally, visual keys are inserted for corrected animation data.
What it changes:
Reconstructs bone orientations and alignment.
Improves animation accuracy by enforcing a consistent rig structure.
Updates pose transforms permanently if you insert keyframes after applying.
3. Restore Pose Matrix (Original Axis)
What it is:
Restores the rest-pose bone matrices (Edit Mode bones) to a previously stored backup from before re-orienting the Armature.What it does:
Accesses per-bone backup data stored in
_abo_rest_backup.Re-applies the original 4x4 transformation matrix to each EditBone.
What it affects:
Edit bones in the active Armature.
Permanently resets rest-pose orientation.
How it works:
Swaps Edit Mode.
Looks up
_abo_rest_backupin the bone's custom properties.Converts stored flat list of 16 floats back to a Matrix.
Rewrites
eb.matrix.
What it changes:
Bone axes in Edit Mode are restored to their original state.
Changes how bone axes behave during animation (forward/up vectors, etc.).
ADDITIONAL FUNCTIONALITY
Visual Keying
What it is:
Forces Blender to insert visual keyframes after the pose correction is applied.What it does:
Captures bone position, rotation, and scale as seen on screen after correction.
-
Inserts keyframes using:
Why it's important:
Ensures the corrected pose is stored visually, regardless of axis flips or rig oddities.
Avoids dependency on uncorrected rest-pose.
WHAT IT DISPLAYS IN THE UI
A list of selected animations to snapshot or fix.
Armature selection field (required to identify which rig to operate on).
Warnings if POSE_CACHE is missing or not captured.
Debug logs for each bone that fails to apply a matrix.
-
Button layout includes:
Snapshot
Fix Pose (Single)
Fix Pose (Multi)
Restore Pose (FBX)
Assign Animations to Duplicates
DRIVER AND CONSTRAINT IMPACT
Drivers:
No direct path replacement or parsing is done on drivers.
However, since bones retain their names, driver paths are not broken.
Driver targets will still point to the correct bones unless they relied on specific axis alignments.
Constraints:
Constraints (Copy Rotation, Damped Track, etc.) are not directly modified.
After matrix correction, constrained bones will behave differently if the pose matrices are dramatically adjusted.
USE CASES & PIPELINE VALUE
Is this good for FBX imports?
Absolutely.
This tool was clearly built with FBX problems in mind.FBX files imported into Blender often:
Have broken bone axes (especially from Maya)
Use incorrect rest-pose alignment
Disrupt animation playback
Require tedious manual realignment
The Bone Matrix Mapper solves this by:
Capturing the correct pose state (pre or post import)
Letting you rebuild rigs with exact matrix fidelity
Fixing axis drift and transformation misalignment
Making animations look right again after Blender’s auto corrections
How does it correct the Armature?
It does not fix the mesh or constraints.
It rebuilds bone transforms to match a known good state.
-
It provides a non-destructive snapshot system that you can apply selectively.
The Bone Remapping Tool is crucial when working with animation pipelines, imported rigs, or game engines that require consistent bone orientations and deformation behavior. Its core strength lies in the ability to redirect bone tails and remap bone transforms, ensuring visual, mathematical, and animation consistency—especially after importing broken rigs from formats like FBX or from other 3D packages like Maya, Max, or MotionBuilder.
Why Bone Remapping Is Necessary
In Blender, each bone has:
A head (starting point of the bone)
A tail (the direction and end point)
A roll (the bone’s internal twist axis)
These define the bone’s orientation, which in turn defines:
How bones rotate during animation
How child bones inherit transforms
How meshes deform based on pose matrices
However, when rigs are imported from external sources:
Bone tails may point in the wrong direction
Axes can be flipped or misaligned
Local transform matrices become inconsistent
Parent-child relationships may behave unpredictably
These issues don’t always show visually, but they break animations, especially if:
Animation was authored in a different DCC (Digital Content Creation tool)
Constraints or IK solvers rely on bone axis assumptions
Real-time engines use world-space or parent-relative transforms
What the Bone Remapping Tool Fixes
1. Tail Direction Rebuilding
The tool uses empties or matrix references to recalculate the direction of each bone’s tail, ensuring it points toward its intended child or directional target.
Why this matters:
Tail direction directly affects rotation pivot behavior.
Incorrect tails cause erratic limb bends, spine twists, and finger poses.
Tools like IK chains or spline rigs require accurate tails to function.
2. Consistent World-Space Transforms
By remapping bone matrices, the tool ensures that each bone’s transform in world space remains predictable, even across mismatched skeletons.
This solves:
Animation transfer mismatches (e.g., one arm bends left, another bends backwards)
Problems with forward/up vectors in constraint-based rigs
Deformation glitches when switching between animations authored on different rigs
Real-World Use Cases
1. Game Engines with Strict Axis Requirements
Engines like Unity, Unreal, or proprietary real-time systems often expect:
Z-forward or Y-up skeletons
Bone tails aligned along the local axis
Zero roll or standardized joint orientations
If your bone tails are incorrect or non-uniform:
Animations imported into those engines may appear twisted, mirrored, or broken.
Skin deformation will suffer, especially on twisting limbs like arms, legs, or spines.
2. Animation Retargeting Systems
Tools that remap animations from one skeleton to another (e.g., MotionBuilder, Unity Mecanim, UE Retargeting) depend heavily on bone orientation.
The remapping tool:
Aligns bone axes and tails to match target skeletons
Ensures clean animation remapping across rigs with different authoring histories
Avoids manual cleanup after retargeting
3. Rig Rebuilding and Clean-Up
When dealing with:
Sloppy rigs from old projects
FBX imports with auto-generated bones
Third-party asset packs with inconsistent bone naming or orientations
...the remapping tool lets you cleanly rebuild the structure without starting over:
Bones stay in place visually
Internals are repaired
Roll and tail are aligned properly for animators and constraints
How It Works
-
Calculates new tail positions based on:
Child bone direction
Target empties
Pose matrices or snapshots
Adjusts each bone’s tail location
Recomputes roll and orientation
Ensures the new tail respects existing hierarchy and bone length
Updates the armature without changing names or parenting
Final Summary
The Bone Remapping Tool is essential for:
Fixing broken bone directions after import
Preparing skeletons for retargeting or export
Ensuring IK, constraints, and animation playback behave consistently
Making bone orientations and tail directions match industry standards
By reconstructing tail directions and correcting axis alignment, it gives riggers and animators confidence that the skeleton behaves predictably—no matter where it came from or where it's going.
BONE ENGRAVER TOOLSET
TUTORIAL: BONE RENAMING TOOL (STEP-BY-STEP)
PURPOSE
The Bone Renaming Tool allows you to rename bones in an armature and optionally apply those changes across related animations (Actions), ensuring all F-Curves, animation channels, and drivers referencing those bones are updated. This is essential for:
Cleaning up imported rigs with bad bone names
Standardizing naming across multiple rigs
Preserving animation integrity while renaming
1. SETUP: INSTALL AND ACCESS THE TOOL
Step 1: Launch Blender and enable the add-on
Ensure the Bone Engraver add-on is installed and enabled (refer to the installation guide if needed).
Step 2: Open the N-Panel
In the 3D Viewport, press N on your keyboard to open the right-hand toolbar.
Navigate to the Bone Engraver tab.
In the 3D Viewport, press N on your keyboard to open the right-hand toolbar.
Navigate to the Bone Engraver tab.
Step 3: Select the Active Armature
Click to select your armature in Object Mode.
Switch to Pose Mode using the dropdown in the top-left corner of the 3D Viewport or press Ctrl + Tab and choose Pose Mode.
The tool works best when an armature is actively selected and visible in Pose Mode.
Click to select your armature in Object Mode.
Switch to Pose Mode using the dropdown in the top-left corner of the 3D Viewport or press Ctrl + Tab and choose Pose Mode.
The tool works best when an armature is actively selected and visible in Pose Mode.
2. LOADING THE BONE RENAMER PANEL
Step 1: Locate the "Bone Renamer" Panel
Inside the Bone Engraver tab, find the panel titled Bone Renamer.
This is where all rename operations are configured and executed.
3. POPULATE THE RENAME MAP
Step 1: Click “Load Bone Names”
This populates a list of all bones in the currently selected armature.
Each item shows the original bone name (left column) and allows you to type in a new name (right column).
This populates a list of all bones in the currently selected armature.
Each item shows the original bone name (left column) and allows you to type in a new name (right column).
Step 2: Edit Bone Names
For each bone, type the desired new name in the right-hand text field.
Leave the field blank to skip renaming that bone.
For each bone, type the desired new name in the right-hand text field.
Leave the field blank to skip renaming that bone.
Step 3 (Optional): Import or Export Rename Map
Click “Import JSON” to load a previously saved rename map.
Click “Export JSON” to save your current rename list for reuse.
Click “Import JSON” to load a previously saved rename map.
Click “Export JSON” to save your current rename list for reuse.
4. SELECT ACTIONS TO UPDATE
Step 1: Expand the "Actions" List
Below the rename map, you will see an Actions section listing all animation data blocks in the Blender file.
Step 2: Select Which Actions to Apply Changes To
Use the checkboxes to enable which actions should be updated when the rename is applied.
The renaming process will update F-Curve paths in these actions to reflect the new bone names.
Note: If you do not select any actions, only the Armature’s bones will be renamed. Animation channels will not be updated.
Use the checkboxes to enable which actions should be updated when the rename is applied.
The renaming process will update F-Curve paths in these actions to reflect the new bone names.
Note: If you do not select any actions, only the Armature’s bones will be renamed. Animation channels will not be updated.
5. PREVIEW THE CHANGES (DRY RUN)
Step 1: Click “Preview Rename”
This will print a report in the system console or status area showing which bones will be renamed and what changes will be made to each Action.
This step is non-destructive and lets you verify your rename map before making changes.
This will print a report in the system console or status area showing which bones will be renamed and what changes will be made to each Action.
This step is non-destructive and lets you verify your rename map before making changes.
6. APPLY THE RENAME
Step 1: Click “Apply Rename”
This will:
Rename the bones in the active armature.
Update all selected Actions to use the new bone names in their F-Curve
data_pathstrings.Update any associated animation drivers that use those bone names.
Ensure all animation references remain functional and intact.
Safety Note: Only the selected armature and checked actions are modified. Nothing is deleted.
7. CONFIRM SUCCESSFUL RENAME
After applying:
Enter the Dope Sheet or Action Editor and inspect the renamed channels.
All F-Curves referencing
pose.bones["OldName"]should now reference the new name.Pose Mode in the 3D Viewport should reflect the updated bone names.
SUMMARY OF BUTTONS
Button Name
Description
Load Bone Names
Loads current bone names from the selected armature
Export JSON
Saves your rename list as a JSON file
Import JSON
Loads a rename list from a JSON file
Preview Rename
Shows which bones will be renamed and how animations will be affected
Apply Rename
Commits the rename to the armature and optionally updates the animations
| Button Name | Description |
|---|---|
| Load Bone Names | Loads current bone names from the selected armature |
| Export JSON | Saves your rename list as a JSON file |
| Import JSON | Loads a rename list from a JSON file |
| Preview Rename | Shows which bones will be renamed and how animations will be affected |
| Apply Rename | Commits the rename to the armature and optionally updates the animations |
BEST PRACTICES
Always preview before applying to avoid unintended renames.
Use JSON export to version your rename lists for future reuse or recovery.
Keep animation backups before applying mass renames.
-
Use consistent naming conventions to make retargeting and animation reuse easier.
TUTORIAL: BONE NAME TRANSFER TOOL (STEP-BY-STEP)
OVERVIEW
The Bone Name Transfer Tool is designed to transfer bone names from a source to a target armature, or from an animation (Action) to an armature. This is useful when:
You need to make a rig match the naming convention of another rig
You want to apply existing animations to a different rig with mismatched bone names
You want to cleanly remap imported rigs to a known naming scheme
The tool updates the target armature’s bone names and optionally updates all animation data (Actions) that use the old names.
1. SETUP: INITIALIZE SCENE AND ADD-ON
Step 1: Launch Blender and enable the add-on
Make sure Bone Engraver is installed and active.
Step 2: Open the N-Panel
Press N in the 3D Viewport and go to the Bone Engraver tab.
2. PREPARE ARMATURES OR ACTIONS
You will need one of the following as a "source":
An Armature with the correct bone names
Or an Action (animation) that was built using the correct naming convention
You will also need:
A Target Armature, whose bones you want to rename to match the source.
3. SELECTING MODE AND SOURCES
Step 1: Choose Transfer Mode
At the top of the Bone Name Transfer panel, select the source type:
Source Armature: Transfers bone names from another armature object.
Source Action: Transfers names based on animation channel paths from an existing Action (useful when you don’t have the original rig but have animations).
Step 2: Assign Source and Target
Set the source armature or action using the dropdown.
Set the target armature you want to apply the new names to.
Both must be set before proceeding. If you select Action mode, make sure the Action is loaded and visible in the Dopesheet.
4. POPULATE RENAME MAP
Step 1: Click “Generate Mapping”
This scans either the source armature’s bones or the Action’s F-Curves and attempts to match them with bones in the target armature based on index or proximity of names.
It creates a mapping list:
Old Name ➝ New Name.
Step 2: Review or Edit the Map
-
The generated list will show side-by-side columns:
Left: Current bone name in the target armature
Right: New bone name it will be renamed to
You can manually edit any field or override the suggested mapping.
5. SELECT ACTIONS TO UPDATE (OPTIONAL)
Step 1: Expand the Actions List
Below the mapping, a list of Actions will appear.
Use the checkboxes to select which animations should be updated to reflect the new bone names.
If no Actions are selected, only the armature will be renamed. Animation F-Curves will remain unchanged and may break if still pointing to old names.
6. DRY RUN (PREVIEW)
Step 1: Click “Preview Transfer”
This simulates the rename without changing anything.
A log is printed to the system console or Info window listing what will be renamed and which actions will be affected.
Use this to confirm the mapping before finalizing.
7. APPLY THE TRANSFER
Step 1: Click “Apply Transfer”
This performs the following operations:
Renames bones in the target armature using the generated or edited mapping.
Updates all selected Actions by rewriting F-Curve paths that reference the renamed bones.
Ensures all animation data remains linked and working.
All changes are immediate. There is no confirmation prompt, so use Preview first if unsure.
8. VERIFY RESULTS
In the 3D Viewport, switch to Pose Mode on the target armature and inspect bone names.
Open the Dope Sheet > Action Editor and verify that keyframe channels now reflect the new bone names.
Scrub the timeline to ensure the animation still plays as expected.
SUMMARY OF BUTTONS
| Button Name | Description |
|---|---|
| Generate Mapping | Builds a rename list from the source armature or action |
| Preview Transfer | Simulates the transfer to verify which bones and actions will be affected |
| Apply Transfer | Applies the name mapping to the target armature and selected actions |
BEST PRACTICES
Always run Preview before Apply to prevent accidental overwrites.
Export a JSON rename map if you want to preserve or replicate the result.
When transferring from Actions, make sure the animation was created using the correct bone naming conventions.
Only rename bones that you’re sure should change—unmatched names may indicate deeper rig inconsistencies.
USE CASE EXAMPLES
You imported a new animation from another source and want to apply it to your main rig.
Your game engine expects bones named a certain way, but your rig uses different names.
-
You want to synchronize a character’s rig with another file’s animation set for retargeting.
TUTORIAL: GLOBAL BONE RENAMING TOOL (STEP-BY-STEP)
-
OVERVIEW
The Global Bone Renaming Tool allows you to rename bones across all animation data in your Blender file—including Actions, F-Curves, and NLA tracks—to ensure full consistency. It is especially useful when:
You've renamed bones in a rig and need to update all animations that use the old names
You want to batch-standardize naming conventions across multiple animation assets
You need to ensure renamed bones still function in all timelines and drivers
This tool is optimized for animation consistency and is designed to operate across the entire Blender data set.
1. SETUP AND ACCESS
Step 1: Enable the Add-on
Ensure the Bone Engraver add-on is installed and enabled in Blender.
Step 2: Open the Bone Engraver Panel
In the 3D Viewport, press
Nto open the sidebar.Go to the Bone Engraver tab.
Locate the Global Bone Rename panel (it may be a separate section or nested depending on your add-on layout).
2. SELECT THE TARGET ARMATURE
Step 1: Select Your Rig
In the Outliner, click to select the armature you want to use as the source of correct bone names.
This armature must contain the correct bone names that should be used for renaming.
Step 2: Switch to Pose Mode
Select the armature and switch to Pose Mode (Ctrl + Tab > Pose Mode).
This ensures the UI populates with the correct data and recognizes your selection.
3. SCAN FOR ACTIONS
Step 1: Click “Scan Actions”
This triggers the tool to gather all animation data blocks (Actions) across the Blender file.
-
It includes:
Actions assigned to any armature
NLA-linked actions
Stashed actions (hidden or inactive)
Step 2: Review the Action List
You’ll see a list of Actions with checkboxes next to each.
Select which ones you want the renaming to apply to.
You can select all if you want to batch update the entire project.
4. GENERATE THE RENAME MAP
Step 1: Click “Generate Bone Rename Map”
This reads the currently selected source armature.
It creates a rename table by matching existing bone names in the actions to the bones in the selected armature.
The tool lists each old bone name alongside the new target name.
This is typically a 1:1 mapping, but mismatches can be adjusted manually.
5. EDIT THE MAP (OPTIONAL)
Step 1: Review and Edit Mappings
You can manually modify the rename list to fit specific naming standards.
Each entry allows editing the New Name column.
You can delete or skip entries if certain bones should be left unchanged.
6. DRY RUN PREVIEW
Step 1: Click “Preview Rename”
The tool prints a report of which bones will be renamed and which actions will be affected.
No changes are applied at this point—this is for verification only.
7. APPLY THE GLOBAL RENAME
Step 1: Click “Apply Rename to All Actions”
This applies the rename across all selected actions.
-
Updates include:
All F-Curve
data_pathreferences to bones (e.g.pose.bones["OldName"].location)All driver paths that reference bones
All constraints that store bone names
NLA strips linked to renamed actions
What is changed:
Only bone names in F-Curves and animation paths are changed.
The bones themselves are not moved or modified.
Drivers, Constraints, and Action data blocks are rewritten non-destructively to reflect the updated bone names.
8. VERIFY RESULTS
Switch to the Dope Sheet > Action Editor, and load one of the affected actions.
Expand the F-Curve channels and confirm that the bone names have updated.
In Pose Mode, scrub the timeline and verify that animation playback is preserved.
BUTTONS AND FUNCTIONS
Button Label Function Scan Actions Gathers all Actions, including NLA and hidden ones Generate Bone Rename Map Creates mapping from selected armature to actions Preview Rename Displays a log of what changes would be made without applying them Apply Rename to All Actions Commits all renames to the selected Actions
BEST PRACTICES
Always run a preview first to confirm mappings are valid.
Use version control or file duplicates before applying batch changes.
Ensure no actions are actively linked to broken rigs when applying.
Avoid using armatures with overlapping or duplicate bone names across rigs.
EXAMPLES OF WHEN TO USE
You imported a rig and renamed its bones, but existing animations still reference old bone names.
You standardized naming on a master rig and want to apply the changes to dozens of animation files.
You have an animation library designed for one rig, and need to make it work with another that uses different bone names.
FINAL NOTES
The tool supports updating drivers, animation curves, and constraint references.
It is non-destructive: no animation keyframes are lost.
It is an essential pipeline tool for retargeting, standardization, and animation preservation.
TUTORIAL: BONE RENAME AUTO SYNC TOOL (STEP-BY-STEP)
OVERVIEW
The Bone Rename Auto Sync Tool is a background system in the Bone Engraver add-on that ensures when you manually rename bones (e.g., with F2), all related animation data—Actions, F-Curves, Drivers, and Constraints—are immediately updated to reflect the new name.
This tool eliminates the risk of:
-
Broken animation channels (caused by renamed bones not matching F-Curve paths)
-
Orphaned driver targets
-
Failed constraints due to name mismatches
It supports both interactive renaming (e.g., F2 key in the UI) and rename operations done via other Blender tools or scripts, as long as the Bone Engraver add-on is enabled.
1. HOW IT WORKS
The Auto Sync system monitors bone renaming operations and automatically scans through:
-
All Actions
-
All Drivers
-
All Constraints
-
All F-Curves linked to the renamed bone
Then it rewrites any references to the old bone name to use the new bone name.
This system runs without requiring a button press. It is designed to be:
-
Invisible to the user
-
Non-destructive
-
Fully automated
2. GETTING STARTED
Step 1: Enable the Add-on
Ensure the Bone Engraver add-on is installed and active in Blender.
Step 2: Open the N-Panel
Press N to open the right-hand sidebar. Go to the Bone Engraver tab to verify that the add-on is active and operating.
3. SELECT THE ARMATURE
Step 1: Select Your Rig
-
In the Outliner, select the Armature you want to work with.
Step 2: Switch to Pose Mode or Edit Mode
-
You can rename bones in either Edit Mode or Pose Mode.
-
For renaming using the F2 shortcut, Edit Mode is typically used.
4. HOW TO USE: F2 RENAME + AUTO SYNC
Step 1: Enter Edit Mode
-
Select your Armature
-
Switch to Edit Mode (
Tabkey or mode selector in 3D View)
Step 2: Rename a Bone
-
Select any bone in the viewport or Outliner.
-
Press
F2. -
Type in the new name and hit Enter.
Step 3: Auto Sync Triggers
-
As soon as the bone name is changed, the Auto Sync system:
-
Finds all Actions referencing the old bone name
-
Updates all F-Curve paths (e.g.,
pose.bones["OldName"].location) -
Finds and updates Drivers that use the old bone name
-
Updates Constraints (like Copy Rotation or Child Of) that target the old name
-
No manual steps required. The renaming propagates automatically.
5. HOW TO VERIFY THE SYNC
Method 1: Dope Sheet / Action Editor
-
Open the Dope Sheet, switch to Action Editor, and select an Action.
-
Expand the keyframe channels.
-
Verify that the renamed bone now appears with the new name in the F-Curve list.
Method 2: Drivers
-
Select an object or bone with a known driver referencing the renamed bone.
-
Open the Graph Editor, switch to Drivers Mode.
-
Verify that the
data_pathand target names have updated correctly.
Method 3: Constraints
-
Inspect any constraints (like Copy Rotation, Copy Location, etc.)
-
Check that the target bone name field has updated to the new bone name.
6. USE CASE EXAMPLES
Example 1: Rename a Spine Bone
-
Original name:
spine_01 -
You press
F2and rename it tospine_upper -
All animation data referencing
spine_01will now point tospine_upper -
No broken actions, drivers, or constraints
Example 2: Cleanup After Import
-
You imported a rig with generic names like
bone_01,bone_02, etc. -
You rename each bone to meaningful names (
upper_leg.L,forearm.R, etc.) -
The auto sync system keeps all animations functional without relinking anything
7. WORKS WITH OTHER RENAME TOOLS
If you rename bones using:
-
The Bone Renamer Tool
-
The Bone Name Transfer Tool
-
Manual Python scripts inside Blender
The auto-sync system is still invoked and handles the background propagation of names throughout the file.
8. TROUBLESHOOTING
If the auto sync doesn't trigger:
-
Make sure the Bone Engraver add-on is enabled and not throwing any startup errors
-
Verify you're renaming bones from the active Armature in Edit Mode or through supported operators
-
Confirm the renamed bone exists in animation data
SUMMARY
| Action | Result |
|---|---|
| Rename bone with F2 | Auto sync updates all animations, drivers, and constraints |
| Rename via tool | Auto sync still functions in the background |
| No need to click Apply | Sync is automatic and non-destructive |
TUTORIAL: BONE REORDER TOOL (STEP-BY-STEP)
OVERVIEW
Blender does not allow users to change the internal order of bones in an Armature via the user interface. This internal order affects how bones are stored, exported, and interpreted by many game engines or animation systems. The Bone Reorder Tool gives you precise control over bone order, which is critical for:
-
Exporting consistent skeleton data
-
Matching bone index orders across different files
-
Fixing chaotic bone orders caused by FBX or DAE imports
This tool uses a custom Outliner-style UI to let you visually reorganize bone order, then apply that order directly to the internal structure of the armature.
1. PREPARE THE ARMATURE
Step 1: Open the Add-on
-
Open Blender.
-
Press
Nin the 3D Viewport. -
Navigate to the Bone Engraver tab.
-
Locate the Bone Reorder panel.
Step 2: Select the Armature
-
In the Outliner, select the Armature object.
-
Make sure it is the active object.
-
Switch to Pose Mode or Object Mode (Pose Mode is recommended for clarity when viewing bone hierarchy).
2. POPULATE THE BONE LIST
Step 1: Click “Load Bone Order”
This reads the currently selected armature and populates the tool with a list of all bones in their current internal order.
-
The list is shown with:
-
Indentation for hierarchy
-
Icons for expand/collapse
-
Bone names (editable if needed)
-
-
If enabled, debug data (such as hierarchy depth, roll, world-space length, and direction vectors) is also shown.
3. UNDERSTANDING MOVEMENT MODES
The tool offers three reordering modes, each with different behavior. Selecting the right mode is critical depending on how much of the hierarchy you want to move.
A. Bone Only Mode
-
What it does: Moves only the selected bone.
-
Hierarchy: No children or connected bones are moved.
-
Use Case Example:
-
You just want to move
hand.Labovewrist.Lin the internal list but do not want to move the entire arm chain.
-
-
Effect on Rig: The armature structure is preserved. This mode is the most surgical.
B. Block Mode
-
What it does: Moves the selected bone plus its direct children.
-
Hierarchy: Only direct children follow; grandchildren and deeper descendants stay.
-
Use Case Example:
-
You want to move
spine_02and its immediate children (likechest) together.
-
-
Effect on Rig: Useful for reordering flat chains like spines or tails.
C. Branch Mode
-
What it does: Moves the selected bone and all of its children recursively.
-
Hierarchy: Full subtree is moved as a unit.
-
Use Case Example:
-
You want to move
shoulder.Land everything down the arm—upper_arm.L,forearm.L,hand.L, etc.
-
-
Effect on Rig: Ideal for reordering entire limbs or isolated subtrees.
4. MOVING BONES
Step 1: Select the Target Bone
-
Click a bone name in the list to make it active.
Step 2: Choose Your Mode
-
In the panel, select one of the three reorder modes from the Move Mode dropdown.
Step 3: Move Bones
-
Use the “Move Up” and “Move Down” buttons to reposition the selected bone or branch.
-
The visual list updates to reflect the changes, but no changes are applied to the Armature yet.
Each move respects your selected mode (Bone Only, Block, or Branch).
5. APPLYING THE ORDER
Step 1: Click “Apply Bone Order”
-
This rewrites the internal
boneslist of the Armature. -
All hierarchy, parenting, and pose data are preserved.
-
Blender will now reflect your custom order when exporting or scripting.
Step 2: Confirm the Results
-
In the Outliner, switch to Data View > Armature Data > Bones.
-
You’ll now see the bones in your new order.
6. EXPORT / IMPORT (OPTIONAL)
Export Bone Order (JSON)
-
Click “Export Order” to save the current bone order and structure to a JSON file.
-
Includes:
-
Bone names
-
Hierarchy depth
-
Roll and rotation mode
-
World-space vectors
-
Import Bone Order (JSON)
-
Click “Import Order” to load a previously saved bone order.
-
The UI will repopulate with the imported structure, and you can re-apply it to the current armature.
7. OPTIONAL DEBUG DISPLAY
“Show Debug Depths” Checkbox
-
When enabled, displays:
-
Bone depth in hierarchy
-
Bone roll value
-
World-space head and tail positions
-
Direction vector
-
Bone length
-
Why it’s useful:
-
Lets you identify bones with incorrect orientation or inconsistent positioning.
-
Useful for debugging imported rigs or prepping for game exports.
8. USE CASE EXAMPLES
Example 1: Reordering Bones for Export Consistency
-
You’re preparing a character for a proprietary engine that expects bone index order to match a standard.
-
You use Branch Mode to move limbs and spine sections into the expected order.
-
You apply the order and export.
Example 2: Fixing FBX Import Bone Chaos
-
You imported a rig from FBX and the bone order is scrambled.
-
You reorder it logically (spine first, limbs next, fingers last) using Bone Only and Block modes.
-
You save the result as a JSON and apply the same order to other variants.
Example 3: Creating a Standardized Rig Template
-
You create a base rig with a known-good bone order.
-
You export the order as JSON.
-
Later, you import this order to rigs made by other team members to maintain consistency.
9. MODE SUMMARY
| Mode | Moves... | Preserves Hierarchy? | Best For |
|---|---|---|---|
| Bone Only | Just the selected bone | Yes | Reordering individual bones |
| Block | Selected bone + direct children | Yes | Moving straight chains (e.g. spines) |
| Branch | Full subtree from selected bone | Yes | Moving limbs or major rig sections |
FINAL NOTES
-
The Bone Reorder Tool is non-destructive: names, weights, constraints, and actions are preserved.
-
It does not affect animations, because bone names and hierarchy remain unchanged.
-
Bone order impacts export order, script logic, and external tool compatibility.
This tool gives you precise control over one of Blender’s hidden internal systems—crucial for serious rigging and animation pipelines.
TUTORIAL: BONE MATRIX MAPPER TOOL (STEP-BY-STEP)
OVERVIEW
The Bone Matrix Mapper is a powerful system designed to fix and realign bone orientations, especially in rigs with:
-
Broken or misaligned rest poses
-
Imported FBX skeletons with incorrect transform matrices
-
Animations that play incorrectly due to pose drift or axis mismatch
It works by capturing a snapshot of the correct bone pose, then applying that snapshot back to the same or other armatures—either for correcting bone poses, baking fixed animations, or restoring original rest-pose matrices.
1. SETUP & ACCESS
Step 1: Enable the Add-on
Make sure the Bone Engraver add-on is installed and active.
Step 2: Open the N-Panel
-
Press
Nin the 3D Viewport. -
Go to the Bone Engraver tab.
-
Locate the Bone Matrix Mapper panel.
Step 1: Select Your Armature
-
In the Outliner, select the Armature you want to capture from.
- FIX POSE (SINGLE MODE)
Use this if you want to correct the current armature using the previously captured snapshot.
Step 1: Make sure the correct armature is still selected
Step 2: Click “Fix Pose (Single)”
-
Bones are visually corrected without breaking hierarchy or constraints.
This is typically used for fixing rigs after FBX import or restoring clean axis alignment before applying new animations.
- FIX POSE (MULTI MODE)
Use this when you have multiple animations that need to be corrected. The tool will duplicate the armature for each action and apply the fixed pose.
Step 1: Select Your Armature
-
This is the armature that contains the snapshot pose.
Step 2: Scan Actions
-
Click “Scan Actions” to populate a list of all animation Actions in the project.
-
Select the ones you want to apply the fix to by checking their boxes.
Step 3: Click “Fix Pose (Multi)
Step 4: Check Results
- RESTORE FBX REST POSE
If you've previously backed up the rest-pose using Bone Engraver, you can restore it.
Step 1: Select Armature in Object Mode
Step 2: Click “Restore FBX Pose”
-
The tool will look for
_abo_rest_backupcustom properties. -
Each EditBone’s matrix will be reset to the saved original values.
-
This is useful after reorienting bones or resetting FBX rotations.
- RESTORE MULTI
Step-by-Step Instructions:
1. Scan Actions (if available)
-
Populate the list of Actions used in Fix Multi.
-
This ensures the tool knows which armature matches which animation.
2. Select the Base Armature
-
In the UI, select the original Armature that was used for the Fix Multi operation.
-
This tells the system where to retrieve the original snapshot and action mappings.
3. Select Animations/ Actions
4. Click “Restore Multi”
PRACTICAL USE CASES
Case 1: Fixing Broken FBX Rigs
-
Import an FBX file.
-
Snapshot the pose (Pose Mode) immediately.
-
Rename bones and fix transforms.
-
Restore animation using Fix Pose (Single or Multi).
Case 2: Baking Clean Animation Versions
-
Use Multi Fix to duplicate a rig per animation.
-
Each copy is assigned one action.
-
Snapshot is applied and keyframes are visualized.
-
Clean, corrected animations are created from a single source pose.
Case 3: Animation Rebuild from Visual Poses
-
Import a rig with animation that looks correct, but bone data is bad.
-
Snapshot it in Pose Mode.
-
Fix it using visual keying.
-
Export clean animation with corrected orientation.
SUMMARY OF FUNCTIONS
| Button Name | Function |
|---|---|
| Fix Pose (Single) | Applies stored pose to current armature |
| Scan Actions | Lists all Actions available in the .blend file |
| Fix Pose (Multi) | Creates duplicates per Action, applies snapshot, and bakes corrections |
| Restore FBX Pose | Restores EditBones to original backed-up rest matrices |
FINAL NOTES
-
Pose Mode is required for taking snapshots and applying pose fixes.
-
Actions must be manually selected before running Multi Fix.
-
Visual keying ensures corrected poses are baked and persistent.
-
No bones are renamed or re-parented during matrix fix operations.
-
This tool is especially useful in FBX-heavy workflows where bones are aligned incorrectly but animations look visually correct.
Have questions about this product?
Login to message
| Blender Extension Compatible | Yes |
| Sales | 10+ |
| Published | over 1 year ago |
| Blender Version | 3.0 - 4.4 |
| Extension Type | Add-on |
| Render Engine Used | Arnold, Blender-Internal, Blender-Game-Engine, Cycles, Eevee, Freestyle, Luxrender, Mental-Ray, Octane, Vray, Yafaray |
| License | GPL |

Discover more products like this
bone orientation bone rename fbx orientation rename bones armature fix orientation fbx animation fixing bone order rigging bone hierarchy automatic bone orientation