 Kaan S.



1. Introduction
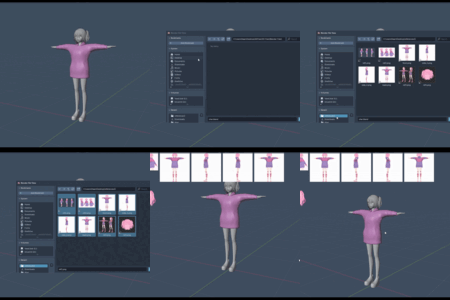
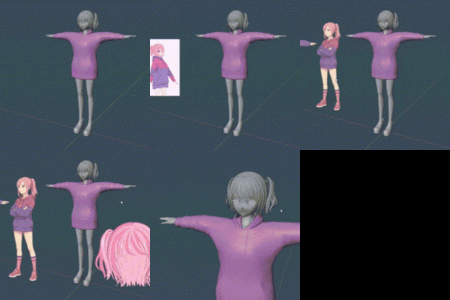
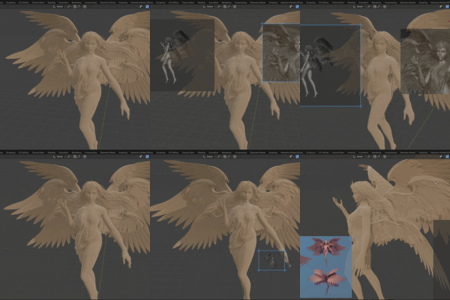
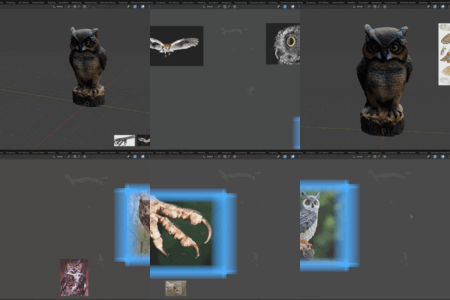
BRef+ is a powerful and minimalistic reference image manager for Blender. It is designed to streamline the workflow for artists who rely on reference images by providing an intuitive overlay system directly within the 3D viewport.
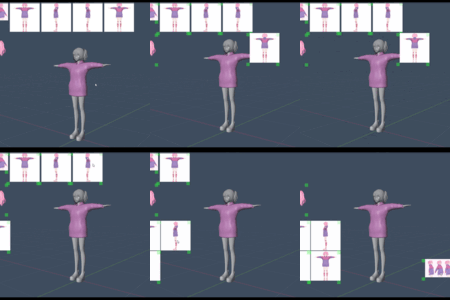
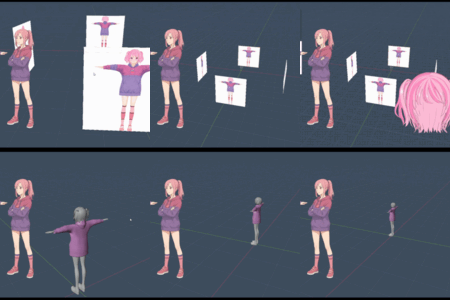
Unlike Blender's default empty images, which exist in 3D space, BRef+ places images in a 2D overlay, making them independent of your camera's view. The addon features an interactive mode for easy manipulation, a robust layer system for organization, advanced tools for automatic arrangement, and support for traditional orthographic reference planes.
2. Installation
- Download the latest version of the addon, which will be a file named
BRef+[experimental-Latest].zip. - Open Blender, then navigate to the main menu and select Edit > Preferences.
- In the Preferences window, select the Add-ons section.
- Click the Install... button located at the top-right of the window.
- A file browser will open. Find and select the
BRef+[experimental-Latest].zipfile you downloaded. Click Install Add-on.-
Important: Do not unzip the file yourself. Blender installs directly from the
.ziparchive.
-
Important: Do not unzip the file yourself. Blender installs directly from the
- After a moment, "UI: BRef+" will appear in the add-on list. Enable it by clicking the checkbox next to its name.
- The addon is now installed. You can find its main panel in the 3D Viewport's Sidebar (press the
Nkey to open/close) under the "BRef" tab.
3. User Interface Overview
BRef+ is controlled through a series of panels in the Sidebar (N Panel) and a convenient set of shortcuts in the Viewport Header.
3.1 Main Panel (BRef+)
This is the primary control center for the addon.
-
Interactive Mode / Exit Interactive: This large button toggles the addon's interactive mode. When active, the button turns red, and you can directly click, drag, and resize images in the viewport. Press
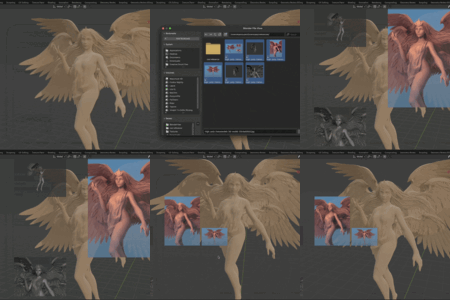
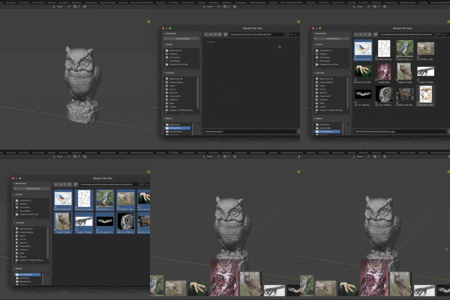
ESCto exit this mode. - Add (+ Icon): Opens a file browser to select and load new reference images.
- Show All Layers: A toggle switch that determines visibility. When enabled, images from all layers are shown. When disabled, only images on the currently active layer are visible.
3.2 Images Panel
This panel lists all loaded reference images and provides tools for managing them.
-
Image List: Each image is an item in this list with several controls:
- Visibility (Eye Icon): Toggles the visibility of that specific image.
- Layer Number: Assigns the image to a layer (0-99). Images on higher layers are drawn on top of those on lower layers.
- Alpha Slider: Controls the individual opacity of the image.
- Filename: Displays the name of the image file.
- Anchor Indicator (Pin Icon): Appears next to the name if the image has Viewport Anchor enabled.
-
Side Toolbar:
-
+/-: Add a new image or remove the currently selected image. -
▲/▼: Move the selected image up or down one layer. - Toggle Visibility (Eye Icon): Another way to toggle the visibility of the selected image.
- Center Image (Cursor Icon): Instantly moves the selected image to the center of the viewport.
-
- Clear All: A button to remove all reference images from the scene. You will be asked for confirmation.
3.3 Transform Panel
This panel provides precise numerical controls for the currently selected image.
-
Position: Set the
XandYcoordinates of the image's bottom-left corner in pixels. -
Size: Set the
WidthandHeightof the image in pixels.- Lock Aspect Ratio: If enabled, changing the width or height will automatically adjust the other dimension to maintain the image's original proportions.
-
Flip: Mirror the image with the
Flip X(horizontal) andFlip Y(vertical) toggles. -
Viewport Anchor: This powerful feature makes an image responsive to the viewport size.
- Enable: When checked, the image's position and size become relative to the viewport dimensions instead of fixed pixel values.
- Anchor H/V: Choose which edge or center of the viewport to pin the image to (e.g., Top-Left, Center-Right).
3.4 Auto Arrange Panel
Use these advanced tools to automatically organize multiple images neatly and prevent overlaps.
-
Layout:
-
Horizontal: Arranges images in a row. -
Vertical: Arranges images in a column. -
Grid: Arranges images in a grid pattern.
-
- Start From: Sets the starting point for the arrangement (e.g., Top Left, Bottom Right, Center).
-
Spacing & Margin:
-
Gap: The space in pixels between each arranged image. -
Edge: The margin in pixels from the viewport's edge.
-
- Columns: (Grid mode only) The maximum number of images per row.
-
Size Mode:
-
Keep Current: Images keep their current size during arrangement. -
Uniform: Resizes all images to a specifiedUniform Size. -
Fit to Viewport: Scales images to fit within the viewport margins.
-
-
Action Buttons:
- Arrange Selected: Applies the layout settings only to the currently selected image.
- Arrange All: Applies the layout settings to all visible images.
3.5 Settings Panel
Customize the addon's behavior and appearance.
- Header Shortcuts: Show or hide the BRef+ controls in the 3D Viewport header.
-
Mouse Wheel Resize: Enable or disable resizing the hovered image using the mouse wheel while in Interactive Mode.
- Resize Speed: Controls how fast the image scales with the mouse wheel.
-
Defaults:
- Default Alpha: The opacity new images will have when first loaded.
- Auto Arrange: If enabled, newly added images will be automatically positioned to avoid overlapping existing ones.
- Display: Customize the color and thickness of the selection frame and the size of the corner resize handles.
-
Grid:
- Snap to Grid: Enables position snapping while dragging images in Interactive Mode.
- Grid Size / Show Grid: Controls the grid's cell size and visibility.
3.6 Orthographic Panel
This panel is for creating traditional reference planes in 3D space using Blender's image empties.
- Enable Orthographic References: Activates this feature.
- Distance: Controls how far the reference planes are from the world origin.
-
View Slots (Front, Back, etc.): For each orthographic view, you can load an image (
filepath) and set itsAlphaandSize. -
Update / Clear:
- Update Orthographic References (Refresh Icon): Creates or updates the empties in the 3D scene based on your settings.
- Clear All References (Trash Icon): Deletes all orthographic empties created by BRef+.
3.7 Viewport Header UI
For quick access, a compact UI can be displayed in the 3D Viewport header (enable it in Settings).
- Enter/Exit Interactive Mode (Pan/Cancel Icon): A quick toggle for interactive mode.
-
Layer Buttons:
- All: Toggles the "Show All Layers" option.
- Layer Numbers (e.g., 0, 1): Click a number to instantly switch the active visible layer. The current layer is highlighted.
4. Core Workflows
4.1 Adding and Manipulating Images
- In the BRef+ panel, click the
+icon to open the file browser. Select one or more reference images. - The images will appear in the viewport. If
Auto Arrangeis on in the Settings, they will be placed automatically to avoid overlaps. - Click the "Interactive Mode" button. The button will turn red.
- You can now manipulate images directly:
- Move: Click anywhere on an image and drag it to a new position.
- Resize: Click and drag one of the corner handles to resize. The aspect ratio will be locked by default (if set in the Transform panel).
- Resize with Mouse Wheel: If enabled, hover your mouse over an image and use the mouse wheel to scale it up or down from its center.
- Click "Exit Interactive" or press
ESCorRight-Clickto return to normal Blender controls.
4.2 Organizing with Layers
- Select an image in the list and change its
layernumber to organize it. - To reduce clutter, disable "Show All Layers" in the main panel. Now, only the images on the active layer are visible.
- Use the number buttons in the Viewport Header to quickly switch between your layers and focus on the references you need.
Have questions about this product?
Login to message
Discover more products like this
#3dsculpting sculpting character 2025-add-ons-for-blender 3d modeling reference 3dmodeling