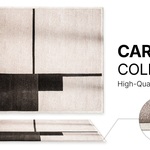
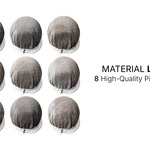
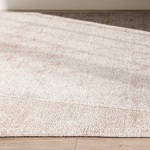
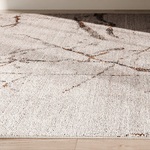
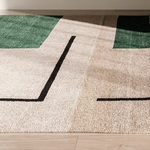
Realistic Carpet Collection - Photorealistic Rug Materials for Archviz (Cycles)
 vanmarukami


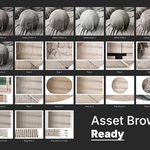
How to Add a .blend File to the Asset Browser in Blender
1. Add the Curtians.blend library to the Asset Browser
Go to
Edit → Preferences....Open the File Paths tab.
Find the Asset Libraries section.
Click Add.
In the Name field, type a name for your library (e.g., "My Models").
In the Path field, select the folder where your
.blendfile with the assets is stored (important: select the folder, not the file itself).Click Save Preferences.
2. Use the assets in any project
Open any Blender project.
Switch one of the editors to Asset Browser (shift + F1).
In the top drop-down menu, choose your library.
-
Drag and drop the desired asset into your scene.
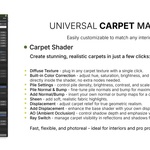
Carpet Material — Parameters Description
This shader is designed to give your carpets a realistic fabric look with intuitive control over color, pile depth, reflections, and light interaction.
Perfect for interior visualization and archviz projects in Blender.
Main Parameters
- Diffuse Texture- The main texture input that defines the pattern and color of your carpet. Connect any image or design here to customize the look of your carpet surface.
- Diffuse Texture Color Correct - Provides quick color adjustments for the texture connected to Diffuse Texture — including hue, saturation, brightness, and contrast.
This allows you to fine-tune the overall color tone directly within the shader without adding extra nodes.
Pile Settings
Controls the built-in fiber (pile) texture that simulates the soft surface of the carpet.
- Pile Mix – blends between the pile texture and your diffuse texture to balance fabric detail and pattern visibility.
- Pile Bright / Contrast – fine-tune the brightness and contrast of the pile for added realism and depth.
- Pile UV Scale – adjusts the scale of the pile texture across the carpet surface, useful for matching different carpet sizes and patterns.
- Pile Normal / Bump - Defines the micro surface details that make the carpet appear more tactile and realistic.
- Normal Strength – controls the intensity of the normal map effect, affecting how light interacts with the fibers.
- Bump Strength – adjusts the perceived height of the fibers for subtle surface variation.
- Distance / Filter Width – controls how soft or sharp the bump details appear.
Add Normal / Bump
Allows you to add your own normal or bump textures on top of the existing pile effect for additional customization.
Ideal if you want to apply a unique weave pattern or enhance realism for close-up shots.
Sheen (Fabric Light Scattering)
Adds a soft reflective layer that mimics the light behavior of real fabric fibers.
This subtle sheen effect helps reproduce the gentle light scattering typical of woven materials, enhancing realism in well-lit interiors.
- Sheen Roughness – controls the sharpness or diffusion of the sheen highlight.
Displacement
Generates real geometric relief on the carpet surface by using a height map to deform the mesh.
- Midlevel – defines the neutral reference point for height.
- Scale – controls the intensity and height of the displacement effect.
Displacement gives your carpet a truly three-dimensional look, especially noticeable in close-up renders and realistic lighting setups.
Add Custom Displacement
Enables you to plug in your own displacement texture, layering it over the existing surface structure for a more customized and detailed height pattern.
This allows for unique fiber depth and intricate carpet designs.
AO (Ambient Occlusion)
Simulates soft shadowing and light blocking between the fibers of the carpet.
- Value – adjusts the shadow intensity.
- Distance – defines how far the occlusion spreads.
AO adds natural grounding and volume, making the carpet look integrated and realistic within your scene lighting.
Ray Switch (Render Optimization & Light Control)
This feature allows you to control how the carpet appears to different ray types — such as reflections, indirect light, or shadows.
If your carpet texture is very saturated and causes unwanted color bleeding in your scene, use Ray Switch to manage it.
-
Ray Switch Color – lets you define an alternative color that appears in reflections or indirect lighting, reducing excessive light spread while keeping the direct view of the carpet unchanged.
This ensures balanced lighting and accurate color behavior in complex interior scenes.
Enabling and Setting Up Displacement in Blender (Cycles)
To ensure your carpet materials display realistic height and fiber detail, you need to enable and configure displacement properly in your scene. Follow these steps to get accurate, high-quality displacement results in Cycles.
1. Switch to the Cycles Render Engine
Displacement only works with the Cycles engine.
- Go to the Render Properties tab (camera icon).
- Under Render Engine, select Cycles.
- Choose GPU Compute if available for faster performance.
2. Enable Experimental Features (for Adaptive Subdivision)
This unlocks Adaptive Subdivision (Microdisplacement) for higher realism without heavy geometry.
- In Render Properties, scroll down to Feature Set → set it to Experimental.
- Scroll down to the Subdivision section (visible only in Experimental mode) and set:
- Dicing Rate Render: 2.0 px — controls mesh detail at render time. Lower = more detail.
- Viewport Dicing Rate: 2.0 px — controls preview quality in the viewport.
- Offscreen Scale: 4.0 — determines subdivision density for off-screen geometry.
- Max Subdivisions: 12 — limits maximum tessellation depth (prevents memory overload).
These settings balance visual fidelity and performance — perfect for detailed carpets with fine displacement.
3. Apply a Subdivision Surface Modifier
- Select your carpet object.
- Go to the Modifiers tab → click Add Modifier → choose Subdivision Surface.
- Set Levels Viewport - 0 and Render - 2, depending on your system performance.
- Then, enable “Adaptive Subdivision” (available when Experimental mode is active). Set Adaptive Subdivision to 1px - 8 px
Adaptive Subdivision automatically increases mesh detail closer to the camera, improving realism while keeping performance optimized — perfect for detailed carpet displacement.
4. Enable Displacement in Material Settings
- Select your carpet and open the Material Properties tab.
- Scroll down to Settings → Surface → Displacement.
- Choose Displacement and Bump (recommended) or Displacement Only for full geometry displacement.
“Displacement and Bump” combines real geometry deformation with bump details — ideal for carpets.
5. Fine-Tune the Displacement Scale
- In the Shader Editor
- Adjust the Displacement → Scale parameter.
- Start with 0.005–0.01 for subtle height variation typical for carpets.
- Too high values may cause geometry artifacts or mesh tearing.
Have questions about this product?
Login to message
| Published | 12 months ago |
| Blender Version | 4.5 |
| Render Engine Used | Cycles |
| Misc Data | Uvs-Unwrapped, Normal-Mapped, Textured |
| License | Royalty Free |
Discover more products like this
carpet materials carpet models 3d carpets interior props archviz carpets rug collection realistic carpets 3d assets rug models blender carpets interior carpets photoreal carpets