Cloudgen 2
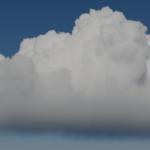 Noah Milliken



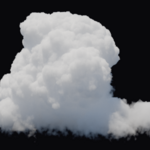
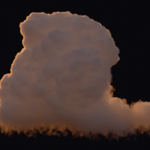
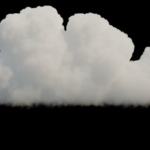
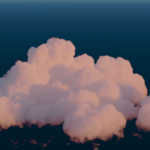
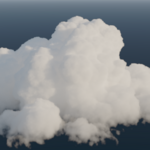
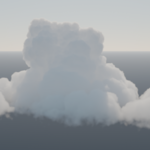
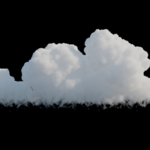
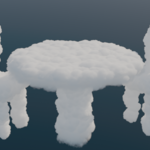
Note: I cover Cloudgen in great detail here so don’t worry, it’s simpler than it looks!
How to install:
Download and unzip the Cloudgen folder.
After unzipping the folder, open any .blend file, and navigate to preferences (edit>preferences>file paths)


Click the + icon to add a new asset library and navigate to the unzipped Cloudgen folder. Select the folder and add it.
Save preferences.
Now, If you navigate to the asset browser, you will be able to find both the geometry nodes systems and the shader, which you can drag and drop onto your base object.
Using the addon:
After you add a Cloudgen node to an object, you need to unpack it by clicking the little box icon right to the right of the name (this applies for single nodes and groups―you need to do both:


Then you also need to unlink the node by clicking on the books icon:
Then have fun!

Once you have added the geometry nodes system and shader to the mesh, you need to add an empty to the scene (shift+a>empty>plain axes) This empty controls where the flat bottom of your cloud is cut off. Then select this as the object under the cloud density bottom fade in the main Cloudgen node.

Then just tweak the smoothness of the fade, the amount of the fade (gradient scale―lower values for more fade, higher for flatter bottoms) and the noise scale.
Changing the detail of the cloud: The cloud system has a resolution input to control the detail of your cloud. The higher the value the lower the detail of your cloud. Start with coarse detail and work up―low values can quickly overwhelm your computer! Also note that if you want your cloud to be a different size after the detail is right, you can simply scale it up. Note: applying the scale of your cloud (Ctrl+A > scale) will mess with your resolution and can crash your blend file!
If you can’t see the cloud: try moving the empty up/down until it is visible.
VDB exports: to export a cloud as a VDB, simply open the geometry nodes workspace and add a bake node right at the end of the system:

Then you can set the bake to disk in the modifiers panel and specify a file location. Then hit bake to bake a VDB to your disk. (FYI if you delete the modifier or the bake without moving the VDB, it will be destroyed.)
---->


Pro tip: if you want a lot of clouds, you can often just make one VDB and rotate and move it in your scene to give the effect of variation.
Pro tip: when you are editing your cloud shape and settings, use a coarse resolution and adjust it for the final cloud. Also, it can be helpful to hide the modifier while you make changes so it won’t slow down your computer. (Make sure the modifier is enabled in the viewport when you try to bake or render―unlike the second picture above)
Adding the wispy details:
To add wispy details, you can add a Cloudgen wisps node (you will find it in the add menu just like a normal node). First, open the geometry nodes workspace for your cloud and add the node. Then add an empty to your scene to control where the wisps go and connect the color output to the socket under the cloud wispy details panel on the main cloudgen node. Then select the empty in the object option on the Cloudgen wisps node (the orange socket). The wispy details will eat into your cloud in a rough sphere around the empty. The noise scale slider controls the scale of the wispy noise, and the gradient scale controls the falloff of the effect (lower values for more fade). The smoothness slider controls how much the noise is mixed into the fade.
Using the Cloudgen wisps combine node: This node allows you to plug in the outputs of two Cloudgen wisps nodes and combine them. You connect the output of this node into the Cloudgen main node just like you would for a wisps node.
Volume bounces/ray depth: The more volume bounces you have in your scene (set under render settings>light paths>volume) the better your clouds will look, but the longer they will take to render. I recommend starting with a value of 12 and adjusting as needed. The ray depth setting on the cloud shader is set right for 12 bounces, but you may need to adjust it if you change the number of scene volume bounces. What this value does is that it allows light to pass through the thinner areas of the cloud, resulting in this effect:

If you change the volume bounces and don’t see this happening, you can change the ray depth until it starts to happen again. Usually it works best to start equal to the number of volume bounces and then increase if needed. The cloud lightness/darkness value controls the strength of this effect, with the effect most apparent when this value is 1 and least when it is 0.
-
$4
Just the VDB library of 25 VDBs
-
$9
Cloudgen version 1: no VDB exports and only 1 cloud type.
-
$12
All the features, VDB library, and Cloudgen 1 and 2. Single user commercial use.
-
$15
The same as Cloudgen V2 but for a studio with up to 3 users.
Have questions about this product?
Login to message
| Sales | 10+ |
| Rating | 1 ratings |
| Dev Fund Contributor | |
| Published | 9 months ago |
| Blender Version | 5.0 |
| Render Engine Used | Cycles |
| License | Royalty Free |
Discover more products like this
cloud generator blender 3d volumetric clouds customizable procedural custom volumetric-clouds geometry nodes generator realism semi-procedural clouds volumetrics cloud shader