Curvbake Pro - High Quality Curvature Map Baker
 Nuriddin Khamidov


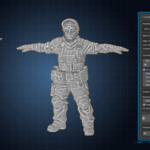
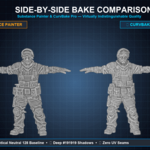

📖 CurvBake Pro — User Guide & Documentation
Thank you for purchasing CurvBake Pro! Follow this step-by-step guide to install the addon and bake your first curvature map inside Blender.
🛠️ 1. Installation
- Open Blender (v3.6 LTS, v4.0, or newer).
- Go to Edit > Preferences > Add-ons.
- Click Install... (or Install from Disk) in the top right corner.
- Select the downloaded
CurvBake_Pro_v1.0.0.zipfile and click Install Add-on. - Enable the checkbox next to Generic: CurvBake Pro.
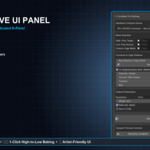
- The addon panel will appear in the 3D Viewport N-Sidebar under the CurvBake Pro tab!
🚀 2. How to Bake a Curvature Map
⚠️ IMPORTANT REQUIREMENT: CurvBake Pro is a specialized High-Poly to Low-Poly baking engine. You must select BOTH a High-Poly Target object and a Low-Poly Source object before clicking Bake!
- Press
Nin the 3D Viewport to open the side panel and click on CurvBake Pro. - Select your High-Poly Target mesh and your Low-Poly Source mesh using the eyedropper pickers.
- Choose your Hardware Compute Device:
- GPU (NVIDIA OptiX): High-contrast, razor-sharp edge highlights for hard-surface assets.
- CPU (C++ OpenMP): Smooth 3D Laplacian cavity falloffs for organic sculptures.
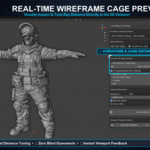
- (Optional) Click SHOW CAGE PREVIEW to visually inspect and tune the Ray Distance wireframe cage.
- Choose your target resolution (e.g.
1024,2048,4096). - Click BAKE CURVATURE MAP!
🎨 3. Viewport Preview
- Click PREVIEW ON MESH to instantly preview your baked curvature map on the low-poly model in Material Preview mode.
- Click RESTORE MATERIAL to revert back to your original material setup.
$12
 Included
Includes 12 months of
- Support from Nuriddin Khamidov
- Product updates
Extend this product’s Support Period +12 months: 50% of product price
Have questions before purchasing?
Login to message
| Published | about 2 months ago |
| Blender Version | 3.6 - 5.2 |
| Extension Type | N/A |
| License | GPL |
