Directory Batch Exporter
 3D Mage



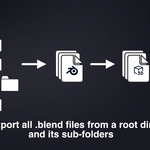

Root Directory- This is where you choose the root directory to perform batch operations from. The other menus will be hidden until you select a root directory.
Click on "Choose Root Directory" to select a folder to serve as the root directory.
Click the drop down button on the right of the "Choose Root Directory" button to select recently used directories.
Click the "Open Root Folder" button to open the currently selected root directory in File Explorer.
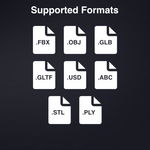
Output Settings - This is where you select which file format to export to and specifying whether to export to a sub-folder or not.
Click on the Format drop down to select which format to export to.
Click on the "Export to Subfolder" toggle to enable exporting to a sub-folder. When on, additional menu items will show up.
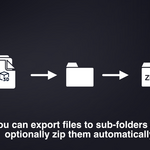
You can select how the batch export will name the sub-folder via the provided drop down. You can name your sub-folders based on the parent folder of the .blend, the .blend filename, or provide a custom name that will apply to all sub-folders that are exported/
If you want the sub-folders to be zipped, tick the Zip Export Files checkbox.
Export Settings - You can select any saved operator preset corresponding to the currently selected format by using the provided Operator Preset drop down.
Click on the "Open Export Settings" button to open the export window of the corresponding format to access the ability to set up your own operator presets for the currently selected format.
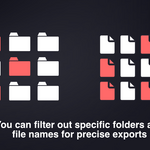
Filter Settings - You can specify which folders and file names to ignore or only include. To specify which mode to use for folders and files, use the corresponding "Ignore" and "Only Include" toggles. Any item while under "Ignore" mode will not be processed during a batch export. Conversely, any item under "Only Include" will only be processed during a batch export.
To add items into a list, click on the '+' key, where a drop down of available folders or files will be displayed. Click on an entry to add it to the list. To remove items from a list, select an entry in the list, the press the '-' button.
Any entry in the Folders list will be considered for being ignored or only processed during a batch export.
Any entry in the Files list will be considered for being ignored or only processed that share the same names found in the list during a batch export.
If you also want to consider files in the root directory itself (those not found in sub-folders), tick the "Include Root Files" checkbox.
Logs - A text file log of each batch export will be recorded while the "Enable Logging" toggle is enabled. If disabled, no logging will occur.
Click the "View Latest Log" button to see the log file of the latest batch export.
Click the "Open Logs Folder" button to open the folder containing all the logs.
Click the "Clear Logs" button to clear all previous logs from the log folder.
Export - Click the "Export All" button to begin a batch export. While exporting, you can see the progress of the batch export on the side panel and status bar. You can click the "Cancel" button to cancel the current batch export operation. A summary of the batch export will be located on the top of the side panel when the batch export is done or canceled.
Have questions about this product?
Login to message
| Blender Extension Compatible | Yes |
| Dev Fund Contributor | |
| Published | about 1 year ago |
| Blender Version | 4.5 - 5.2 |
| Extension Type | Add-on |
| License | GPL |