 Skettch


DSLR AutoFocus Pro — Documentation
Table of Contents
- Installation
- Quick Start
- AF Behavior Modes
- AF Area Modes
- Transition & Lens Effects
- Visual Overlay Settings
- Keyframe Bake
- Keyboard Shortcuts
- Tips & Best Practices
- Troubleshooting
- FAQ
1. Installation
Blender 4.0–4.1 (Legacy Addon)
- Download the
.zipfile - Open Blender → Edit → Preferences → Add-ons
- Click "Install..." and select the downloaded
.zip - Enable "DSLR AutoFocus Pro" in the addon list
Blender 4.2+ / 5.0 (Extension)
- Download the
.zipfile - Open Blender → Edit → Preferences → Get Extensions
- Click the dropdown arrow (top right) → "Install from Disk..."
- Select the downloaded
.zip - The addon appears in the sidebar automatically
Verify Installation
- Select a camera in your scene (or add one with Shift+A → Camera)
- Open the sidebar with N
- Look for the DSLR AF tab
- You should see the "AF DISABLED" toggle button
2. Quick Start
30-Second Setup
- Select your scene camera
- Open N-Panel → DSLR AF tab
- Click AF DISABLED to enable (turns green: "AF ENABLED")
- Choose AF Behavior: AF-S (default)
- Click Focus — the camera will focus on whatever object is at the AF point
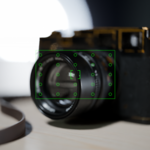
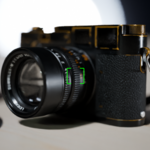
- Check the viewport: you'll see green AF indicators when focus locks
First Focus Test
- Add a few objects at different distances from the camera
- Enter camera view (Numpad 0)
- Enable AF → Click Focus
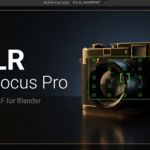
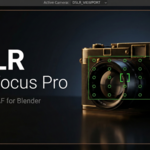
- The green square shows where focus locked
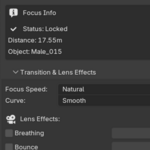
- The info overlay shows distance and object name
3. AF Behavior Modes
The addon has three focus behaviors, matching real DSLR/mirrorless cameras:
AF-S (Single Shot)
What it does: Press Focus once, the system casts a ray, and locks focus on the first object hit. Focus stays locked until you press Focus again.
When to use:
- Portraits and static scenes
- Precise focus on a specific object
- Product shots
Controls:
- Click Focus button (or press F in camera view)
- AF point turns green when locked
- Press Focus again to re-focus
AF-C (Continuous)
What it does: Continuously casts rays at the set interval and updates focus distance in real-time. Tracks moving objects.
When to use:
- Animated scenes with moving objects
- Camera fly-throughs
- Action sequences where subjects move
Controls:
- Click Start to begin continuous focusing
- Click STOP to end
- Adjust update interval (ms) for speed: 33ms = 30fps, 17ms = 60fps
- Auto-pauses during render (resumes after)
Important: AF-C uses a timer that runs in the background. Always stop it when you're done to save system resources.
MF (Manual Focus)
What it does: No automatic focusing. You control the focus distance directly via a slider.
When to use:
- Cinematic rack focus (manual control)
- Focus stacking setups
- When you know the exact distance
Controls:
- Adjust the Distance slider
- Click Apply to set focus
- Works well with Focus Peaking overlay (enable in Visual Settings)
4. AF Area Modes
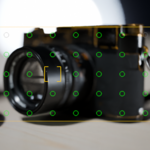
The area mode determines WHERE the system looks for objects. These match Fujifilm's AF area system:
Single Point
- Casts one ray from the AF point position
- Most precise mode
- Set position with X/Y sliders or click Pick with Mouse (Ctrl+F)
- Click Center to reset to middle
Zone (S / M / L)
- Casts a grid of rays in a region around the AF point
- S (Small): 3×3 = 9 rays — tight area, still precise
- M (Medium): 5×5 = 25 rays — general purpose
- L (Large): 7×5 = 35 rays — wide coverage
- Priority setting determines which hit wins: Nearest, Center Weighted, or Largest Object
Wide/Tracking (S / M / L)
- Scans a wide area and automatically tracks the detected object
- With AF-C: locks onto nearest object and follows it across frames
- If tracked object is lost, re-scans the area after 5 ticks
- Yellow AF indicator = tracking active
- Size controls the scan area width
All
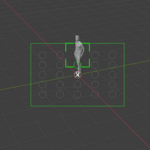
- Scans the entire viewport (9×7 = 63 rays)
- Automatically focuses on the nearest object
- No settings needed — "fire and forget" mode
- Best for quick setups where you just want something in focus
5. Transition & Lens Effects
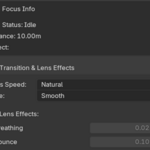
Speed Presets
Found in the Transition & Lens Effects subpanel:
| Preset | Speed | Approx. Time | Best For |
|---|---|---|---|
| Cinematic | 2.0 | ~1.2 sec | Dramatic rack focus, film look |
| Slow | 4.0 | ~0.6 sec | Deliberate focus pulls |
| Natural | 8.0 | ~0.3 sec | Real lens motor feel (default) |
| Fast | 14.0 | ~0.17 sec | Sport/action/documentary |
| Instant | 25.0 | ~0.09 sec | Jump cuts, no visible transition |
| Custom | — | — | Set your own speed value |
Interpolation Curves
- Linear: Constant speed, robotic feel
- Smooth: Exponential easing, natural lens motor
- Smooth In/Out: Smoothstep, most cinematic (accelerates then decelerates)
Lens Breathing
Real camera lenses slightly change their field of view when focus distance changes. This is called "breathing."
- Enable: Check "Breathing" in Lens Effects
- Strength slider: Higher = more visible FOV shift
- How it works: Closer focus = more FOV change, far focus = almost none (physics-accurate)
- Tip: Subtle values (0.01–0.03) look most realistic
Focus Bounce
A slight overshoot oscillation when focus locks — like a real lens motor overshooting then settling.
- Enable: Check "Bounce" in Lens Effects
- Strength slider: Higher = bigger overshoot
- Behavior: Only triggers on significant distance changes (>10%). Small adjustments don't bounce.
- Duration: ~0.3 seconds, 2 Hz oscillation with exponential decay
6. Visual Overlay Settings
All overlays are only visible in Camera View (Numpad 0).
AF Points
- Show/Hide: Toggle "AF Points" checkbox
-
4 Styles:
- Square — Canon/Fujifilm style corner brackets ┌ ┐ └ ┘
- Bracket — Sony style side brackets [ ]
- Cross — Nikon style crosshair +
- Dot — Circle indicator ○ / ●
- Size: Adjustable from 20 to 200 pixels
Status Colors
| Color | Status | Meaning |
|---|---|---|
| Gray | Idle | System waiting, no active focus |
| Red (blinking) | Searching | Casting rays, looking for target |
| Green | Locked | Focus acquired and locked |
| Yellow | Tracking | Following a moving object (AF-C + Wide) |
Info Text
- Shows: AF mode, area mode, status, focus distance, object name
- Appears in bottom-left of viewport
- Adjustable text size (10–36px)
Focus Plane
- Shows a semi-transparent green plane in 3D space at the focus distance
- Useful for visualizing depth of field
- Enable in Visual Settings → "Focus Plane"
7. Keyframe Bake
Baking creates focus_distance keyframes so your render matches the viewport preview.
How to Bake
- Set your AF mode and area (these determine where rays are cast)
- Open Keyframe Bake subpanel
- Set Start and End frame
- Set Step (1 = every frame, 2 = every other frame)
- Click Bake
- Done! Check the Graph Editor — you'll see focus_distance keyframes
How Bake Works
- Frame 1: Raycast + snap to target (no transition)
- Frame 2+: Raycast + smooth interpolation using your transition settings
- The transition speed and curve you set in Transition & Lens Effects are used
- This means: Cinematic preset = slow rack focus in the bake, Instant = immediate
Clear Bake
Click Clear to remove all focus_distance keyframes from the active camera.
Tips
- Bake works independently of whether AF is enabled or disabled
- Set your transition preset before baking — it affects the result
- For perfectly sharp cuts, use Instant preset
- For cinematic rack focus, use Cinematic or Slow preset
- After baking, you can manually edit keyframes in the Graph Editor
8. Keyboard Shortcuts
| Shortcut | Action | Context |
|---|---|---|
| Alt+F | Toggle AF on/off | 3D Viewport |
| F | Trigger focus (AF-S) | Camera view |
| Ctrl+F | Pick AF point with mouse | Camera view |
9. Tips & Best Practices
For Cinematic Shots
- Use AF-S + Single Point + Cinematic preset
- Set AF point on your subject's eyes/face
- Focus, then animate camera — focus stays locked
- Enable Lens Breathing at 0.01–0.02 for extra realism
For Action/Animation
- Use AF-C + Wide/Tracking + Natural or Fast preset
- Start AF-C, let it track your moving object
- Bake keyframes before rendering
- Check baked keyframes in Graph Editor for smoothness
For Maximum Performance
- AF-C uses a background timer — stop it when not needed
- Zone L (35 rays) and All (63 rays) use more CPU than Single Point
- Overlay only draws in camera view — no performance cost in other views
- Update interval: 33ms (30fps) is good for most cases
Common Workflow
- Set up your scene and camera
- Enable AF, choose mode
- Test focus in viewport (camera view)
- When happy, set frame range
- Bake keyframes
- Render
10. Troubleshooting
AF points don't appear
- Make sure you're in Camera View (Numpad 0)
- Check that "AF Points" is enabled in Visual Settings
- Verify AF is enabled (green "AF ENABLED" button)
Focus doesn't lock (stays red/searching)
- No object is at the AF point position — move the AF point or add objects
- Object may be too far — default max distance is 1000m
- Make sure objects are visible mesh objects (lights, empties won't be hit)
AF-C won't stop
- Click the STOP button in the AF-C Control box
- If that doesn't work, toggle AF off/on with Alt+F
- This uses a race-condition-safe stop mechanism
Bake produces flat line
- Make sure objects are moving or camera is animated
- Check that your AF area mode hits objects at different distances
- Verify transition speed isn't set to Instant (it would snap immediately)
Crash on addon disable/remove
- If you use Geo Scatter or similar addons with depsgraph handlers, use the Clean Up for Removal button in Utilities first
- Then close Blender and remove the addon from Preferences on next launch
Blender 5.0 specific
- The addon fully supports Blender 5.0's channelbag API
- If you see fcurve errors during Clear Bake, update to the latest version
11. FAQ
Q: Does this work with Cycles and EEVEE? A: Yes. The addon controls the camera's focus_distance, which works with both render engines' depth of field.
Q: Can I use this with multiple cameras? A: The addon works on the active scene camera. Switch cameras to configure each one separately. Settings are stored per-camera.
Q: Does AF-C affect render performance? A: No. AF-C automatically pauses during render and resumes after. Zero render overhead.
Q: Can I manually edit baked keyframes? A: Absolutely. After baking, keyframes appear in the Graph Editor like any other animation. Edit, delete, or add as needed.
Q: What's the difference between Zone and Wide/Tracking? A: Zone casts rays in a fixed grid and picks the best hit. Wide/Tracking does the same but also remembers which object was hit and follows it across frames — true object tracking.
Q: Is this compatible with other camera addons?
A: Generally yes. The addon only touches dof.focus_distance and lens (only when breathing is enabled). It doesn't modify camera transforms or other properties.
Q: What Blender versions are supported?
A: Blender 4.0 and newer. Tested on 4.2 LTS, 5.0, and 5.0.1. Uses pure gpu module (no deprecated bgl).
Support
For bug reports and feature requests, contact Skettch through the Superhive product page or via the support inbox.
Version: 1.0.0 License: GPL-3.0-or-later © 2026 Skettch
Have questions about this product?
Login to message
| Blender Extension Compatible | Yes |
| Sales | 10 |
| Dev Fund Contributor | |
| Published | 8 months ago |
| Blender Version | 5.0 |
| Extension Type | Add-on |
| Render Engine Used | Cycles, Eevee |
| License | GPL |