 SkdSam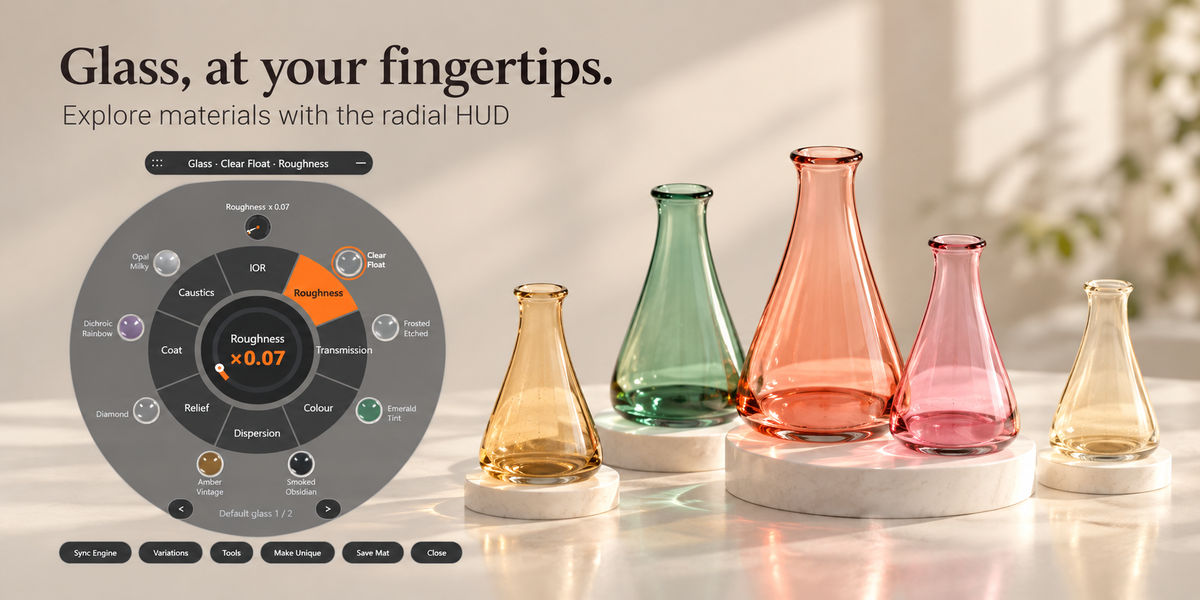
Glass Radial HUD · Blender addon
Glass, at your fingertips.
Create, refine and save glass materials from an intuitive radial HUD. Start with clear, coloured or frosted glass, add the character of surface wear, explore variations and build a reusable material library—all from your Blender viewport.
Start with a shape. Make it glass.
- Install the addon. In Blender 4.2 and newer, open Edit → Preferences → Extensions and choose Install from Disk from the menu. In Blender 3.6–4.1, use Preferences → Add-ons → Install. Select glass_radial_hud_v1.1.7.zip, enable the addon if needed, and restart Blender after updating.
- Select a mesh in the 3D Viewport. Use a closed shape or a properly modelled glass wall so thickness, tint and refraction have a volume to work with.
- Open the HUD. Press Shift + G in the viewport, or open the N sidebar → Glass HUD → Toggle Viewport Glass HUD.
- Choose a material orb. Clicking a preset applies it to the selected object. Use the page arrows to browse the default collection and your saved glass.
- View and refine. Use Material Preview or Rendered shading to see the material. Select a wheel category and drag its circular control to tune the active material. Use Sync Engine to configure relevant glass settings for the current render engine.
A complete glass toolkit, in one wheel.
Position it your way
Drag the top header to move the HUD. Scroll over it to resize. Use the header’s minus or plus button to collapse or expand the wheel, and Close to dismiss it. The outer orbs apply materials; the arrows move between library pages.
Tune in the viewport
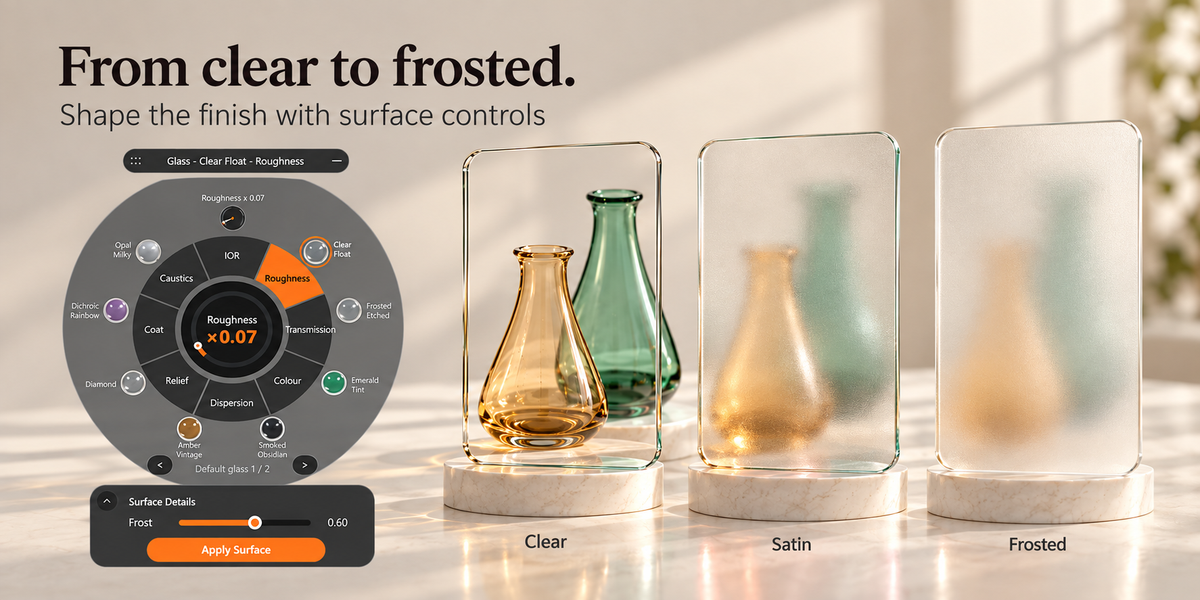
Select a segment to activate its property, then drag the central dial to change its value. The numeric readout and top mini-dial show the active setting as you work.
- IOR: The material’s index of refraction.
- Roughness: Surface smoothness and the softness of reflections.
- Transmission: How strongly the shader transmits light.
- Colour: The shader’s colour/tint control; use the Material tools for volume absorption.
- Dispersion: Dispersion where the Blender shader exposes a supported socket.
- Relief: The HUD’s surface-frosting setting.
- Coat: The clearcoat layer’s strength.
- Caustics: The shader’s specular reflection level. Actual caustic rendering also depends on the engine, scene and lighting.
The action bar
Sync Engine configures glass-related engine settings. Variations opens candidate generation. Tools opens the Material, Variations, Preview and Checks tabs. Make Unique gives the selected object its own material copy. Save Mat adds a material snapshot to your library. Close dismisses the HUD.
Click and release Tools or Variations to open the floating controls. The popup remains open while you work; dismiss it with Close, OK on older Blender versions, or Esc.
The default collection: Clear Float, Frosted Etched, Emerald Tint, Smoked Obsidian, Amber Vintage, Diamond, Dichroic Rainbow, Opal Milky, Thick Crystal, Borosilicate, Cobalt Blue, Rose Crystal, Ruby Glass, Sea Glass, Satin Glass and Champagne.
Create new glass. Refine existing glass.
Create a new material
- Select your mesh and open Tools → Material.
- Choose a type under Glass Starting Points.
- Click Create Type as New Material to assign a fresh material to the active mesh.
- Under Absorption & Surface, choose a Tint and click Use Tint. Fine-tune the absorption colour, density and surface roughness.
- Set your surface details and click Apply Surface.
Edit a material
- Select the object with the material you want to change.
- Click Make Unique if other objects share it and you want to edit this object independently.
- Open Tools → Material → Read Material to load its stored surface controls.
- Adjust the radial settings, tint or surface details.
- Click Apply Surface after editing the surface controls, then use Save Mat to store the result as a preset.
Volume absorption becomes stronger with the distance light travels through the glass. Density is measured per Blender unit, so object thickness and scale affect the result. Conflicting custom Roughness, Normal or Volume node links can prevent a surface update; create a new glass type to begin an addon-managed setup.
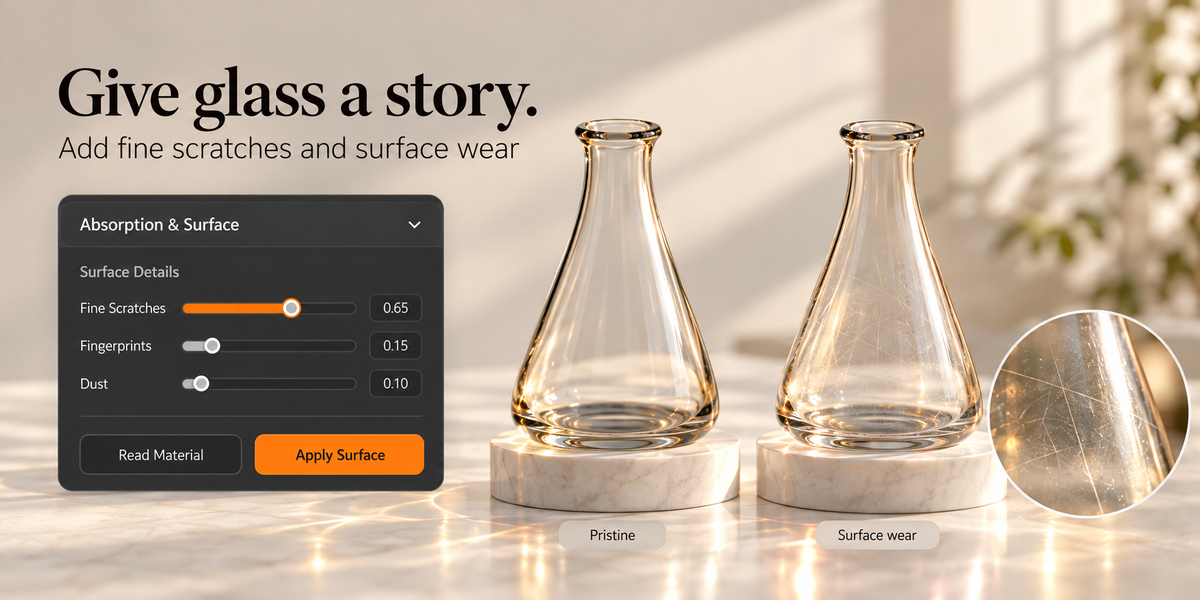
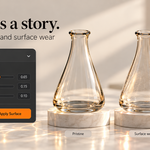
Give glass a story.
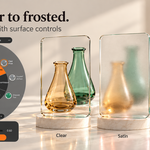
Go from a polished finish to handled, weathered or decorative glass with Tools → Material → Absorption & Surface → Surface Details. Load existing settings with Read Material, adjust the effects you want, then click Apply Surface.
Available effects: frost, fine scratches, fingerprints, dust, bubbles, streaks, chips, waviness, water spots, smudges, pitting, etching, crackle and limescale.
Scratches & handling
Start with a small amount of Fine Scratches, then add a touch of Fingerprints or Smudges. Check the result under directional lighting and increase the effect gradually.
Frost & weathering
Use Frost for a softer finish. Combine streaks, water spots and limescale for weathering, or use waviness and pitting to give the surface an aged character.
Surface effects use procedural roughness and bump shading. Bubbles and chips do not alter the mesh, and crackle does not fracture the object.
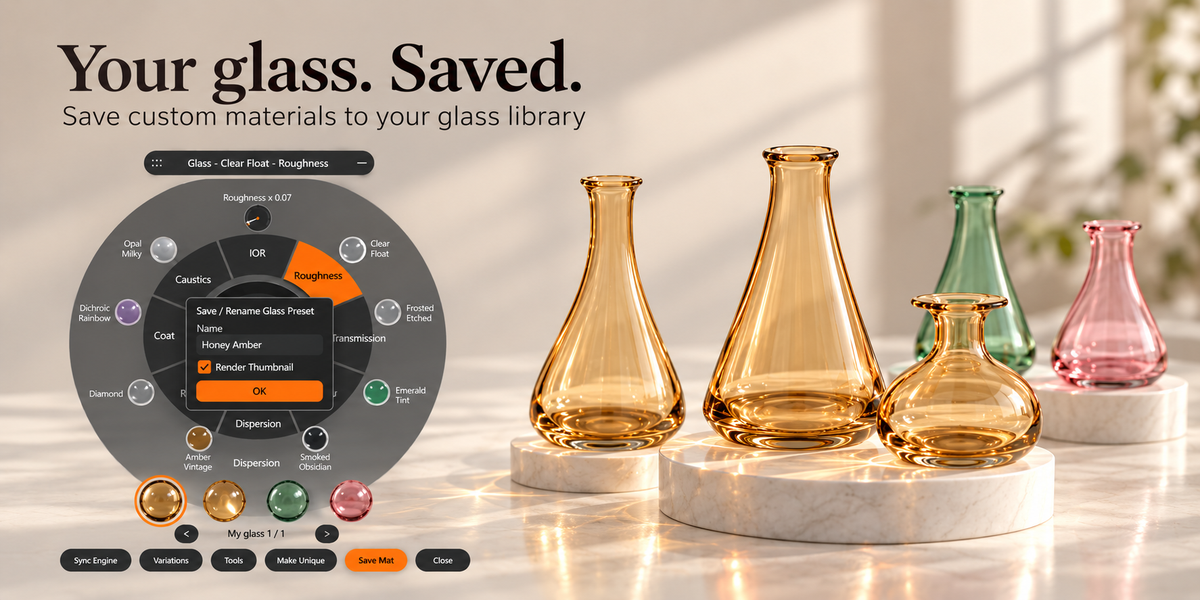
Your glass. Saved.
- Finish your material. Select the mesh carrying the glass you want to keep.
- Click Save Mat. Enter a descriptive name. Leave Render Thumbnail enabled for a rendered library preview, or disable it to skip that render.
- Confirm the save. The addon stores a native material snapshot, including node groups and packed image dependencies, assigns a separate material copy to the object and adds a new library preset.
- Reuse it. Navigate to the My glass pages, select another mesh and click your saved orb.
- Save another version when you edit. Saving creates a new entry—even if you reuse the same name. Give versions distinct names to keep your library easy to browse.
Organise your library
Right-click a custom orb to rename or remove its library entry. Removing a preset keeps materials already assigned to objects. Use Render Saved Preset Thumbnails to refresh existing previews.
Take materials with you
Use the custom-orb context menu to export or import your library. Native .zip archives include the manifest, materials and available thumbnails; imports add new entries. Open native archives in the exporting Blender version or newer. Older .glasslib and .json libraries remain importable.
Use native archives for full node graphs and supported packed still textures. Animated image sequences and movies are not portable through this static-material workflow. Thumbnail renders can keep Blender busy until they finish.
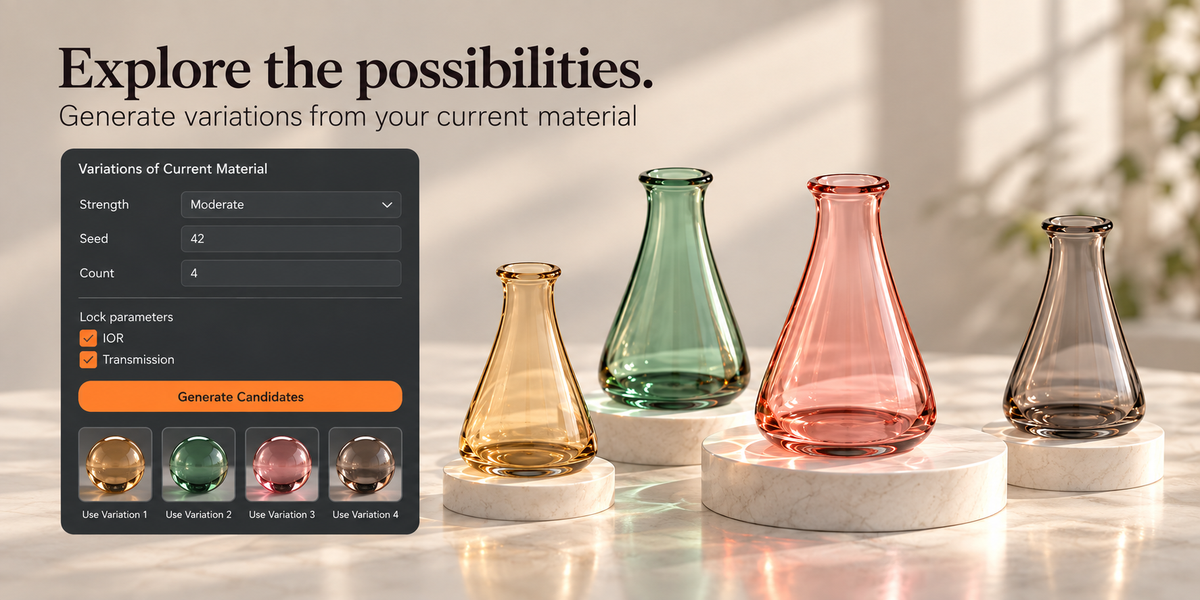
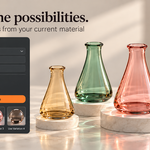
Explore the possibilities.
- Select the object carrying your starting material and click Variations.
- Choose Subtle, Moderate or Experimental, set a seed and select between 2 and 12 candidates. Opening the HUD’s Variations action generates candidates; use Generate Candidates to regenerate after changing settings.
- Lock any properties you want to preserve: colour, IOR, roughness, transmission, coat or dispersion.
- Click Render Candidate Previews to compare the results.
- Click a Use Variation button to assign a copy to the object captured during generation. Save your favourite with Save Mat.
The same source material, seed and settings reproduce the same candidates. Candidate generation keeps the original material intact, making it easy to explore different directions.
Preview with confidence.
A dedicated preview studio
Open Tools → Preview → Open Preview Studio to create a separate scene with a glass test sphere, checker floor, lights and camera. It uses a material copy. Press F12 to render, then Return to Project to switch back.
Use Clean Up Preview Studios to remove the addon’s marked preview scenes and unused assets. Clean Up Orphan Glass Materials removes unused addon-tagged materials without a fake user.
Check your object
Open Tools → Checks → Check Selected Object to review boundary and non-manifold edges, apparent inward orientation, unapplied scale, shared materials, render engine and missing light objects.
Use the explicit wall-thickness, apply-scale or recalculate-normals actions when the reported issue matches your model. These checks inspect the base mesh; judge modifiers, thickness and lighting visually.
- Preview: 32 samples; 8 / 8 max / transmission bounces.
- Balanced: 128 samples; 12 / 12 max / transmission bounces.
- Final: 512 samples; 16 / 16 max / transmission bounces.
Quality profiles switch the current scene to Cycles and enable denoising. Final takes longer to render; lighting, geometry and render-engine support still determine the result. Dispersion requires a supported shader socket.
Make the HUD your own.
Open Edit → Preferences → Add-ons, find Glass Radial HUD and expand its preferences. Choose Poly Orange, Cyberpunk Neon, Ice Crystal Cyan, Obsidian Gold or Minimalist Dark.
Customise the backdrop, orbit, idle/hover/active segments, slider track, fill arc, knob, text and glow colours. Adjust the interface scale to suit your workspace. Use Export HUD Theme to save your theme as a .json file, Import HUD Theme to restore or share it, or Reset Theme to return to Poly Orange.
HUD themes change the interface appearance. Your glass material colours are controlled separately through the wheel and Material tools.
Guide for Glass Radial HUD 1.1.7. Actual controls and appearance depend on Blender version and your chosen HUD theme.
Have questions about this product?
Login to message
| Blender Extension Compatible | Yes |
| Dev Fund Contributor | |
| Published | 1 day ago |
| Blender Version | 3.6 - 5.2 |
| Extension Type | Add-on |
| Render Engine Used | Cycles |
| License | Mit |