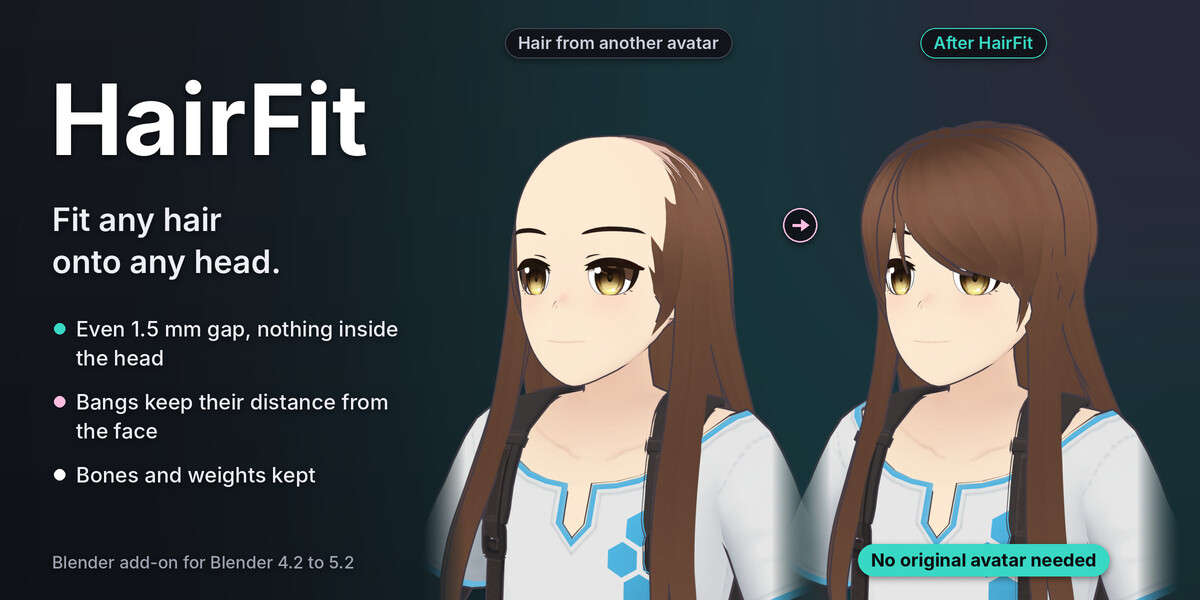
HairFit: Fit Any Hair Onto Any Head, No Original Avatar Needed
 Meshwright
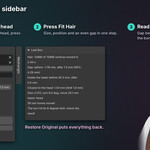
2. Install
- Download
hairfit-1.0.0.zip. Do not unzip it. - In Blender: Edit > Preferences > Get Extensions. Open the menu at the top right (the small arrow) and choose Install from Disk.
- Pick
hairfit-1.0.0.zipand press Install from Disk. HairFit is enabled at once. - In the 3D Viewport press N to open the sidebar and click the Meshwright tab. The panel is HairFit.
You can also drag the zip onto the Blender window and confirm.
To update, install the new zip the same way. To remove it: Preferences > Get Extensions, HairFit, Uninstall.
Japanese interface: Edit > Preferences > Interface > Translation, Language 日本語, with Interface and Tooltips ticked. The panel, the buttons, the tooltips, the messages and the Last Run report are all in Japanese then.
3. The panel
3D Viewport > Sidebar (N) > Meshwright > HairFit.
- Hair: the hair mesh to fit.
- Head: the avatar. Pick its head or body mesh, or its armature. HairFit uses the visible meshes that move with the head bone.
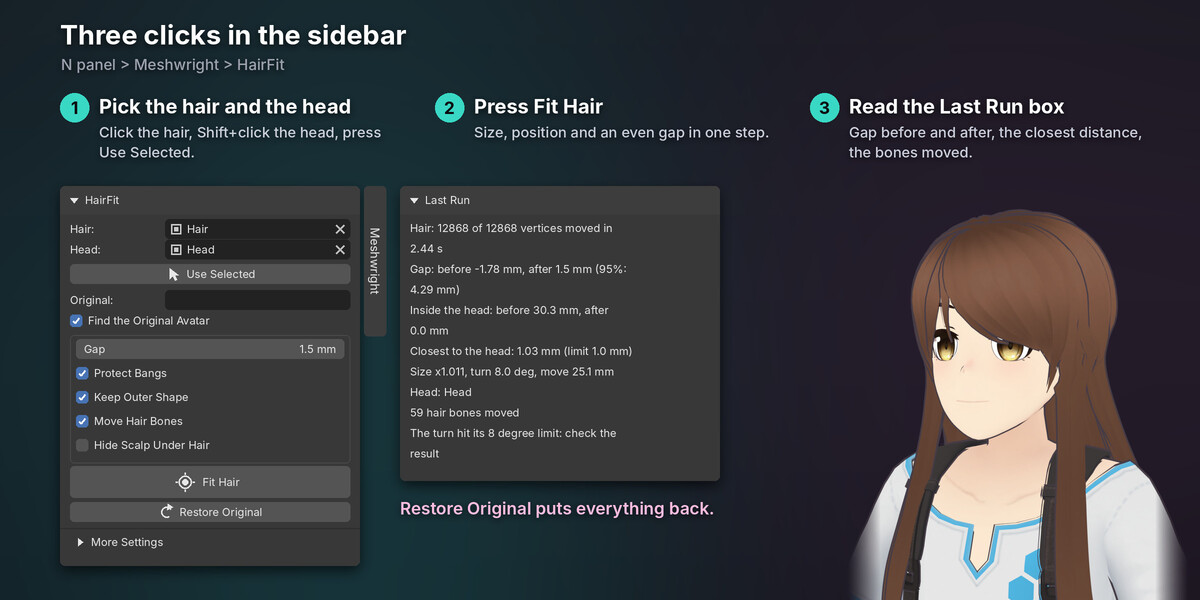
- Use Selected: fills in Hair and Head from the selection. Click the hair, then Shift+click the head, so the head is the active object.
- Original: optional. The avatar the hair was made for, with the hair still on it (section 5).
- Find the Original Avatar: on by default. Shown while Original is empty.
- Gap, Protect Bangs, Keep Outer Shape, Move Hair Bones, Hide Scalp Under Hair: section 6.
- Fit Hair: fits the hair.
- Restore Original: puts the hair, its bones and a moved armature back as they were before the first fit.
- More Settings (closed by default): Match Size and Position, Search Distance, Face Direction.
- Last Run: the report of the last fit (section 10).
4. Fit a hair (the usual case)
- Import your avatar and the hair (FBX or VRM). Keep both at real size in meters, as VRChat, VRM and Unity FBX files are.
- Hide the avatar's own hair and any hat or head accessory. Meshes with "hair" in their name are skipped by themselves. VRoid avatars keep a hair base layer inside the Body mesh (the faces with the HairBack material): delete those faces too, because HairFit fits the new hair over whatever is on the head.
- Click the hair, then Shift+click the avatar's head (or body). Press Use Selected.
- Press Fit Hair.
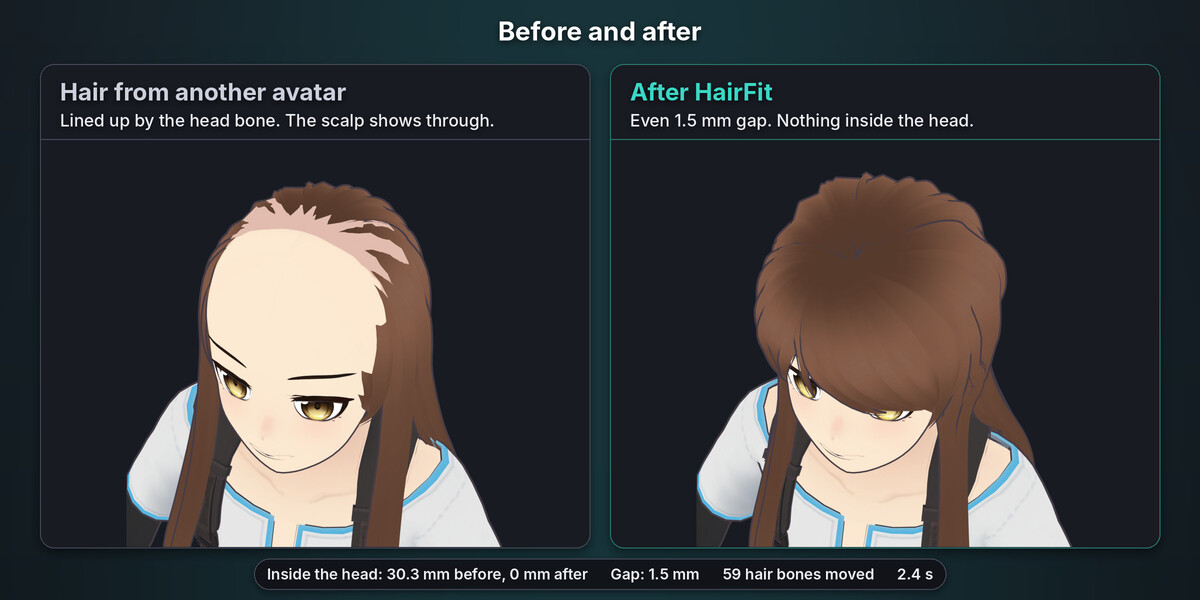
That is all. In our tests a 12,868-vertex hair took about 2 seconds, or about 7 seconds with the original avatar. A 30,000-vertex hair takes about 10 to 30 seconds.
The hair does not have to sit on the head first. A hair that comes with its own armature, away from the avatar, is moved with its armature so its head bone lines up with the avatar's head bone. Then the fit starts. A hair without an armature must be on the head roughly first. Move it there by hand.
Read the Last Run box: the gap before and after, how deep the hair was inside the head before and after, and the closest distance to the head.
5. With the original avatar
When the hair still sits on the avatar it was made for, HairFit can use that head too. The original head is matched to the new head and morphed onto its shape, and the hair follows the morph. Every part of the hair keeps its designed distance from the head, in proportion to the size change. The face below the eyes does not steer the morph, so the bangs follow the forehead, not the nose.
- Find the Original Avatar (on by default): when the hair is on its own avatar's armature, HairFit finds that avatar's head by itself. The report says which head it used.
- Original: pick the original avatar's head mesh or armature by hand. The hair must still sit on it.
Without the original avatar, the fit puts the inner side of the hair at the Gap everywhere.
For a big change of style, such as an anime hair on a realistic head, fit without the original avatar. The bangs keep their shape better then.
6. Settings
| Setting | Default | What it does |
|---|---|---|
| Gap | 1.5 mm | Distance between the inner side of the hair and the head. 1 to 3 mm works well (range 1 to 5 mm). No hair vertex ends up closer than 1 mm. |
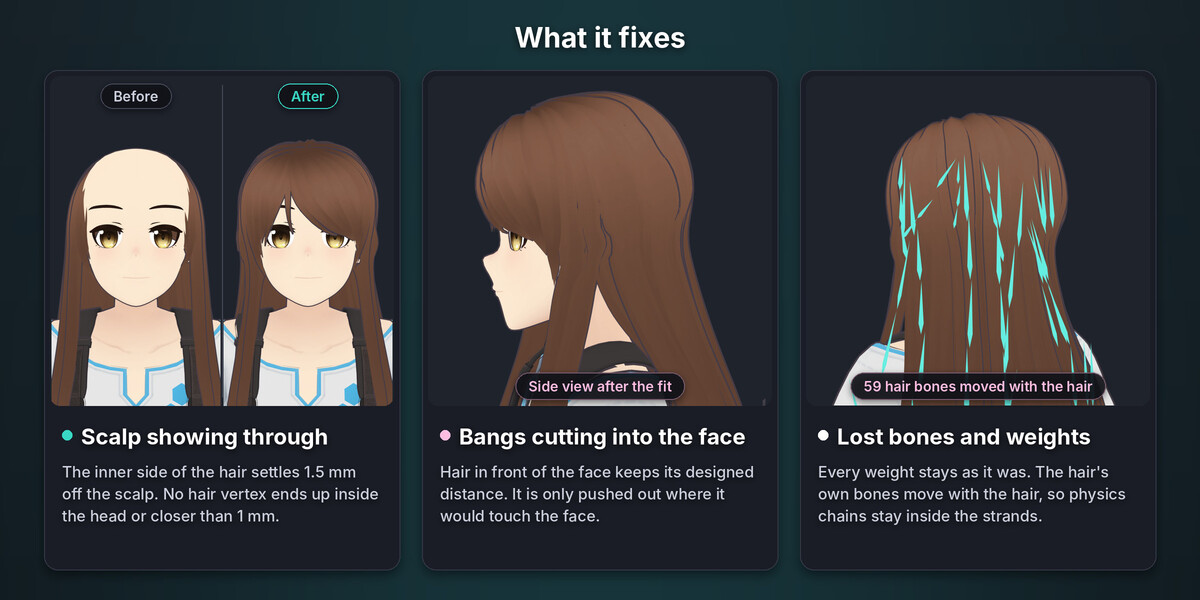
| Protect Bangs | on | Hair in front of the face keeps its designed distance and is only pushed out where it would touch the face (section 7). |
| Keep Outer Shape | on | On: the outer layers move with the inner side, so the hair keeps its thickness and style. Long hair moves as one piece with the scalp. Off: only hair near the head moves, and long strands stay where they are. |
| Move Hair Bones | on | The hair's own bones move with the hair. Weights never change (section 8). |
| Hide Scalp Under Hair | off | Hides head faces fully covered by the hair (section 9). |
| Match Size and Position | on | (More Settings) Scales (0.75 to 1.35), turns (up to 8 degrees) and moves the whole hair onto the head before the smooth fit. Keep it on. |
| Search Distance | 30 mm | (More Settings) Hair within this distance of the head counts as its inner side. It grows and shrinks with the head size. |
| Face Direction | Auto | (More Settings) Which way the face looks. Auto takes it from the avatar's armature, or -Y when there is none. Used to protect the bangs. |
7. Bangs
HairFit finds the hair in front of the face from the avatar's armature (the face direction). That hair keeps the distance it had from the face in the design. It moves out only where it would touch the new face, smoothly, so the bangs bend a little at that spot and nowhere else.
If your avatar has no armature, or the face does not look toward -Y, set Face Direction in More Settings.
Turn off Protect Bangs only if you want the bangs fitted to the Gap like the rest of the hair.
8. Bones, weights and shape keys
- Every weight of every vertex group stays exactly as it was. Group names and order stay. The Armature modifier stays.
- The hair's own bones (the bones that hold weights on the hair, and their end bones) move with the vertices they weight. The overall size change is applied to the bone itself, so it stays inside its strand. Physics chains (for example VRChat PhysBones) keep working.
- The avatar's own bones (head, neck and the rest) never move. Bones are known by name, also Japanese MMD names (頭, 首, 上半身), and by the avatar meshes they deform.
- Bone names, parents and deform settings stay. Objects parented to a moved bone keep their place on it.
- HairFit does not merge the hair's armature into the avatar's. Do that the usual way afterwards (section 13).
- Shape keys on the hair are kept. Every key moves with the fit and keeps its offsets. A key left switched on is fitted as you see it.
- A posed avatar is fitted in rest pose, and the pose is kept.
9. Hide Scalp Under Hair
The fit keeps every hair vertex at least 1 mm from the head. Between two hair vertices, a sharp part of the head can still show on a coarse hair. Hide Scalp Under Hair hides the head faces that the hair covers fully:
- A vertex group and an inverted Mask modifier are added to the head mesh.
- On a head mesh with shape keys, only the vertex group is added. A Mask modifier would drop the shape keys on export. Use the group in your own workflow, or delete those faces by hand.
- Restore Original removes the mask again.
10. Read the report
The Last Run box after our demo fit (the VRoid sample hair on Seed-san, every setting at its default):
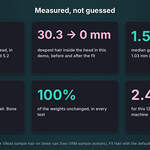
- Hair: 12868 of 12868 vertices moved in 2.44 s
- Gap: before -1.78 mm, after 1.5 mm (95%: 4.29 mm): the median gap of the inner side. A negative gap means the hair was inside the head. 95% of the inner side is closer than the second number.
- Inside the head: before 30.3 mm, after 0.0 mm: how deep the deepest hair vertex was inside the head.
- Closest to the head: 1.03 mm (limit 1.0 mm)
- Size x1.011, turn 8.0 deg, move 25.1 mm: the size and position match. With the original avatar, this line names the original head instead.
- Head: Head: the head meshes used.
- 59 hair bones moved
Notes under the report tell you about anything special:
| Note | Meaning |
|---|---|
| Moved the hair and its armature N cm to line up the head bones | The hair was away from the head and was placed by its head bone first. |
| Used the hair's own avatar as the original head | Find the Original Avatar found it (section 5). |
| The turn hit its 8 degree limit: check the result | The hair would have turned more than 8 degrees. The turn stops at 8 degrees and the smooth fit does the rest. Look at the result. In our demo the hair sits right. |
| The size change hit its limit (0.75 to 1.35): check the result | The head is much smaller or bigger than the hair. Check the scale of both. |
| Some hair below the head may pass through the body | Only the head is fitted. Long hair on the shoulders is left as it is (section 15). |
| The hair was changed after the last fit, so it was kept as it is | Section 11. |
| Only a little of this hair is near the head, so it moved with the change of the head shape | A separate piece fitted with its original avatar (section 12). |
| The head has a hole under the hair (no scalp there) | Check the height and the size of the hair. |
| The hair's bones were not moved | Its armature is hidden in an excluded collection or linked. Show it and fit again. |
11. Fit again, Undo and Restore Original
- Change a setting and press Fit Hair again. HairFit starts over from the hair as it was before the first fit, so the new setting applies cleanly, and the same settings always give the same result.
- If you changed the hair by hand after a fit, Fit Hair keeps your change. Only parts closer than the Gap move out. Press Restore Original first to start over from the original hair.
- One Ctrl+Z undoes a fit.
- Restore Original puts the hair, its bones and a moved armature back as they were before the first fit, and removes the scalp mask. It works after saving and reopening the file.
- A hair fitted to one head that you want on another head: press Restore Original first.
12. Hair in several pieces
Each hair mesh is fitted on its own. If the hair is split into several meshes (front, back, ponytail), fit each of them.
A piece with only a little of it near the head, such as a ponytail on its own mesh, cannot be fitted to the head by itself. Two ways:
- Join it to the main hair first (Ctrl+J), then fit.
- Or keep the original avatar in the scene. The piece then moves with the change of the head shape.
Overlaps between separate hair meshes are not corrected.
13. Export to Unity
Export as usual. The hair's vertices, weights and bones are where HairFit put them.
The hair still has its own armature. Merge it into the avatar the usual way: Modular Avatar (or a similar tool) in Unity, or join the armatures in Blender and parent the hair's root bone to the avatar's head bone.
PhysBones on the hair's bones work as before. The chains are still inside their strands.
14. Messages and what to do
When Fit Hair stops, nothing changes.
| Message | What to do |
|---|---|
| Pick the hair mesh, or select it and press Use Selected | Pick the hair in the Hair field. |
| Pick the head: the avatar's head or body mesh, or its armature | Pick the avatar in the Head field. |
| The hair and the head are the same object | Pick the head of the avatar in Head. |
| The original head is the avatar you fit to | Leave Original empty, or pick the avatar the hair was made for. |
| The hair and the head must be in the scene (in a visible collection) | Show the collection. |
| The hair is linked from another file | Object > Relations > Make Local. |
| The hair mesh is shared with another object (a linked duplicate) | Object > Relations > Make Single User > Object & Data. |
| Apply the Mirror modifier of the hair first | Apply it, so both sides are fitted. |
| Apply the Solidify modifier of the hair first | Apply it, so its thickness is fitted too. |
| Apply the Mirror modifier of the head first | Apply it, so both sides of the head are there. |
| No head faces found | Pick the mesh with the face and the scalp (often Body or Face). On an avatar with an armature these are the faces weighted to the head bone. |
| The head is N cm wide | HairFit works with avatars at real size in meters. Apply the scale (Ctrl+A) or import the avatar at real size. |
| The hair is not on the head | Move the hair onto the head (roughly is enough) and press Fit Hair again. |
| Too little of the hair is near the head to fit it | Move it onto the head, or join a separate piece to the main hair (Ctrl+J), or fit it with its original avatar. |
| The hair is not on the original head | Original is for hair that still sits on the avatar it was made for. Leave it empty otherwise. |
| This hair was fitted to another head before | Press Restore Original first, then fit it to this head. |
| The head has a hole under the hair (no scalp there) | Place the hair on the head by hand, turn off Match Size and Position (More Settings) and press Fit Hair again. |
| The hair's armature cannot be edited | Show its collection, then press the button again. |
15. Limits
- Only the head is fitted. Long hair that passes through the shoulders, back or chest is not corrected.
- Each hair mesh is fitted on its own. Overlaps between separate hair meshes are not corrected.
- HairFit does not merge the hair's armature into the avatar's.
- Bangs that touch the new face are pushed out and bend a little where they touch. For very different head shapes (an anime hair on a realistic head), fit without the original avatar.
- Apply a Mirror or Solidify modifier on the hair, and a Mirror modifier on the head, before you fit. Other modifiers stay, and the fit uses the mesh without them. A Subdivision Surface on the hair smooths it a little toward the head (a few tenths of a millimetre on a dense hair). Normals are kept from the original mesh.
- A head with the scalp cut away under the hair: a hole at the crown is fine. When most of the scalp is missing, HairFit cannot tell how high the hair should sit and stops (section 14).
- Avatars at real size in meters (VRChat, VRM, Unity FBX).
- Tested on the two VRM sample avatars (the VRoid sample and Seed-san), CC0 MakeHuman heads and script-made hairs. Not yet tested on BOOTH hairs.
Have questions about this product?
Login to message
| Blender Extension Compatible | Yes |
| Published | about 2 hours ago |
| Blender Version | 4.2 - 5.2 |
| Extension Type | Add-on |
| License | GPL |