 KVD
KVD


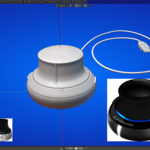
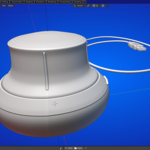
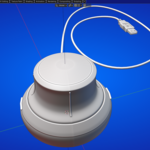
for documentation, please take a look at the video or take a look at this below:
Installation:
Download the image_overlay.py file
In Blender, go to Edit → Preferences → Add-ons
Click Install and select the downloaded file
Enable the add-on by checking the box next to "Image Overlay"
Interface Location:
Find the Image Overlay panel in the 3D Viewport sidebar (press N if hidden) under the "Image-Overlay" tab.
Quick Start Guide
Step 1: Set Up Your Image Folder
In the panel, navigate to "Image Folder Setup"
Click the folder icon and select a folder containing your reference images
Supported formats: PNG, JPG, JPEG, TGA, BMP, TIF, TIFF, EXR, WEBP
Click the refresh button (⟳) to scan the folder
Step 2: Add Images
Option A: Add All Images
Click "Add All Images" to load every image from the folder
Option B: Add Single Image
Select an image from the "Available Images" dropdown
Click "Add Selected Image"
Step 3: Display Settings
Choose where to display your overlays:
3D Viewport: Shows images while modeling/sculpting
Image Editor: Shows images while texturing/painting
Working with Images
Managing the Image List:
Enable/Disable: Check/uncheck the box next to each image
Select: Click on an image name to make it active for editing
Remove: Click the X button next to any image
Clear All: Remove all images with the "Clear All" button
Image Properties (Selected Image)
When an image is selected, you can adjust:
Size:
Drag the slider or input a value (10-1000 pixels)
Position:
X: Horizontal position from left edge
Y: Vertical position from bottom edge
Opacity:
Controls transparency (0 = invisible, 1 = fully visible)
Quick Positioning Presets:
For the selected image, use these one-click buttons:
Top-Left, Top-Right, Bottom-Left, Bottom-Right: Corners with 50px margin
Center: Perfectly centered in the current view
Opacity Presets:
Quick transparency settings:
100%: Fully visible
75%: Slightly transparent
50%: Half transparent
25%: Mostly transparent
0%: Hidden (but still in list)
Workflow Tips
For 3D Modeling:
Set display mode to "3D Viewport"
Add orthographic reference images
Position them at screen corners
Adjust opacity to 50-75% so you can see through to your model
Disable when not needed with the checkbox
Open an Image Editor window
Set display mode to "Image Editor"
Add texture reference images
Position them opposite your painting area
Use lower opacity (25-50%) for subtle reference
For Comparison Work:
Add multiple reference images
Position them side-by-side
Toggle visibility to compare different references
Use opacity to blend references
Have questions about this product?
Login to message
| Blender Extension Compatible | Yes |
| Sales | 20+ |
| Dev Fund Contributor | |
| Published | 8 months ago |
| Blender Version | 4.4 - 5.0 |
| Extension Type | Add-on |
| Render Engine Used | Cycles, Eevee |
| License | GPL |
