 SkdSam


Isometric Room Generator — How to Use
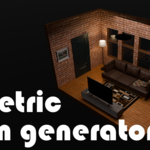
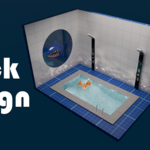
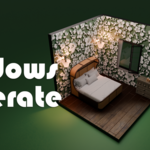
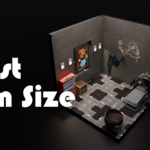
Create editable architectural dioramas, from a single room to connected layouts and multi-floor buildings. Choose a footprint, customise the construction, add openings and furniture, then prepare a camera and lighting for presentation.
Getting started
Install the extension ZIP through Blender's Preferences → Get Extensions → Install from Disk, then enable it. In the 3D View, press N and open the IRG tab.
- In Object Mode, choose your room shape and dimensions.
- Click Generate Room. Alternatively, choose a starter under Presets & Variations, click Apply Starter, then generate.
- Select the room root or any generated part to access that room's settings.
- After changing settings, click Update Room, or enable Live update for delayed automatic rebuilding.
Each room has its own settings and collection. Move or rotate the room's root empty to transform the complete room. Duplicate creates another editable room; New from These Settings copies the settings into the new-room defaults.
Room & Walls
Choose Rectangle, L shape, Round, Polygon, or Custom outline. Adjust width and depth, or diameter for round and polygonal rooms. L-shaped rooms have notch controls; polygons have a side count; round rooms have curved-wall coverage and rotation controls.
Set wall height, thickness, and whether dimensions measure the interior or exterior. Use the wall list to enable or disable individual walls, override their height, or assign a different material. A height override of zero uses the room height. Add an optional ceiling with its own thickness.
For a custom shape, use Draw Custom Footprint, or Capture Outline & Generate from a closed planar mesh or cyclic curve. When drawing, click to add corners, press Enter to build, Backspace to remove the last point, or Esc to cancel. Hold Ctrl to snap to a 0.25-unit grid.
Floor & Pattern
Control floor thickness and overhang, and optionally add a raised plinth with adjustable height and inset. Choose a plain floor, tiles, boards, or basketweave parquet. Pattern controls include tile or board dimensions, gaps and rotation. Patterns are clipped to the room footprint. The colour-variation control varies the built-in floor palette; an assigned custom floor material is used across the pattern.
Doors & Windows
Click Window, Door, or Passage, then select the opening in the list. Choose its wall index, shape, position, width, height, and sill or threshold level. Shapes include rectangle, arch, round/elliptical, and sash.
Enable frames and adjust their width and depth. Windows offer glazing and sill options; sash windows also have pane divisions and a lower-sash fraction. Doors can include a leaf with an adjustable opening angle. Door and passage clearance values reserve space during furniture placement.
For rectangular rooms, wall indices are 0 front, 1 right, 2 back, 3 left. Distribute Windows replaces windows on the chosen wall with a regularly spaced series, retaining doors and openings on other walls.
Bevels & Architectural Trim
Adjust edge bevel size and segment count. Add skirting boards, cornices and wall panels, then control their height, projection and spacing. Generated trim is interrupted around openings.
Materials & UVs
Assign separate materials to floors, walls, trim, frames, glass and ceilings. Empty slots use the built-in palette. Use the texture repeat size to adjust the room-local UV scale. Individual walls can also have their own material overrides.
Furniture & Attached Assets
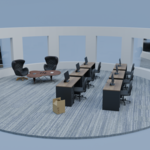
Choose a Furniture source collection, set the furniture count, and update the room. Placement uses a repeatable seed and checks available space around openings, stairs, the central walkway and other content. In multi-floor rooms, the count applies to each floor. Adjust furniture clearance, walkway width, or Align furniture to walls to change the arrangement.
Each source furnishing should be one independent mesh object, with local Z up and local +Y facing into the room. Combine multi-part furniture into one mesh first, and apply unusual source rotations. The add-on uses your own collections; a furniture library is not bundled. If everything cannot fit, the room status reports how many pieces were placed.
Use Add Wall Attachment for an asset that should follow a wall. Choose its source object, wall, position, height, offset, scale and rotation. Bind to Active Opening makes an attachment follow the selected opening instead; its height then measures an offset above the opening's top.
Connections, Floors & Stairs
To extend an existing rectangular room, select it, choose a Connect to side, and click Add Connected Room. Enable Share connecting wall to use one common wall. The connection adds aligned passages and replaces existing openings on the connecting wall.
Use Generate Connected Layout to create a new grid of connected rooms, with adjustable room and column counts. Update the source room to realign its connected descendants after changing dimensions. Connection tools require rectangular rooms with an unscaled root.
Increase Floors to stack up to eight levels. Adjust extra floor spacing, enable Stairs and slab openings, and set stair width, run and step count. Front balcony and railing adds balconies with adjustable depth. Automatic stairs require a rectangular footprint with enough space for the stair flight. Wall and opening settings repeat on every floor.
Presets & Variations
Start with Studio, Bedroom, Shop, Display or Round presets. Save your own configurations with names, tags and favourites using Save to Library, or import and export JSON presets.
Use the seed and dimension, opening and material locks to control Randomize Unlocked Settings. Generate Variations creates a batch of independent rooms. Presets store settings rather than asset files; referenced materials and furniture must be available in the destination Blender file.
Editing & Validation
Switch between Draft and Final quality, adjust curve resolution, and enable dimension handles or measurement overlays. Use Check Dimensions & Clearances to check room settings, opening intersections and bounding-box collisions.
Manual additions survive room rebuilds. Use Keep Selected as Manual Content to protect selected generated parts from replacement. Duplicate with Linked Dimensions / Materials creates a room linked to the source's dimensions and material slots. Create Finalized Mesh Copy produces a separate mesh collection with evaluated modifiers while retaining the editable source.
Camera, Lighting & Rendering
Click Add Camera, Lights & Backdrop to create an orthographic presentation setup. Enable Camera-aware cutaway to hide obstructing generated walls, with an option to hide the ceiling too.
Choose an output directory and render size, then use Render Room, Render All Rooms, or Render Turntable PNG Sequence. These tools render rooms individually in isolated scenes. For a composed scene showing several rooms together, use your scene camera and Blender's normal render command, F12. Turntables export individual PNG frames. Esc cancels batch jobs between completed renders or frames.
Practical notes
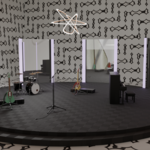
Custom footprints must be a single closed loop without holes or self-intersections. Furniture and clearance checks use bounding boxes rather than detailed mesh collision. Finalized copies are not automatically joined into a single watertight solid. Promotional furniture and styling illustrate possible results and should not be presented as bundled assets unless included separately in your product package.
Have questions about this product?
Login to message