Material Manager
 Techqon core


Documentation – Material Manager
What is Material Manager?
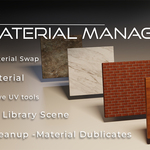
Material Manager is a powerful Blender addon designed to simplify and accelerate the process of managing materials in your 3D projects. It allows you to create, preview, organize, replace, and clean materials visually—saving time and reducing complexity in your scene.
Whether you're building environments, props, or characters, Material Manager helps you focus on creativity rather than organization.
Installation
-
Download the
.zipfile from this product page. -
In Blender, go to Edit > Preferences > Add-ons > Install.
-
Select the downloaded
.zipfile and click Install Add-on. -
Enable the addon by checking the box next to “Material Manager”.
-
The addon panel will appear in the Sidebar (N-panel) under the Material Manager tab.
How to Use
1. Create a Material Collection
-
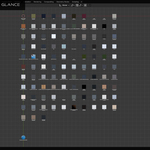
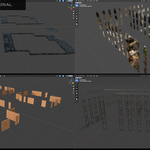
Click See Materials to generate a visual grid of all the materials in your scene.
-
Each material is previewed on a plane, with optional text labels showing its name.
-
Enable HDRIs to include World environment materials.
-
You can rebuild the entire collection anytime with the Recreate Collection button (red).
⚠️ The addon avoids duplicates and always overwrites the existing collection for consistency.
2. Create New Materials
-
Use the Create New Material section to add a new material directly to the grid.
-
Materials are added in the next available slot and named via the text field above the button.
-
Labels are included if the "Create Text Labels" option is enabled.
3. Replace Materials
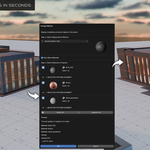
You can replace materials across multiple objects in just two steps:
-
Choose the destination material (the one you want to apply).
-
Select the source materials you want to replace using checkboxes.
Additional options:
-
Enable “Only Show Selected” to filter the list to currently selected objects.
-
Preview affected materials and object slots before confirming.
4. Manage Materials Efficiently
Remove Unused
-
Click Purge Unused Materials & HDRIs to clean up your project.
-
This also removes unused HDRI world materials and preview textures.
Merge Duplicates
-
Click Clean Duplicate Materials to find and merge similar materials.
-
Choose which version to keep from each group.
-
You can process all duplicates at once with the Clean All Groups button.
Optionally exclude standard Blender materials from cleanup.
5. Adjust UVs Easily
Use the UV Helper section for visual UV transformations.
-
Sliders for Scale, Rotation, Offset X, and Offset Y
-
Works in Object Mode (all UVs) or Edit Mode (selected faces)
-
Smart UV Project: Quickly unwrap selected faces
-
Reset UV Transform: Restore original UVs
-
Make Equal: Ensures even texel density (Edit Mode only)
-
Apply Scale to Object: Updates UVs based on object scale
6. Use the Radial Menu (Alt + 2)
A quick-access pie menu to speed up your workflow:
-
Show Objects with Material
-
Open Library
-
Create Collection
-
Replace Material
-
Clean Duplicates
-
Purge Unused
-
See All Materials
-
Create New Material
Customize or reassign the shortcut in Preferences > Keymap.
Features Summary
-
Visual grid of all materials with previews
-
Material creation, replacement, and cleanup in seconds
-
HDRI support from world materials
-
UV adjustments with live sliders and Smart UV
-
Radial menu for quick access
-
Search and isolate tools for easier navigation
-
Works with Cycles and Eevee
-
Built-in filters and scene-wide material statistics
Requirements
-
Blender 3.0 or newer
-
Works with Cycles and Eevee
-
No external libraries required
-
HDRI files (optional, for world preview inclusion)
Tips & Notes
-
Use Auto Focus and Isolate to quickly inspect materials in the grid.
-
The Search bar in the Materials List helps find materials fast.
-
You can zoom to or isolate a material directly from the list.
-
The addon respects Blender’s naming conventions and is designed to integrate smoothly with existing workflows.
Have questions about this product?
Login to message
| Sales | 10+ |
| Published | about 1 year ago |
| Blender Version | 4.2 - 4.5 |
| Extension Type | N/A |
| Render Engine Used | Cycles, Eevee |
| License | GPL |