Modular Product Lighting Scene for Blender - Desert Silk Studio
 Contrast 3D Design Studio


Documentation
Thank you for purchasing the Modular Product Lighting Scene for Blender – Desert Silk Studio.
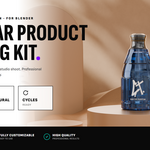
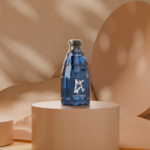
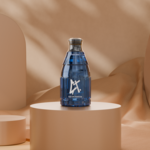
This Blender file is designed to help you create warm, editorial product visualization renders quickly. The scene includes a prepared lighting setup, cameras, a styled silk-and-desert set, organized collections and a placeholder product position.
How to use the scene
- Open the Blender file.
- Find the PRODUCT collection.
- Replace the placeholder product with your own 3D model.
- Keep your product centered around the placeholder position for best results.
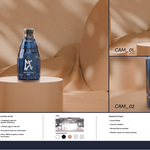
- Choose one of the included cameras: CAM_01, CAM_02 or CAM_03.
- Render using Cycles.
- If needed, adjust the highlight lights or move the tracking targets to better fit your product shape.
Scene organization
- BG — background set: Fabric (silk), Floor, Wall, Flower and props P_1–P_4.
- PRODUCT — placeholder product area.
- CAMERAS — included camera views.
- LIGHTING_SETUP — general light, highlight lights, back/top lights, spot and tracking targets.
Cameras
- CAM_01 — main hero product view.
- CAM_02 — clean front product view.
- CAM_03 — closer detail view.
Lighting controls
The scene includes a general key light plus several highlight lights for controlled reflections and a warm, editorial mood. The lights use tracking targets, so you can move the targets to change where they point.
- GL — general light (main key, warm and soft).
- HL_1 / HL_2 — highlight lights for glossy reflections.
- Back_HL — back / rim light to separate the product from the background.
- Up_HL — top light for highlights on the upper surfaces.
- G_HL — additional highlight for fine control.
- LH — soft fill light.
- Spot — focused light that creates the soft, dappled foliage-style shadow pattern.
- TRACK / TRACK_02 — target objects used to control light direction.
Render notes
- This file is made for Blender only.
- Designed in Blender 5.1.
- Recommended render engine: Cycles.
- Caustics are enabled for better results with glass and reflective products.
- Caustics can increase render time. You can disable them during previews and enable them again for final renders.
Compositor
A compositor setup is included for basic color adjustment. You can use it to refine contrast, exposure, color balance and overall render mood. If you prefer a neutral render output, you can bypass or disable the compositor nodes.
Important
- The product shown in the preview images is for demonstration purposes only.
- Your final result will depend on your own product model, materials and render settings.
- This product does not include external software, plugins or add-ons.
- Do not resell, redistribute or repackage this Blender file as a separate asset product.
Created by Contrast 3D Design Studio.
Have questions about this product?
Login to message
| Published | 5 months ago |
| Blender Version | 4.1 - 5.2 |
| Render Engine Used | Cycles |
| License | Royalty Free |