Open In
 Jishnu Jithu


Installation
Download the latest version of the add-on (.zip file).
Open Blender and go to Edit > Preferences > Add-ons.
Click Install..., select the downloaded zip file, and click Install Add-on.
Enable the add-on by checking the box next to its name.
Save preferences to keep the add-on enabled across sessions.
Preferences
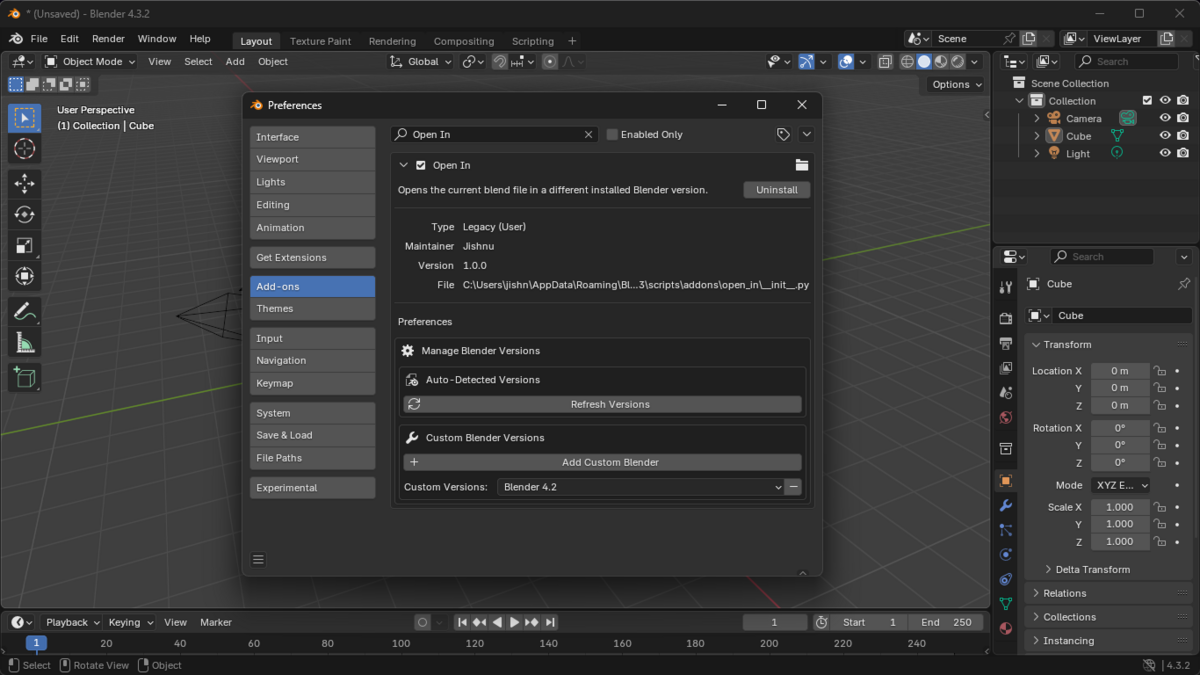
After installation, you can configure the add-on settings:
Open Edit > Preferences > Add-ons.
Locate Open In in the list and expand its options.
-
The preferences panel includes:
Auto-detected Blender Versions: Lists all installed Blender versions found on your system.
Refresh Versions: Manually refresh the list of detected Blender installations.
Custom Blender Versions: Add or remove additional Blender versions not automatically detected.
Remove Custom Blender: Select and remove a manually added Blender version.
File Menu Integration
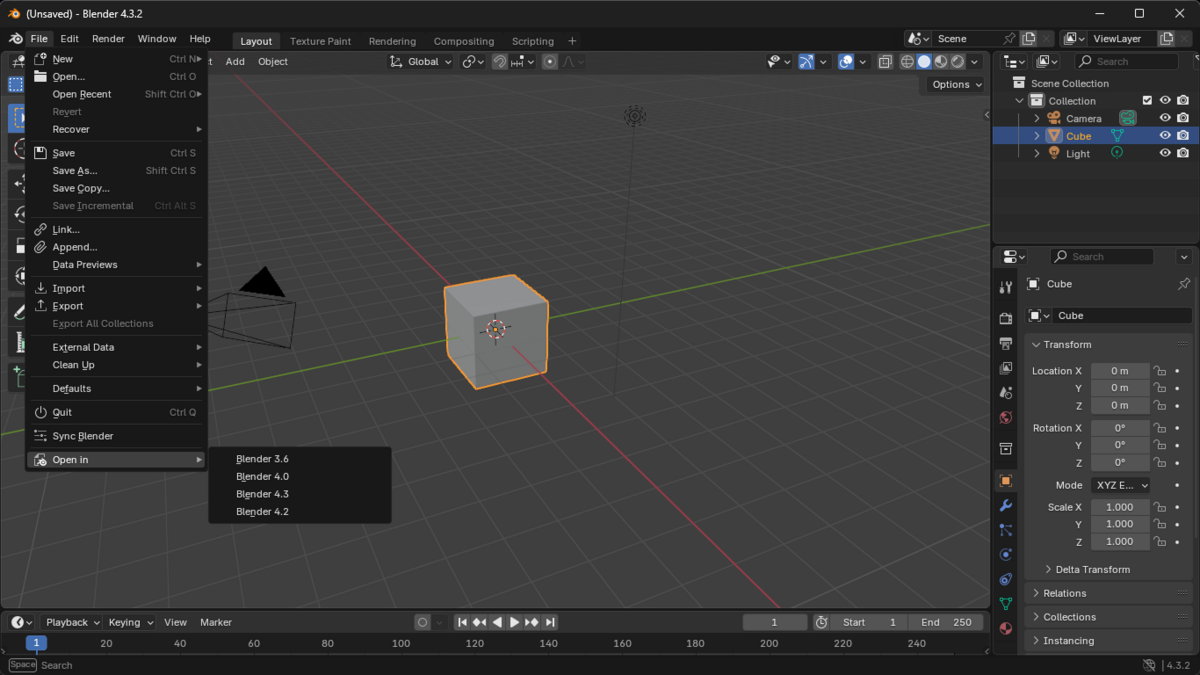
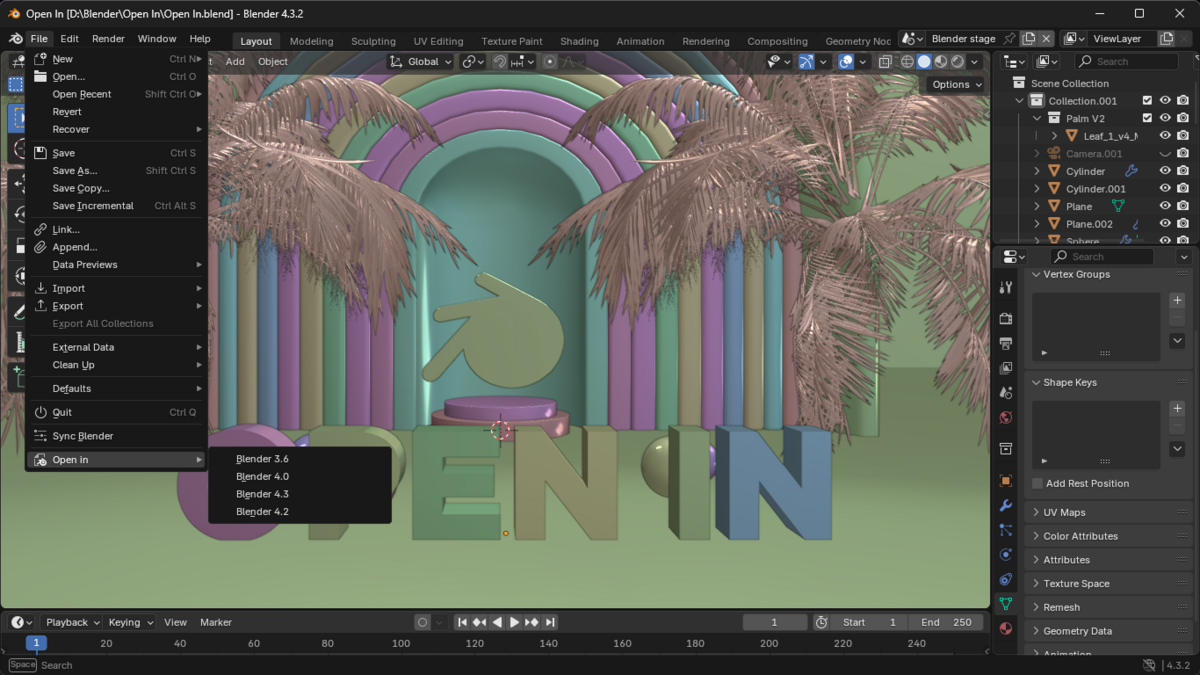
Once installed, the add-on integrates seamlessly into Blender's File menu:
Go to File > Open In.
A list of detected Blender versions will appear.
Select the desired Blender version to open the current project in.
If the project is unsaved, it will be temporarily saved before opening in the selected version.
Custom Blender Version Support
In addition to auto-detected versions, you can manually add other Blender installations:
Open Edit > Preferences > Add-ons > Open In.
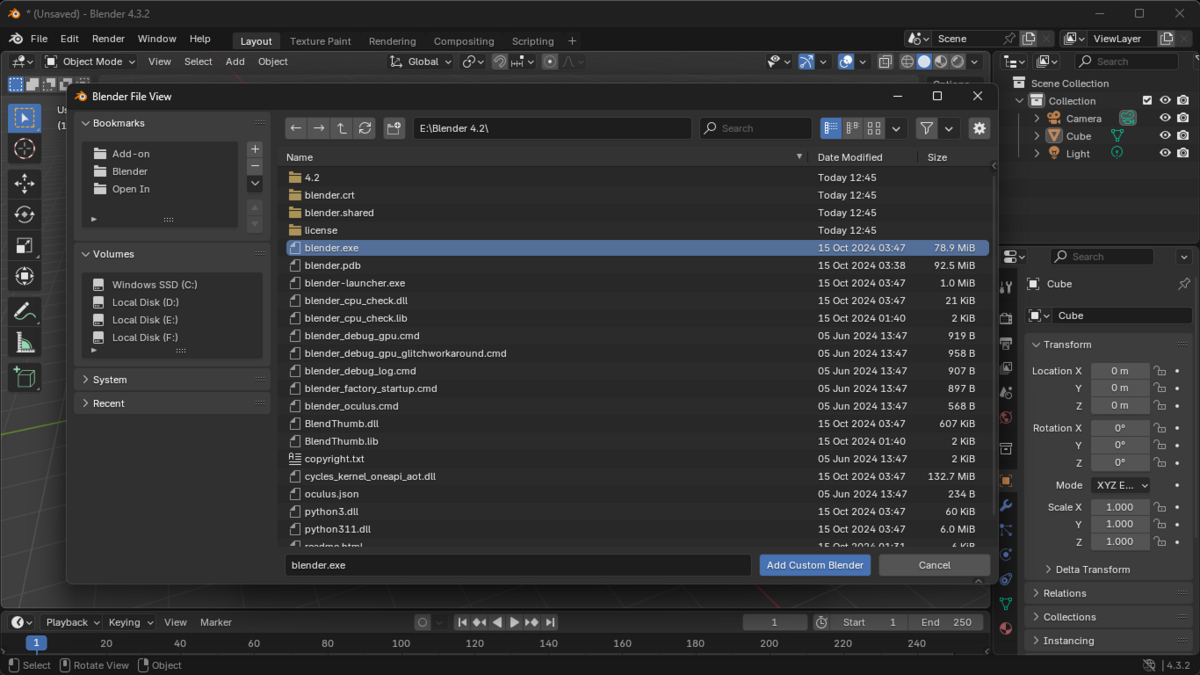
Click Add Custom Blender.
Select the Blender executable (.exe or equivalent for macOS/Linux).
The version will be added to the list and available in File > Open In.
To remove a custom version:
Open the add-on preferences.
Select the version under Custom Blender Versions.
Click Remove Custom Blender.
Have questions about this product?
Login to message
| Published | over 1 year ago |
| Blender Version | 4.4, 4.3, 4.2, 4.1, 4.0, 3.6 |
| Extension Type | N/A |
| License | GPL |