Painterly Compositing
 Pojo
Pojo


Documentation
Pojo's Painterly Compositing V2
Official Controls Reference
This node group transforms your render by independently displacing the base image and its bloom through artistic texture maps. Connect it between your Render Layers and Composite output for instant painterly results.
INPUTS
Image: Connect your rendered image (Render Layers > Image).
Normal: Connect your Normal pass (Render Layers > Normal). Required for strokes to bend with surface direction.
Mask: Optional but powerful. Connect any grayscale mask for separate control for paint displacement.
CONTROLS REFERENCE
PAINT SECTION
Paint Type Dropdown: Select your brush stroke texture:
Brush Stroke – Directional strokes that sweep across surfaces
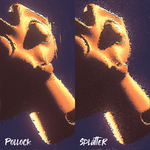
Pollock – Energetic scratches and paint splatter for chaotic texture
Splatter – Organic paint splat effect, like flicked wet paint
Custom – Load your own paint texture images
Brush Strokes Scale: Size of the selected paint texture. Larger values = bigger, more visible strokes.
Bend to Normals: How strongly strokes conform to your scene's surface directions. Higher values make strokes curve organically around forms.
Normals Scale Offset: Scale the normals pass to offset the displacement from the original image.
Animate Toggle: Enable for evolving/moving brush strokes over time in animations.
Frame Rate: Frame increment at which the paint textures changes.
DISPLACEMENT SECTION
These controls warp the image through the selected paint textures.
A: First displacement channel intensity (affects the white part of your mask).
B: Second displacement channel intensity, only available if there is a mask in use (affects the black part of your mask).
Glare Displacement: Controls displacement strength specifically on the bloom/glare pass only. Higher values = bloom scatters and breaks apart independently from the base image.
Offset X/Y: Moves the displacement patterns horizontally and vertically across the frame (affects both image and glare displacement).
GLARE SECTION
Note: These controls affect how the bloom/glare is processed before displacement.
Size: Scales the bloom/glare itself. Larger = wider glow.
Threshold: Brightness cutoff for bloom generation. Lower values make more pixels glow; higher values restrict glow to only the brightest areas.
Low/High Toggle: Quality level of your glare.
POST-PROCESSING SECTION
Fine-tuning for final image polish:
Sharpen: Enhances edge definition after displacement. Higher = crisper.
Soften: Blurs/smooths the final result. Higher = more diffused.
Shadow: Deepens shadow areas. Higher = richer contrast.
Overlay: Overlay the original paint texture over the final image.
USING MASKS
The Mask input gives you surgical control:
Example 1: Character Only
Render a Cryptomatte pass
Connect to Mask input
Painterly effect applies only to your character, background stays clean
Example 2: Depth-Based
Render Depth pass
Connect to Mask input
Adjust with ColorRamp to make distant objects more painterly than foreground
Example 3: Selective Focus
Create simple gradient mask
Connect to Mask input
Painterly effect fades across the frame
REQUIREMENTS & COMPATIBILITY
Blender Version: 5.0 or later only
Render Engines: Works with Cycles and EEVEE (as long as Normal passes are enabled)
Required Passes: Enable Normal pass in View Layer properties for Bend to Normals to function
Happy Painting!
– Pojo
Have questions about this product?
Login to message
| Sales | 100+ |
| Published | 7 months ago |
| Blender Version | 5.0 |
| Render Engine Used | Cycles, Eevee |
| License | Creative Commons |