Panel Stitcher
 Witting Graphics
Contents
1. Quick Start
2. PBR Map Baking
3. Tool settings
Quick Start
Download and the .zip addon file in a location of your choice.
Open the Edit>Preferences>Add-ons Panel
Click Install and select the .zip.
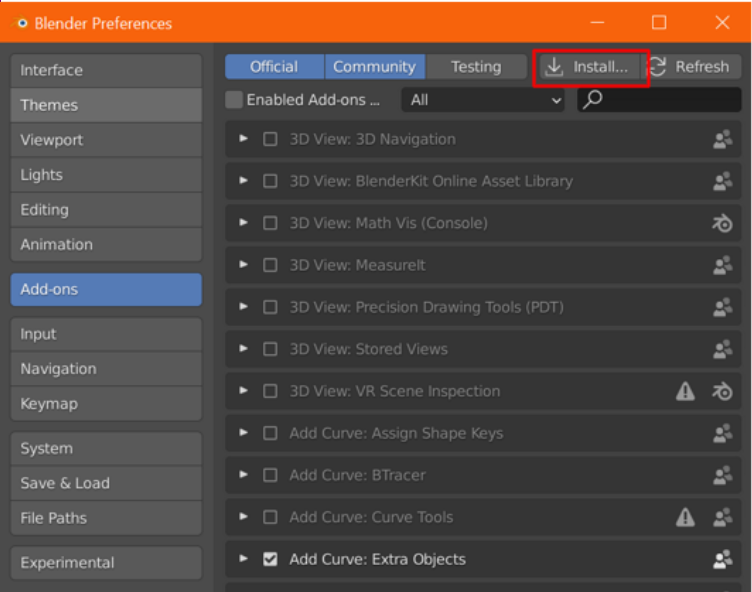
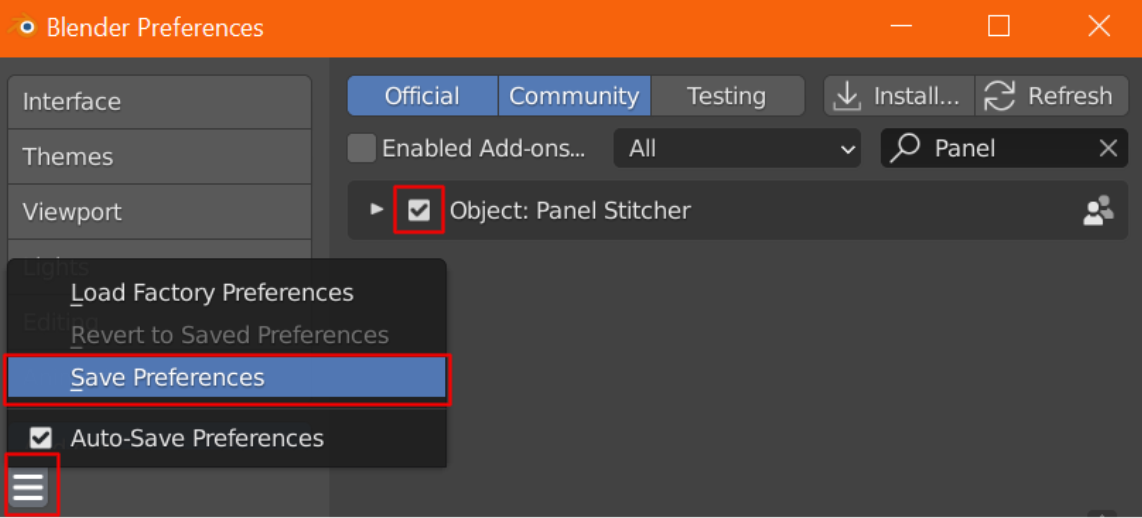
After a few seconds Panel Stitcher should be visible in the list. Click the the checkmark and save the preferences.
You can now acces the addon in the right-side panel ("N" to hide/unhide) from object mode, under the "Create" tab.
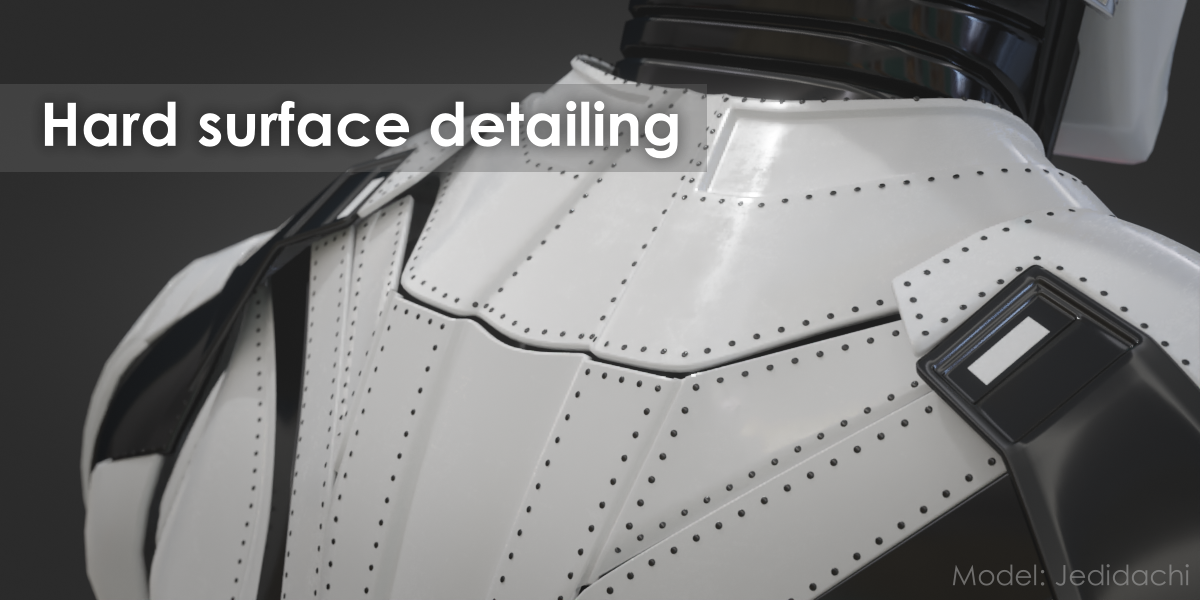
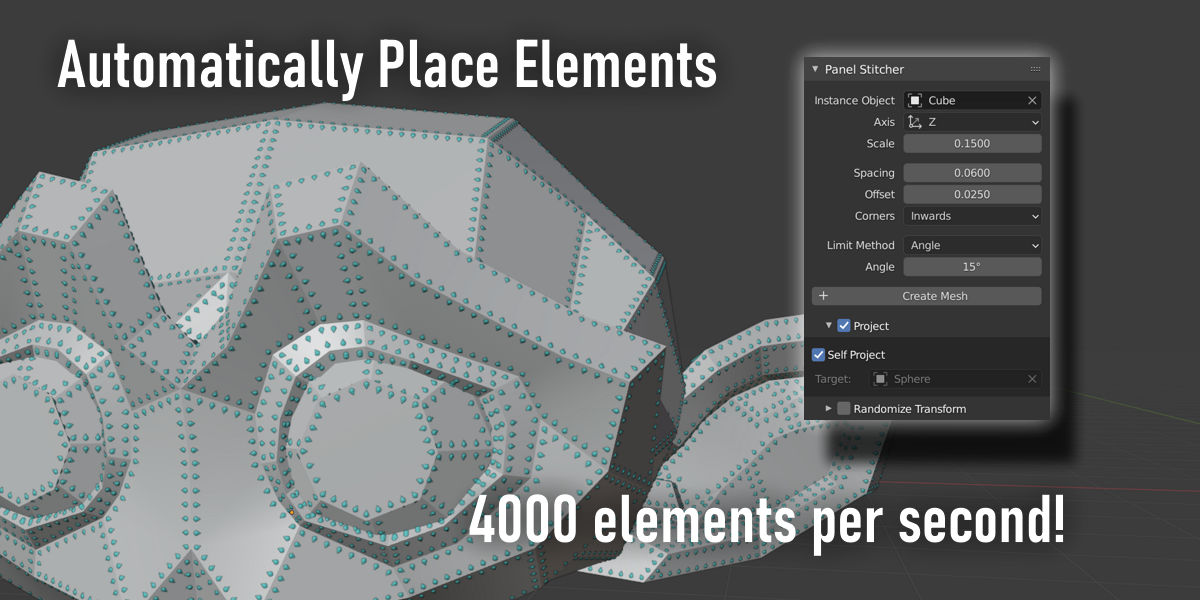
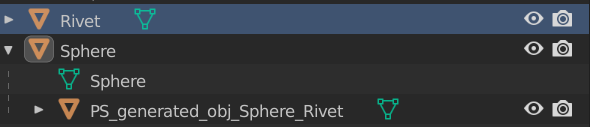
Select the object whose geometry forms the pattern in the viewport. Optionally choose your own object for the small elements, or use a template.The "Create Mesh" option will either create a new mesh with an auto-generated name, or replace the one with the same name. So when trying out different settings, you don't have to delete the old ones. When you want to keep the last object, change its name in the outliner.
Baking PBR maps
What is baking?
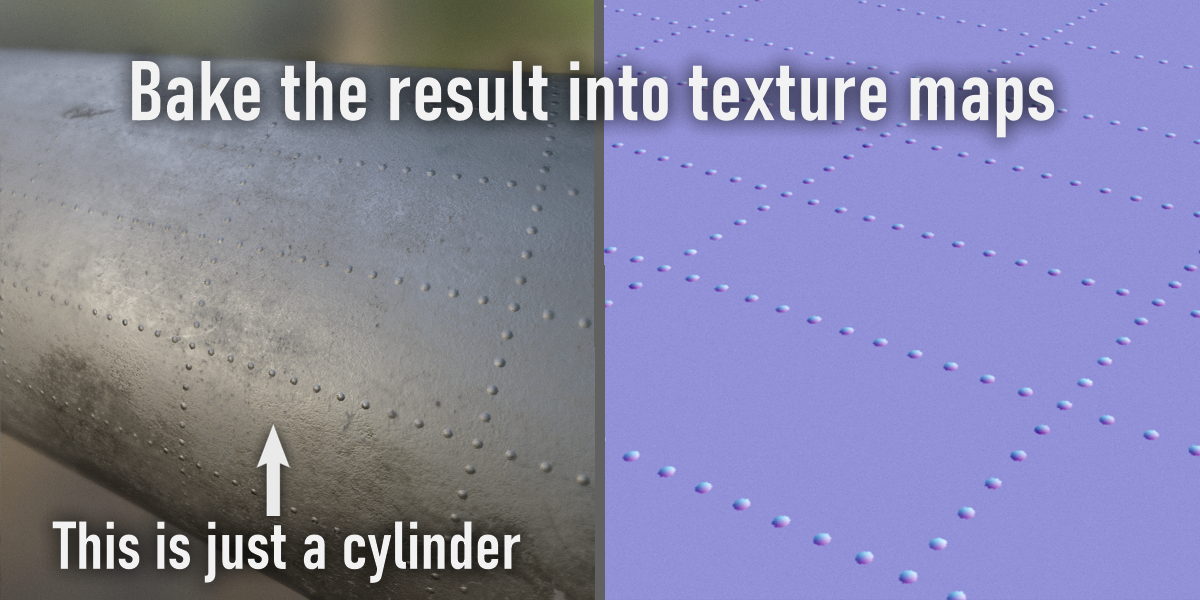
"Baking" refers to converting information from shaders or geometry to a flat texture. It can be used to "fake" small details on surfaces using textures instead of 3D geometry, this greatly improves performance and simplifies models.
Because the geometry generated by Panel Stitcher is already on the surface of a different object it is well suited for this proces.
If you do not know what PBR textures are, I suggest this 5-minute tutorial.
Part 1: Create the texture
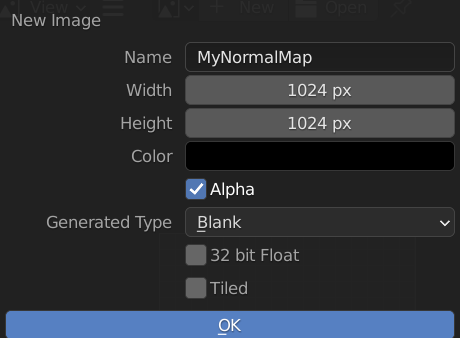
Create a new texture in the image editor. Most settings can be left at default, but the resolution might need to be larger depending on how small the instance elements are.

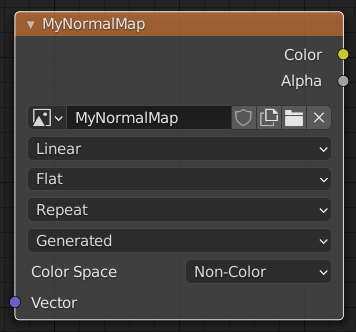
Add a Texture -> Image Texture node to the material that you main object uses.. Make sure to set it to Non-Color! (else the values will not be read correcty). Enter the texture you just created, then select the node itself. The selection is important because it lets blender know which texture to bake to.
Part 2: Bake the result
Select all objects you want to bake into the main object, you can use multiple Panel Stitcher-generated objects for the same texture. Select the main object last, so that it is the active object. (yellow outline in viewport instead of orange for most themes)
In the render tab, set the render engine to Cycles (the baked result can be used for Eevee too). The bake panel should be visible now. The settings to use:

- select the type of texture you want to create (Normal here)
- leave Influence at default
- Enable Selected to Active
- Set Extrusion and Max Ray Distance to the same value, it should be a short distance. You might need to tweak this depending on the size of your objects.
- Set Output -> Margin to 0 pixels
Press "Bake" and after a few seconds, the texture updates. Make sure to save the result from the texture editor.
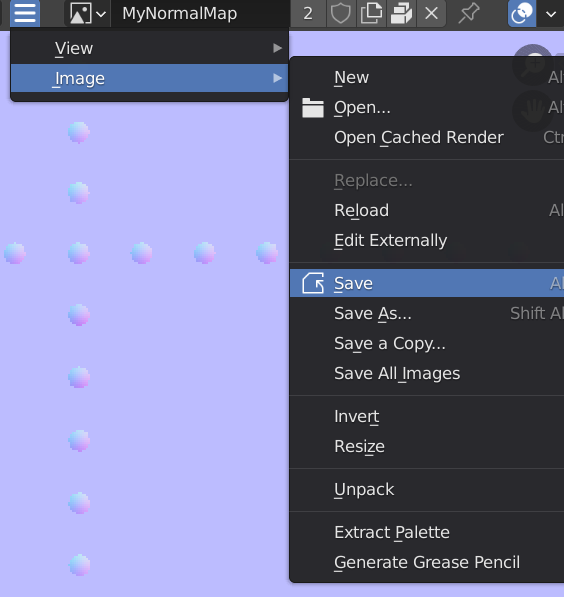
That's the entire process. If you want to bake the texture again, make sure that the last one is not used for the material output, or the effects could "stack".
Tool settings
Main Panel
Auto Update
Execute 'Generate' every time a parameter is changed.
Default: True
Source (Instance Type)
Where the instance object comes from.
- Object: Select an object from your scene as template
- Collection: Randomly select instances from the collection
- Template: Loads one of the default instances
Object / Collection / Template
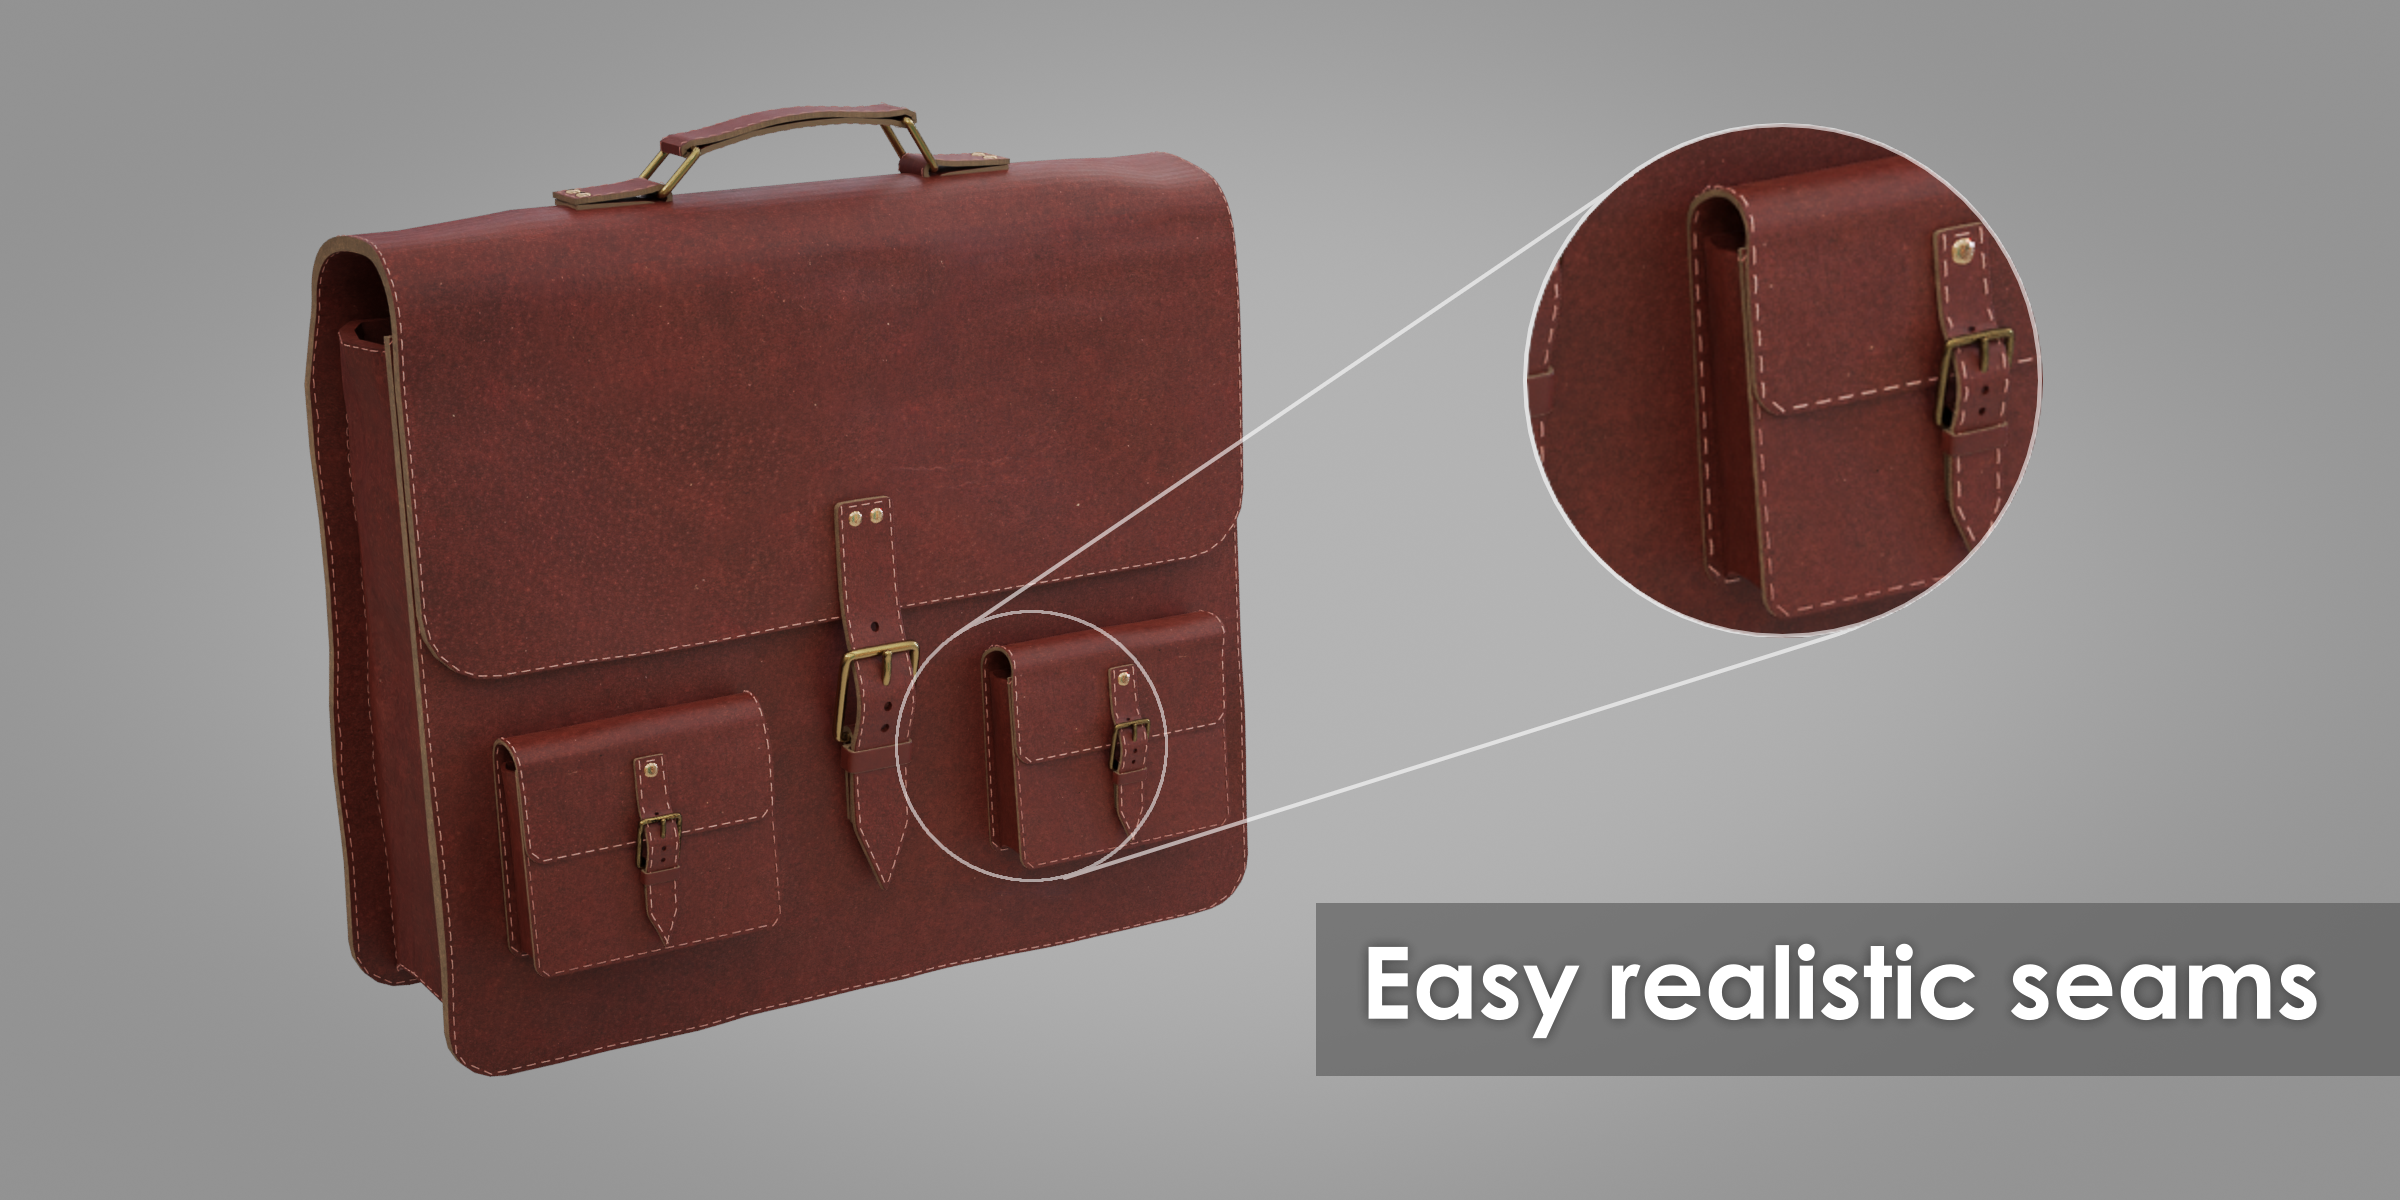
Specific selection field based on the chosen Source mode. Templates include several presets like Rivets, Screws, and Stitches.
Axis
Up-Axis of instance object, this axis will be aligned with the normals on the active object.
Default: Z
Scale
Scale of instanced elements.
Default: 0.1
Spacing
The target spacing between elements, might be adjusted to spread evenly across edge.
Default: 0.1
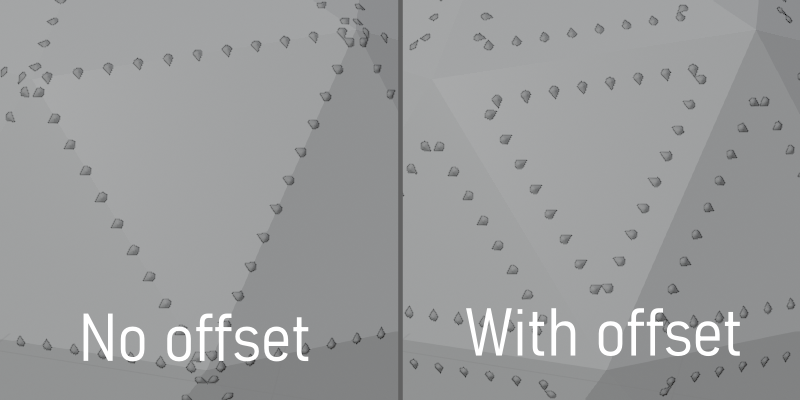
Offset
When non-zero, enables two rows on both sides of edges and sets offset distance.
Default: 0.1
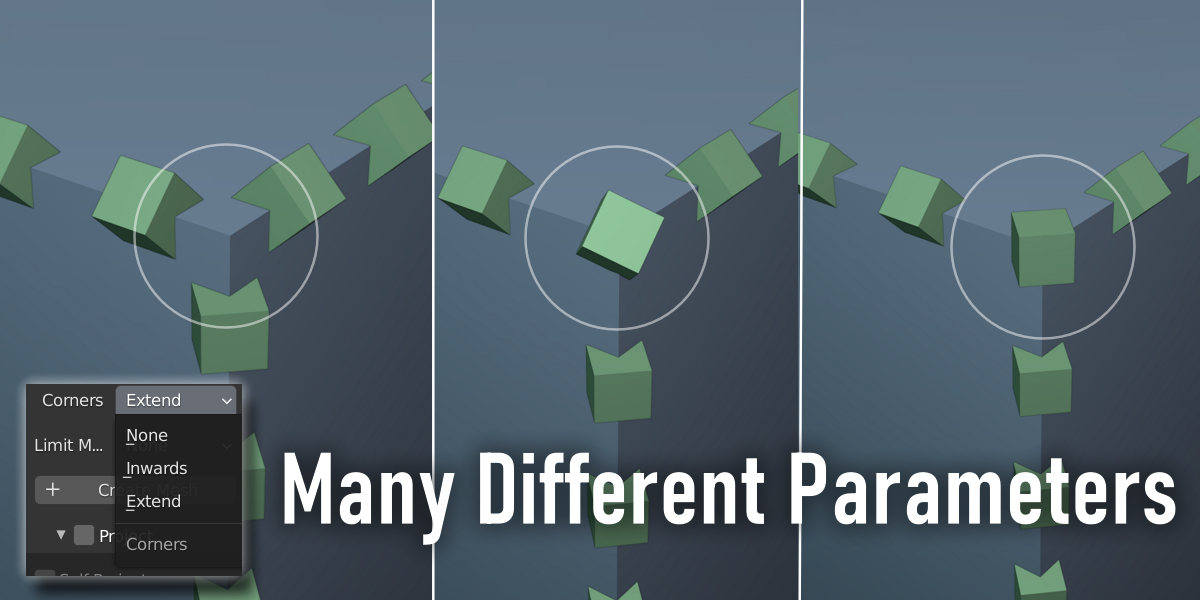
Corners
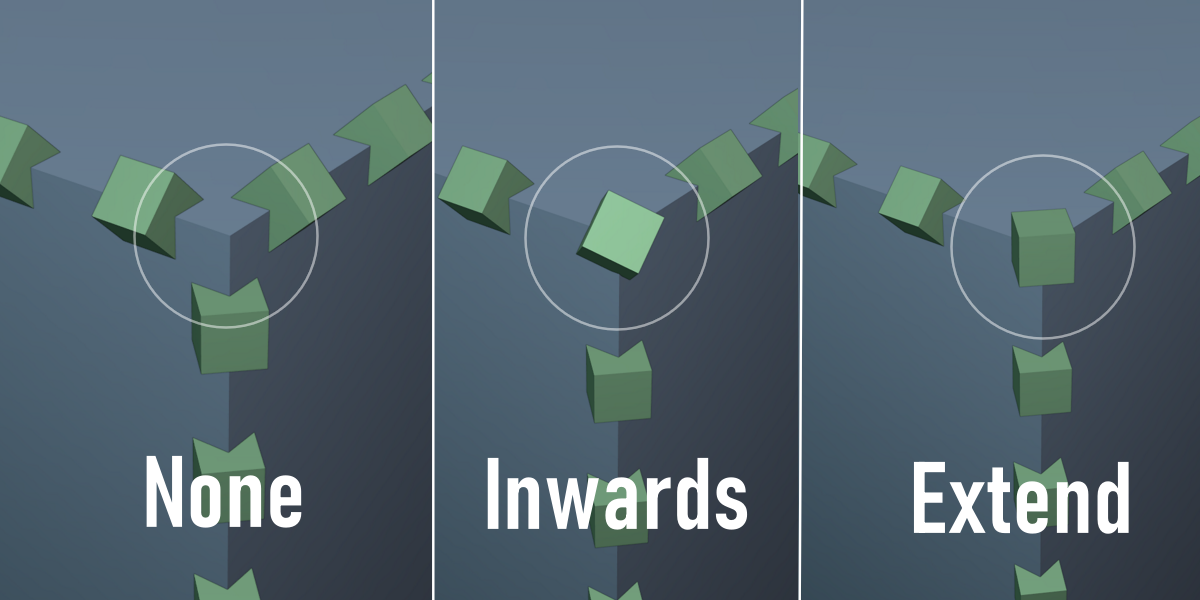
Where to place elements on corners.
- None: Don't create any corner elements
- All: Place all elements, on edges and corners
- Corners Only: Only place elements on corners
Orientation
Change how corner elements orientation are handled.
- Inwards (Interpolate): Orient corners by interpolating the elements around it (recommended for offset)
- Extend: Orient corners like continuing edge elements, unpredictable which edge is used (recommended when not offset)
Filters
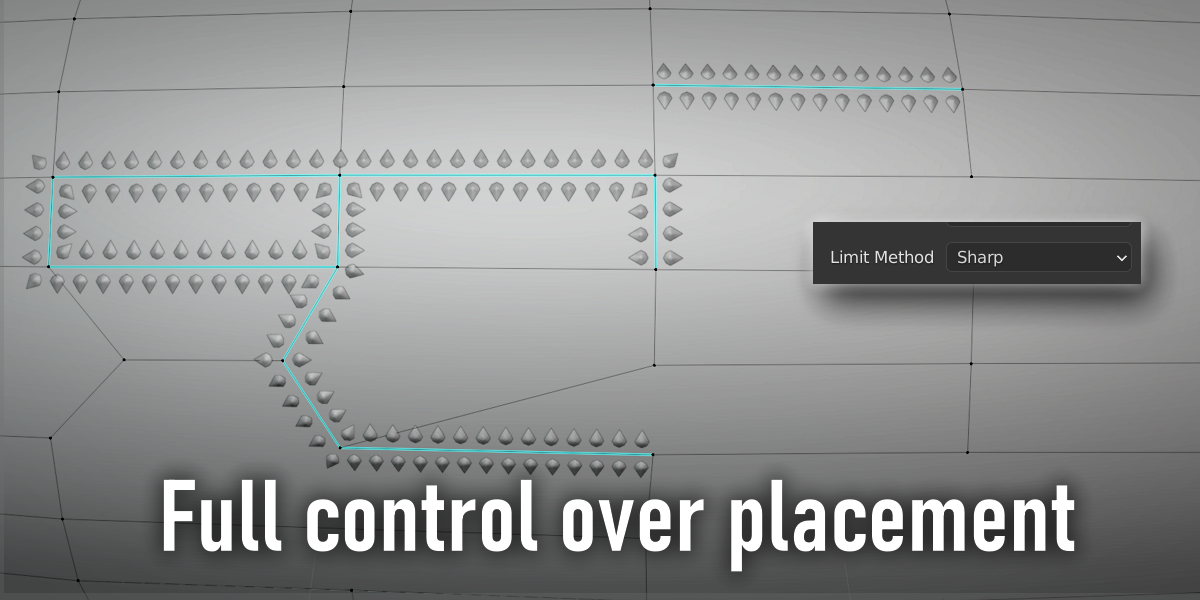
Angle / Area / Sharp / Seam / Selection
Toggles to filter placement based on edge angle, face area, sharp marks, seam marks, or viewport selection.
Selection type
Specific behavior for selection-based filtering (e.g., Boundary only, Inside selection, etc.).
Angle (Threshold)
Edge angle above which to place instances.
Minimum Area
Face area above which to place instances.
Quality (Only visible with Offset > 0)
Iterations
Number of iterations for insetting and projecting. Higher values improve accuracy on curved surfaces.
Default: 1
Snap Normals
Align instances with the surface normal at their projected location.
Default: False
Snap Edge Normals
When landing exactly on an edge, average the normals of connected faces. Improves smoothness but performance impact is high.
Default: False
High Resolution
Subdivide edges before insetting to improve accuracy on curved surfaces.
Resolution
Maximum length of edges along the path before insetting. Smaller values improve accuracy on curved surfaces.
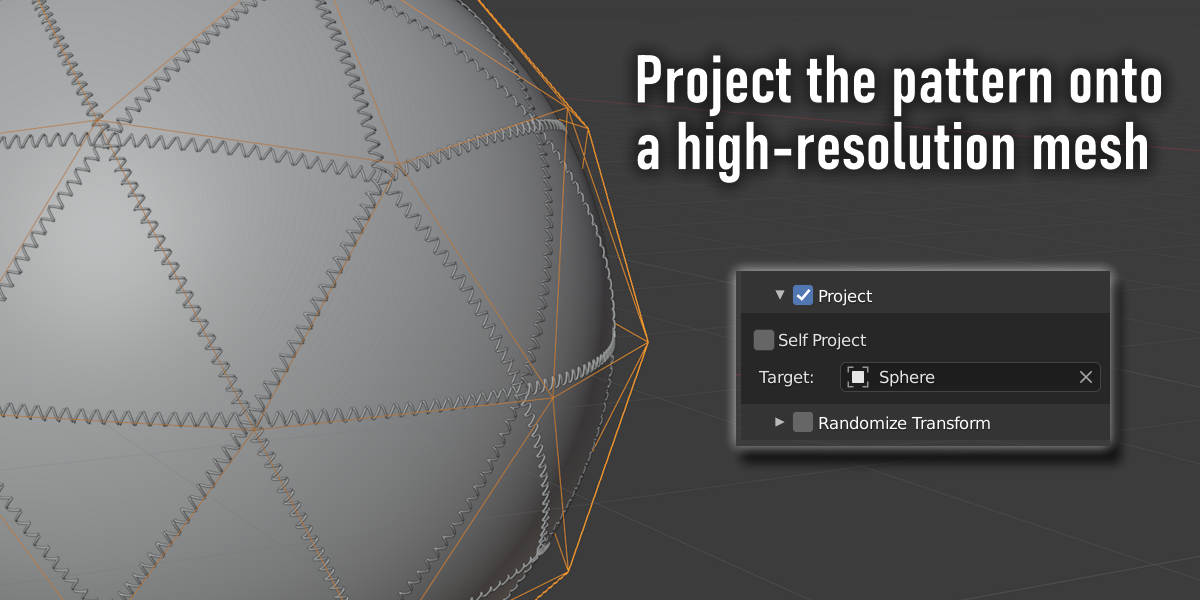
Project
Project (Toggle)
After creating instances along edges of the active object, project them onto the surface of a different object.
Target (Object)
Object to project instances onto.
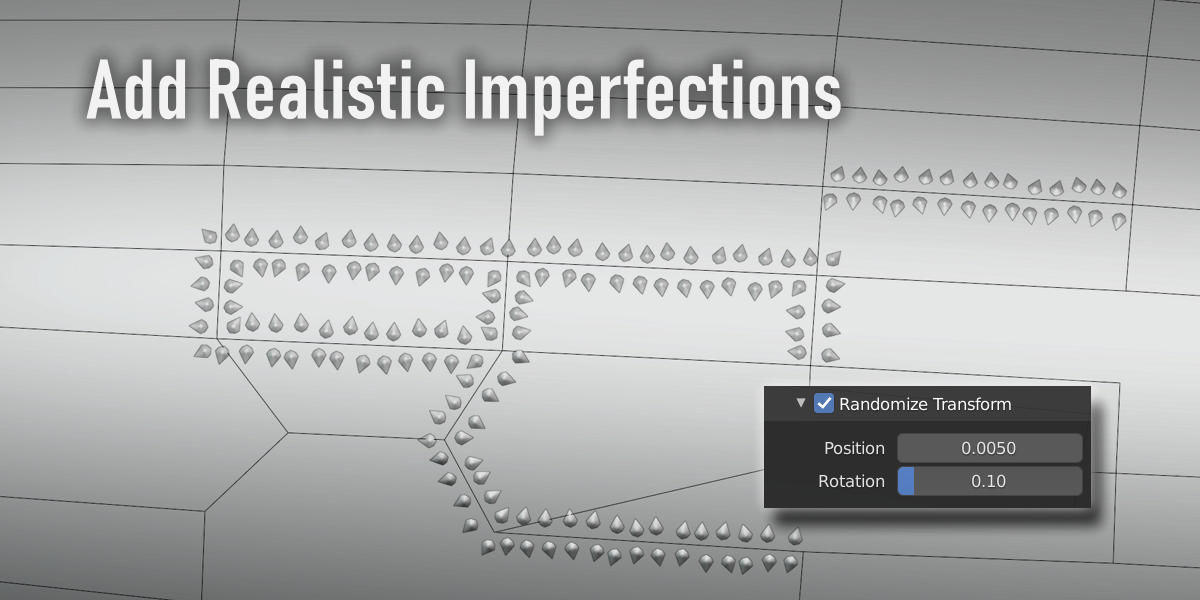
Randomize Transform
Randomize Transform (Toggle)
Add a randomized component to the placement of instances.
Sideways / Lengthwise
Factor for randomizing the position of instances relative to the edge.
Rotation
Factor for randomizing the rotation of instances.
Seed
Seeds the random translation and rotation.
Interpolate Normals
Rotate the instances smoothly around the edge (Available when Offset is 0 and Sideways randomization is used).

Interpolation Amount
The strength of the interpolation. One means the farthest elements from the edge have exactly the face normal.
Advanced
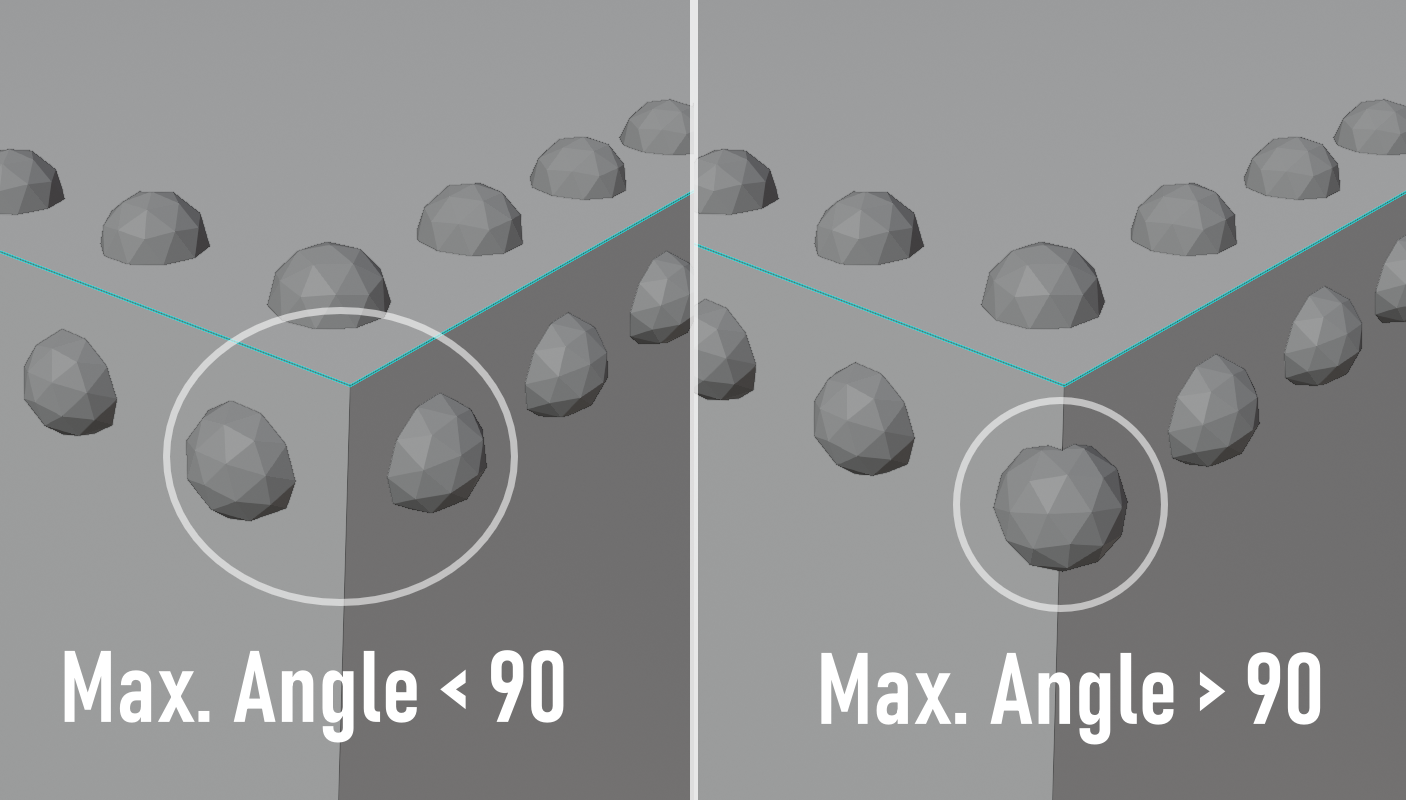
Corner Angle
Force bends with angles sharper than this to behave like fixed corners. Lowering this might reduce artifacts on high-poly meshes.
Ridge/Valley Angle
Maximum face angle difference for which still to put a corner element exactly on the ridge or valley.
Corner Bevel Angle
Corners with angles sharper than this will be subdivided/beveled before insetting to prevent large offsets. Only necessary for, and applies to, outward facing corners.
Instance Limit
Hard limit on maximum amount of placed elements, failsafe to prevent crashing.
Default: 20000
Timeout
Maximum execution time in seconds for the generation process, failsafe to prevent freezing.
Default: 5.0
If anything in the documentation is unclear, please contact me, so I can help you and also update it for other users.
-
$29
Commercial use - max. 2 seats
-
$119
Commercial use - more than 2 seats
Have questions about this product?
Login to message
| Blender Extension Compatible | Yes |
| Sales | 500+ |
| Rating | 11 ratings |
| Dev Fund Contributor | |
| Published | over 5 years ago |
| Blender Version | 4.0 - 5.2 |
| Extension Type | Add-on |
| Render Engine Used | Cycles, Eevee |
| License | GPL |