Pcm_Core
 Marco Sibaldi


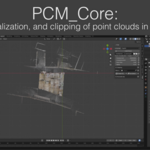
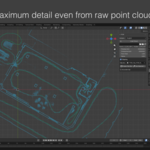
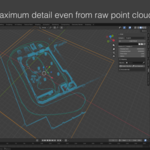
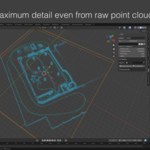
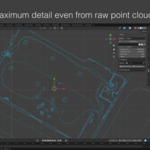
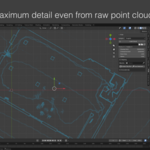
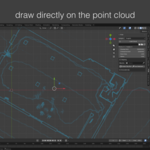
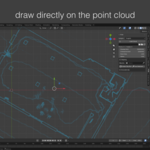
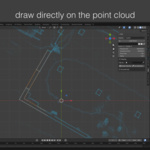
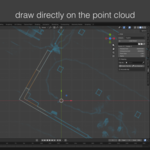
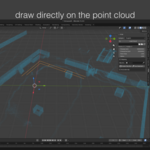
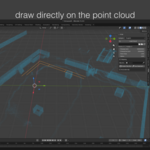
PCM_Core: Manual
Import, visualization, and clipping of point clouds in Blender 5.x
GENERAL PREMISE
Why work directly on point clouds in Blender
In professional surveying and architectural restitution work, the choice of tools determines not only the efficiency of the workflow, but also the integrity and fidelity of the final result. For a long time, orthoimages have been the de facto operational standard for restitution from laser scanner or LiDAR data. This approach, while practical, relies on an intrinsic simplification of the 3D data, which is projected onto a 2D plane. On one hand, this allows operation on less performant hardware and with traditional CAD software; on the other, it entails a significant loss of information. Depth, spatial stratification, deformations, and real geometric relationships between elements are flattened, forcing the technician into continuous interpretation that can distance them from the measured reality.
The point cloud, on the contrary, is the primary surveying data. Each point represents a real measurement in space, a direct testimony of the surveyed object's geometry. Choosing to work directly within the point cloud means maintaining total control over the information, without reducing or interpreting it prematurely. It means treating the survey not as a static image, but as a living 3D environment that is explorable, sectionable, and verifiable in every detail. This approach, though it may seem more complex initially, proves more direct, honest, and technically reliable, ensuring that the graphic restitution is based on the real data and not on its representation.
Why Blender
The choice of Blender as the operational environment for point cloud management is neither random nor dictated solely by graphic needs. Blender, a free and open-source software, offers a unique combination of power, flexibility, and accessibility that makes it ideal for this purpose. Its ability to handle complex 3D scenes, combined with a highly customizable visualization system and complete extensibility via the Python API, provides the perfect foundation for building a professional workflow.
In particular, Blender excels in allowing immersive interaction with the point cloud. It is possible to dynamically vary transparency to read element stratification, isolate specific portions of the survey, create dynamic sections in real time, and change viewpoints without ever losing contact with the 3D information. Although not born as surveying software, its open architecture allows, through the development of specific plugins like the PCM pipeline, to transform it into a powerful and versatile tool for architecture and engineering, democratizing access to advanced workflows that would otherwise require expensive proprietary software.
The role of PCM plugins and artificial intelligence
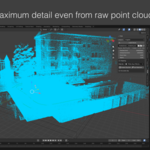
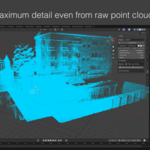
Working efficiently with large point clouds in Blender would not be possible without dedicated tools. The PCM (Point Cloud Motor) plugin pipeline was developed precisely to fill this gap, transforming Blender into a professional work environment for architectural surveying. PCM_Core, in particular, is the heart of this pipeline: a lightweight and performant engine specifically designed for importing, visualizing, and basic management of point clouds.
The development of PCM_Core was inspired by the analysis of existing tools, with special thanks to Jakub Uhlík for his PCV plugin, which paved the way for point cloud use in Blender. PCM is not a copy, but a reimplementation focused on the needs of building sector professionals. A significant role in development was played by artificial intelligence (particularly ChatGPT), used as a programming assistant for algorithm analysis, code writing and validation, and documentation structuring. It is important to emphasize that AI does not intervene on the data, does not interpret the cloud, and does not replace the technician: its role was confined to the development phase to improve software quality and robustness. The result is a transparent, verifiable system free of blind automations, where every operation remains under full user control.
0. SURVEYING BEST PRACTICES
The quality of graphic restitution critically depends on the upstream survey quality. No software can correct systematic errors or acquisition gaps. The following are general best practices, valid regardless of processing software, but essential for correct use of the PCM.
| Survey Type | Fundamental Best Practices |
| Interiors with SLAM | - Plan paths beforehand to cover all areas. - Maintain constant and smooth walking speed. - Always close loops (return to starting point) to allow the algorithm to correct drift. - Insist on edges, thresholds, windows, and other geometric discontinuities. - Avoid abrupt rotations or jerky movements. |
| Exteriors with SLAM | - Always keep stable vertical references in the scanner's field of view. - Avoid crossing large open spaces without geometry (e.g., empty squares). - Follow facades keeping a trajectory as parallel as possible. - Always close paths around the building. |
| Static Laser Scanner | - Ensure at least 30-40% overlap between one scan and the next. - Pay attention to highly reflective surfaces (glass, shiny metal) or fully absorbent ones (dark fabrics). - Perform an initial quality check and pre-alignment directly on site, if possible. |
A good survey is the first and most important step for correct and reliable restitution.
1. PCM_Core PLUGIN OVERVIEW
Plugin Purpose
PCM_Core is the fundamental engine of the PCM pipeline. Its sole purpose is to give Blender the ability to import, visualize, and manage large point clouds efficiently and interactively. It is not a modeler or analyzer, but the tool that enables any subsequent operations, acting as a bridge between the raw survey data and Blender's 3D modeling environment.
What PCM_Core Does
•Multi-format Import: Loads the most common point cloud formats in the sector, including PCD (ASCII, binary, binary_compressed), PLY, LAS, LAZ, and E57.
•Performant Visualization: Uses a GPU batch-based rendering engine, decoupled from Geometry Nodes, to visualize millions of points in real time.
•Dynamic Level of Detail (LOD) Management: Applies separate display limits for static mode (Preview Limit) and interactive mode (Interactive Limit) to ensure fluidity during scene navigation.
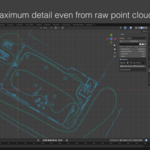
•Real-Time Clipping: Allows isolating portions of the point cloud via a manipulable Clipping Prism object (bounding box), with instant view update.
•Display Property Controls: Offers direct controls to modify point size and cloud transparency, essential for correct data interpretation.
What PCM_Core Does NOT Do
It is equally important to understand what PCM_Core does not do, to frame it correctly in the workflow:
•Does not modify the original file: The point cloud is read and loaded into memory, but the source file on disk is never altered.
•Is not a 3D modeler: Does not offer tools to create meshes, surfaces, or solids from the cloud (for this, use Blender's native tools or other plugins).
•Does not perform complex analyses: Does not carry out operations like meshing, semantic classification, feature extraction, or deviation calculations.
•Does not produce 2D outputs: Does not automatically generate plans, sections, or elevations. Its purpose is to provide a sectioned and clean view of the cloud, on which the technician can then trace manually or with other tools.
In summary, PCM_Core is the indispensable starting point: it prepares the work field, making the survey data accessible and navigable within Blender.
2. INSTALLATION AND DEPENDENCIES
Addon Installation
PCM_Core installation follows the standard procedure for Blender addons:
1.Open Blender and go to Edit > Preferences....
2.Select the Add-ons tab.
3.Click the Install... button in the top right.
4.Navigate to the PCM_Core .zip file and select it. Once installed, search for "PCM" in the addons list and activate the checkbox next to "PCM - Point Cloud Motor".
Dependency Management
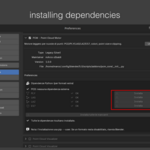
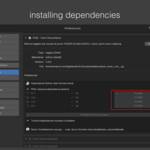
PCM_Core can natively read only the .pcd format. To enable support for PLY, LAS, LAZ, and E57 formats, additional Python libraries must be installed. The plugin offers a convenient panel to manage this automatically.
5. In Blender Preferences, with PCM_Core selected, expand the options panel.
6. A list of dependencies for each format will be shown (e.g., plyfile for PLY, laspy and lazrs for LAS/LAZ, pye57 for E57).
7. For each missing format, an Install button will appear. Dependencies for a single format can be installed, or click "Install all missing" to install them all at once.
8. After installation, Blender may need to be restarted for the new libraries to load correctly.
3. PCM_Core INTERFACE
Once activated, the plugin is accessible from the 3D View Sidebar (panel opened with N key), under the "PCM" tab.
| UI Element | Functional Description |
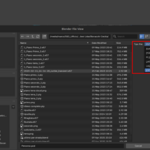
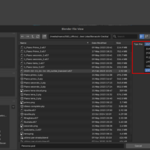
| Load Cloud | Opens a window to select a point cloud file (.pcd, .ply, .las, .laz, .e57). Creates a new PCM_Cloud object in the scene. |
| File Path | Shows the path of the selected cloud's source file. Clicking the folder icon allows replacing the active object's cloud with a new one, keeping settings. The refresh icon forces reloading the file. |
| Statistics | Provides two key numbers: Points (total points loaded into memory from the file) and Visible (number of points currently shown in the viewport, based on limits and clipping). |
| Preview Limit | Defines the maximum number of points to display when the view is static. A higher value offers more detail but may slow navigation. |
| Interactive Limit | Defines the maximum number of points to display during interactive operations (rotation, pan, zoom). A low value ensures fluidity and responsiveness. |
| Point Size | Controls the pixel size of each rendered point in the viewport. |
| Transparency | Adjusts the cloud's opacity (0 = fully transparent, 1 = fully opaque). Useful for viewing overlapping elements. |
| Clipping | Activates or deactivates the Clipping Prism effect. |
| Clip Object | Field to manually assign any scene object as the clipping volume. |
| Create Clipping Prism | Creates a new wireframe cube object, centered on the cloud, acting as the clipping volume. This is the main tool for sectioning the cloud. |
| Eyedropper Icon | Allows using the currently selected object as the Clipping Prism for the active cloud. |
| Accurate Clipping | If active, clipping is calculated on the entire point cloud in memory (more precise but slower). If inactive, it is calculated only on the Preview Limit subset of points (faster). |
4. OPERATIONAL WORKFLOW: FROM SURVEY TO 2D RESTITUTION
This chapter illustrates a practical workflow for using PCM_Core as a base for plan and section restitution.
Phase 1: Cloud Import
The first step is to load the survey. Click "Load Cloud" in the PCM panel and select the file. The plugin will create a new PCM_Cloud object (represented by an Empty with axes) and display the point cloud. The initial visual analysis allows verifying the general integrity of the survey, its extent, and the presence of any macroscopic artifacts.
Phase 2: Orientation and Positioning (Optional)
Surveys are often not perfectly aligned with Blender's global axes. Although not strictly necessary, it can be useful to rotate the PCM_Cloud object to align the building's main walls with the X and Y axes. This simplifies creating orthogonal views. Select the PCM_Cloud object and use Blender's rotation tools (R).
Phase 3: Sectioning via Clipping
This is the key phase. To create a plan, it is necessary to isolate a horizontal "slice" of the building.
1.Select the cloud and click "Create Clipping Prism". A wireframe cube will be created around the cloud.
2.Select the prism and scale it (S) and move it (G) to define the area of interest. For a plan, scale the prism along the Z axis to create a thin slice (e.g., 10-20 cm thick) and position it at the desired height (e.g., 1.20m from the floor).
3.During prism manipulation, PCM_Core uses the Interactive Limit for fluidity. Upon mouse release, the Preview Limit will be displayed.
Phase 4: Creating an Orthogonal View
Once the section is defined, it must be viewed correctly. For a plan, switch to Top View by pressing 7 on the numeric keypad. To switch to an orthogonal view (no perspective), press 5 on the numeric keypad. The point cloud section will now appear as a 2D plan.
Phase 5: Geometry Tracing
With the cloud section visible and flat, tracing can proceed.
1.Create a new object for the drawing. A good practice is to use a Mesh type object. (Shift + A > Mesh > Plane, then delete faces in Edit Mode).
2.Enter Edit Mode (Tab) for the new object.
3.Using Blender's modeling tools (e.g., vertex extrusion with E), trace the visible contours in the cloud section, such as walls, doors, and windows.
The same process can be applied to create vertical sections or elevations, simply by orienting the Clipping Prism vertically and switching to a front view (1) or side view (3).
5. TECHNICAL INSIGHTS
Visualization Engine
PCM_Core does not use Blender's Geometry Nodes for visualization. Instead, it leverages a lower-level system, creating GPU data batches. In practice, point coordinates and colors are sent directly to the graphics card, which draws them using an optimized shader. This approach reduces CPU load and allows handling a much higher number of points than an object-based approach.
Memory Management (Caching)
When loading a cloud, PCM_Core reads the entire file and saves the data (coordinates and colors) in an internal RAM cache associated with the PCM_Cloud object. This means all subsequent operations (clipping, limit changes, etc.) do not require re-reading the file from disk, making them extremely fast. The cache is updated only if the file is explicitly reloaded or a new one is selected.
Interactive Clipping
Fluidity during clipping prism manipulation is achieved with a dual level-of-detail strategy. When Blender detects the user transforming an object (moving, rotating), PCM_Core applies rapid subsampling of the cloud to not exceed the Interactive Limit. As soon as the operation ends, the plugin recalculates the visualization using the Preview Limit, restoring full detail. This ensures a responsive user experience even with very large clouds.
Supported Formats
PCM_Core relies on standard sector Python libraries to read different formats. This table summarizes the dependencies:
| Format | Library Used | Notes |
| PCD | Native | The loader is integrated directly into the plugin. |
| PLY | plyfile | Common format for meshes and point clouds. |
| LAS / LAZ | laspy, lazrs | Standard formats for LiDAR data. lazrs is a high-performance Rust binder for LAZ compressed format decompression. |
| E57 | pye57 | Standard format for laser scanner data exchange, defined by ASTM. |
APPENDIX
Common Troubleshooting
•Cloud does not appear after import: Check that the PCM_Cloud object is visible in the outliner. Try selecting it and pressing . (period) on the numeric keypad to center the view on it. The survey scale may be very large or very small.
•Import of a format (e.g., LAZ) fails: Ensure the correct dependencies are installed from the addon's preferences panel and restart Blender.
•Visualization is slow: Reduce Preview Limit and Interactive Limit values in the PCM panel. Close other heavy-running applications.
•Clipping prism has no effect: Verify that the Clipping checkbox is ticked in the PCM panel and that an object is correctly assigned to the Clip Object field.
$35
Have questions about this product?
Login to message
| Blender Extension Compatible | Yes |
| Sales | 10 |
| Published | 7 months ago |
| Blender Version | 5.0 |
| Extension Type | Add-on |
| Render Engine Used | Blender-Internal, Cycles, Eevee |
| License | GPL |
Discover more products like this
modeling 3d-scanning architectural survey blender addon point cloud Visualization Import-Export gpu rendering Multilingual clipping point reduction lidar