 Cobox
Cobox





Thank you for choosing Portal! This Blender add-on is designed to teleport any type of mesh you want.
Below, you'll find everything you need to install, configure, and use Portal.
Installation
- Download the ZIP file of the add-on from your account.
- Open Blender and navigate to Edit > Preferences > Add-ons > Install from disk > Search the file.
- Click Install and select the downloaded ZIP file.
- Activate the add-on by checking the box next to "Portal"
- Save your preferences by clicking Save Preferences so the add-on loads automatically in future sessions.
Key Features
- Real-Time Teleportation: Teleport any mesh in real time, including complex geometry and fluids
- Unlimited portals: Add unlimited portals, manage routes per setup
- Entry And Exit Routing: Choose Entry and Exit within the same system, switch roles with Assign Portal
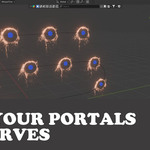
- Curve Integration: Place portals on curves, distribute with Global Offset, override with Individual Offset
- Automation: Move the domain when a target approaches, adjust detection with Offset
- Border And VFX: Toggle portal borders, set Thickness, assign Materials, apply preset Effects
- System Link And Unlink: Unlink to convert a portal into an independent mesh, Link to attach it to a system
- Collections Support: Teleport a single Object or an entire Collection, manage lists quickly
- Performance Switch: Turn teleport On or Off per setup to keep heavy scenes responsive
- Keyframe-Ready Controls: Animated portal size, border thickness, offsets, and animation parameters, any control with a key icon next to it can be animated
- Hide/Show: What is teleported is a copy of the original object, therefore options are offered to hide the original object and only display the teleportation. In case you want to revive or make modifications to the teleported object, it is necessary to show the original object.
How to Use Portal
- Open the side panel (shortcut: N) and navigate to the Portal tab.
- Create portals:
-
Create Portal: Create a default portal, choose Square or Circle
-
Assign Portal: Convert meshes into editable portals
-
Name: Set portal names before Assign for easier search
-
Additional exits: Create unlimited portals, each Exit requires an Entry, a portal cannot be Entry and Exit for the same object at the same time, to swap roles select the portal and click Assign Portal
-
Unlink/Link: Unlink makes the portal an independent mesh, Link attaches that mesh to a portal system
-
- Set it up:
-
Readjust: Restore location, rotation, and scale, this can be used for one object or all objects
-
Automation:
-
Domain: The portal’s active area for teleport
Proportional: Extends the domain with respect to the shape of the portal or in a straight line
-
Empty scale & type: Adjust Empty size and choose the Empty shape
-
Automatic mode: Move the domain when the target approaches, Offset widens the detection range
-
-
Curve:
-
Curve Mode: Pick the curve that will host portals
-
Curve Objects: Include or exclude portals from the same system using the list checkboxes
-
Global Offset: Evenly distribute selected portals along the curve
-
Individual Offset: Override global scrolling and enable individual scrolling with the animate option
-
-
- Customize it:
-
Shading/Subdivision: Change the appearance of portals with options such as Smooth Shading, Flat Shading, and Subdividing with Level settings and types such as Catmull-Clark or Simple
-
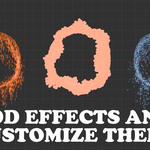
Center & Size: Add a border, adjust the thickness with an animatable property, assign a material, and apply preset effects
-
Border & Effects: Toggle Border, adjust Thickness + Keyframe, assign Material, apply preset Effect
-
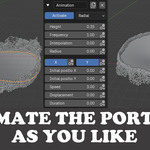
Animations: Add animation and customize it with options like Linear or Radial animation and their respective animatable properties settings including Height, Frequency, Interpolation, Radius, X and Y, Start X and Start Y, Speed, Offset as start time, Duration
-
- Teleport:
-
Optimization: Disable the second-to-last button at the top of the menu to temporarily disable teleportation and prevent the scene from loading
-
Objects: Select an object or collection, manage the object list with Hide All, Show All, Hide, or Show by Item, and click on a name to select directly
-
Routing: Select an entrance portal. The exit portal option will then be enabled to the right of the entrance portal. Once the exit portal is selected, click the "+" sign located to the right of where you selected the exit to perform the corresponding teleportation (You can also click the collection icon so that if you have many exit portals, absolutely all exits related to the entry are automatically recognized as such, instead of adding them one by one.)
Remember: If the selected exit portal is not in the list located below this option, nothing will teleport. It is important that the object to be teleported has at least the base material, otherwise the teleport will not be visible.
-
Useful Tips
- Teleports meshes with good topology. If the model has poor topology, the system will take longer to teleport.
- Each option in this add-on is complex. Keep in mind that the more you do, the more work the computer will have to do. Avoid doing heavy work if it's not necessary.
Compatibility
- Compatible with Blender 3.1 and later versions.
- Border Effects only enabled in 3.6 and later versions.
- Works on Windows, macOS, and Linux.
Support
If you have any questions, technical issues, or suggestions, feel free to contact us. We provide support through:
-
Email: [email protected]
Have questions about this product?
Login to message
Discover more products like this
portal effect animation real-time 3D utilities real-time Car Teleporter TELEPORTER portals VFX portal Portal Animations teleport