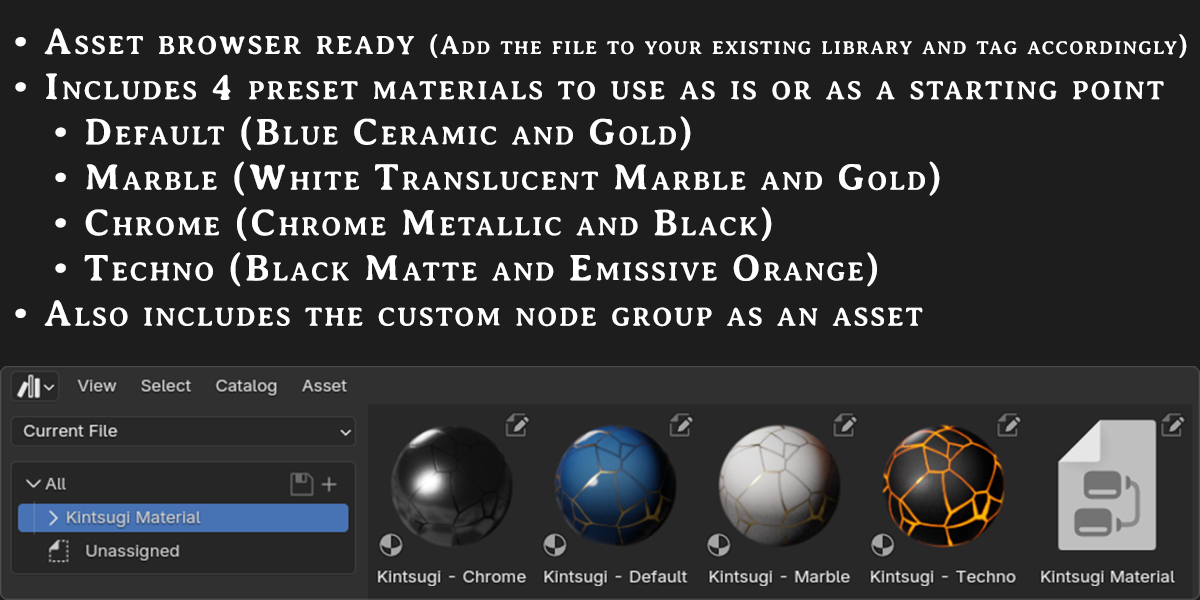
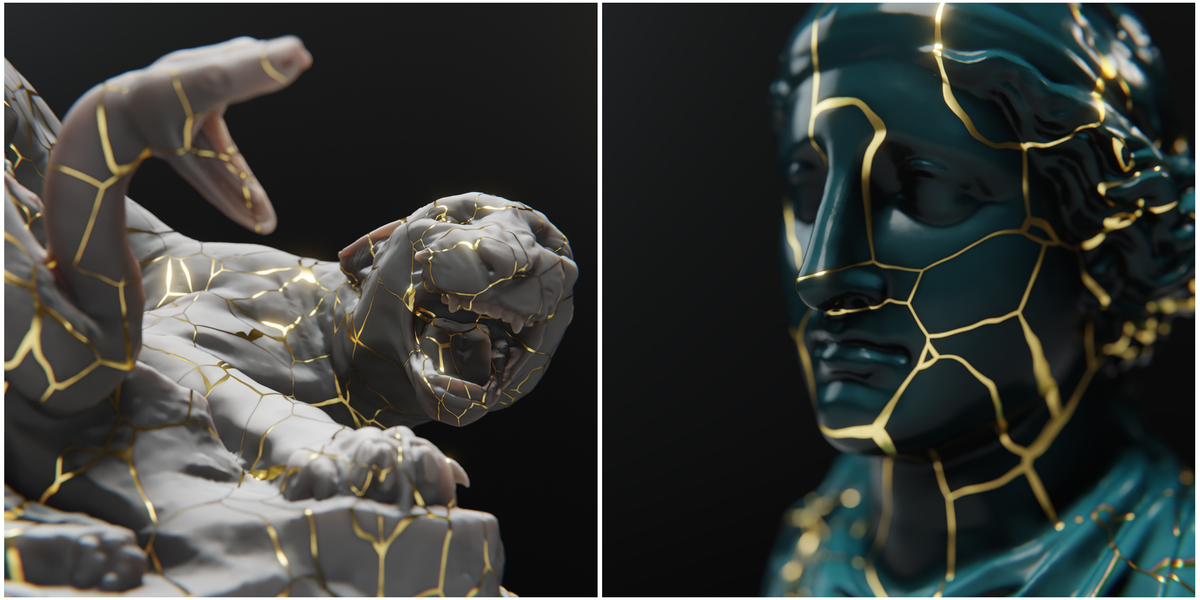
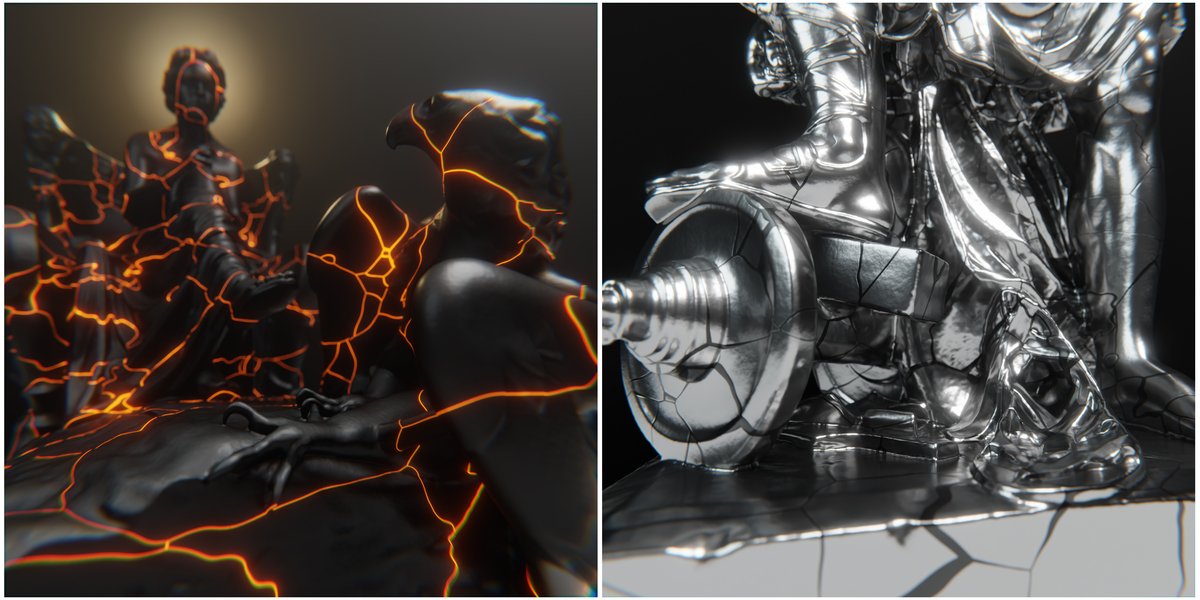
Procedural Kintsugi Material
 Harry Helps
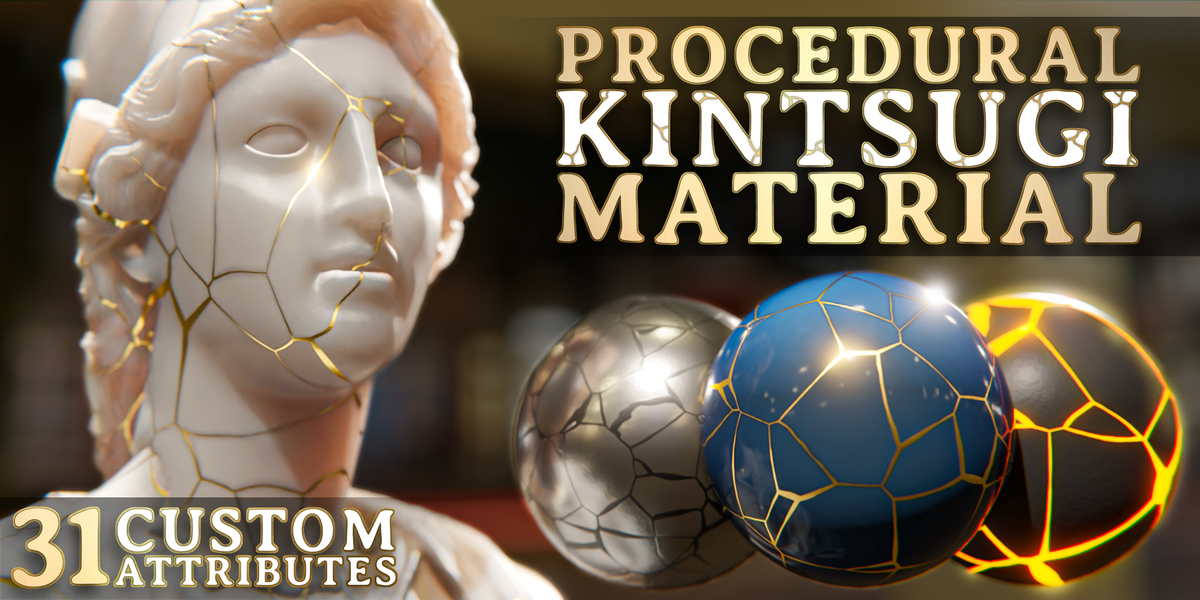
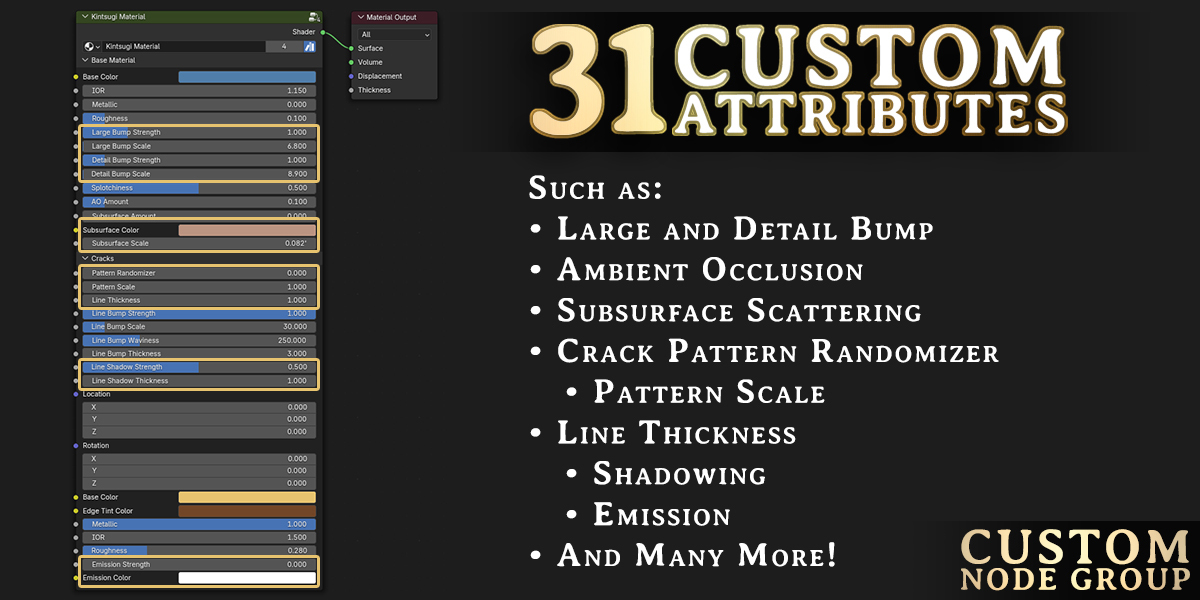

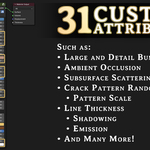
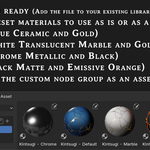

Below is a full list of all custom attributes and their descriptions:
All inputs can be controlled by images or other nodes if you'd like!
Base Material
- Base Color: Adjust the color of the base material.
- IOR: Adjust the IOR (reflectivity) of the base material.
- Metallic: Adjust how metallic the base material is. This will overwrite the IOR slider if set to 1.0
- Roughness: Adjust the roughness (reflectivity) of the base material.
- Large Bump Strength: Adjust to change the large bump of the base material. Higher numbers make a bumpier material.
- Large Bump Scale: Adjust to change the scale of the large bump on the base material.
- Detail Bump Strength: Adjust to change the detail bump of the base material. Higher numbers make a bumpier material.
- Detail Bump Scale: Adjust to change the scale of the detail bump on the base material.
- Splotchiness: Adjust the varied splotchiness of the base material. Lower values mean less splotchiness.
- AO Amount: Adjust the Ambient Occlusion on the base material. Higher values make the crevices darker.
- Subsurface Amount: Add Subsurface Scattering to the base material. This allows light to pass through and bounce around inside the model.
- Subsurface Color: Change the color of the light bouncing around inside the base material if Subsurface Scattering is enabled.
- Subsurface Scale: Adjust how deep the light is allowed to scatter inside of the base material. Requires a value greater than 0.0 in the Subsurface Amount to have any effect.
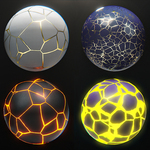
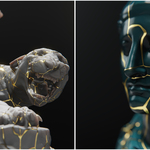
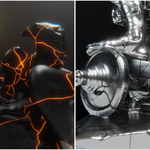
Cracks
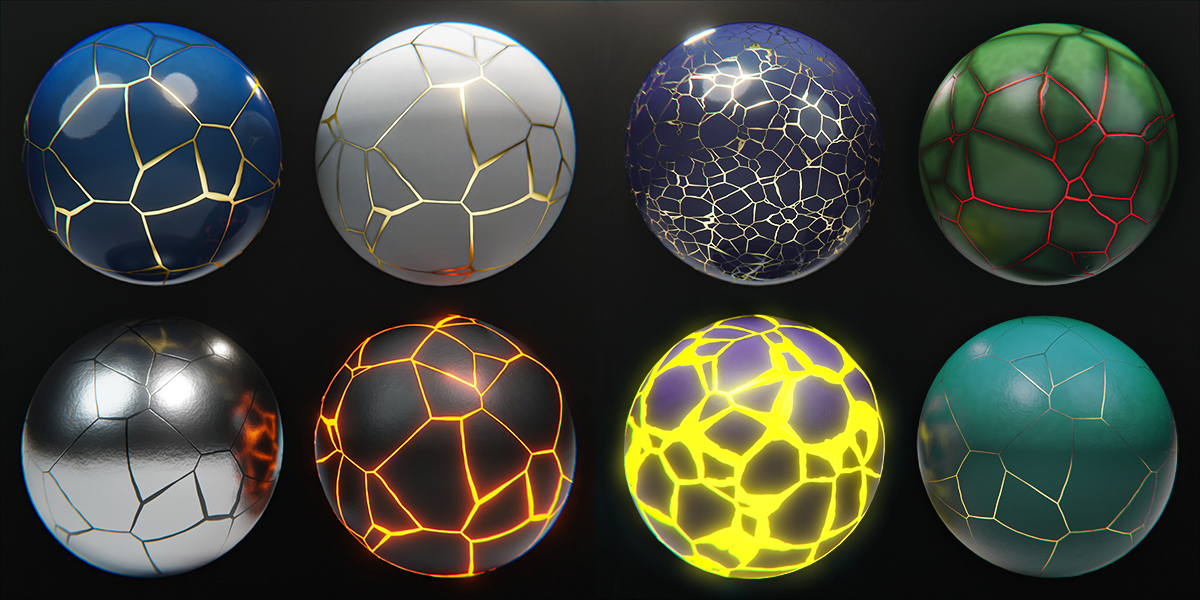
- Pattern Randomizer: Adjust value to randomize the crack pattern.
- Pattern Scale: Adjust the overall scale of the crack pattern.
- Line Thickness: Adjust the thickness of the crack pattern. Lower numbers make the cracks thicker, larger numbers make the cracks thinner.
- Line Bump Strength: Adjust the depth of the edges around the crack pattern lines. Values between 0 and 1 may create a broken line effect. It's best to use either 1 or 0.
- Line Bump Scale: Adjust to change the scale of the bump inside the line bump area. Most useful for larger pattern scale values.
- Line Bump Waviness: Adjust to change the waviness of the line bump area. Most useful for larger pattern scale values.
- Line Bump Thickness: Adjust the thickness of the edges around the crack pattern lines. Higher numbers make the bump edge thinner.
- Line Shadow Strength: Adjust the strength of the dark shading found around the cracks pattern.
- Line Shadow Thickness: Adjust the thickness of the dark shading found around the cracks pattern. Higher values make the shading thinner.
- Location: Adjust the location of the cracks. In general the X and Y sliders work best (though this is dependent on the orientation of your model).
- Rotation: Adjust the rotation of the crack pattern. The Z rotation works best (though this is dependent on the orientation of your model).
- Base Color: The base color of the cracks.
- Edge Tint Color: The edge tint color of the cracks. Primarily effects the look at sheer angles. White will give a neutral result if the cracks are a non-metallic material.
- Metallic: Adjust how metallic the cracks are. This will overwrite the IOR slider if set to 1.0
- IOR: Adjust the IOR of the cracks material. This slider is overwritten by the Metallic slider if it's set to 1.0
- Roughness: Adjust the roughness of the cracks material.
- Emission Strength: Increase the strength of the emissive light coming from the cracks material.
- Emission Color: Change the color of the emission coming from the cracks material. Requires a value greater than 0.0 in the Emission Strength to have any effect.
$5
Have questions about this product?
Login to message
| Dev Fund Contributor | |
| Published | 3 months ago |
| Software Version | 4.3, 4.2 |
| Render Engine Used | Cycles |
| License | Royalty Free |