 skingxyz



1. Introduction
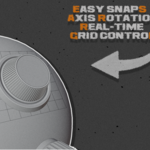
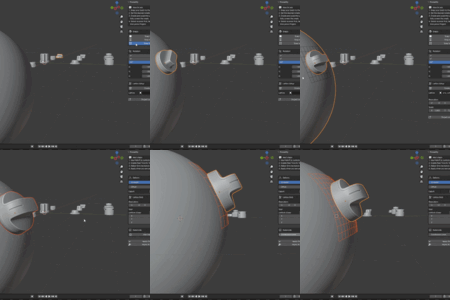
Projectify is a Blender addon that lets you project and wrap 3D objects onto any surface using Lattice deformation. Whether you need to place a bolt on a curved hull, wrap a logo around a sphere, or conform any hard-surface detail to an organic shape, Projectify handles it in a few clicks — non-destructively
1.1 Key features
- Snap to Face, Edge, and Vertex — interactive modal snapping with surface alignment.
- Rotation controls - rotate your object in 1°,5°, or 45° increments on any local ax
- Lattice-based deformation — fully non-destructive workflow.
- Falloff system — control deformation intensity from base to tip with Bias slider or custom curve points.
- Real-time Lattice Grid editing — adjust resolution and size live in the viewport.
- Uniform Scale — proportional scaling across all axes.
- Subdivision support — add subdivision modifier directly from the panel.
- Apply Only Lattice or Apply All Modifiers.
- Compatible with Blender 3.x, 4.x and 5.x.
2. Installation
- Download — Obtain Projectify.py from a trusted source or official marketplace.
- Open Preferences — In Blender, go to Edit → Preferences → Add-on
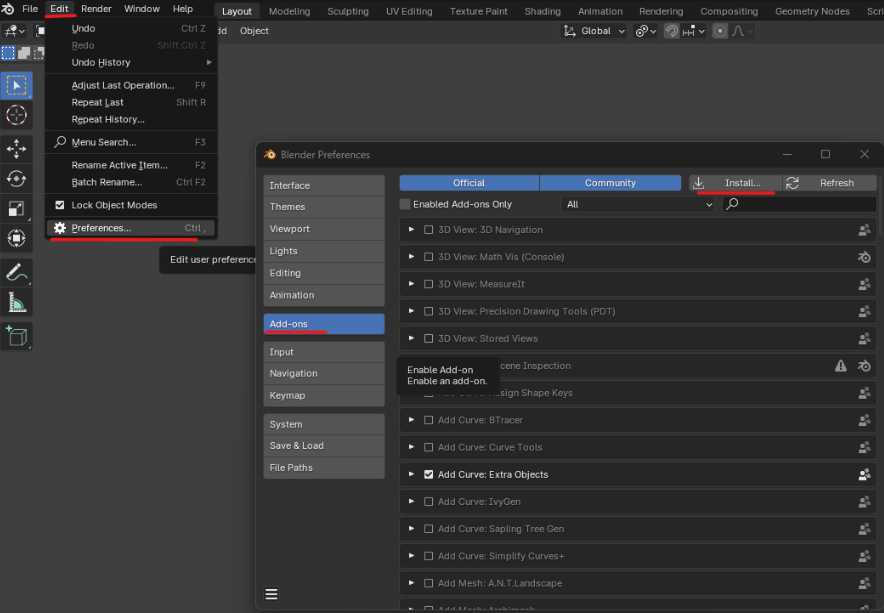
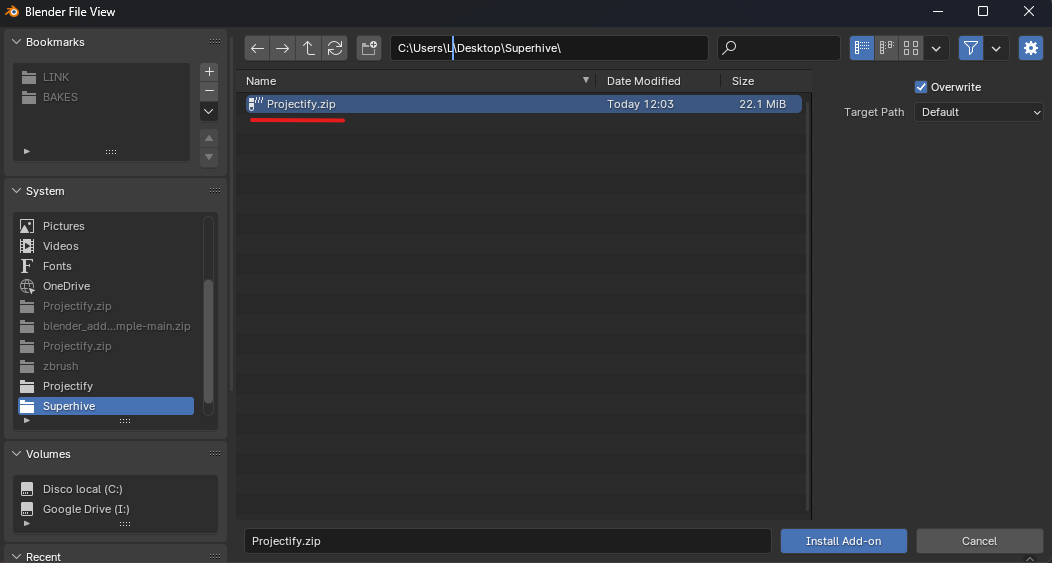
- Install — Click Install, navigate to Projectify.zip and select it.
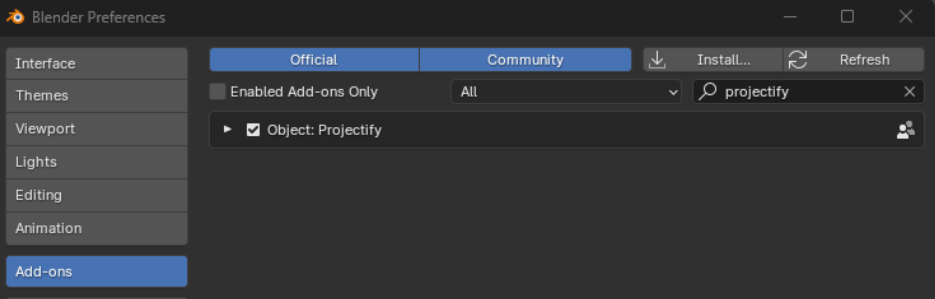
- Enable — Check the checkbox next to Projectify to activate it.
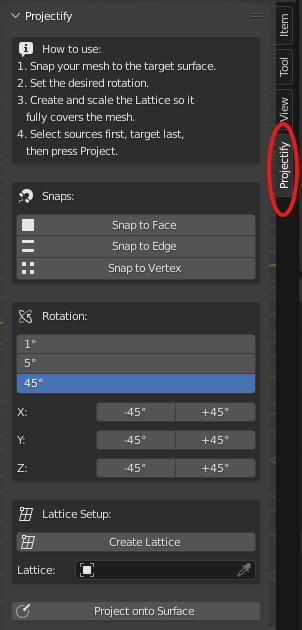
- Access — Open the N-Panel (press N in the 3D Viewport) and select the Projectify tab.
3. Interface Overview
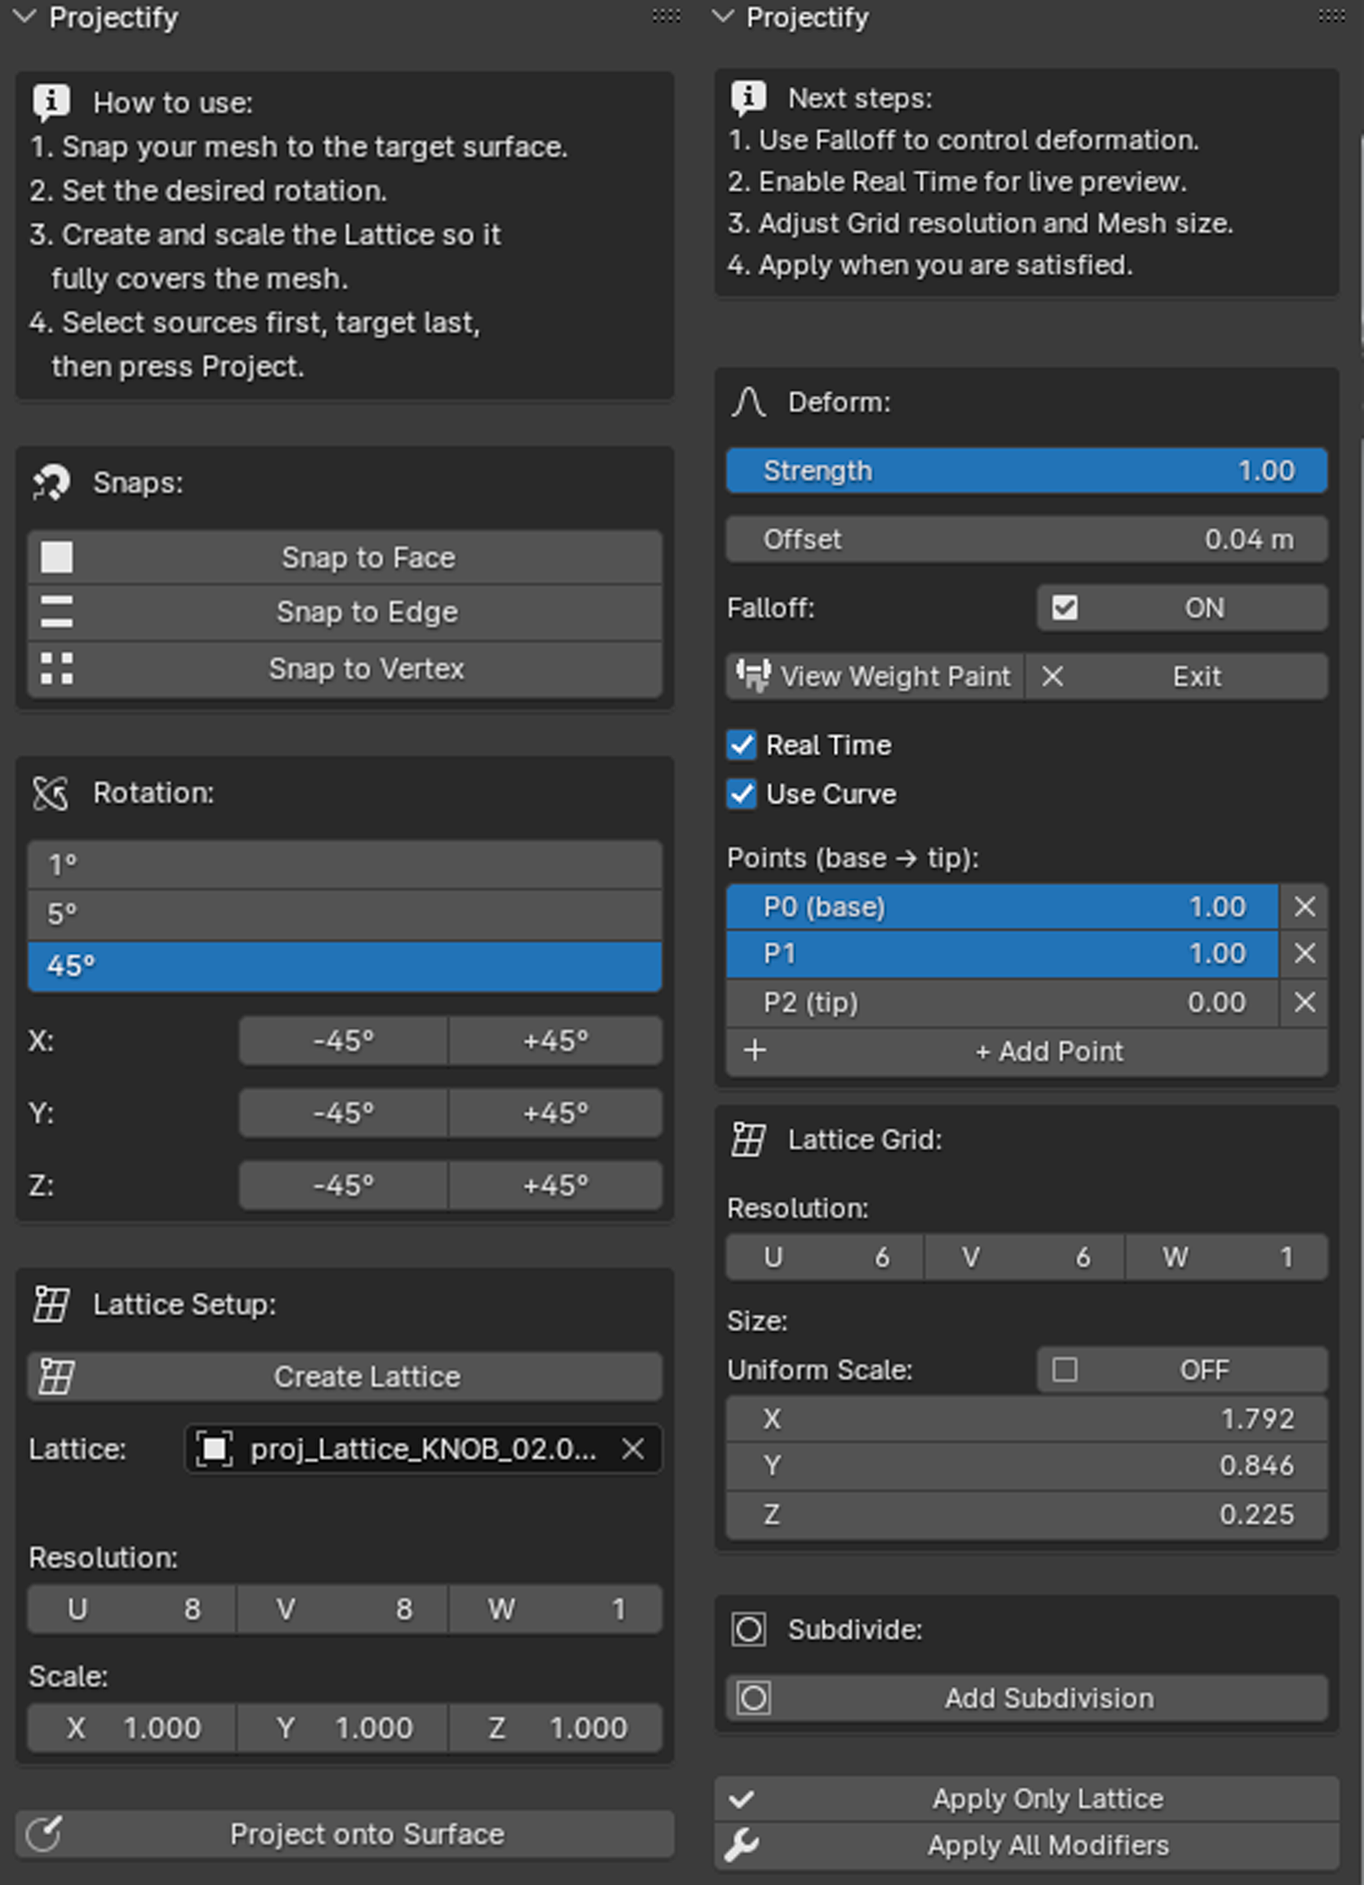
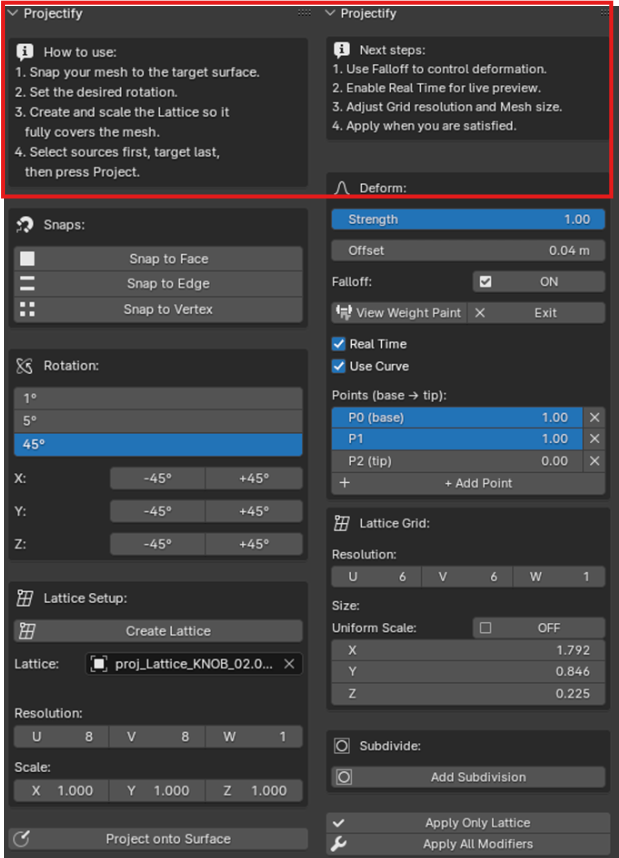
The Projectify panel lives in the N-Panel of the 3D Viewport under the Projectify tab. It adapts contextually — before projecting it shows the setup tools, and after projecting it shows the deformation controls.
3.1 Instructions Box
At the top of the panel there is always a small instruction box. Before projecting it shows the recommended workflow steps. After projecting it shows the next steps for deformation and applying
3.2 Snaps
Three interactive snap operators let you position the source object on any surface before projecting.
- Snap to Face — snaps to the nearest face, aligning the object normal with the surface normal.
- Snap to Edge — ray-casts to the surface and snaps to the nearest edge of the hit face.
- Snap to Vertex — snaps to the nearest vertex, using the vertex normal for orientation
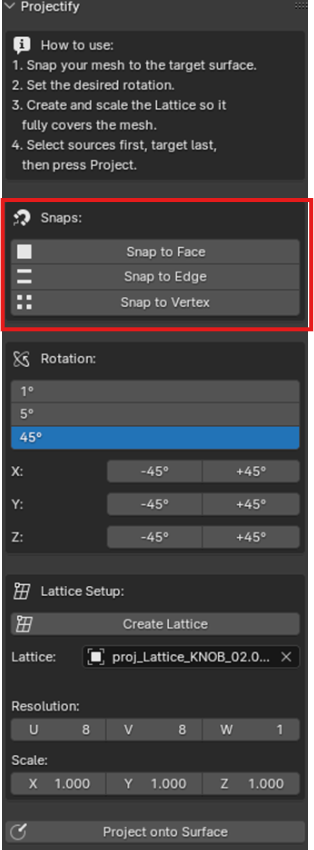
Move the mouse over the target surface to preview. Left-click to confirm. Right-click or ESC to cancel and restore the original position and rotation
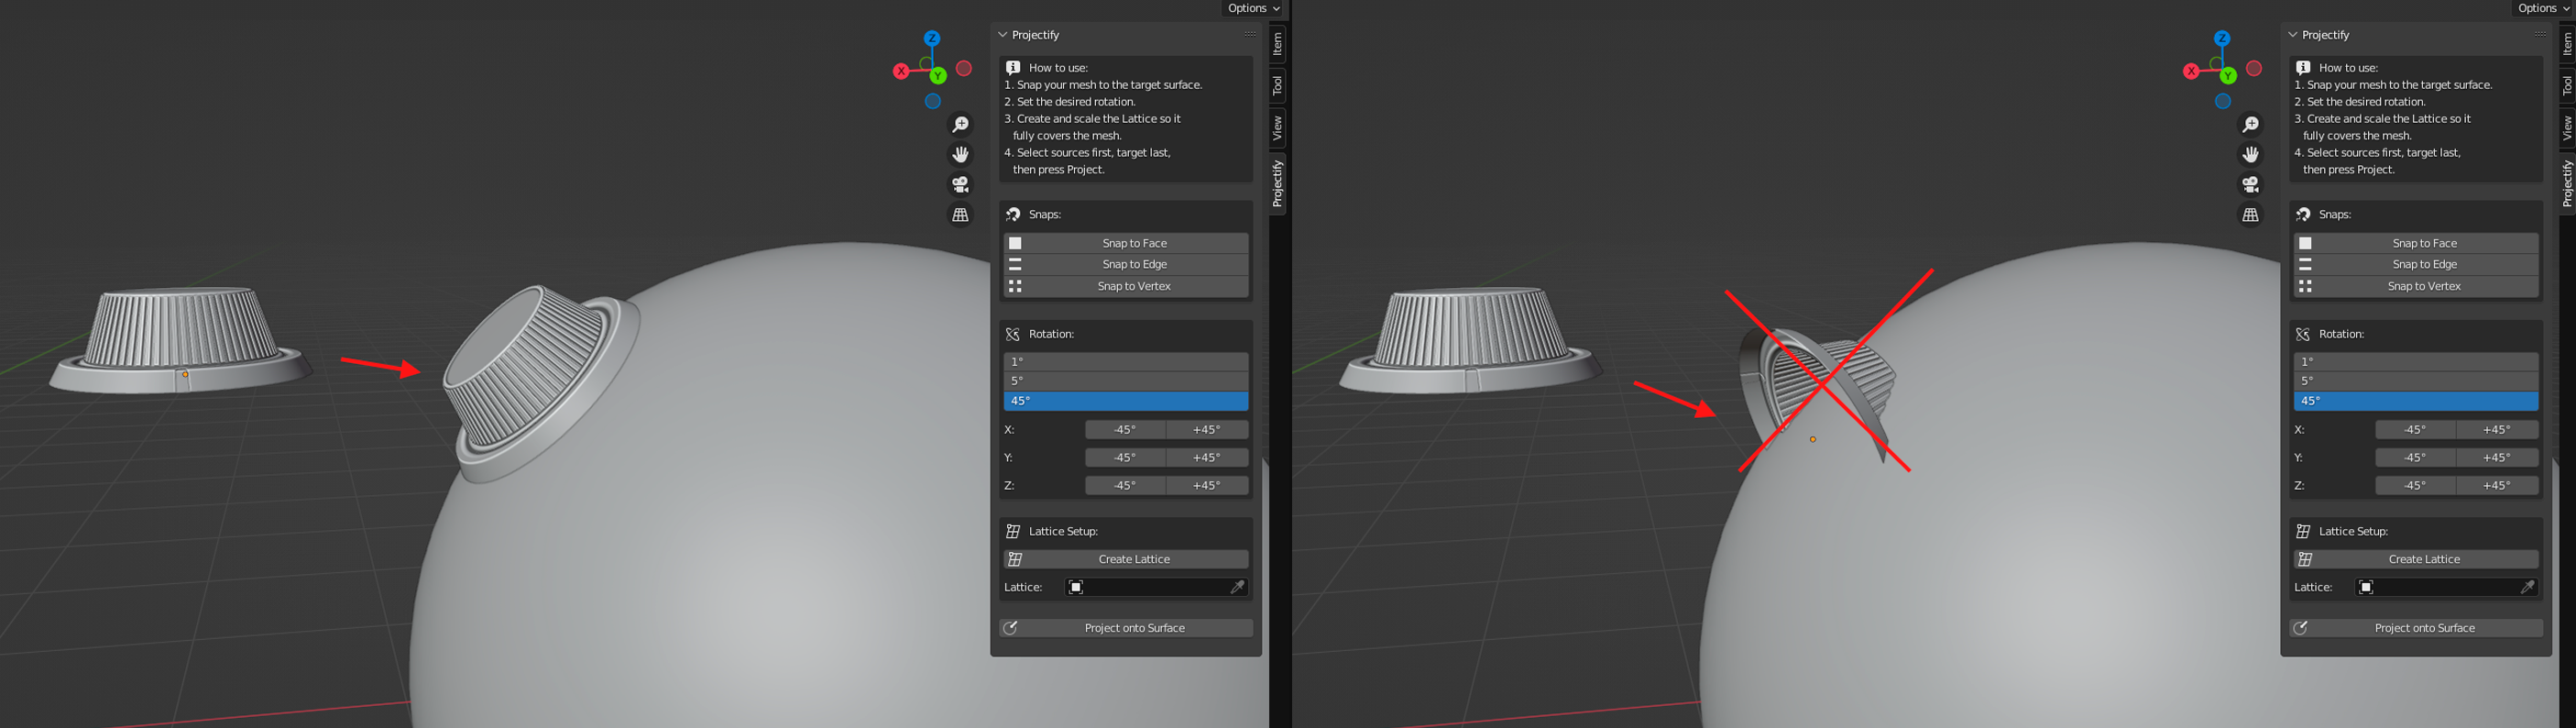
For best results, ensure your object's origin is at its base and apply rotation (Ctrl+A → Apply Rotation) before snapping. Objects with non-applied rotations may not align correctly.
Example of the results of applied versus non-applied rotation. As you can see, the second screenshot aligns incorrectly due to a non-applied rotation
3.3 Rotation
The Rotation section lets you rotate the source object on its local axes before projecting. Choose the step size and click the buttons to rotate.
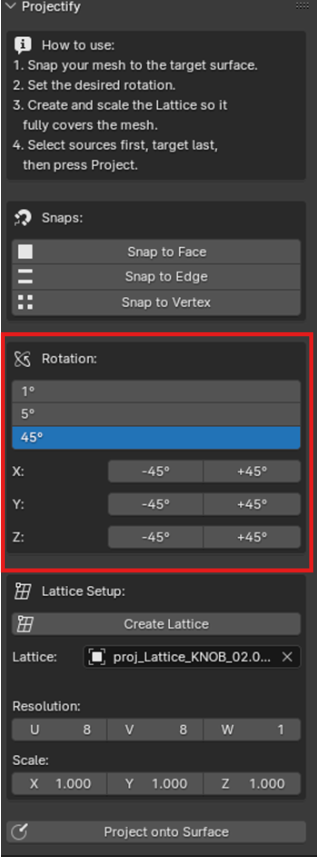
- Step selector — choose between 1°, 5°, or 45° increments
- X / Y / Z rows — each row has a -step and +step button for that axis.
Rotation is applied on the local axis of the object, so it works correctly regardless of the surface orientation.
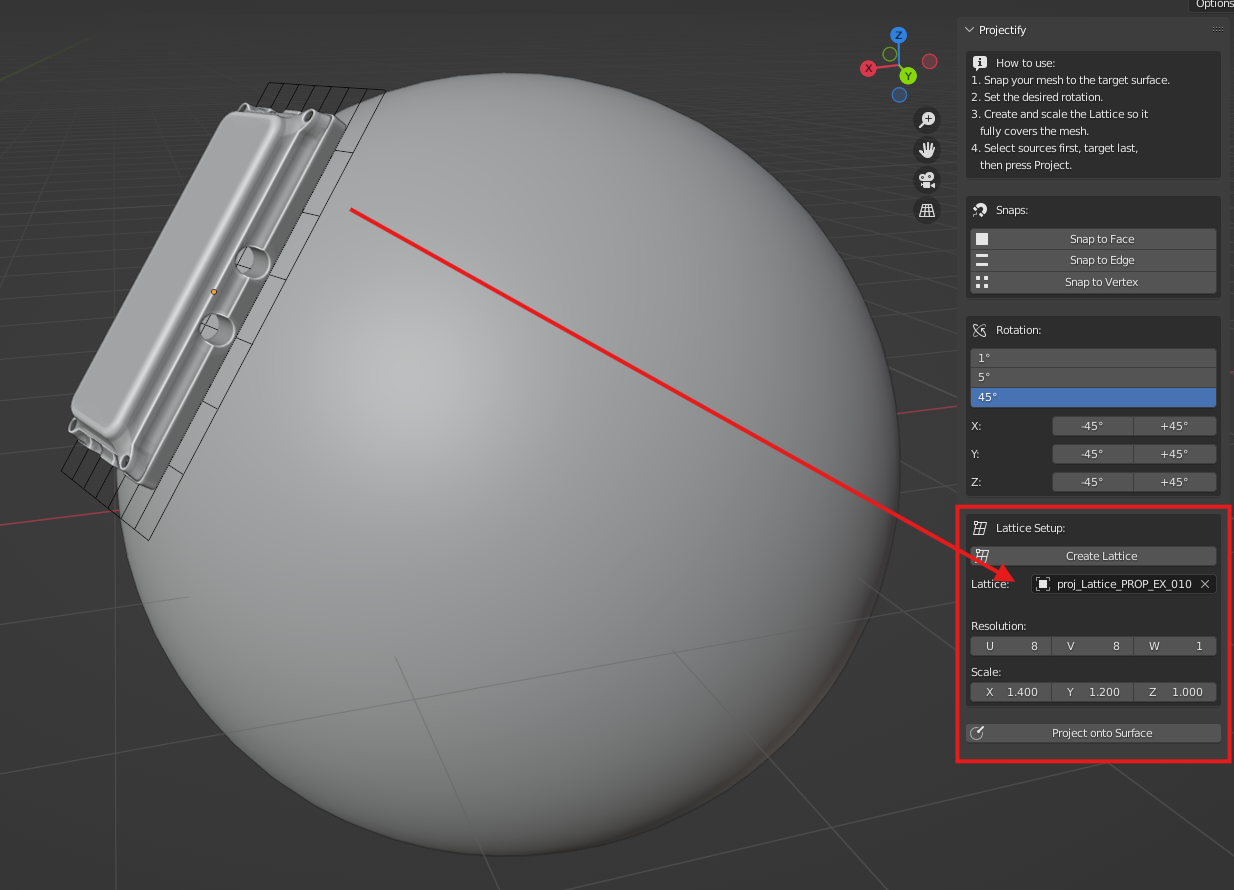
3.4 Lattice Setup
This section is visible before projecting. It lets you create and configure the Lattice that will drive the deformation.
- Create Lattice — creates a wireframe Lattice at the origin of the source object. It is automatically placed in the Projectify Lattices collection.
- Lattice picker — the created Lattice is auto-assigned here. You can manually select a different Lattice if needed.
- Resolution (U/V/W) — number of control points along each axis. Default: U=6, V=6, W=1. Updates live on the Lattice.
- Scale (X/Y/Z) — scales the Lattice along each axis. Updates live in the viewport
4. Project onto Surface
Once the Lattice is set up, select the source object(s) and make the target surface the active object, then press Project onto Surface
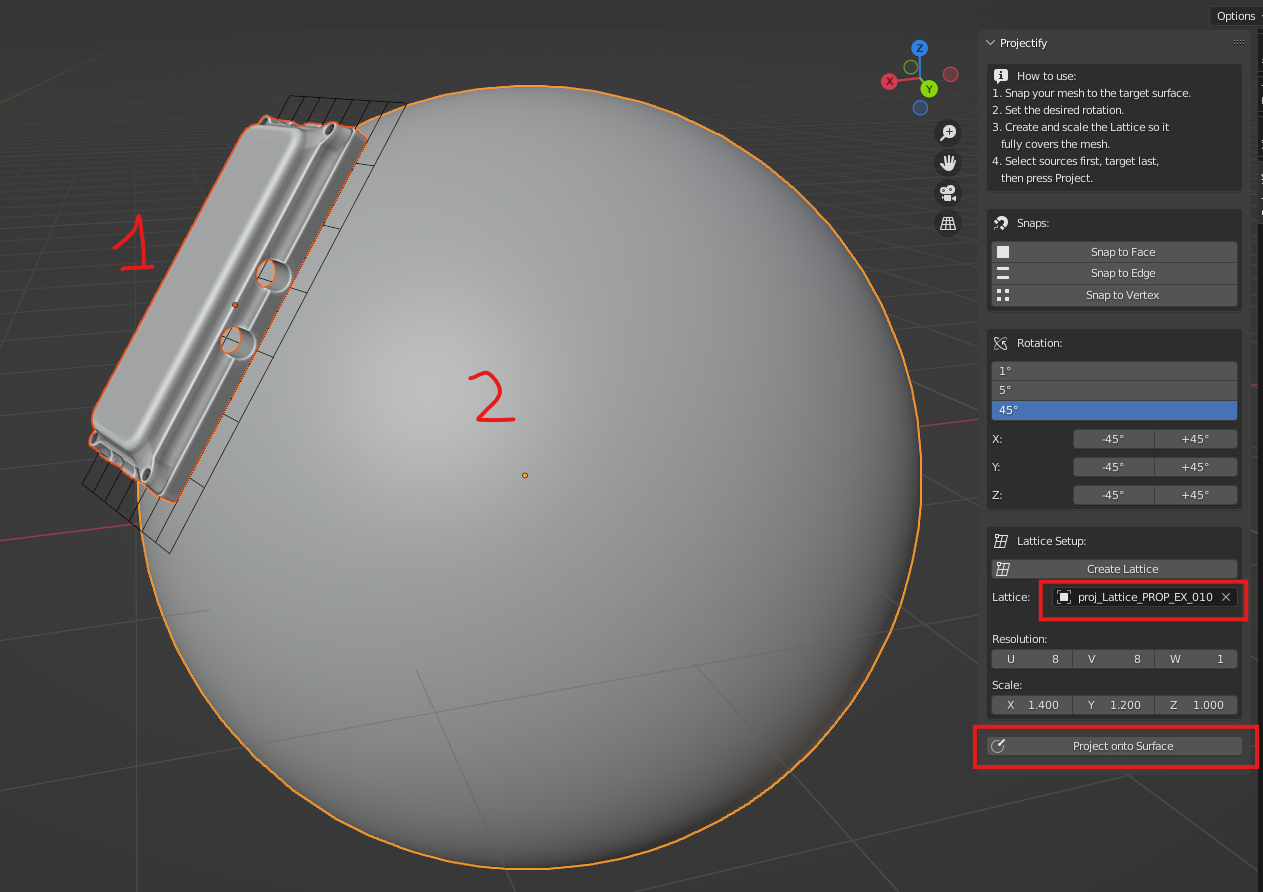
First, you select the mesh to project, and then the mesh onto which you will project mesh 1. Make sure the lattice in the picker is the correct one.
Projectify only allows projecting one mesh at a time. .
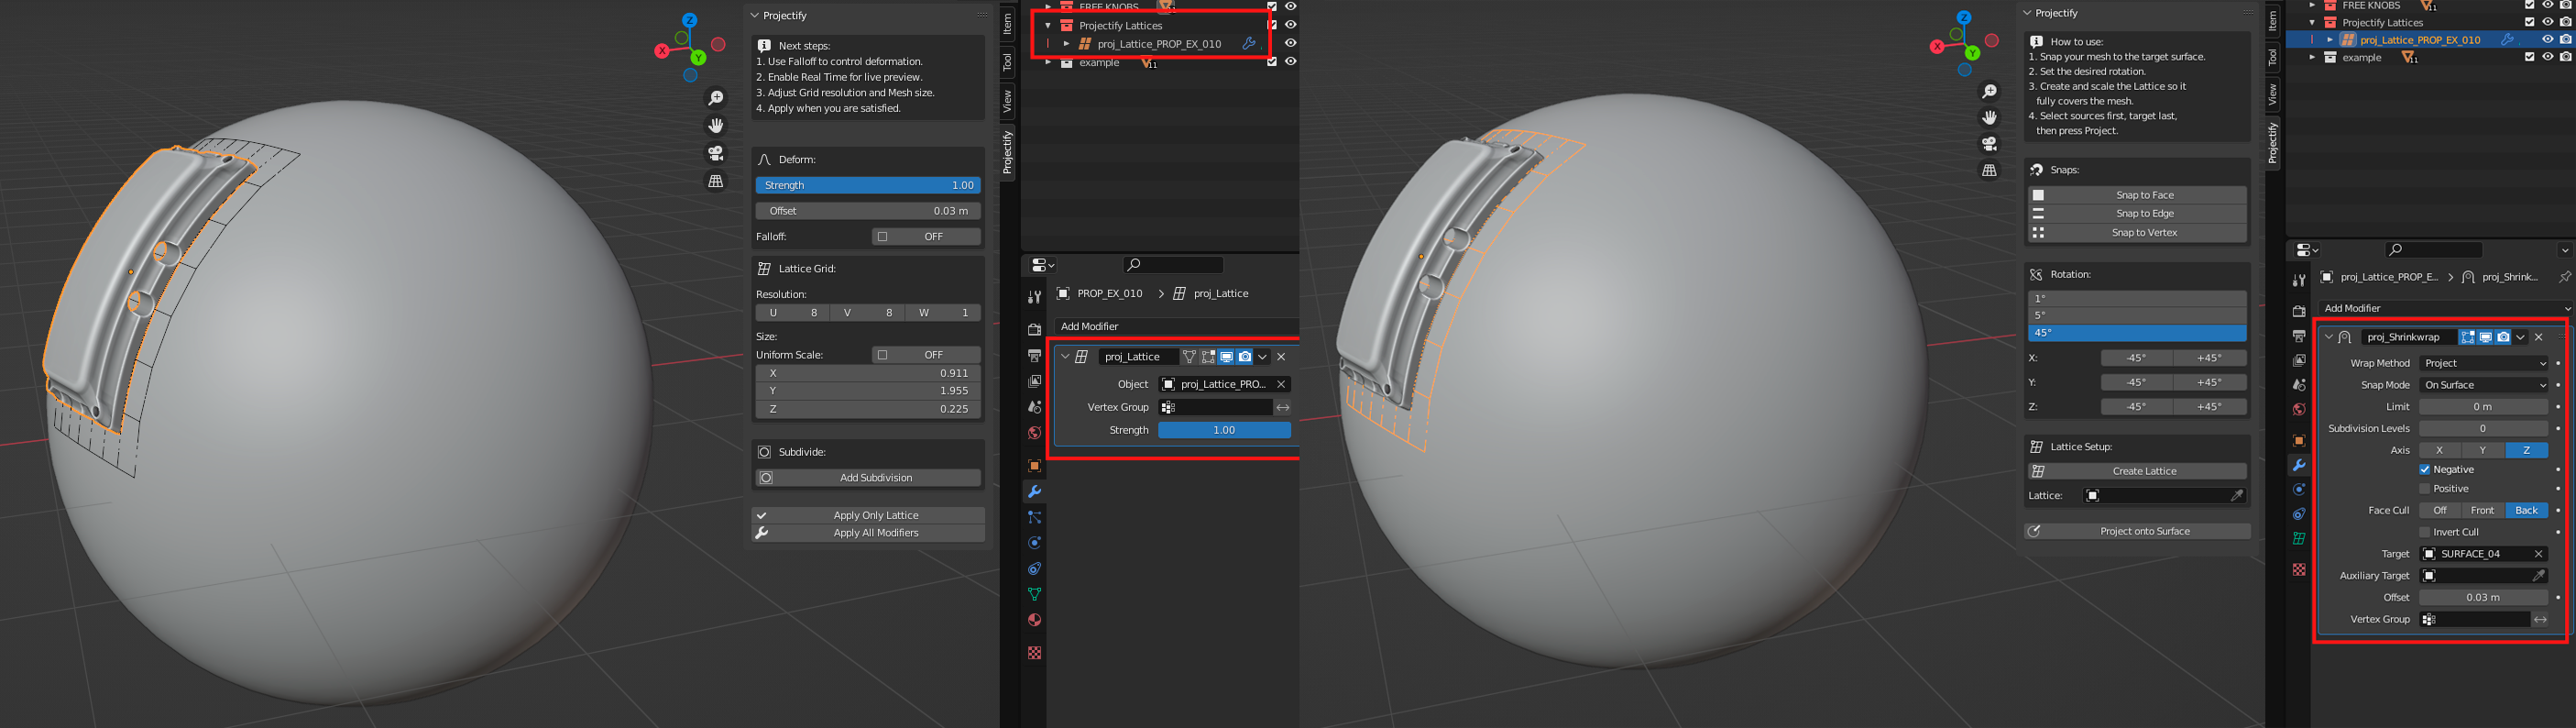
When you click on Project onto Surface, this will:
- Link the Lattice modifier to the source mesh.
- Add a Shrinkwrap modifier to the Lattice pointing at the target surface.
- Parent the source mesh to the Lattice (keep transform).
- Hide the Lattice Setup section and reveal the Deform controls
5. Deform Section
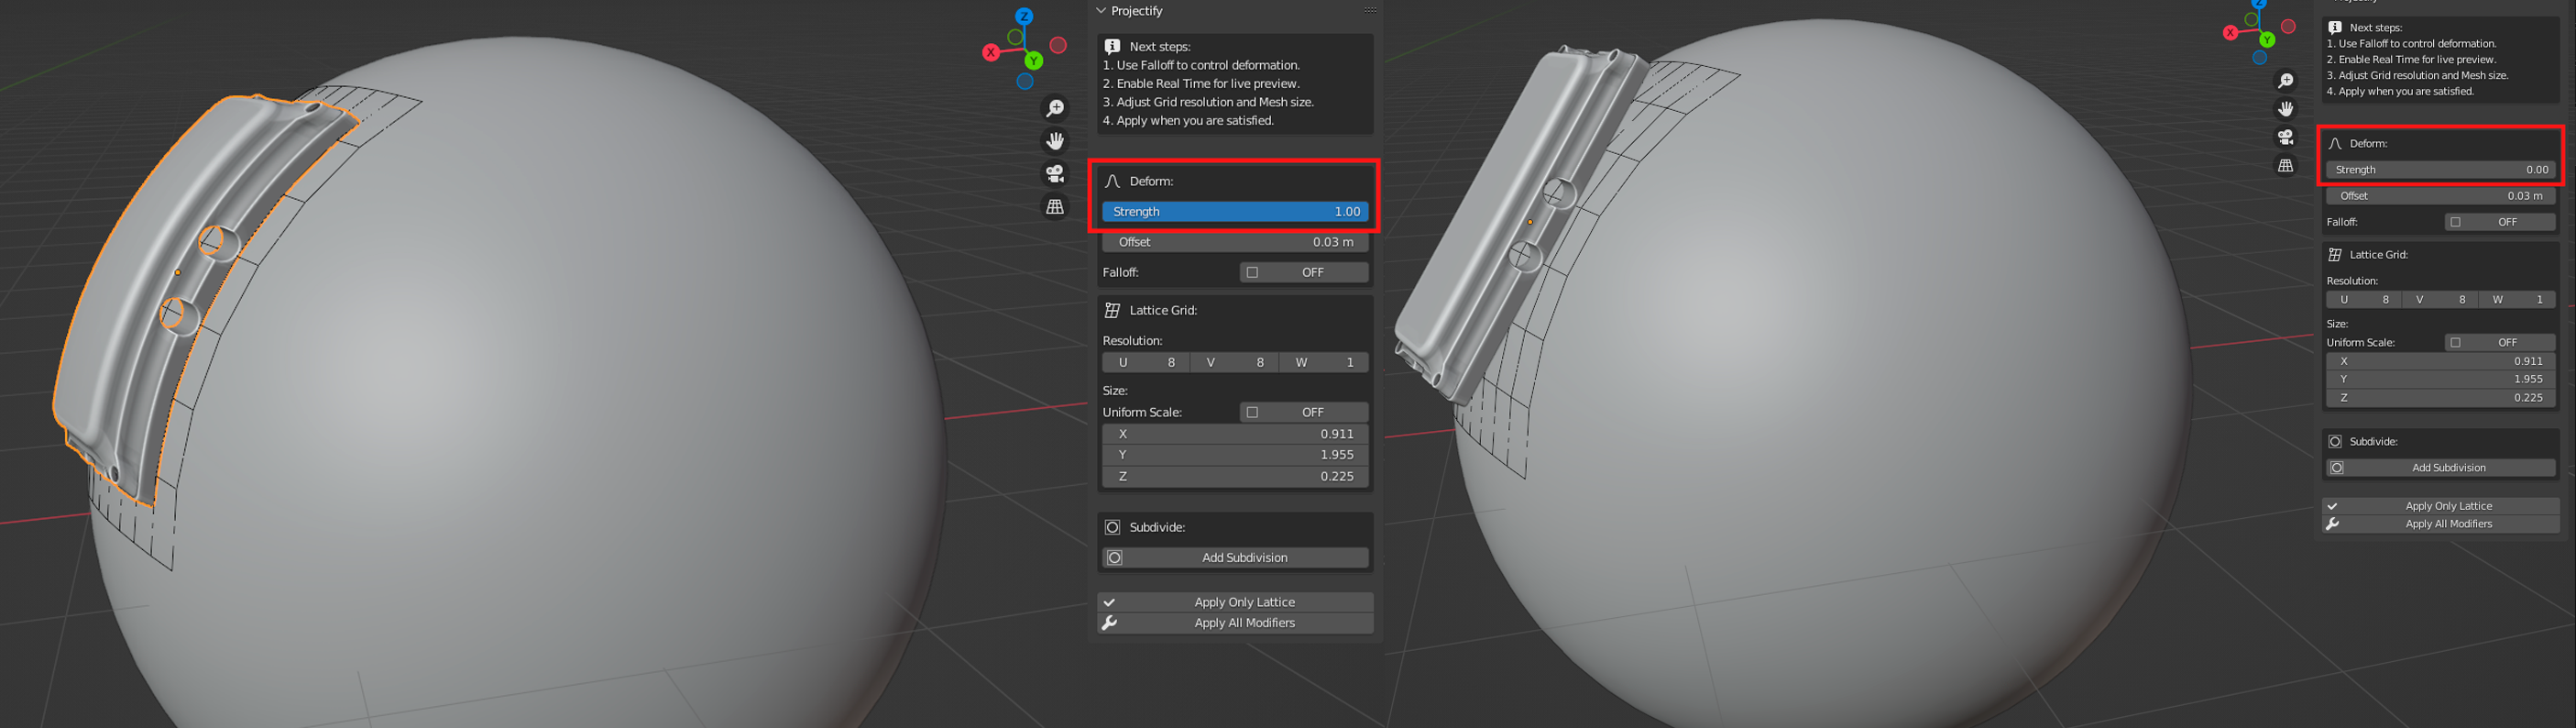
After projecting, the Deform section provides controls to fine-tune the deformation.
5.1 Strength
Controls how strongly the Lattice modifier affects the source mesh. At 1.0 the full deformation is applied. At 0.0 the mesh is unaffected
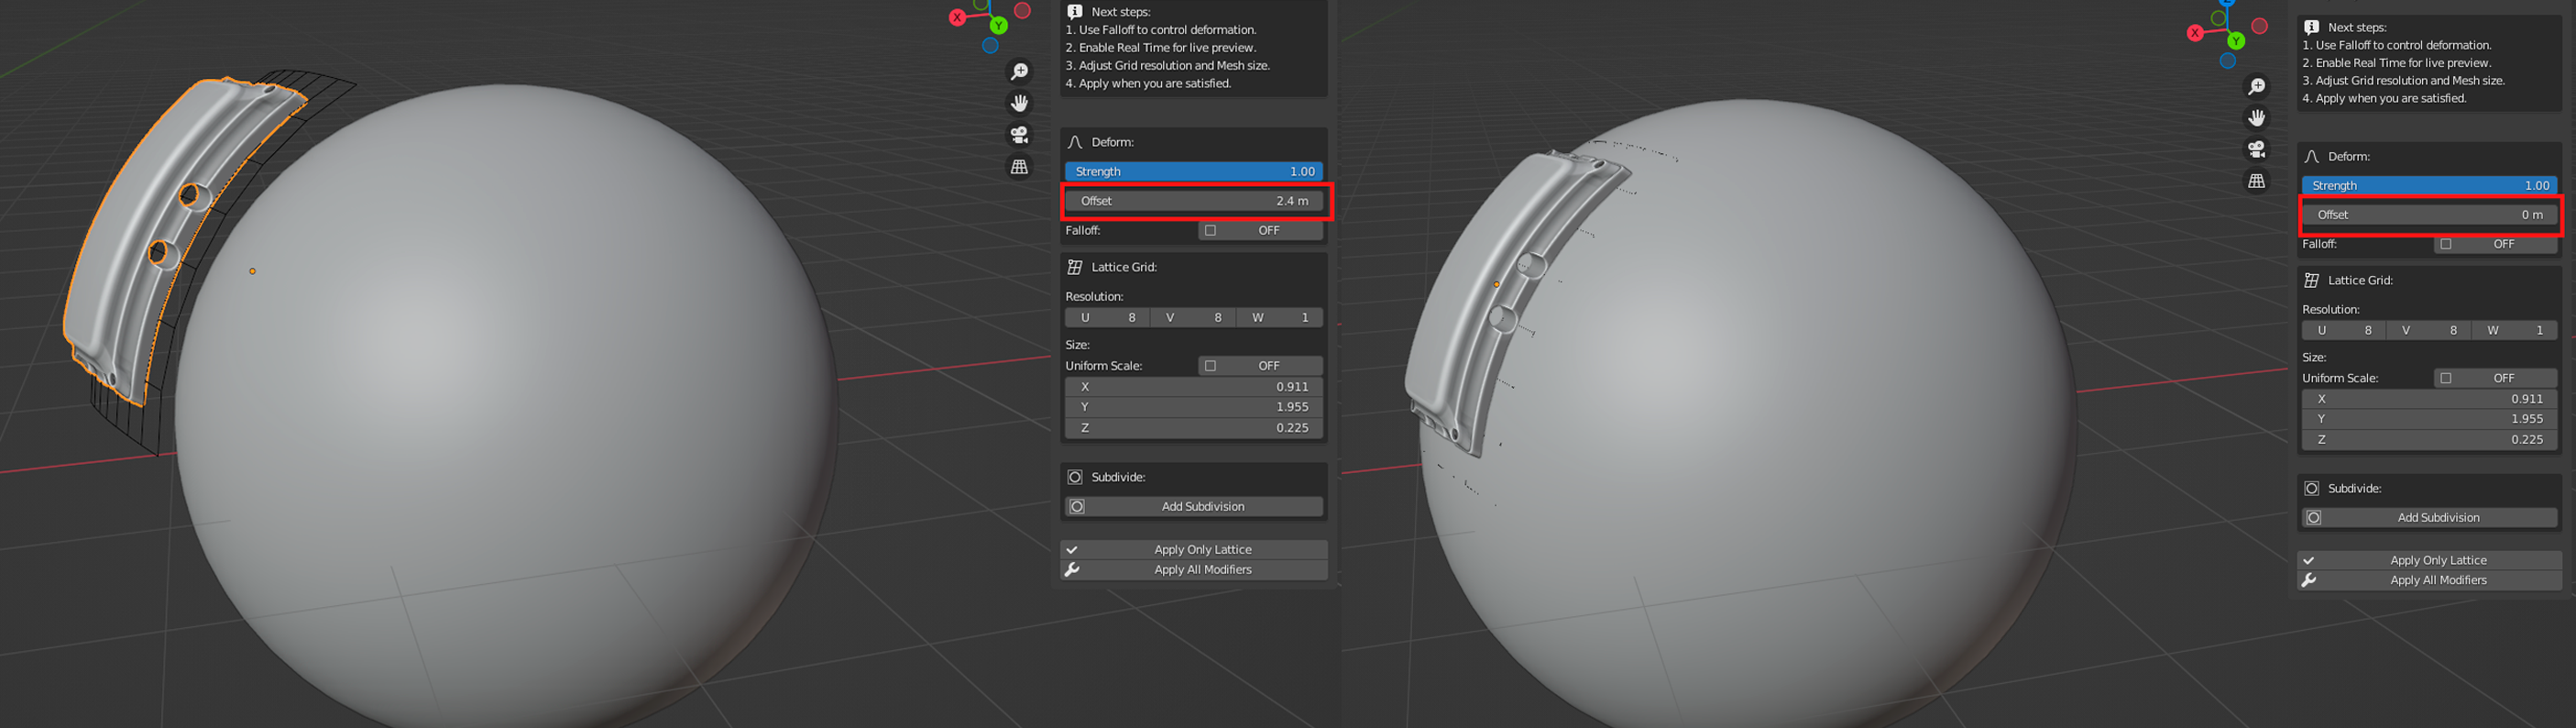
5.2 Offset
Controls the distance between the Lattice and the target surface via the Shrinkwrap offset. Increase to lift the projected object off the surface
5.3 Falloff
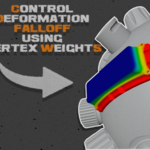
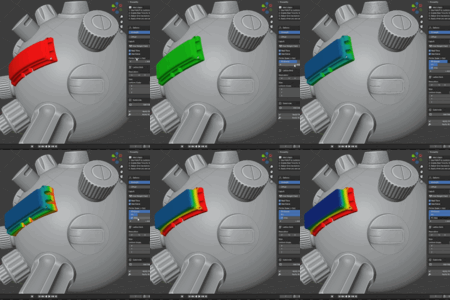
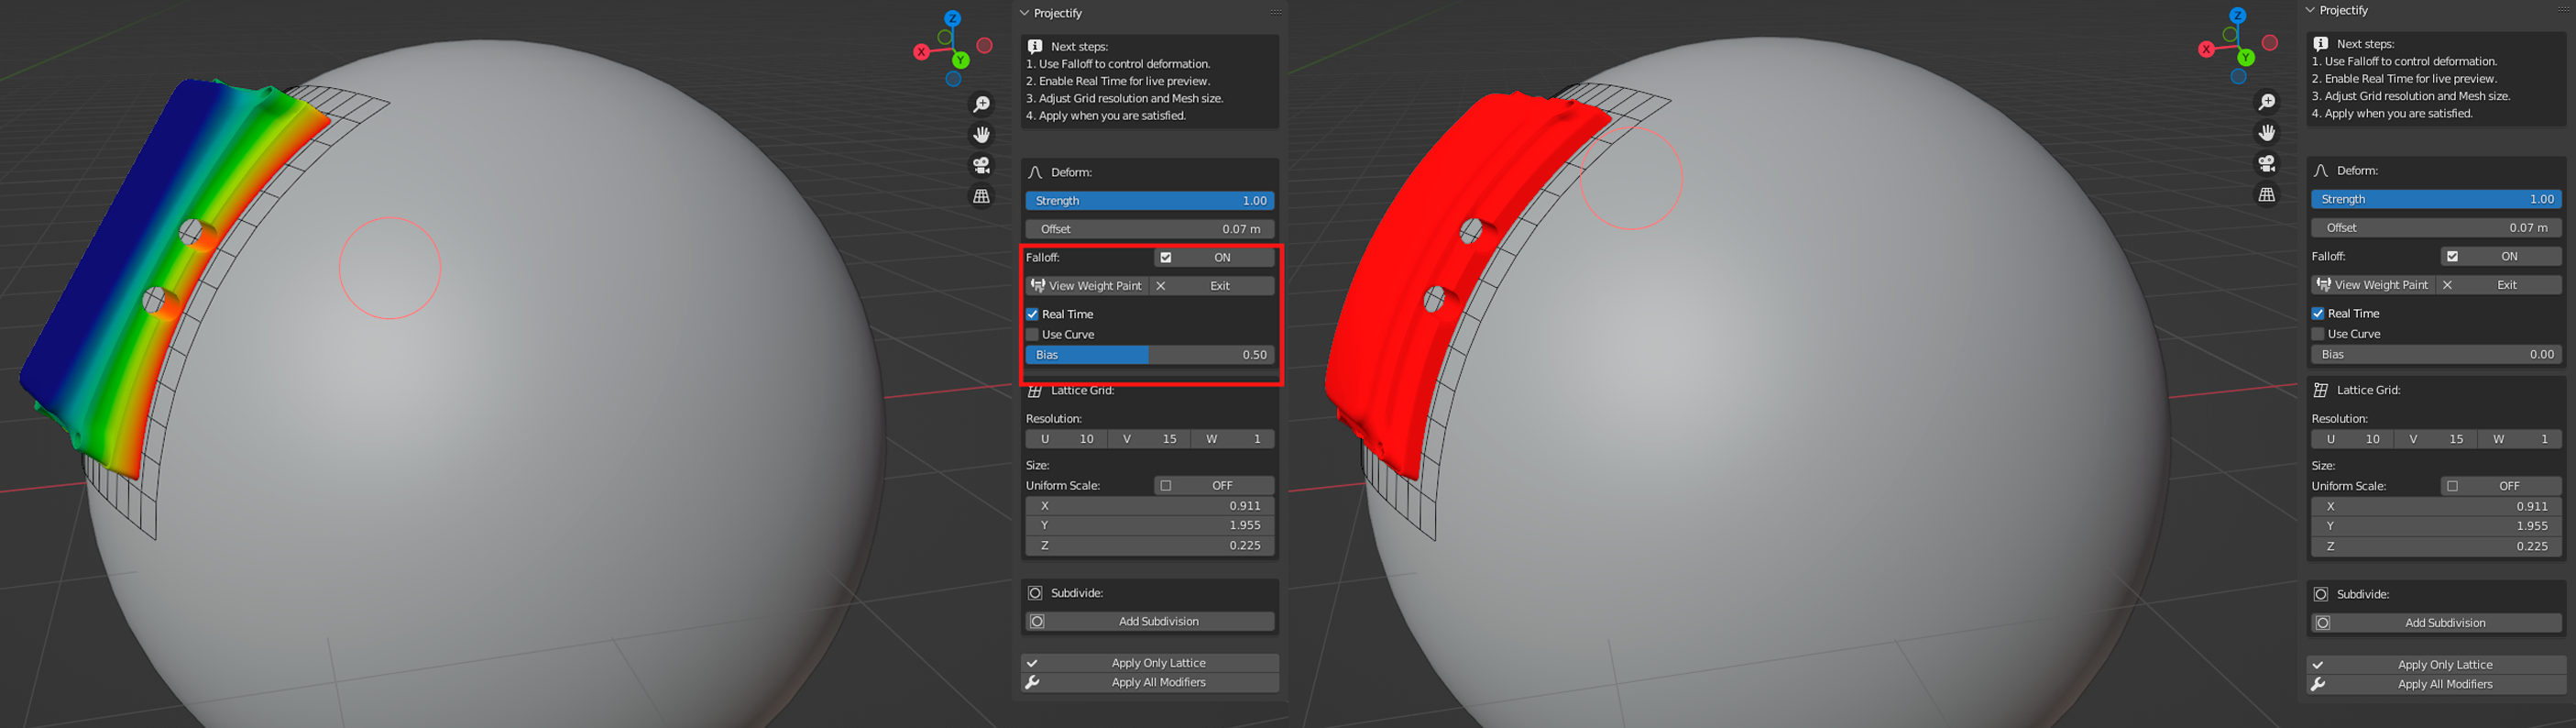
The Falloff system controls how deformation is distributed across the mesh using a vertex weight group (proj_falloff). The base of the object deforms fully, while the tip can be kept rigid.
- ON / OFF toggle — enables or disables the falloff. Disabling while in Weight Paint mode automatically returns to Object Mode.
- View Weight Paint / Exit — enters Weight Paint mode to visualize the gradient, or exits back to Object Mode.
- Real Time — enabled by default. Updates the falloff live as you adjust Bias or curve points.
- Bias — shifts the midpoint of the gradient. 0.0 = full deformation everywhere, 0.5 = centered gradient, 1.0 = no deformation
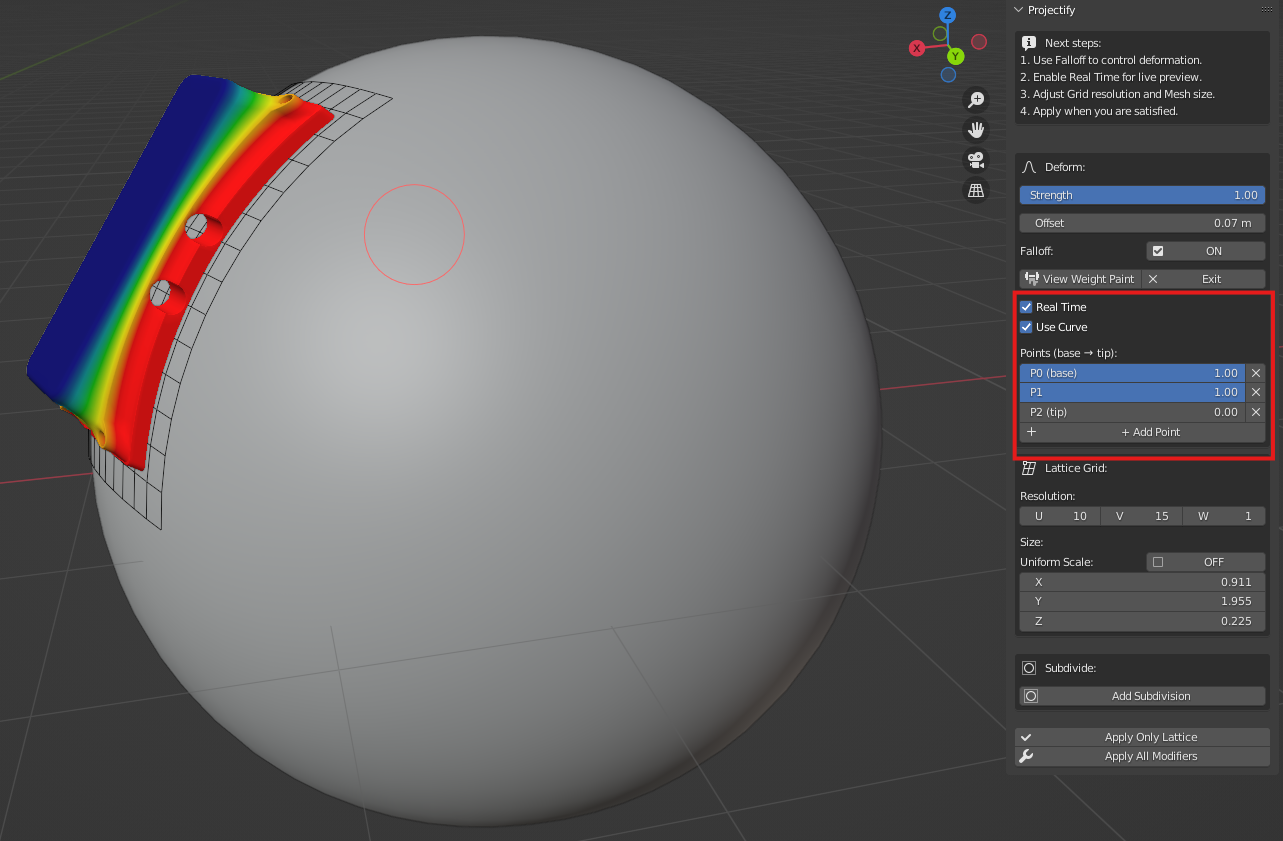
- Use Curve — switches between the Bias slider and a custom multi-point curve.
5.4 Custom Curve Points
When Use Curve is enabled, the falloff is defined by a series of control points from P0 (base) to Pn (tip).
- + Add Point — inserts a new control point.
- X button — removes a point (minimum 2 required)
6. Lattice Grid
The Lattice Grid section gives direct control over the projected Lattice.
6.1 Resolution
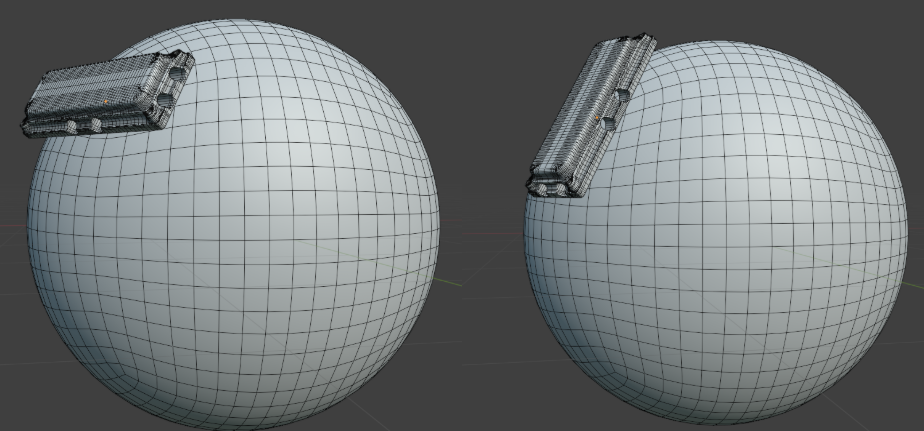
U, V, W sliders control the number of Lattice control points per axis. Higher resolution gives smoother deformation
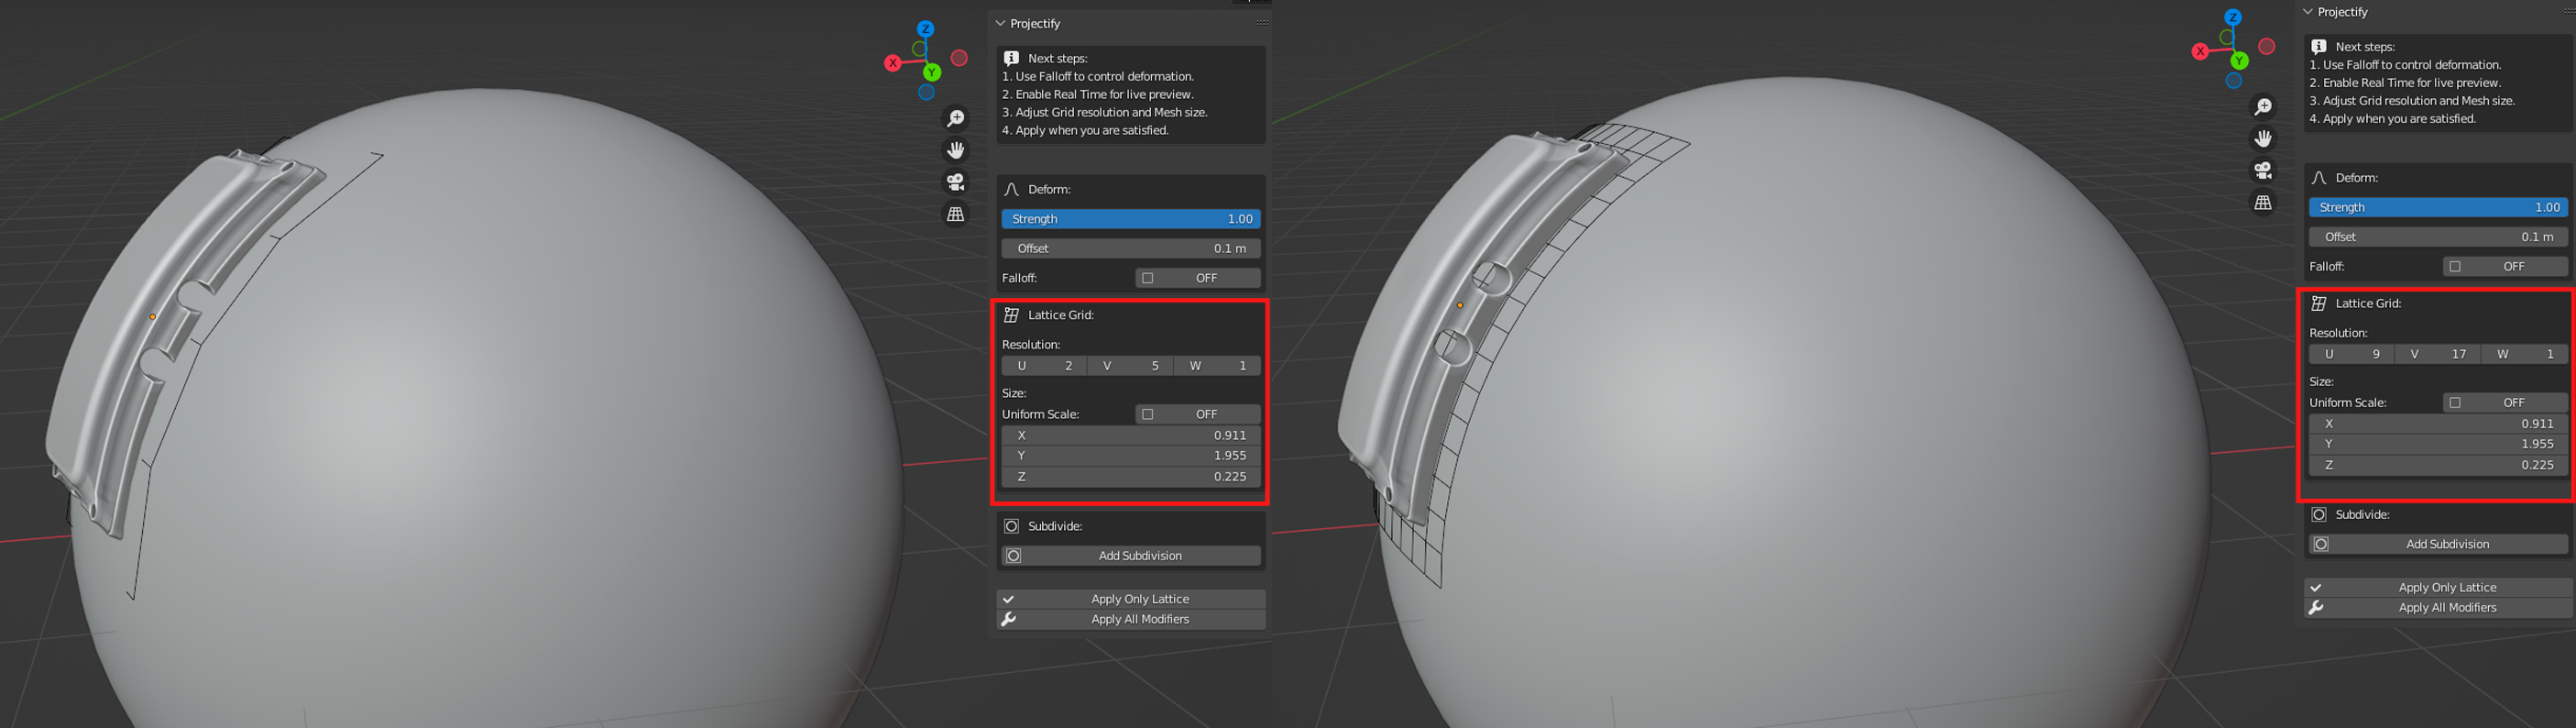
In the first screenshot, you can see the mesh clipping due to the low lattice resolution. In contrast, the second shows a smoother result thanks to the increased resolution
6.2 Size
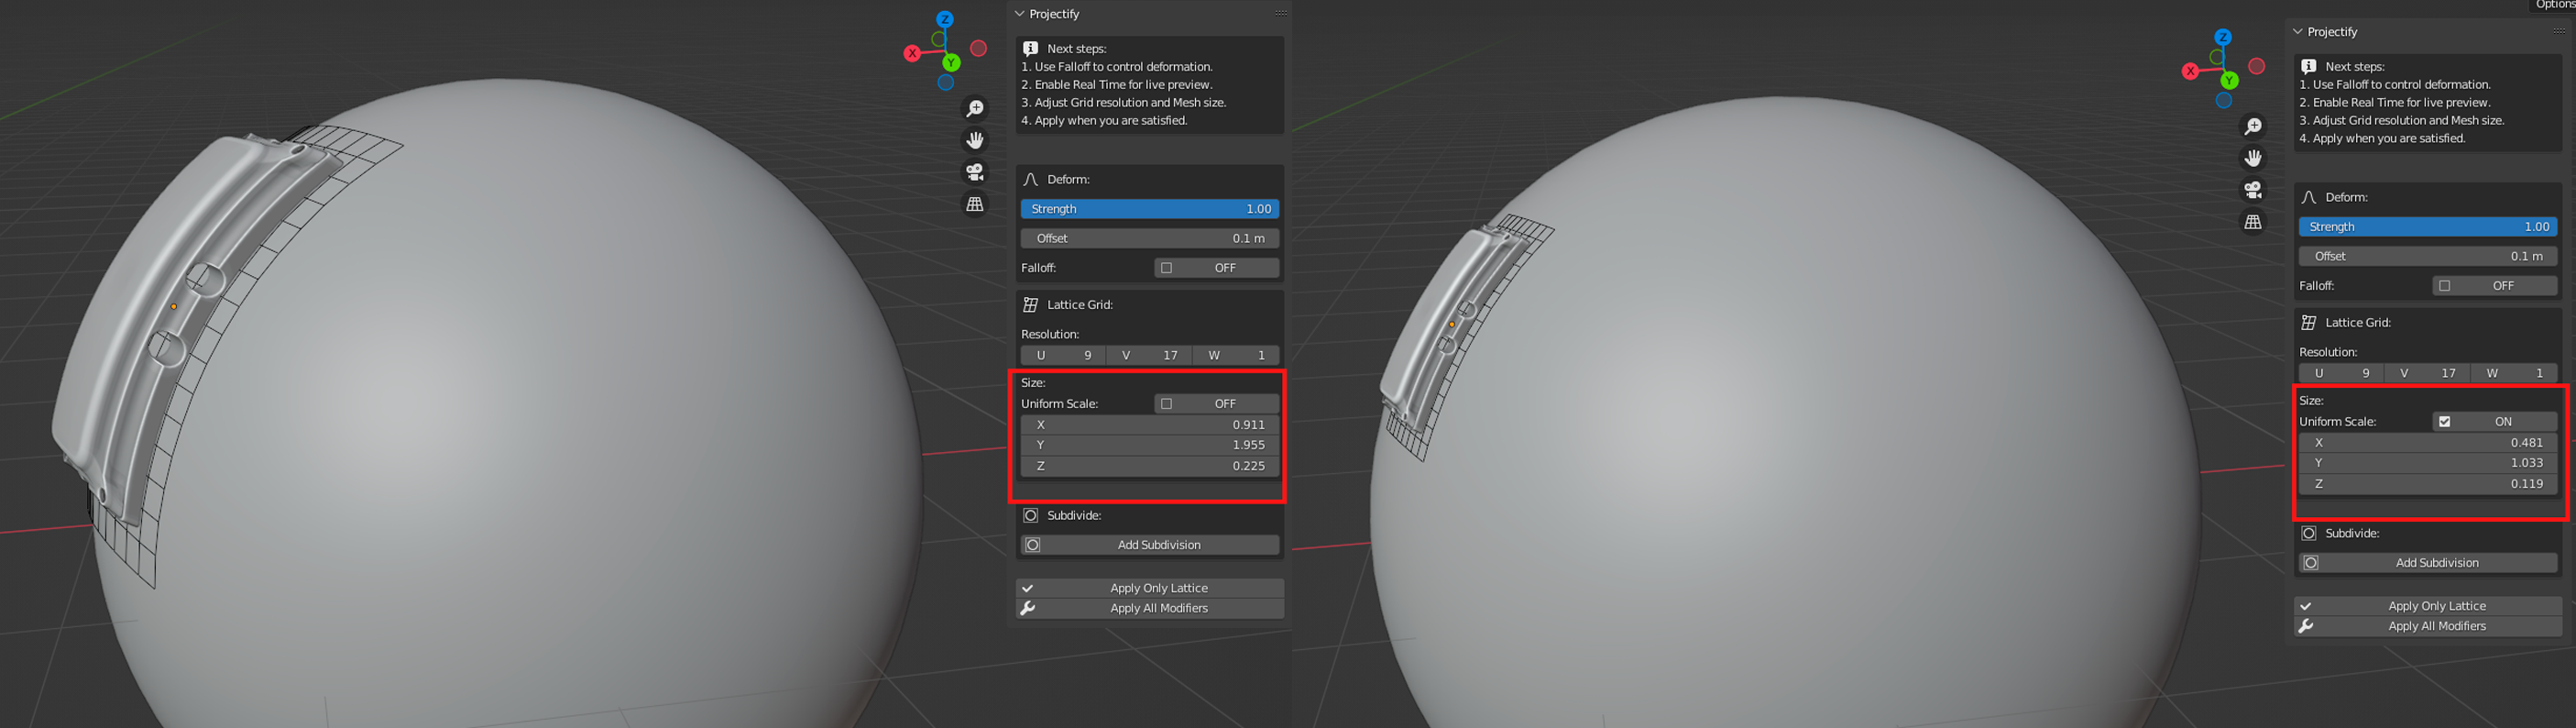
X, Y, Z sliders scale the Lattice directly in the scene. Since the source mesh is parented to the Lattice, scaling the Lattice also moves and scales the mesh.
- Uniform Scale — when enabled, changing any axis scales all three proportionally
7. Subdivide
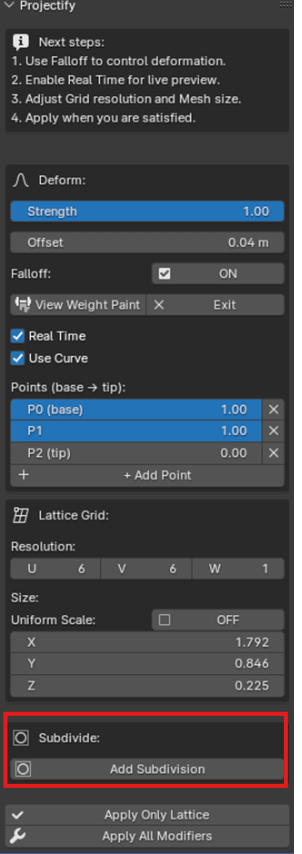
The Subdivide section appears after projecting, above the Apply buttons. It adds a Subdivision Surface modifier to the source mesh for extra geometry smoothness.
- Add Subdivision — adds the modifier at the top of the modifier stack.
- Subdivision Level — adjusts the subdivision level
8. Applying the Projection
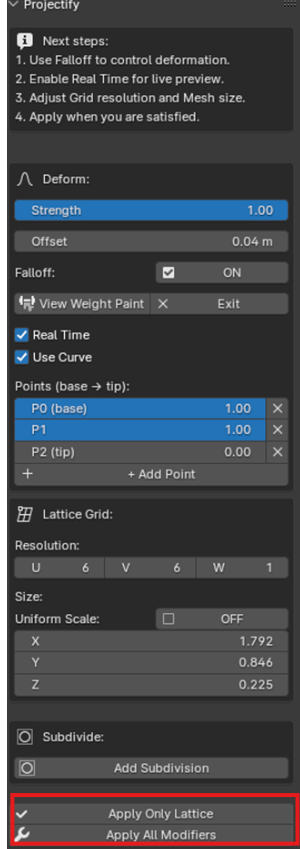
When satisfied with the result, apply the deformation to bake the mesh into its final shape. Both buttons automatically exit Weight Paint mode if active.
- Apply Only Lattice — applies the Lattice modifier and clears the parent relationship (keep transform).
- Apply All Modifiers — applies all modifiers on the source mesh and clears the parent relationship
9. Recommended Workflow
- Position — Use Snap to Face, Edge, or Vertex to place the source object on the target surface.
- Rotate — Use the Rotation buttons to set the desired orientation on any local axis.
- Create Lattice — Configure Resolution and Scale, then press Create Lattice.
- Check Lattice — Verify the correct Lattice is in the picker and that it fully covers the mesh.
- Select objects — Select source object first, then make the target surface the active object.
- Project — Press Project onto Surface.
- Adjust deformation — Use Strength, Offset, and Falloff to fine-tune the result.
- Refine Grid — Adjust Lattice Grid resolution and size as needed.
- Apply — Press Apply Only Lattice or Apply All Modifiers to bake the result.
$4.99
Have questions about this product?
Login to message
| Blender Extension Compatible | Yes |
| Sales | 10+ |
| Published | 5 months ago |
| Blender Version | 3.0 - 5.0 |
| Extension Type | Add-on |
| Render Engine Used | Cycles, Eevee |
| License | GPL |
Discover more products like this
kitbash 3d_hard_surface 3d-lattice shrinkwrap Knobs and Buttons deformer 2025-add-ons-for-blender auto lattice mesh deform 2026 addon 3d-mesh-wrapping 3d model scifi building