Quick Asset Creator
 Anindya Jana


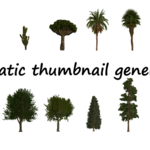
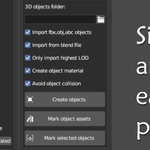
Quick Asset Creator documentation (based on v2.3)
INSTALLATION
1. Go to Edit > Preferences...
2. On the left panel go to the tab "Add-ons"
3. Top right click on "Install from Disk..."
4. Now select Quick Asset Creator v2.3.zip that you downloaded and wait a short while for the data to be copied to your Blender AppData folder.
5. You can now find the addon panels in the sidebar of the 3D view under the "Asset" tab!
Requires Blender 5.2 or later. Compatible with Cycles and EEVEE on Windows, macOS, and Linux.
How to Use — Quick Workflow Guide
Creating Materials from Textures
Open the Asset sidebar tab in the 3D Viewport (press N to open the sidebar).
In the Texture Asset section, click the folder icon next to Textures Folder and select your textures folder.
Enable the texture map types you want to include (Albedo, AO, Roughness, Normal, etc.).
Choose your mapping type: UV (default), Object, or Generated.
Click Create Materials. The addon will scan the folder and build a full PBR material for every valid texture set found.
Optionally click Mark Material Assets to add all created materials to the Blender Asset Browser.
Open the Asset sidebar tab in the 3D Viewport (press N to open the sidebar).
In the Texture Asset section, click the folder icon next to Textures Folder and select your textures folder.
Enable the texture map types you want to include (Albedo, AO, Roughness, Normal, etc.).
Choose your mapping type: UV (default), Object, or Generated.
Click Create Materials. The addon will scan the folder and build a full PBR material for every valid texture set found.
Optionally click Mark Material Assets to add all created materials to the Blender Asset Browser.
Importing and Creating Object Assets
In the 3D Asset section, click the folder icon next to 3D Objects Folder and select the folder containing your 3D models.
Configure your import settings (LOD filtering, material creation, collision avoidance).
Click Import Objects. All supported 3D files in the folder are imported into the scene.
Click Mark Object Assets or Mark Selected Objects to add them to the Asset Browser.
In the 3D Asset section, click the folder icon next to 3D Objects Folder and select the folder containing your 3D models.
Configure your import settings (LOD filtering, material creation, collision avoidance).
Click Import Objects. All supported 3D files in the folder are imported into the scene.
Click Mark Object Assets or Mark Selected Objects to add them to the Asset Browser.
Editing a Created Material
Select an object in the viewport that has a Quick Asset Creator material applied to it.
The Material Edit panel will appear automatically in the Asset sidebar tab.
Adjust the sliders (tint, roughness, normal strength, etc.) to fine-tune the look of the material in real time.
Select an object in the viewport that has a Quick Asset Creator material applied to it.
The Material Edit panel will appear automatically in the Asset sidebar tab.
Adjust the sliders (tint, roughness, normal strength, etc.) to fine-tune the look of the material in real time.
Exporting Objects
In the 3D Object Export Settings section, click the folder icon and choose your destination folder.
Enable Export Selected Objects if you only want to export specific objects.
Enable Use Object Name to name the file after your object.
Click Export.
In the 3D Object Export Settings section, click the folder icon and choose your destination folder.
Enable Export Selected Objects if you only want to export specific objects.
Enable Use Object Name to name the file after your object.
Click Export.
Generating Asset Previews
Select all the objects you want to render previews for in the 3D Viewport.
In the Quick Preview Generator panel, set a Base Folder and choose a View Angle.
Adjust Resolution and Zoom Padding as needed. Note that renders will use your current scene lighting.
Click Render Previews. PNG images are saved as Base Folder / Collection / Object.png.
Select all the objects you want to render previews for in the 3D Viewport.
In the Quick Preview Generator panel, set a Base Folder and choose a View Angle.
Adjust Resolution and Zoom Padding as needed. Note that renders will use your current scene lighting.
Click Render Previews. PNG images are saved as Base Folder / Collection / Object.png.
Supported File Name Keywords (Texture Detection)
The addon automatically detects texture types based on keywords found in the file name. Below is the full list of supported keywords:
| Map Type | Detected Keywords |
|---|---|
| Albedo / Base Color | albedo, color, col, diffuse, diff |
| Ambient Occlusion | ao, ambientocclusion |
| Roughness | roughness, rough |
| Gloss (auto-inverted) | gloss, smoothness |
| Metallic | metallic, mtl, metallness |
| Specular | specular, spec, refl |
| Translucent / SSS | translucency, transmission, translucent, subsurface, sss |
| Normal | normal, nrm, nor |
| Displacement / Height | disp, height |
| Alpha / Opacity | alpha, opacity, transparent |
Note: LOD variants (LOD1–LOD6) in file names are automatically skipped during texture detection to ensure only the highest-quality maps are used.
Properties Description
Did you know that you can hover over almost any Blender slider, toggle, or dropdown item to read its description? We pack a lot of information into our property descriptions. Taking time to hover and gather information is always a good habit. If you feel that some items need more or better descriptions, contact us join our Discord Server.
The Documentation is arranged panel-wise for better and quicker workflow.
Quick Asset Creator — Texture Asset Panel

This panel lets you automatically create PBR materials from a folder of textures. The addon will scan the selected folder, detect texture types by their file names, and wire up a full node tree for each material automatically.
1. Textures Folder
Click the folder icon or type a path to the folder containing your texture files. The addon will scan all subfolders recursively. Note: Make sure to provide an absolute path (e.g. C:\Textures\). Do not use a relative path starting with //.
2. Select Texture Maps
Choose which texture types you want the addon to pick up and wire into the material node tree. Enable only the maps you need to keep your materials clean and performant.
Diffuse / Albedo
The base color of your material. The addon detects files with keywords like albedo, color, col, or diff in their name. This is the most important map — without it, a solid default color is used. Tip: If this is disabled a warning will appear in the panel.
Ambient Occlusion (AO)
Multiplies shadow detail into the base color for a more grounded, realistic look. Detected by keywords ao or ambientocclusion. When both Albedo and AO are present, an AO Multiply mix node is automatically added between them.
Roughness / Gloss
Controls how rough or shiny the surface appears. Detected by keywords roughness, rough, gloss, or smoothness. If a gloss map is detected, the addon automatically inverts it to convert it to roughness.
Metallic
Defines metallic surfaces. Detected by keywords metallic, mtl, or metallness. A Multiply math node is added so you can adjust metallic intensity from the Material Edit panel.
Specular / Reflect
Controls specular highlights. Detected by keywords specular, spec, or refl. A Multiply math node is added for easy control from the Material Edit panel.
Translucent
Controls how much light passes through the surface (e.g. leaves, fabric). Detected by keywords translucency, transmission, translucent, subsurface, or sss. Wired into the Transmission Weight socket of the Principled BSDF.
Normal
Adds fine surface detail without extra geometry. Detected by keywords normal, nrm, or nor. A Normal Map node is added automatically between the texture and the shader. You can adjust the strength from the Material Edit panel.
Displacement
Adds real geometry displacement for surface detail (e.g. bumps, cracks). Detected by keywords disp or height. Wired into the Material Output displacement socket. Strength can be adjusted from the Material Edit panel.
Alpha / Transparent
Adds transparency to the material (e.g. leaves, fences, decals). Detected by keywords alpha, opacity, or transparent. The material blend mode is automatically set to clipped transparency.
3. Additional Settings
Automatically Scale Texture
Automatically scales the textures according to the real-world scale of the object. A Texture Coordinate and Mapping node are added and connected to all texture maps. The scale is driven by an Object attribute so it updates dynamically.
Skip Material Without Albedo
When enabled, the addon will skip creating a material for any texture set where no Albedo/Diffuse map is found. Recommended to keep enabled to avoid creating broken materials.
UV / Object / Generated (Mapping Type)
Selects how the texture is projected onto the surface when Auto Scale is enabled.
- UV — Uses the mesh UV maps. Best for most assets. The mesh must have UV maps. (Default)
- Object — Projects using the object's bounding box. Good for quick tiling materials without UVs.
- Generated — Most accurate for randomly scaled objects as it uses Blender's auto-generated coordinates.
4. Create Materials
Scans the selected Textures Folder, detects all valid texture sets, and creates a fully wired PBR material for each one. Existing materials with the same name are skipped automatically.
5. Mark Material Assets
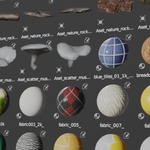
Marks all materials currently in the scene as Blender Assets so they appear in the Asset Browser for easy drag-and-drop use across projects. A thumbnail preview is automatically generated for each material.

Quick Asset Creator — 3D Asset Panel

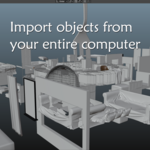
This panel handles the bulk import of 3D objects from a folder and automatically marks them as Blender Assets. Combine with the Texture Asset panel to fully automate your asset library creation pipeline.
1. 3D Objects Folder
Click the folder icon or type a path to the folder containing your 3D model files. The addon scans all subfolders recursively. Note: Provide an absolute path (e.g. C:\Models\). Do not use a relative path starting with //.
2. Import Settings
Import FBX, OBJ, ABC Objects
Automatically imports all .fbx, .obj, and .abc files found in the specified folder path. After importing, a rotation and scale transform is applied to ensure the objects are properly oriented in the scene.
Import from Blend File
Automatically appends all mesh objects from any .blend files found in the folder path directly into the current scene.
Only Import Highest LOD
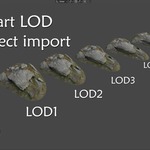
When enabled, only LOD0 (the highest detail Level of Detail) meshes are imported. Objects with LOD1 through LOD6 in their name are automatically removed after import, keeping your scene clean.
Create Object Material
After importing each object, the addon will automatically scan the same folder for matching textures and create a PBR material for the object. Uses the same detection logic as the Texture Asset panel.
Avoid Object Collision
After importing, objects are automatically repositioned to avoid overlapping each other. Each object is placed at a distance proportional to its own size, keeping the viewport tidy when importing large batches.
3. Import Objects
Starts the import process. All matching 3D files in the selected folder will be imported with the settings above applied.
4. Mark Object Assets
Marks all mesh objects currently in the scene as Blender Assets so they appear in the Asset Browser. A thumbnail preview is automatically generated for each object.
5. Mark Selected Objects
Only marks the currently selected objects in the viewport as Blender Assets, instead of all objects in the scene. Use this when you want precise control over what gets added to your asset library.

Quick Asset Creator — 3D Object Export Settings

This section handles exporting your objects out of Blender as .obj files, for example to share them or archive them alongside their textures.
1. Export Folder
The destination folder where exported files will be saved. Note: Provide an absolute path. Do not use a relative path starting with //.
Export Selected Objects
When enabled, only the objects that are currently selected in the viewport will be exported. When disabled, all visible objects in the scene are exported.
Use Object Name
When enabled, the exported file is named after the active object's name in Blender (e.g. Tree_01.obj). When disabled, the file is saved as myfile.obj.
2. Export
Exports the object(s) to the chosen folder as an .obj file using the settings above.
Material Edit Panel

This panel appears automatically in the sidebar when you have a material that was created by Quick Asset Creator selected on the active object. It gives you fine-grained control over the material without having to open the Shader Editor.
Note: Only properties for maps that were actually created will appear. For example, if no Normal map was included in the material, the Normal Strength slider will not show.
Color Controls
Base Tint
A color multiplied over the base albedo texture. Use it to tint the overall color of the material without changing the original texture. Default is white (no tint).
Tint Multiplier
Controls how strongly the Base Tint color is mixed into the albedo. Set to 0 to use the original texture color with no tint, set to 1 for full tint.
Color Saturation
Adjusts the overall color saturation of the material. Reduce toward 0 for a desaturated/greyscale look, or increase above 1 for more vivid colors.
Color Brightness
Adjusts the overall brightness of the material's base color. Useful for darkening or lightening the material without re-exporting textures.
Surface Controls
AO Strength
Controls how much the Ambient Occlusion map darkens the base color. Set to 0 to completely ignore the AO map, or 1 for full effect.
Roughness Multiplier
Scales the roughness value from the texture map. Values below 1 make the surface shinier; values above 1 make it rougher.
Roughness Adder
Adds a flat value on top of the roughness after the multiplier is applied. Use it to fine-tune the overall roughness without losing texture detail.
Metallic Strength
Scales the metallic value from the texture map. 1 is full metallic texture influence; 0 is fully non-metallic regardless of the map.
Specular Tint
Colors the specular highlights on the material surface.
Specular Strength
Multiplies the specular map value. Use it to boost or reduce the specular highlights on the material.
Normal Strength
Controls how strong the normal map effect appears on the surface. 1 is full strength, 0 is completely flat.
Displacement Strength
Controls how much the displacement map pushes the geometry. Lower values produce subtle bumps; higher values produce deep cracks or raised surfaces. Requires Cycles with displacement enabled for full effect.
Quick Preview Generator

The Quick Preview Generator renders individual preview images of your selected objects from any orthographic angle. Images are always saved as transparent PNG (RGBA) and are automatically sorted into subfolders by their Blender collection name. Renders use your current scene lighting.
1. Selected Objects
Shows how many objects are currently selected in the viewport and whether they are ready to render. The render button label updates to show the count (e.g. "Render 3 Preview(s)"). Select all objects you want to render before clicking the render button.
2. Output Settings
Base Folder
The root folder where rendered preview images will be saved. Files are automatically organized into subfolders like this:
Base Folder / Collection Name / Object Name.png
If an object is not in any collection, it is placed in an "Uncategorized" subfolder.
3. Render Settings
View Angle
Choose the orthographic angle from which each object is rendered. Options:
| Option | Description |
|---|---|
| Front | Renders from the front. Default. |
| Back | Renders from behind the object. |
| Left | Renders from the left side. |
| Right | Renders from the right side. |
| Top | Bird's-eye view from above. |
| Bottom | View from below the object. |
| Isometric | Classic 45° isometric angle. Useful for game asset previews. |
Tip: When the view is set to anything other than Front, the view name is automatically added to the file name (e.g. Tree_top.png) to prevent files being overwritten.
Resolution (W / H)
Sets the output image width and height in pixels. Default is 256 × 256. Use higher values for product-quality renders.
Scale %
Applies a percentage scale to the resolution. At 100% the full resolution is rendered; at 50% it renders at half size. Useful for quick test renders.
Zoom Padding
Adds extra space around the object so it does not touch the image edges. Default is 1.15 (15% padding). Increase this value for more space; decrease it to fill the frame more tightly.
Format
Locked to PNG (RGBA). Transparent background is always enabled so previews look good on any background color.
4. Render Previews
Renders a preview image for each selected object one at a time, saving each into the output folder sorted by collection. A progress bar is shown at the top of Blender during the render. The original scene is fully restored afterwards — no objects are moved or modified.

Have questions about this product?
Login to message
| Sales | 80+ |
| Dev Fund Contributor | |
| Published | about 3 years ago |
| Blender Version | 4.5 - 5.2 |
| Render Engine Used | Cycles, Eevee |
| License | GPL |

Discover more products like this
FBX Import Asset Creation batch-import 3DShaders 3D importer material creator import bulk importer blend file importer