Quick Snow
 Anindya Jana





Quick snow documentation(based on v5.0)
INSTALLATION
1. go to Edit > Preferences...
2. on the left panel go to the tab "Add-ons"
3. top right click on "Install"
4. now select Quick Snow v5.0.zip that you downloaded and wait for a short while before the data is copied to your Blender AppData folder.
5. now you can find the panel in the sidebar of the 3D view under "Snow" tab!
Requires Blender 5.2(Quick Snow v5). Compatible with Cycles and EEVEE on Windows, macOS, and Linux.
Properties description
Did you know that you can hover on almost any blender sliders, toggles, or drop down items to read their description? We pack a lot of information in our properties description. Taking time to hover in order to gather information is always a good reflex. If you feel that some items need more or better descriptions, contact us or join our Discord Server.
The Documentation is arranged panel wise for better and quick work.
Quick Snow Main Panel

1.Global parameters
Use Snow Displacement
Enabling this feature will automatically add snow displacement to objects after creating snow. By default it is turned on.
Apply to all material slots
Enabling this feature will automatically add snow to all material slots of an object.
Global snow coverage
Changing the values will globally change the snow coverage value on every object when local snow coverage of that object is not enabled.

2.Object preset
Object preset lets the addon adjust settings based on the preset selected, which allows the best settings to be applied to any object.
Note: For foliage assets you must select the foliage preset, otherwise the addon will skip the transparent and translucent shader.
3.Select snow
Textured Snow
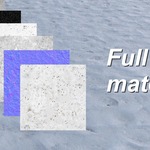
Textured snow with full PBR materials. You can choose any one of 1K, 2K, and 4K textures. 16 snow textures are included — each designed to meet quality standards in every scene.
Procedural Snow
Procedural snow created by mixing various procedural noise textures. Includes an optimized shader option for faster viewport performance.
Simple Snow
Preview-quality snow using only a Principled BSDF node. Ideal for fast previews and low-resource scenes.
4.Create Dynamic Snow
Creates a dynamic snow material among the selected objects by blending the original material with the selected snow material.
Note: Your material must have a node connected to the Material Output to create dynamic snow.

5.Append Snow Material
Appends the selected snow material to the active or selected objects without blending with existing materials.
6.Remove Snow
Removes snow nodes and restores the previous shader of the material. If the snow material was appended, it restores to the previous material.
Dynamic Snow Properties

Note: This panel will be visible after creating dynamic snow on an object.
1.Override Globals
When enabled, this object uses its own local snow coverage value instead of the global coverage. This allows per-object fine tuning without affecting other objects in the scene.
2.Lock Snow Rotation
On enabling lock snow rotation, the snow will lock its rotation direction and you can rotate the object without rotating the snow on the object.
Note: This feature works on the active object only.

3.Normal Blend
Normal blend blends snow by calculating height based on the normal map. It automatically takes the node which connects the color of the normal map as default.
It works on the active material. The value ranges from 0 to 10.
Note: This feature requires a normal map for the object.

4.Pixel Blend
Pixel blend blends snow by calculating height based on any map except the normal map. It automatically takes the node which connects the base color of the Principled BSDF as default.
It works on the active material. The value ranges from 0 to 10.
Note: This feature requires an albedo/diffuse map for the object. You can manually insert the bump map (if you have one) to the base color node.

5.Blend Softness
Blend softness blends snow by creating a soft gradient on the edge. It does not require any map to work.
It works on the active material. The value ranges from 0 to 10.
Snow Displacement

Note: This panel will be visible after creating dynamic snow on an object. Requires Cycles render engine.
1.Enable Snow Displacement
This feature will add snow displacement to your active object using a Subdivision Surface modifier.
Note: You need to enable the Cycles render engine to use snow displacement.

2.Invert Displacement
Inverts the final snow displacement. Useful in mountain or terrain creation.
3.Snow Displacement Strength
By default all objects have snow displacement strength of 50 when displacement is enabled.
The value ranges from 0 to 100 but you can even increase the displacement more than 100.

4.Adaptive Subdivision
Enables adaptive subdivision on the Snow Displacement modifier. When enabled, the mesh is subdivided adaptively based on pixel size in the render, providing more detail where needed and less where not visible.
5.Dicing Precision (Pixel Size)
Controls the adaptive pixel size of the subdivision. Lower values produce finer subdivision and more detail but use more memory. Only visible when Adaptive Subdivision is enabled.
6.Subdivision Level
Sets the number of subdivision levels for the Snow Displacement modifier. Higher values give smoother displacement but increase computation time.
Snow Material

Note: This panel will be visible after creating dynamic snow on an object.
The textures are mapped on objects by UV map. If you don't have a UV map for the object, then the material will be flat color.

1.Snow Tint
The color which is being multiplied with the original snow texture.
2.Tint Multiplier
The multiplication factor of snow tint with the original snow texture.
3.AO Strength
Ambient Occlusion strength controlled by the AO map.
4.Subsurface Amount
Increasing the value will increase the amount of subsurface scattering on the material.
5.Subsurface Color Intensity
Intensity of subsurface scattering color on the material.
6.Snow Softness
Amount of snow softness which is multiplied with subsurface radius.
7.Snow Wetness
Amount of snow wetness which is controlled by the roughness map.
8.Snow Glitters
Amount of snow glitters which is controlled by a baked texture map.
9.Specular
Specular strength — same as that of Principled BSDF.
10.Normal Strength
Strength of the snow normal map.
11.Bump Strength
Strength of the snow bump map.
12.Texture Scale
Texture scale of the snow texture (UV mapped).
Note: By default the snow texture will scale according to the object dimension.
Snow Mask

Note: This panel will be visible after creating dynamic snow on an object.
1.Gradient Mask
Gradient mask allows you to remove snow from the bottom part. It works by masking with a procedural gradient mask. Includes a gradient falloff slider for controlling the transition.

2.Vertex Paint Mask
Vertex paint mask allows you to mask out the areas where you don't need snow to accumulate by manually painting a mask.
Note: Painting a black mask will remove snow, whereas painting a white mask will add snow.

3.Texture Mask
Texture mask allows you to mask snow using procedural textures. You can change the texture location and scale of the object.
Available texture types:
1 — FBM noise texture
2 — Multifractal noise texture
3 — Noise texture
4 — FBM noise combined with noise texture

4.Cavity Mask
Cavity mask allows you to mask out the snow in cavity/concave areas of the mesh. Includes a cavity strength slider.
5.Edge Mask
The edge mask is used to mask out snow on edges. Includes an edge strength slider.
Note: Edge mask requires the Cycles render engine.

Snowfall

This panel controls particle-based snowfall and volumetric snow fog effects.
1.Weather Preset
Select from different weather presets to quickly set up snowfall intensity and behavior.
2.Snowflakes Preset
Choose the type of snowflake particles to use in the simulation.
3.Create Snowfall
Creates a snowfall particle system in the scene with the selected presets.
4.Wind Settings
After creating snowfall, you can control:
Wind Direction — The direction of the wind affecting snowfall.
Wind Velocity — The strength of the wind.
Snow Turbulence — Amount of random turbulence in the snowfall.
5.Particle Settings
Particle Mass — Controls how heavy the snowflakes are, affecting their fall speed.
Snow Fall Amount — The number of snowflake particles emitted.
6.Animation Frame Settings
Start Frame — The frame at which snowfall begins.
End Frame — The frame at which snowfall emission stops.
Lifetime — How long each snowflake particle lives before disappearing.
7.Remove Snowfall
Removes the snowfall particle system from the scene.
8.Animated Snow Fog
Creates an animated volumetric snow fog in the scene for atmospheric depth. Click again to remove.

Geo Snow Mesh

This panel contains Geometry Nodes–based features: Snow Mesh, Snow Accumulation, Dynamic Snow Prints, and Icicles.
Snow Mesh
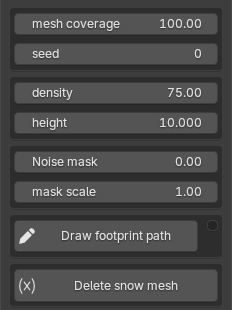
1.Create Snow Mesh
Creates a snow mesh using geometry nodes on the selected objects. Your original object is not affected — the addon creates a duplicate with the snow mesh modifier applied.
Note: Works with asset library objects automatically (handles multi-user mesh data).

2.Snow Coverage
Controls how much of the object surface is covered with snow mesh.
3.Snow Seed
Random seed value for snow placement variation.
4.Snow Density
Controls the density/resolution of the snow mesh geometry.
5.Snow Height
Controls the height/thickness of the snow mesh layer.
6.Mesh Mask
Procedural mask to control where snow mesh appears on the surface.
7.Mask Scale
Scale of the procedural mask pattern.
8.Draw Footprints (Curve-based)
Draw footprint paths on the snow mesh using curves. After drawing, click "Create Footprints" to stamp them into the snow mesh.
Footprint controls include: Foot Length, Foot Width, Pair Offset, Foot Scale, and Foot Rotation.

9.Delete Snow Mesh
Deletes the snow mesh and its duplicate object.
Snow Accumulation Simulation

Real-time snow accumulation powered by Geometry Nodes simulation. Snow falls and piles up on target objects with physics-based behavior.
1.Create Snow Accumulation
Select the objects you want snow to accumulate on, then click "Create Snow Accumulation". This creates a snow emitter plane above the selected objects and links them to a "Snow Targets" collection.

2.Emitter Scale
Controls the size of the snow emitter plane.
3.Snow Density
Number of snow particles emitted per frame. Higher values create denser snowfall.
Warning: Values above 10 with self-collision enabled may cause slow performance.
4.Snow Size (cm)
Size of each individual snow particle in centimeters.
5.Mesh Resolution
Resolution of the snow mesh that forms when particles accumulate.
6.Snowflakes Resolution
Resolution of individual snowflake geometry.
7.Gravity
Controls the gravity strength affecting falling snow particles.
8.Wind Strength
Adds directional wind force to the falling snow.
9.Kill Floor Z
The Z-height below which snow particles are removed. Prevents particles from falling infinitely.
10.Enable Self Collision
Enables collision between snow particles, allowing snow to pile up realistically. Required for snow animation effects.
11.Collision Radius (cm)
Radius of collision detection between particles. Only visible when self-collision is enabled.
12.Display Emitter Plane
Toggle visibility of the emitter plane in the viewport.
13.Display Snowflakes
Toggle visibility of individual snowflake particles.
14.Snowfall Stop Frame
The frame at which snow emission stops. Snow that has already fallen will remain.
15.Delete Snow Accumulation
Removes the snow accumulation modifier, the emitter object, and the Snow Targets collection.
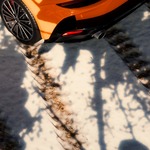
Dynamic Snow Prints

Real-time snow footprint deformation simulation. Objects leave realistic impressions in the snow surface during animation playback.
1.Create Snow Print
Select the objects that will leave footprints, then click "Create Snow Print". This creates a 10m² subdivided snow plane below the selected objects with the Dynamic Snow Print geometry node modifier and a 4K snow impression material applied.

2.Subdivision Level
Number of uniform subdivision levels on the snow plane. Only visible when Adaptive Subdivision is disabled.
3.Adaptive Subdivision
When enabled, the snow mesh is subdivided more densely near objects in the Snow Print collection and less densely in empty areas. This significantly improves performance.
4.Subdivision Distance Threshold
Distance from target objects at which adaptive subdivision activates. Only visible when Adaptive Subdivision is enabled.
5.Subdivision Density
Controls how dense the adaptive subdivision is near target objects. Only visible when Adaptive Subdivision is enabled.
6.Border Height
Controls the height of the snow border/rim that forms around footprint impressions.
7.Snow Pressure Distribution
Controls how the pressure/weight of the object is distributed across the footprint impression.
8.Max Depth
Maximum depth of the footprint impressions during simulation.
9.Impression Smoothness
Overall blur/smoothness of the snow print impressions.
10.Snow Displacement
Toggle to enable Cycles displacement on the snow print plane for additional surface detail. When enabled, a displacement strength slider appears.
11.Snow Impression Material
When the Snow Impression Material is loaded, material controls appear including:
Mud Tint / Dirt Tint — Color swatches for mud and dirt tinting of the snow surface.
Additional material parameters from the "Snow impression mud" node group are exposed automatically.
12.Snow Print Mask
Controls the snow print mask intensity via the attribute multiply node. Default is 1.0, range is 0 to 2.
13.Delete Snow Print
Removes the Dynamic Snow Print modifier, the snow plane, and the Snow Print collection.
14.Snow Prints Active On
Shows a list of all objects in the Snow Print collection that are being tracked for footprint generation.
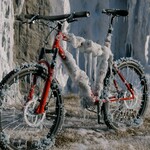
Icicles & Frost

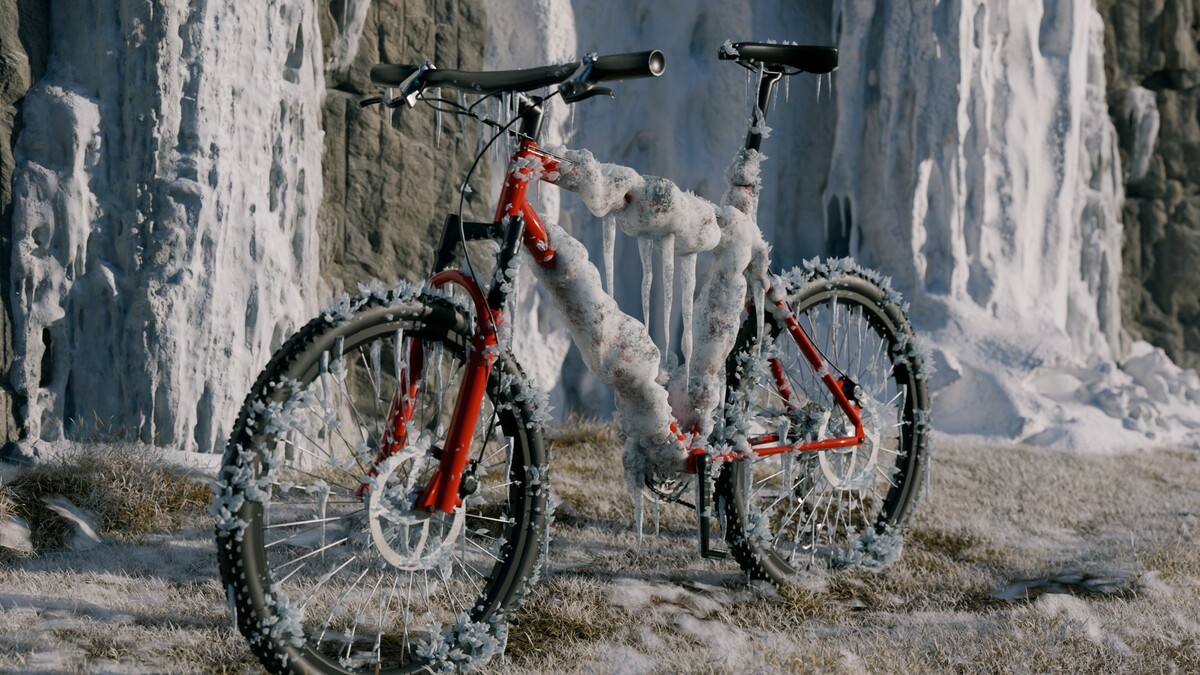
Procedural icicle generation with ice controller and frost crystal particles.
1.Create Icicles
Creates procedural icicles on the selected object using geometry nodes with an ice controller empty for positioning.

2.Ice Spikes
Icicle Size — Controls the overall length/size of the icicles.
Base Diameter — Controls the thickness at the base of each icicle.
Density — Number of icicles generated on the surface.
Distortion — Amount of random distortion/irregularity in the icicle shapes.
3.Ice Particles
Enable Ice Crystals — Toggle frost crystal particles on/off.
Crystal Density — Number of frost crystal particles.
Crystal Scale — Size of individual frost crystals.
Crystal Texture Scale — Scale of the frost crystal texture.
4.Ice Mesh
Ice Mesh Density — Density of the ice mesh layer.
Ice Mesh Volume — Volume/thickness of the ice mesh.
Ice Mesh Quality — Resolution quality of the ice mesh.
5.Ice Controller
Toggle the ice controller empty that lets you position and direct the icicle growth.
6.Frost Effect
Overall frost effect intensity with respect to the ice controller position.
7.Delete Icicles
Removes the icicle modifier and associated objects.
Tips & Troubleshooting
Asset Library Objects
Quick Snow v5 automatically handles multi-user mesh data from asset libraries. Objects imported from asset libraries will work directly without needing to manually unpack them first.
Performance Tips
• Use the optimized procedural shader option for faster viewport performance with procedural snow.
• For Snow Accumulation, keep Snow Density below 10 when self-collision is enabled to avoid slow simulation.
• For Dynamic Snow Prints, enable Adaptive Subdivision to improve performance — it only subdivides areas near objects.
• Use Simple Snow for quick previews before switching to textured or procedural snow for final renders.
Render Engine Compatibility
• Snow Displacement requires Cycles render engine.
• Edge Mask requires Cycles render engine.
• All other features work with both Cycles and EEVEE.
Snow Simulation Playback
Snow Accumulation and Dynamic Snow Prints are simulation-based features. Press Play in the timeline to see the simulation in action. You may need to bake the simulation for final renders.

Discover more products like this
snowfog Snowmesh 4k-materials procedural snow geometrynodes dynamic snow icicles footprint pbr snow snow material snowfall snow animation