Reblend: Experimental Blender Build
 Leonid Altman




Using Reblend
Everything is in the Properties editor, with the render engine set to Cycles.
Pick a method
Render Properties > Sampling > Method
| Method | Use it for |
|---|---|
| Path Tracing | Most scenes. Same as stock Cycles, and the default. Photon Caustics and Path Guiding build on it |
| Bidirectional | Caustics seen directly, small or hidden lamps. Higher cost per sample |
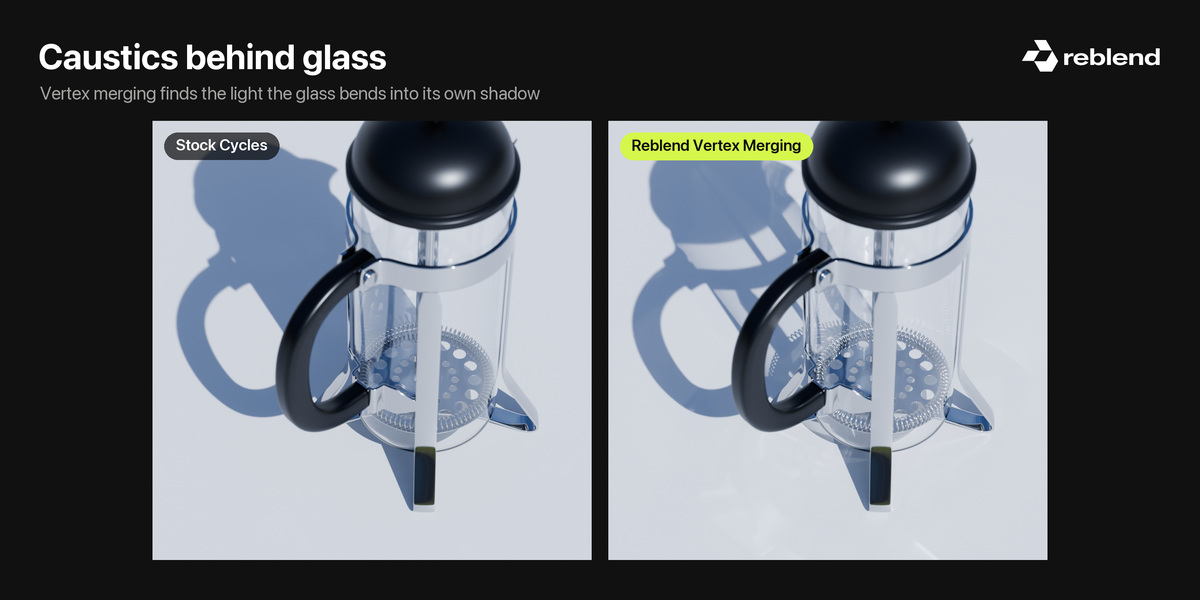
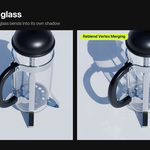
| Bidirectional + Vertex Merging | Caustics seen through glass or water |
With Bidirectional selected, a Bidirectional panel appears under Sampling:
- Vertex Merging: also joins camera and light paths where they land close together, which reaches caustics seen through glass or water. Off by default; slightly soft at first, sharpening with samples, at a higher cost per sample.
- Light Paths: light paths traced per sample, relative to the pixel count. Lower renders faster, higher gives cleaner caustics and cleaner light from small or hidden lamps. Defaults are 0.25, and 1.0 with Vertex Merging.
- Merge Radius (Vertex Merging only): 2 px by default. Lower is sharper at the cost of noise; higher reduces noise in faint caustics spread over a large area.
Bidirectional traces its own light from the lamps, so the Photon Caustics and Path Guiding panels are hidden while it is selected. Files saved with the old VCM method open as Bidirectional with Vertex Merging ticked.
On NVIDIA with OptiX, the first Bidirectional render after launch can pause for a few minutes while the GPU code compiles. It happens once per session; CUDA has no such wait.
Photon Caustics
Works with Path Tracing.
Render Properties > Light Paths > Caustics > Photon Caustics
- Photons: more give smoother caustics at the cost of render time and memory. Bounces: two covers a caustic through one glass, four also light that bounces around inside glass or water. Strength: 1.0 is the physically correct result.
- Casters (subpanel): Automatic lets your materials decide what casts caustics: anything refractive, and reflections sharper than a quarter roughness. Manual lets you pick the objects and collections yourself, which puts all the photons where you want them. Either way nothing is lost; what doesn't cast photons is rendered by the path tracer.
- Advanced (subpanel): normally leave it alone.
Photons come from every light by default. To switch one off, untick Emit Photons in any of these places:
- Lamps: Light Properties > Settings.
- The world: World Properties > Settings > Surface.
- Glowing objects: Object Properties > Shading > Caustics.
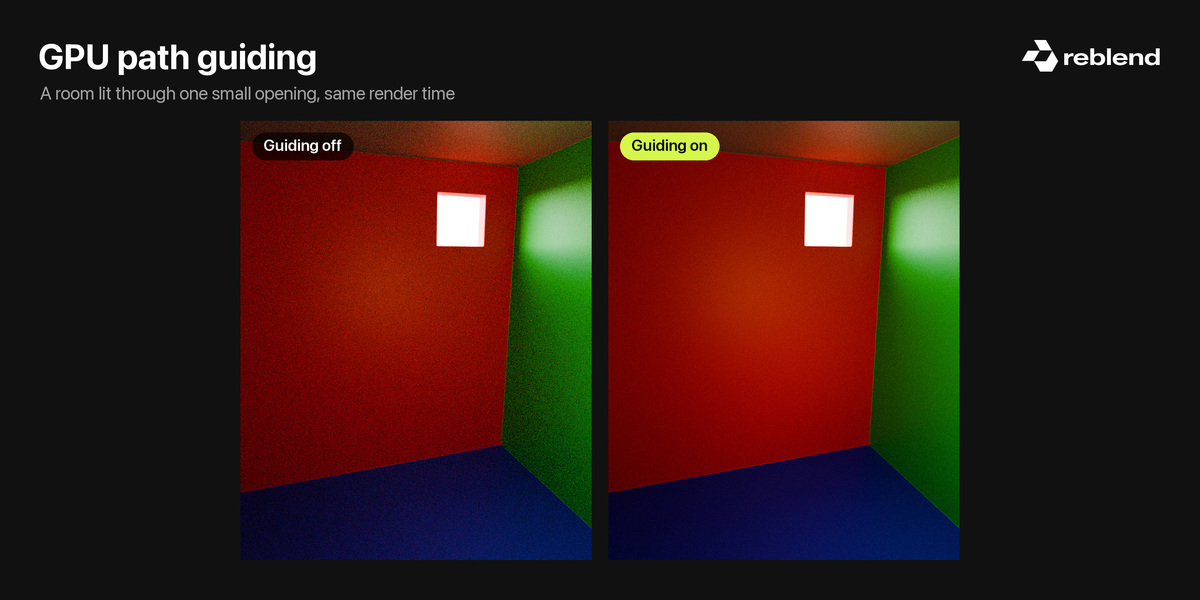
Path Guiding
Works with Path Tracing, on the CPU or on the GPU (Metal, CUDA, OptiX). It is unavailable when the CPU and the GPU are both enabled in Preferences; pick one.
Render Properties > Sampling > Path Guiding. Tick the checkbox in the panel header.
- Turn it on for interiors lit by bounced light, like a room lit through a window.
- Leave it off in brightly lit scenes, where it costs more than it saves.
- Training Samples: how many samples are spent learning. 0 keeps learning until the last sample.
- Photon Training (GPU only): gives it a head start by tracing photons before the first sample, about a second per render.
- Surface and Volume switch guiding on or off for each.
Nested Dielectrics
For objects that overlap, like a glass with a liquid and ice in it. Works with every method.
Object Properties > Shading > Nested Dielectrics > Priority
- Model each object as a closed mesh and let them overlap a little: the liquid slightly into the glass wall, the ice fully inside the liquid. Don't let two surfaces sit exactly on top of each other.
- Give each object its own Glass, Refraction or Principled material with the right IOR.
- Set the priority: glass 3, ice 2, liquid 1. Where objects overlap the higher one is the medium: the surfaces of the lower one inside it are ignored, its volume is off there, and light refracts between the two with the ratio of their IORs.
- 0 is the default and means the object takes no part, so scenes without priorities render as before.
Caustics pass
View Layer Properties > Passes > Light > Caustics. Available with Photon Caustics on, or with Bidirectional. It holds only the caustic light, so you can grade it separately in the compositor. It is also part of Combined, so subtracting it gives the render without caustics.
When Bidirectional can't run
The render switches back to Path Tracing, and tells you, when a scene uses a shadow catcher, a rolling shutter, a custom camera, depth of field or spherical stereo on a panoramic camera, Open Shading Language on a GPU, or more than one render device. With motion blur, light paths still reach the camera directly, so caustics seen directly remain, but nothing is connected or merged.
 Included
Includes 12 months of
- Support from Leonid Altman
- Product updates
Extend this product’s Support Period +12 months: 100% of product price
Have questions before purchasing?
Login to message
Discover more products like this
caustics Cycles apple silicon bidirectional gpu rendering Lighting Glass rendering product-visualization blender build ArchViz path guiding