Rego Spectrum - Full Spectrum 3MF Studio
 TastyVoxels





Rego Spectrum - Full Spectrum 3MF Studio
Blender add-on by TastyVoxels (Regolith Highfield). Version 1.0.1, Blender 4.2 or newer.
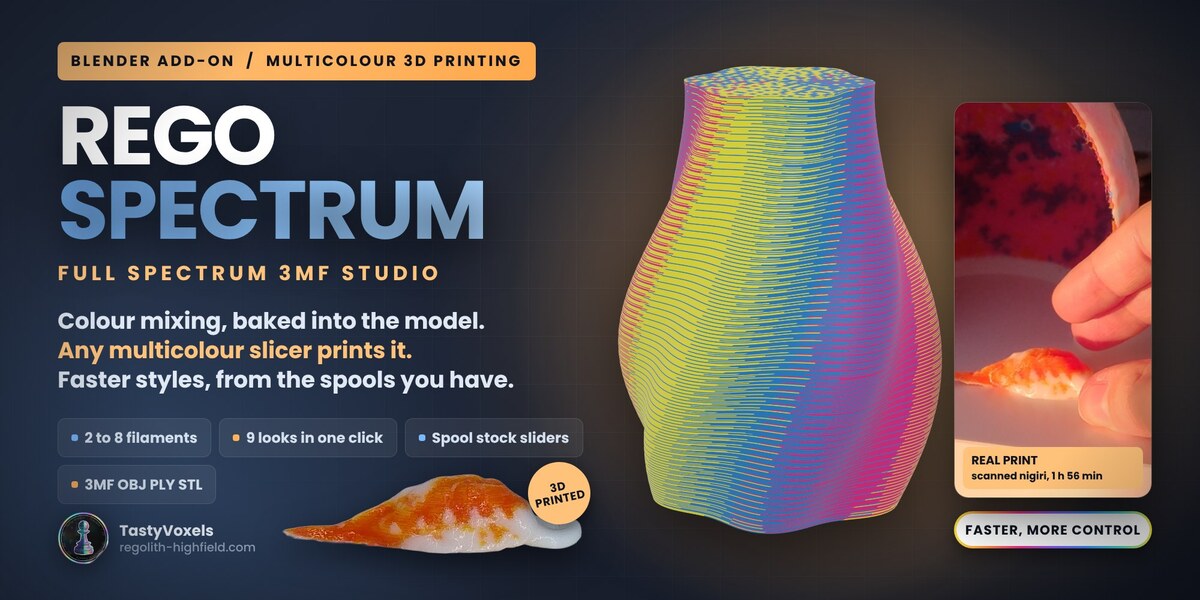
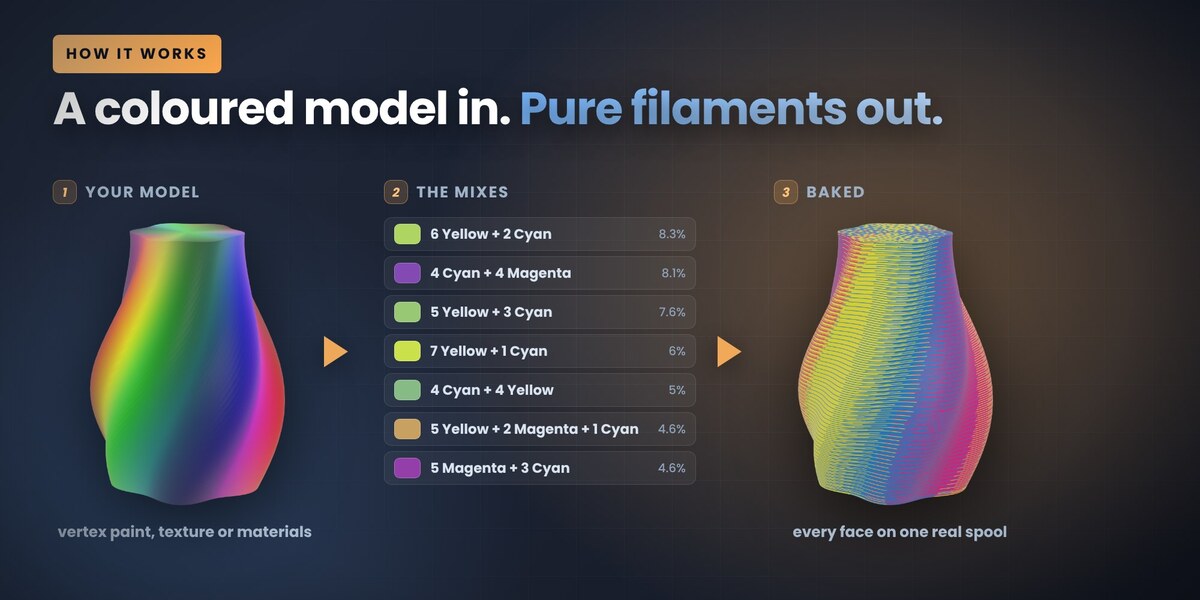
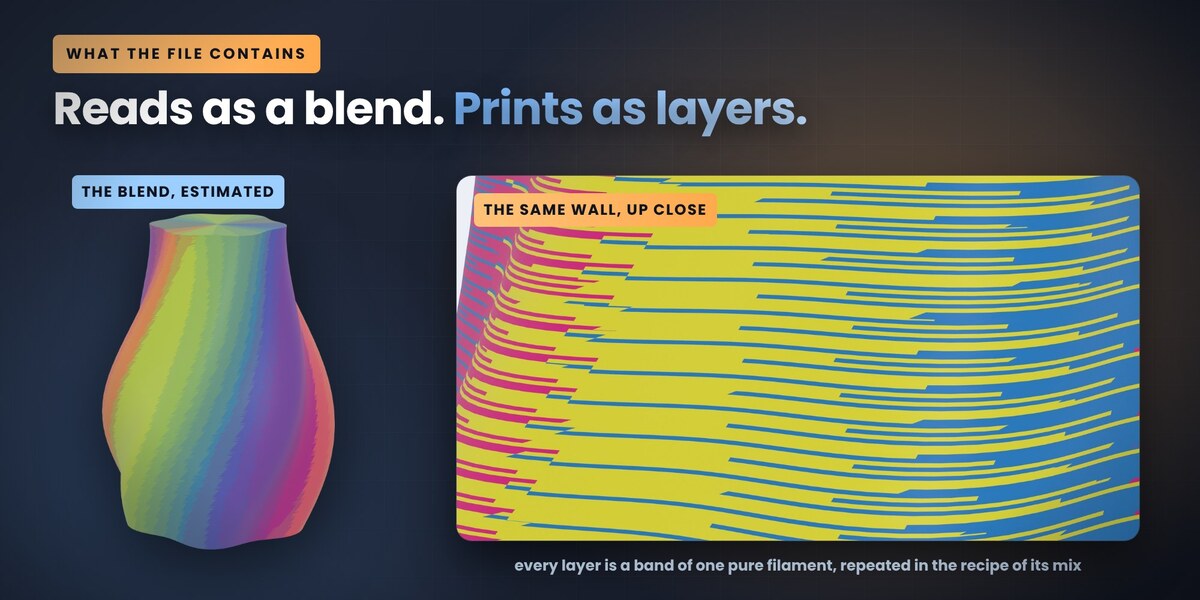
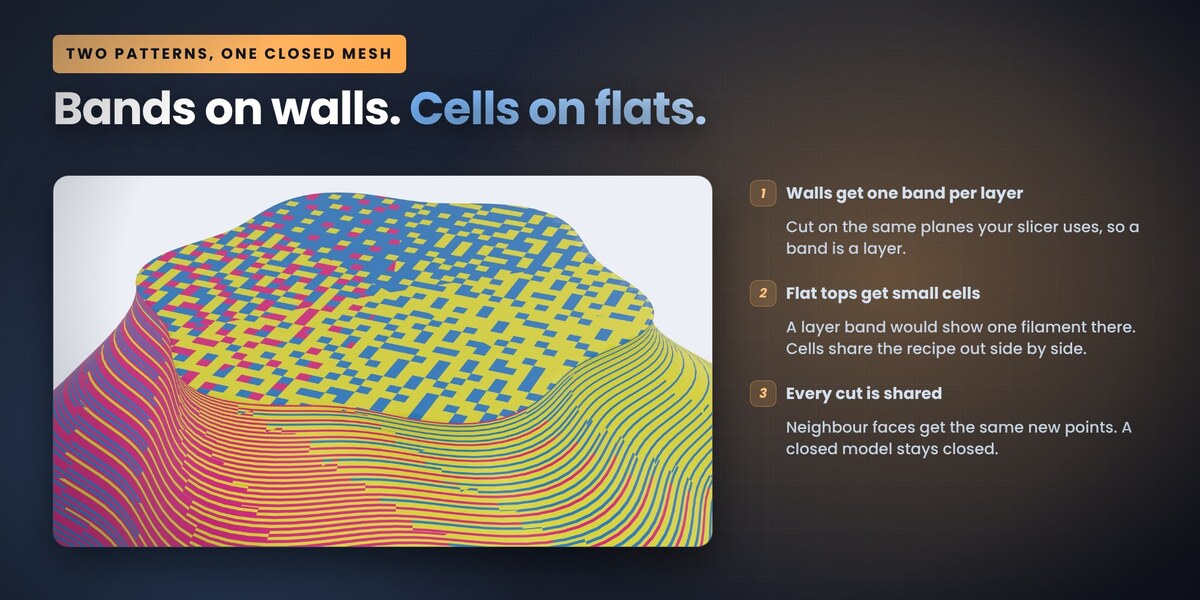
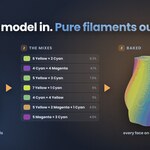
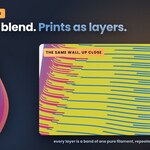
Thin layers of two or three filaments, printed one over the other, read as a new colour. Some slicers can do that for you. This add-on does it in the model instead: it cuts the surface into layer bands and small cells and puts every face on one pure filament. Any multicolour slicer then prints the same mix, with no mixing feature.
Find it in the 3D view sidebar (N), tab Spectrum.
The seven steps
The panel lists the steps at the top, ticks each one when it is done and tells you the next one.
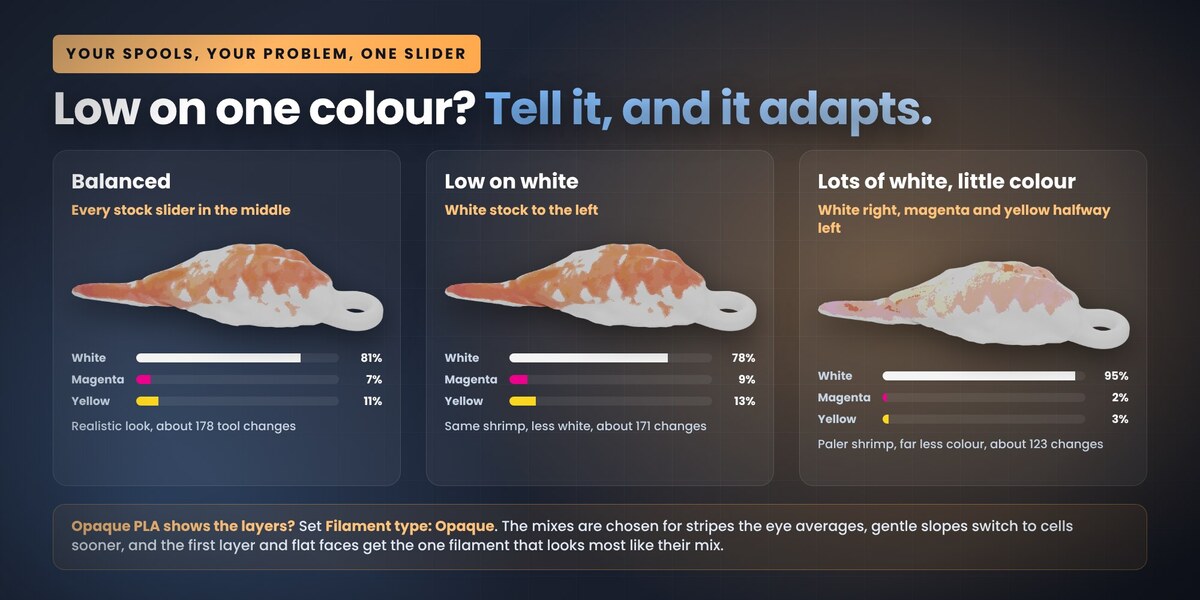
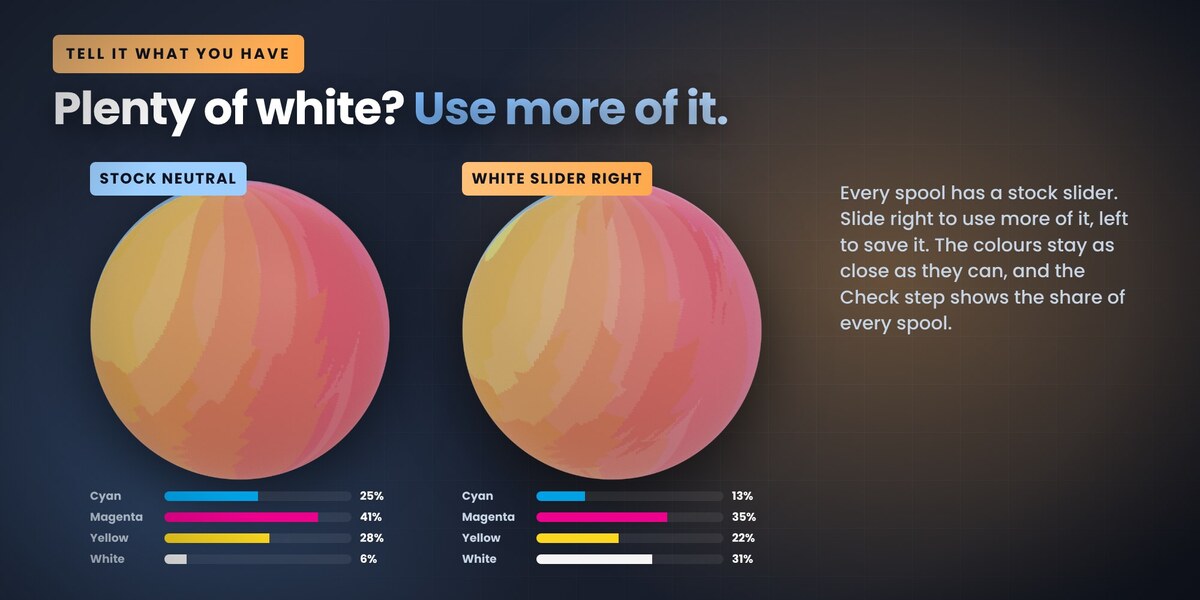
- Spools. Load a set (Cyan Magenta Yellow White and others) or list your own spools, two to eight, in the same order as in your slicer. Set each colour to the real spool. Untick a spool to keep it out of the mixes without changing the slots (a prawn on rice needs no cyan, for example). Your stock: pick a spool and slide left to save it, you have little left, or right to use more of it, you have plenty. The mixes move toward your stock and keep the colour as close as they can. Filament type: Translucent for filaments made for colour mixing, where light goes through a few layers and the colours multiply like inks; Usual for ordinary PLA; Opaque for opaque PLA, where each layer shows only its own colour and the eye averages the stripes. With opaque spools the mixes are chosen for that, gentle slopes get cells sooner, and the first layer and flat faces cut in bands get the single filament that looks most like their mix, because that is all you will see there.
- Model. The colours come from the active colour attribute, from the texture on the base colour, or from the materials. Detail splits big faces first so a texture is not lost. For photo textures and scans, see "From a photo or a scan" below. You can also start from a mixing 3MF of 3MF Magic Solver or Print it Flexy!.
-
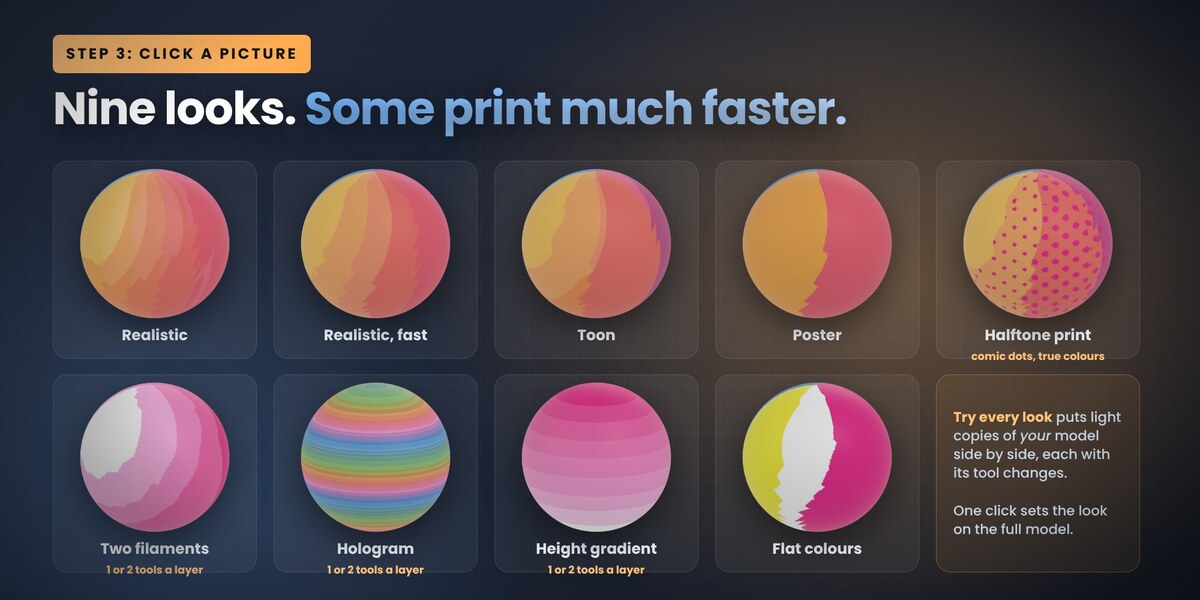
Look. Click a picture. Every look sets all the options that go with it:
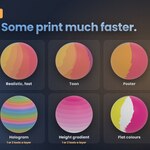
- Realistic: every colour gets its closest mix.
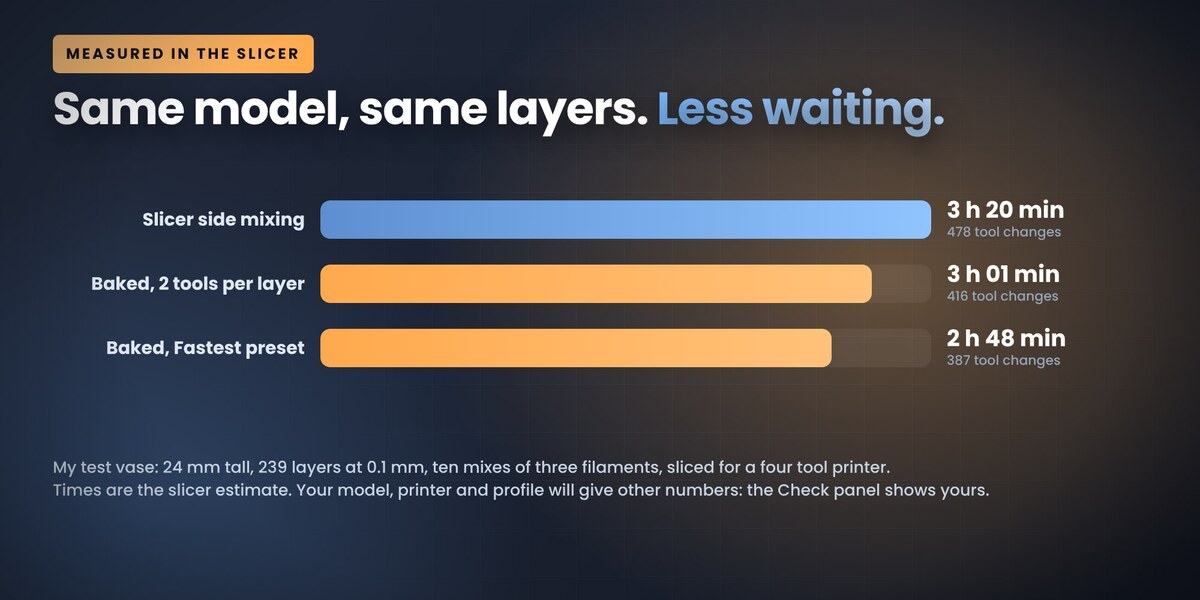
- Realistic, fast: close colours, at most two tools a layer and twelve mixes.
- Toon: light and shade in a few flat steps, like a comic.
- Poster: a few bold flat colours, like a screen print.
- Halftone print: toon tones in their real colours, shaded with round dots like a colour comic page. Darker tones get bigger dots. Dot spacing sets the screen.
- Two filaments: the whole model from dark to light with two spools.
- Hologram: rainbow bands that follow the height, like a holographic foil. Rainbow height sets the band.
- Height gradient: two spools fading from the bottom to the top.
- Flat colours: no mixing at all, every colour on its nearest pure filament. Two filaments, hologram and gradient need one or two tools a layer: a cheap print that looks like a choice. Halftone print is about the look: its dots add changes. Try every look sets light copies of your model side by side in every look (see "Gallery of looks"). The Fine control section opens the cycle, the filaments per mix and your own recipes. - Slicer. Give the layer height and first layer height you will slice at. Bands + cells uses layer bands on walls and small cells on tops, bottoms and gentle slopes. Layer bands is the lightest. Cells is a halftone everywhere.
- Print time. Best colour, Balanced, Fastest in one click, or by hand: Share tools per layer makes the mixes agree on a filament when their recipes allow it, Tools per layer is a soft limit, Most mixes joins look alike colours, Inside filament is the one printed under the skin.
- Check. Work out the mixes, then read the tool changes with and without the speed options, the share of every spool, the size, the layers and whether the mesh is closed. It warns you when spool 1 ends up unused.
- Export. See below.
Short tutorials: common jobs in the panel
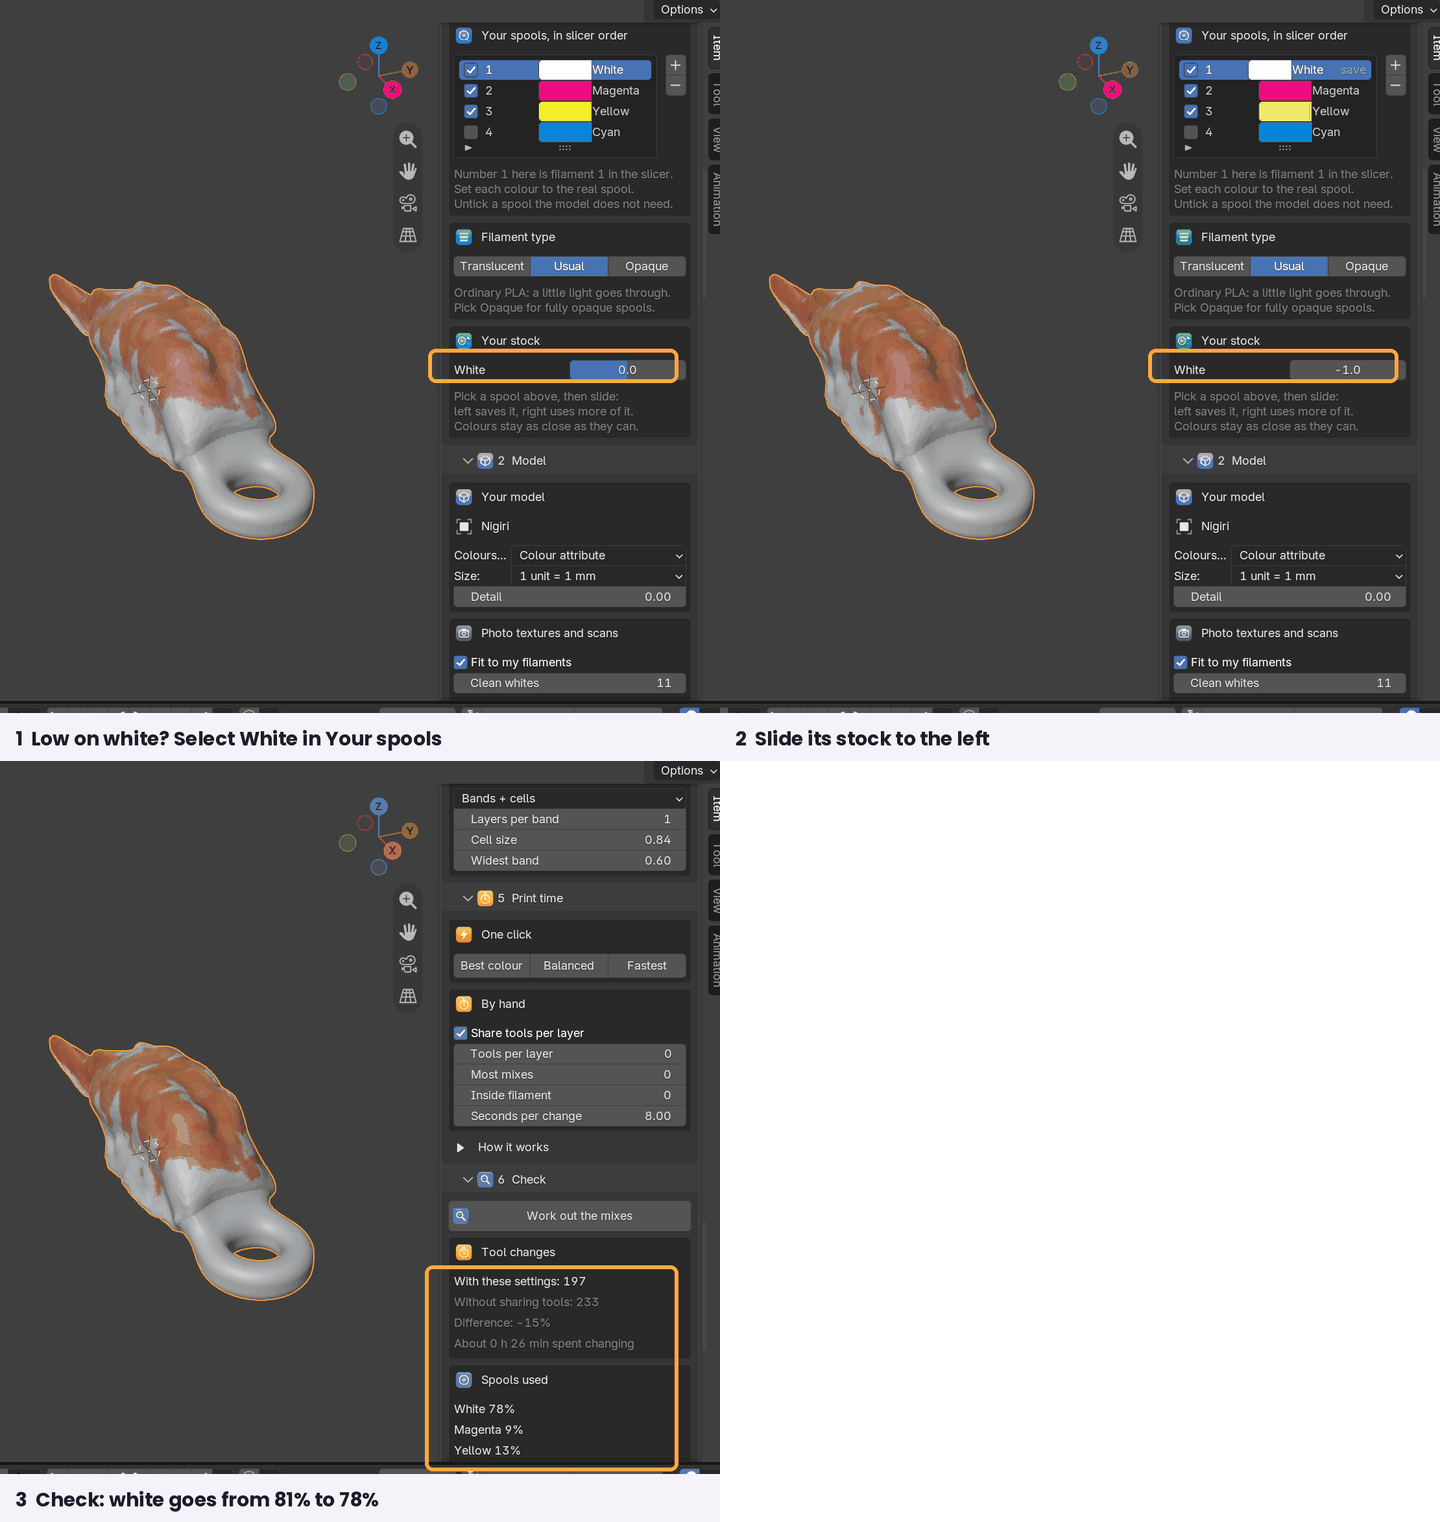
Low on white. In step 1 select White in Your spools, then slide Your stock to the left. The Check step shows the new share of every spool.
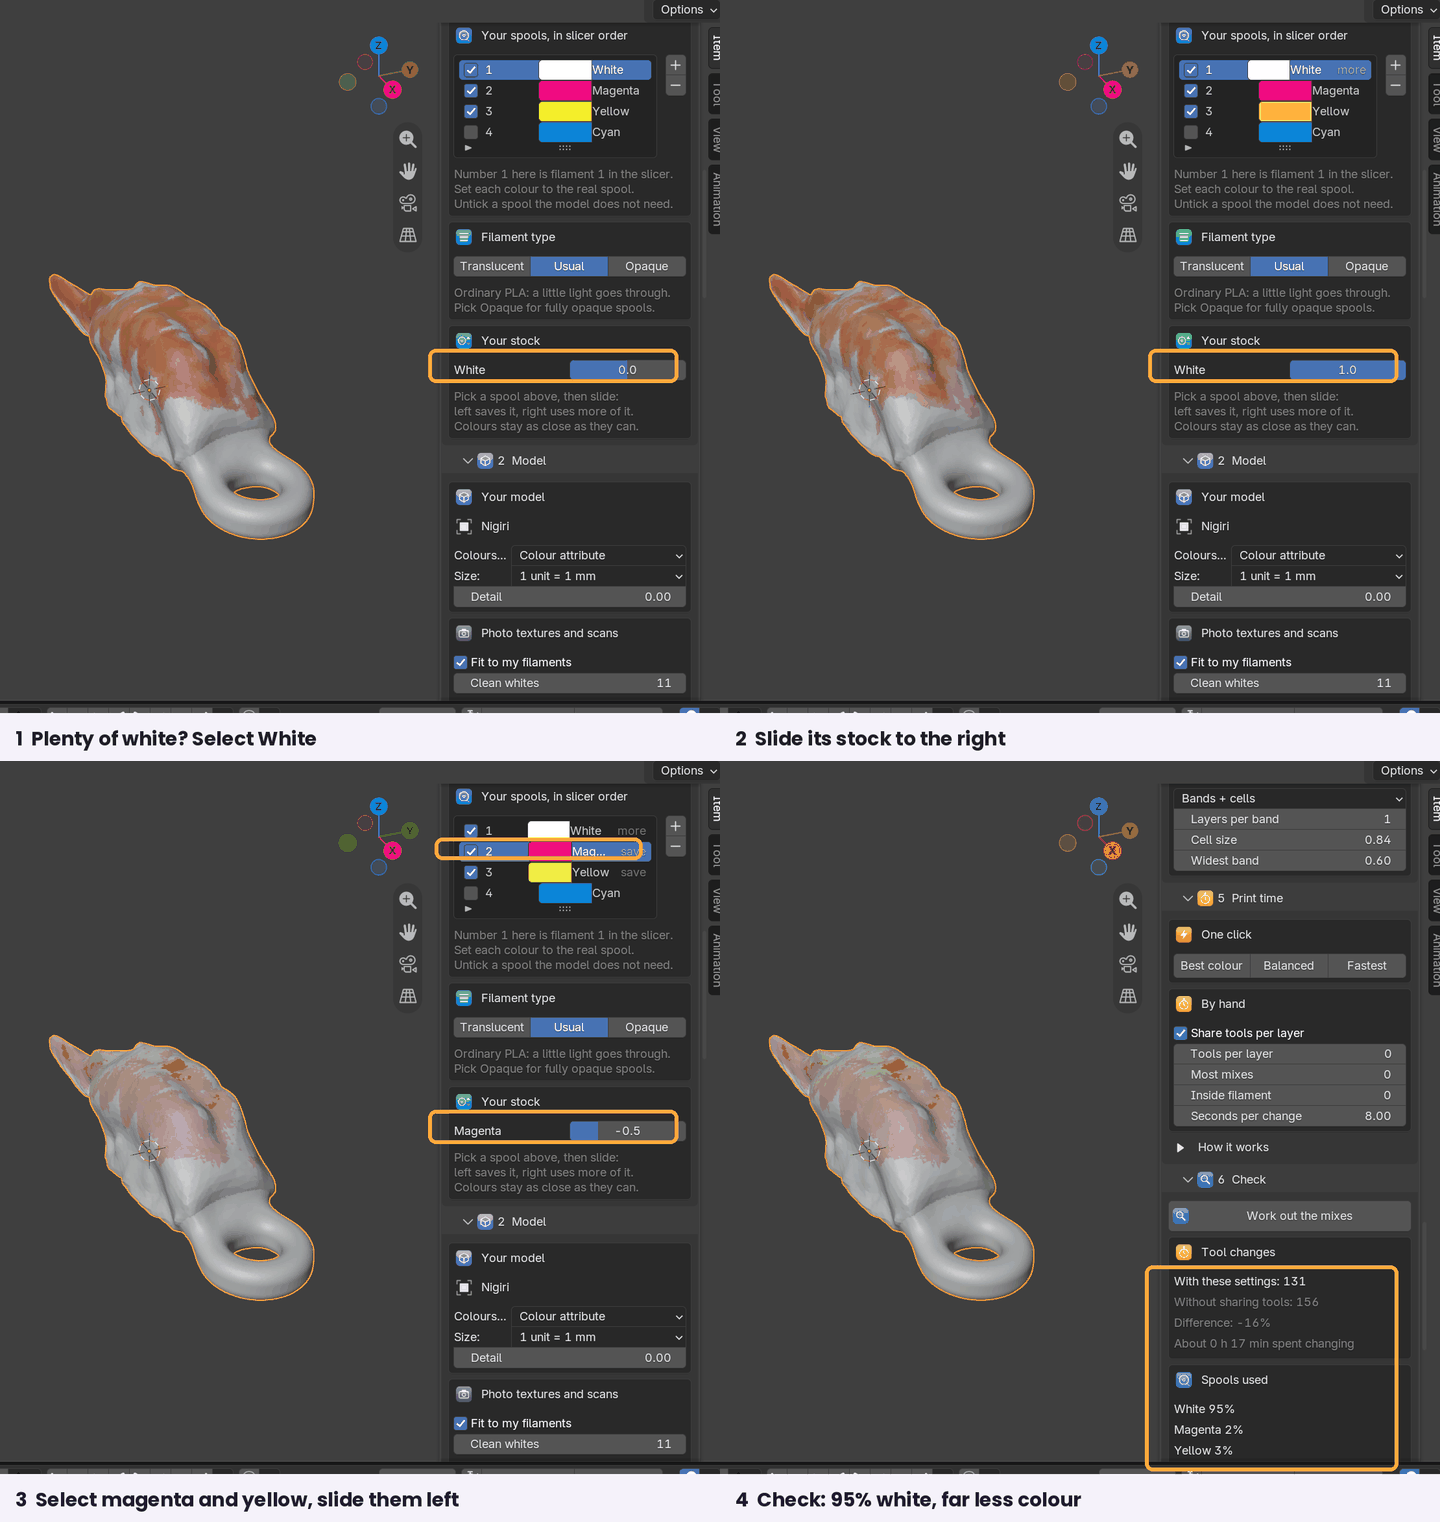
Plenty of white, little colour left. Select White and slide it right, then select magenta and yellow and slide them left. The colours get paler and the tool changes drop.
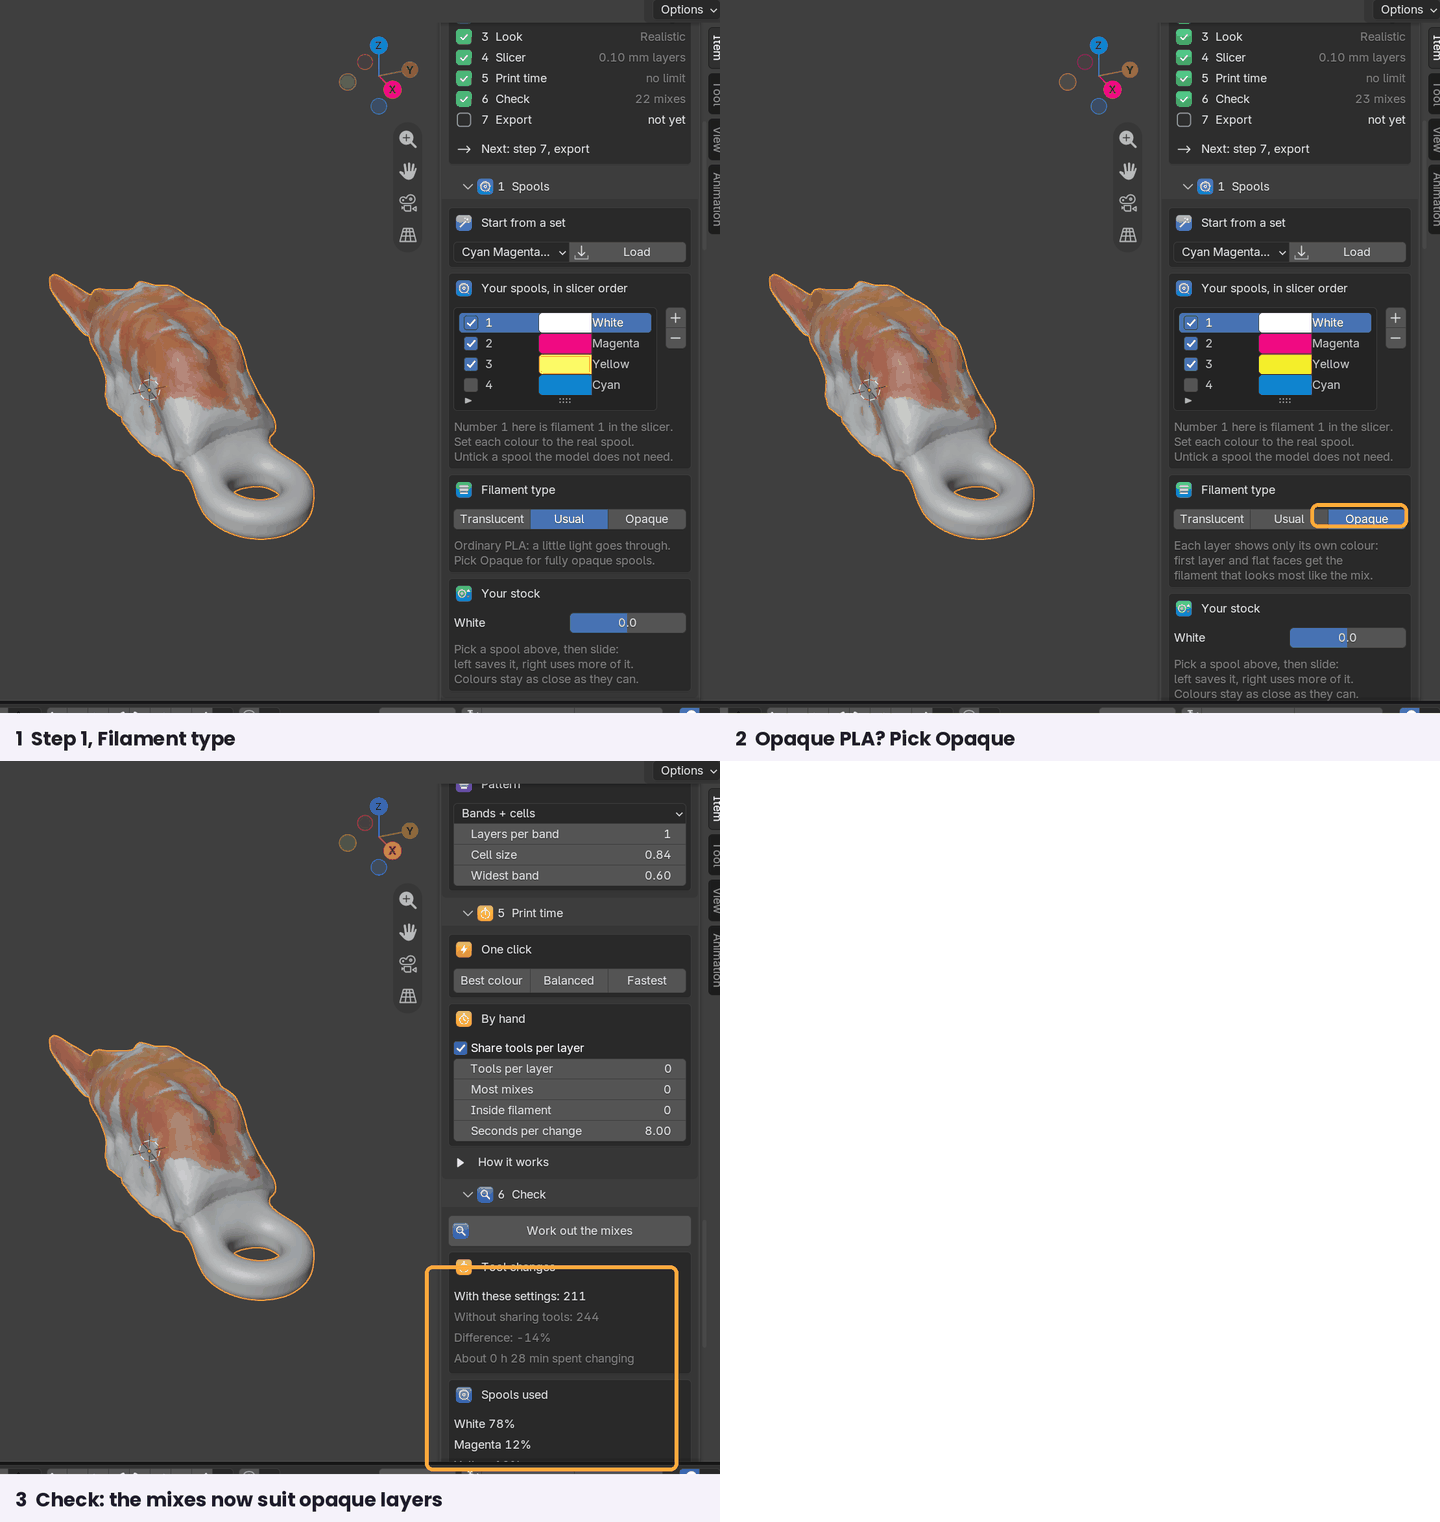
Opaque PLA. In step 1, Filament type, pick Opaque.
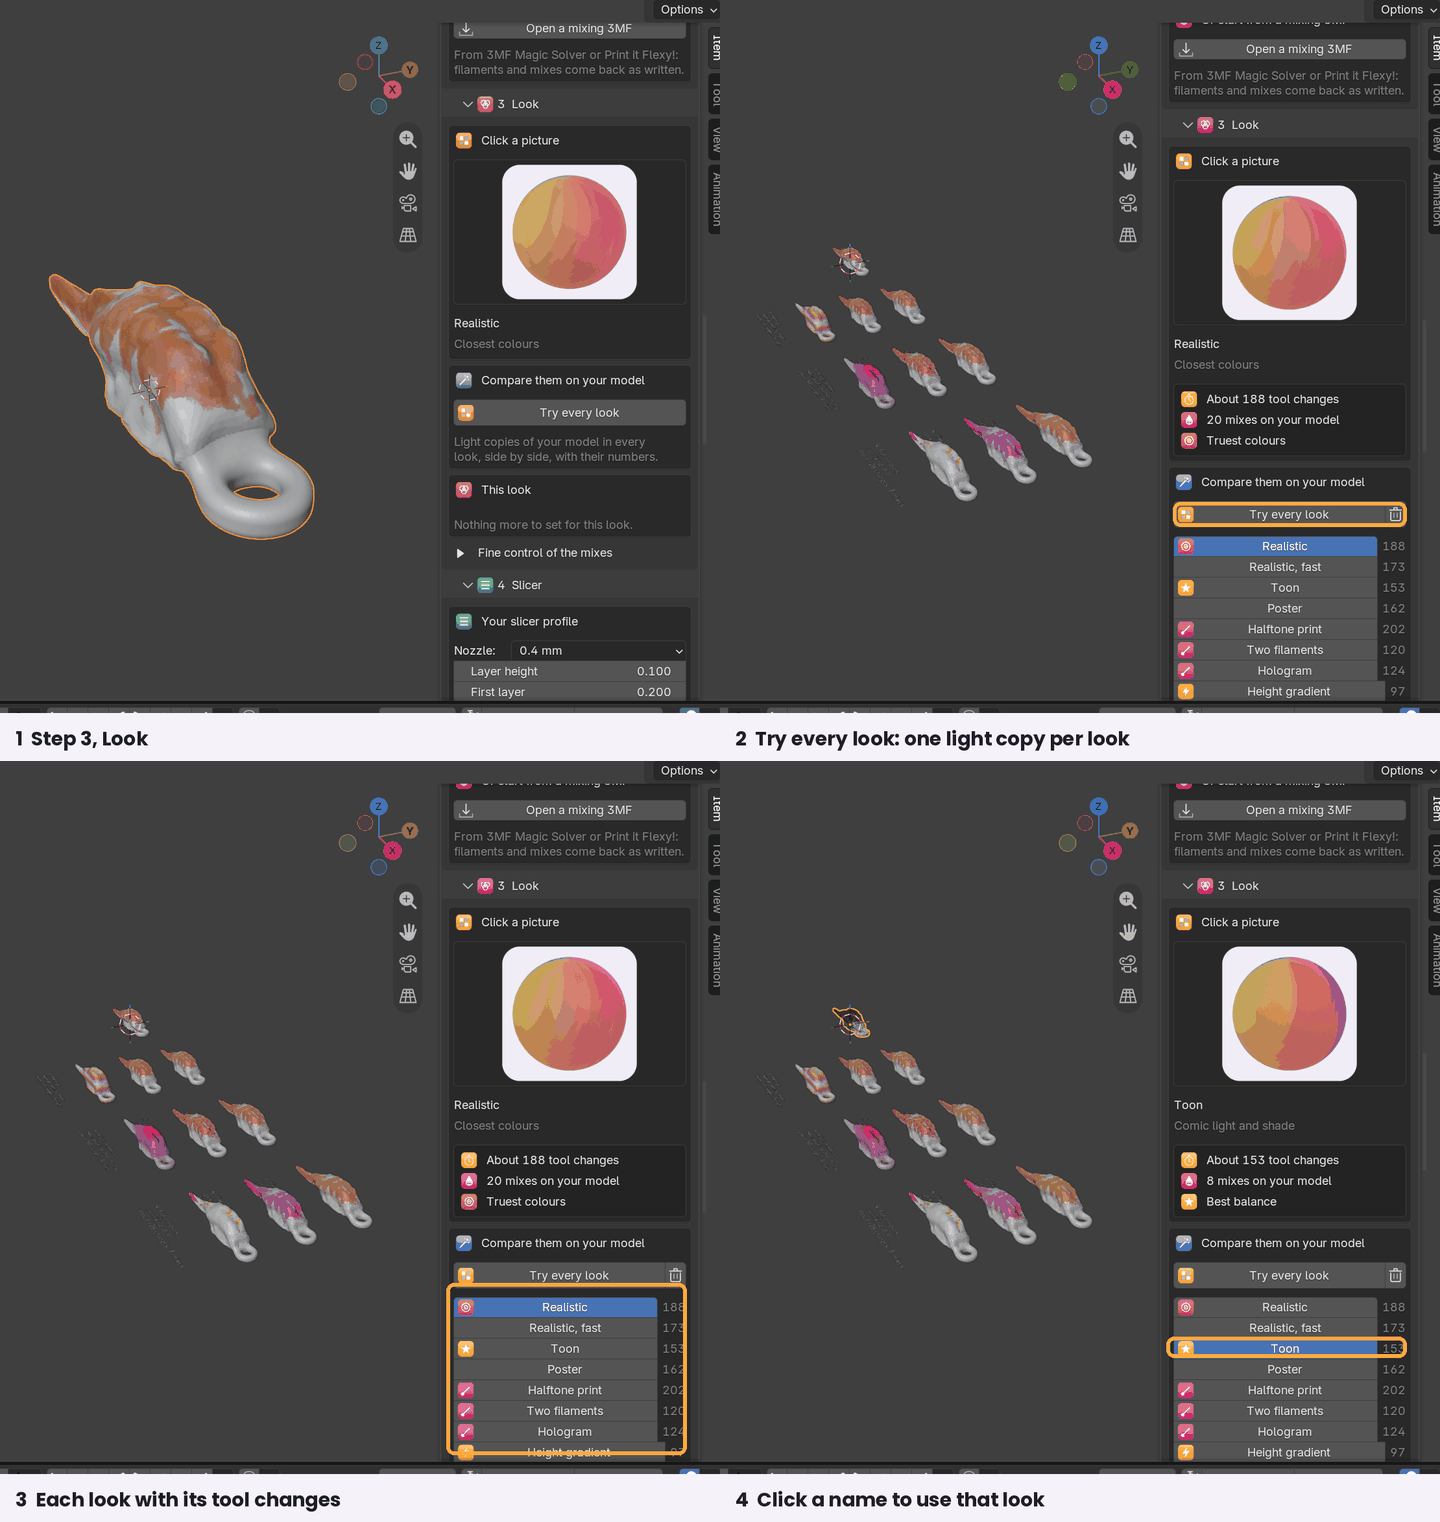
Which look? In step 3 click Try every look: light copies of your model appear, one per look, with their tool changes. Click a name to use that look.
Files
| File | What it is | Use it when |
| Painted 3MF | one closed object, every triangle painted with a pure filament | your slicer reads filament painting |
| Painted 3MF, second dialect | the same paint under the other common attribute name | the first one opens without colours |
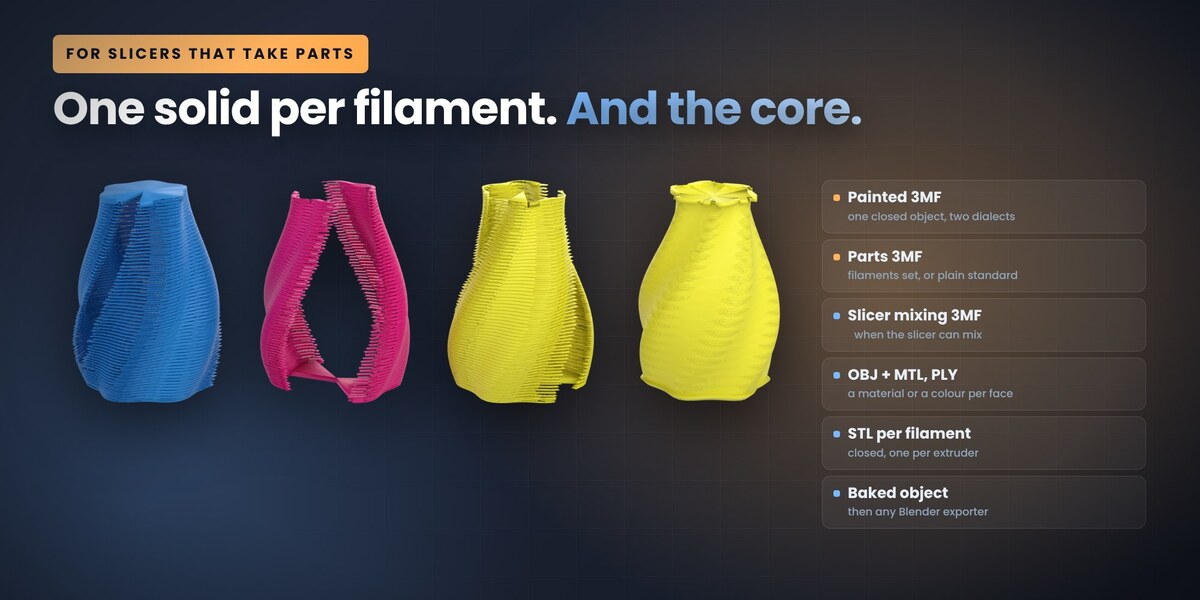
| Parts 3MF | one closed solid per filament for the skin, plus the core, filaments set | your slicer takes parts but not painting |
| Parts 3MF, standard | plain standard 3MF, one colour per part | any other slicer |
| Slicer mixing 3MF | the slicer mixes: mixed filament rows and painted triangles | the four tool printer profile with mixed filaments |
| OBJ + MTL | one group and one material per filament | anything that reads OBJ |
| PLY with colours | a colour on every triangle, blended or pure | viewers, full colour services |
| STL per filament | one closed STL per filament and one for the core | slicers that load one STL per extruder |
Bake into a new object leaves the result in the scene, every face on a filament material, with the blended colour stored in the attribute FS Printed. From there any Blender exporter works (FBX, glTF, USD and so on).
Add the four tool project writes the printer, filament and process settings of the four tool printer I tune my files on. Leave it off to keep your own slicer setup.
Gallery of looks
Try every look (step 3) tries every recommended look on a light copy of your model and sets the copies side by side next to it, each with a label: the look, what it is for, about how many tool changes and how many mixes. In the list, the looks are marked truest colours, best balance (colour against tool changes) and fewest changes; the ones made for style are marked style. Click a look to copy its settings into the panel and work out the mixes on the full model. The bin button deletes the copies; your model is never touched. To see the colours, set the viewport shading to show attribute colours (Solid mode, Color: Attribute).
From a photo or a scan
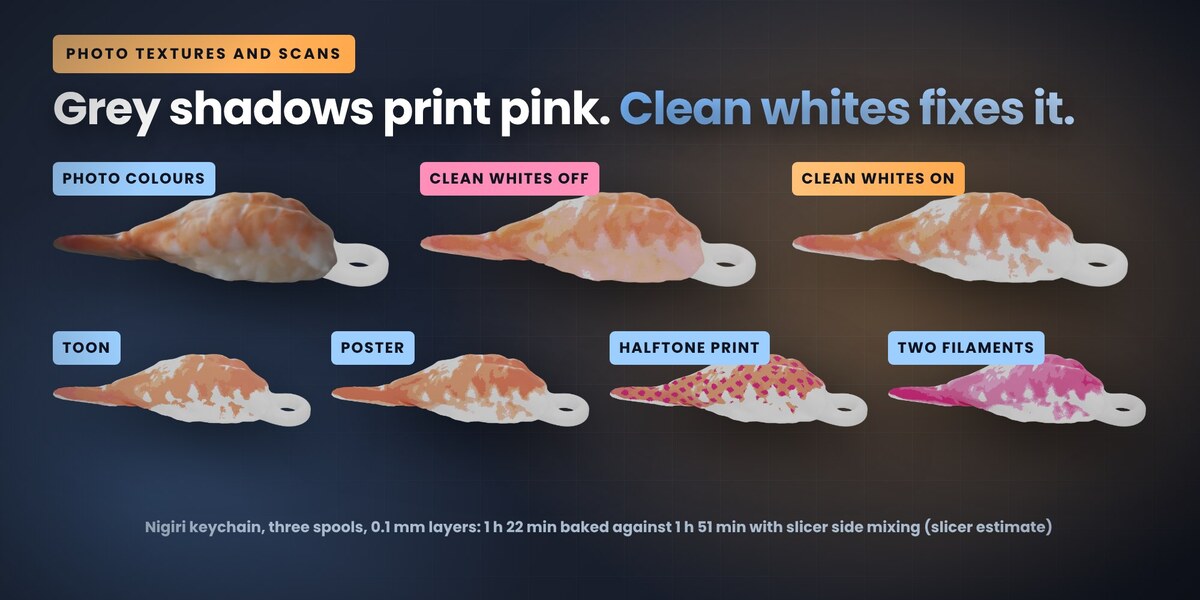
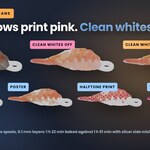
Textures from photos and scans carry the light of the room: shadows, grey corners, beige where a white thing sat in the shade. A printer can only make a colour darker by adding pigment, so grey on a white object prints pink or peach. Two options fix it:
- Fit to my filaments maps the darkest and lightest parts of the texture to what your spools can really print.
- Clean whites makes everything with less colour than the value pure white, with a soft edge so the coloured parts keep their shading. 10 to 15 suits most scans. Raise it if white areas still come out tinted, lower it if pale coloured areas turn white.
Bonus file: the nigiri keychain
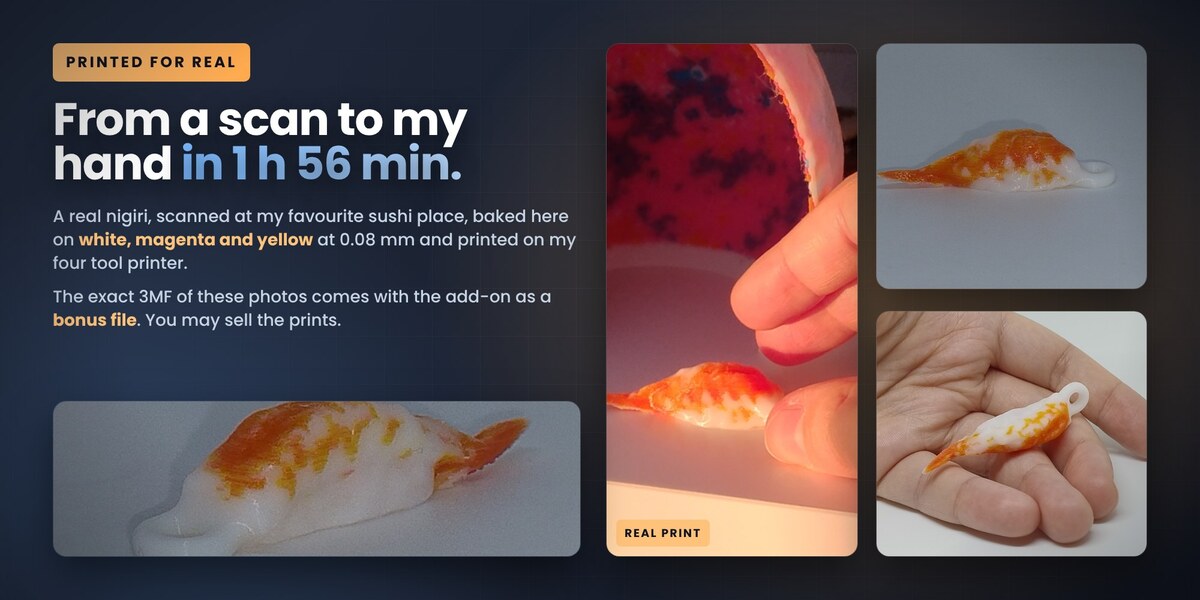
The second download holds nigiri_keychain_fs_fine_008.3mf, the exact file I printed for the photos: a real nigiri scanned with Rego Scan and baked with this add-on, for a four tool printer with a 0.4 mm nozzle (1 white, 2 magenta, 3 yellow), 0.08 mm layers, 53.9 x 10.8 x 12.2 mm, 1 h 56 min on my printer. You may print it and sell the prints. Please do not share or resell the file itself.
Slice it right
- Slice at exactly the layer height and first layer height you gave in step 4. Bands are cut on those planes. Another height makes stripes.
- Keep the model flat on the bed as exported. Do not scale it in Z in the slicer.
- If your slicer has a paint depth setting for painted regions, a thin skin (about two walls) is faster than colour through the whole wall.
- If your slicer spreads top and bottom paint over several layers, lower that to one or two layers for the truest colours on flat tops.
- Variable layer height and adaptive layers break the bands. Leave them off.
- Keep a spool in use in slot 1. Some slicers stop at export when filament 1 prints nothing and a prime tower is on. If the Check panel warns you, reorder the spools so one that is used comes first, and set the slicer slots the same way.
Working with my other add-ons
Open a mixing 3MF (step 2) reads the files that 3MF Magic Solver and Print it Flexy! export for slicer side mixing. Filaments and mixes come back exactly as written, so the same model can be baked for every other slicer. The colour estimate, the recipes and the mixed filament rows are the same in all three add-ons.
Limits in 1.0.1
- Cyan, magenta and yellow cannot make black. Add a black spool for dark colours.
- The blended colour in the viewport is an estimate. Translucent filaments, layer height and light change the real result.
- A mesh with open edges still bakes, but the solid parts need a closed mesh.
- Very fine layers on a big model make millions of triangles. The panel stops at the triangle limit and tells you what to raise.
- Sub layers (the slicer splitting mixed layers into thinner ones) are a slicer side feature. A baked file gets the same look by baking and slicing at the thinner layer height.
Licence
GPL-3.0-or-later. The models you make with it are yours.
Have questions about this product?
Login to message
| Blender Extension Compatible | Yes |
| Downloads | 1 |
| Dev Fund Contributor | |
| Published | about 8 hours ago |
| Blender Version | 4.2 - 5.3 |
| Extension Type | Add-on |
| License | GPL |
Discover more products like this
3d printing full-spectrum toolchanger halftone slicer photogrammetry color-mixing filament 3MF print-time vertex color multicolor 3mf