 TastyVoxels
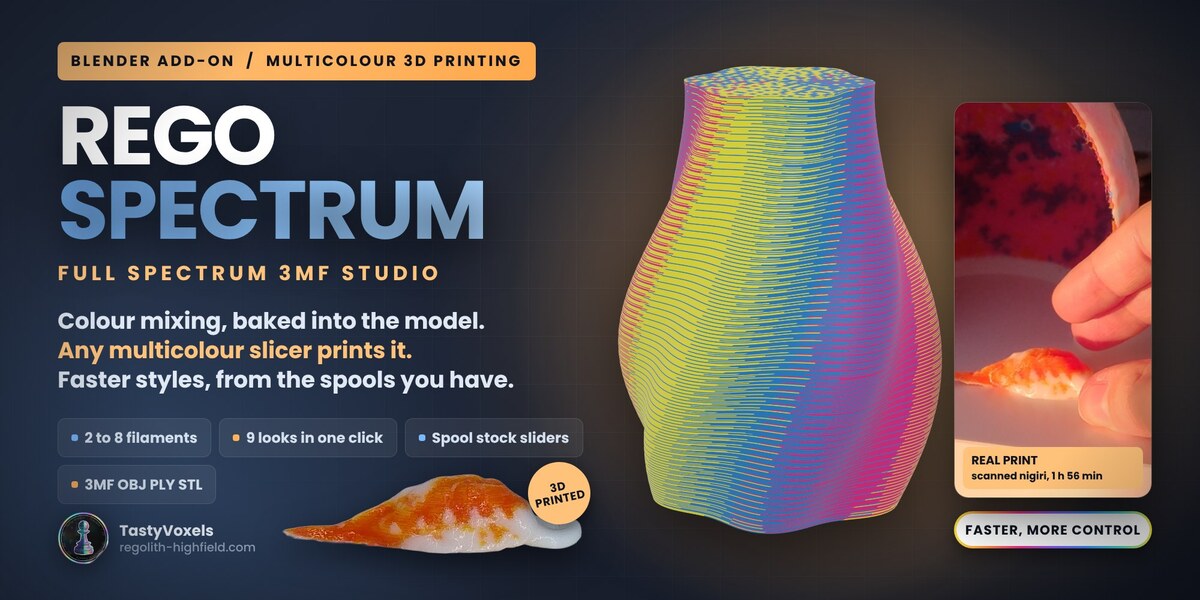
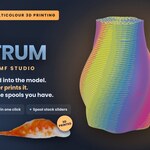

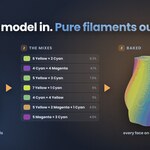
Thin layers of two or three filaments, printed one over the other, read as a new colour. With four spools you get dozens of colours. Until now you needed a slicer with a colour mixing feature to do it.
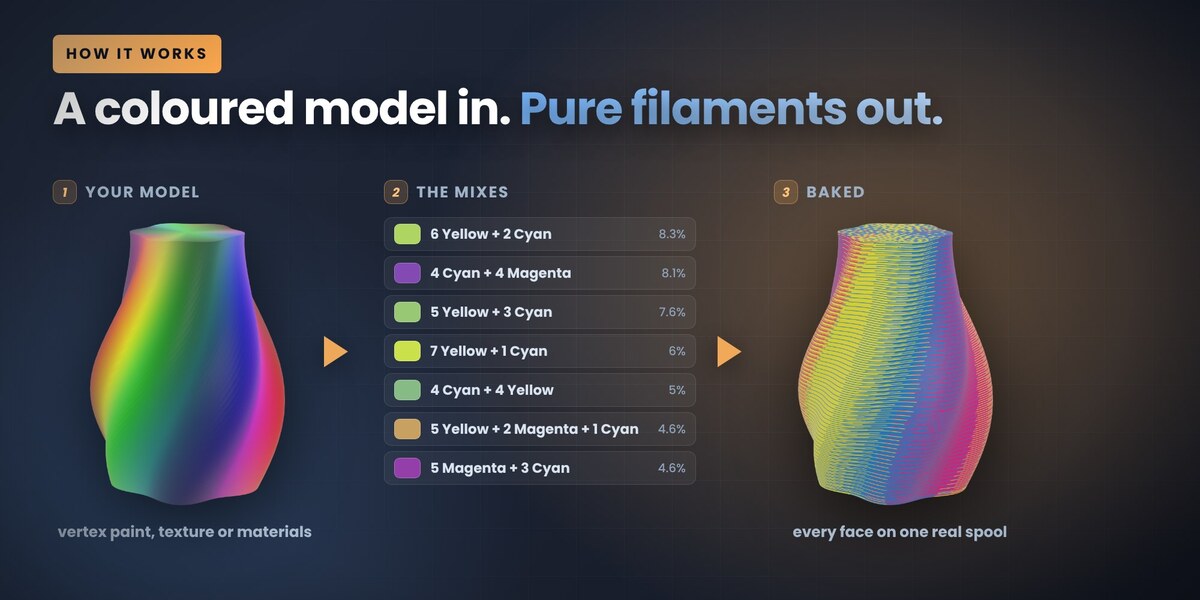
Rego Spectrum does the mixing in the model instead. It cuts the surface of your coloured model into layer bands and small cells, and puts every face on one pure filament. The file you export already carries the blend, so a multicolour slicer with no mixing feature prints the same result. And because the plan is yours, you can decide the spools, the recipes and how many tool changes you are willing to pay for.
COMMON PROBLEMS, CLEAR ANSWERS
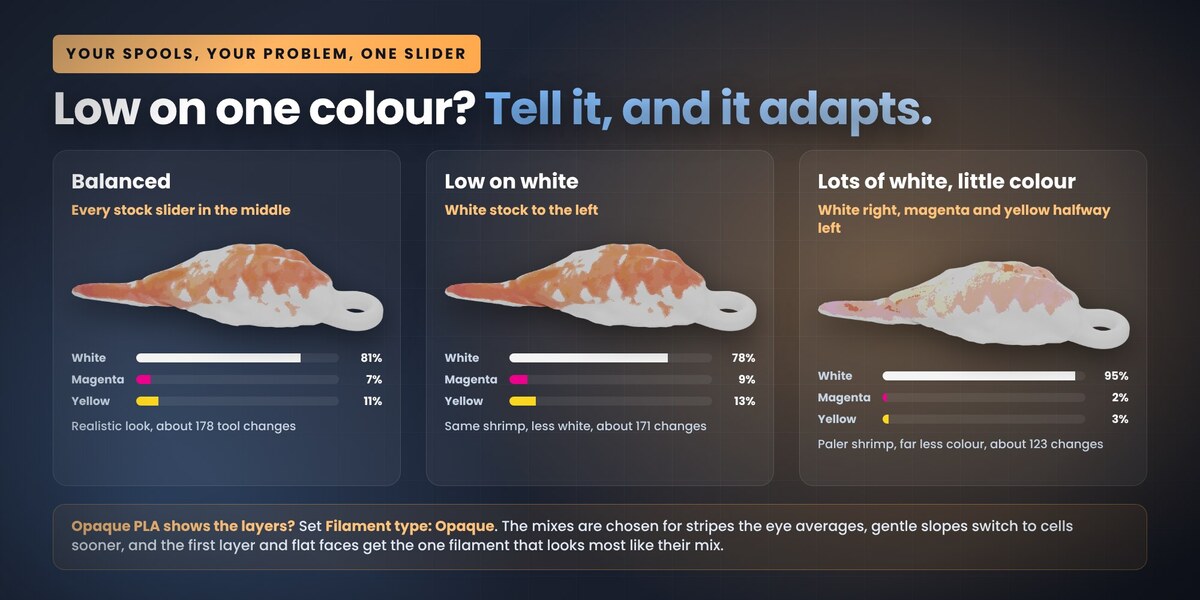
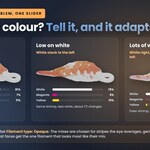
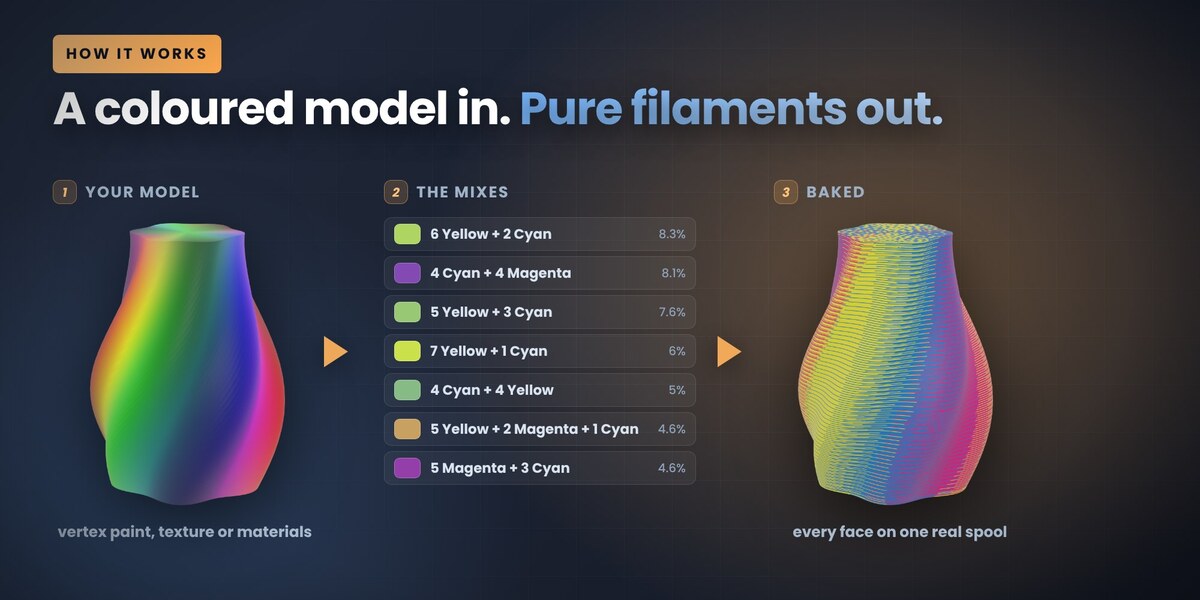
- I am low on white. How do I waste less of it? In step 1, slide the White stock to the left. The mixes lean on the other spools and keep the colours as close as they can. On the nigiri keychain white goes from 81% to 78%: a white object still needs white, but every gram counts.
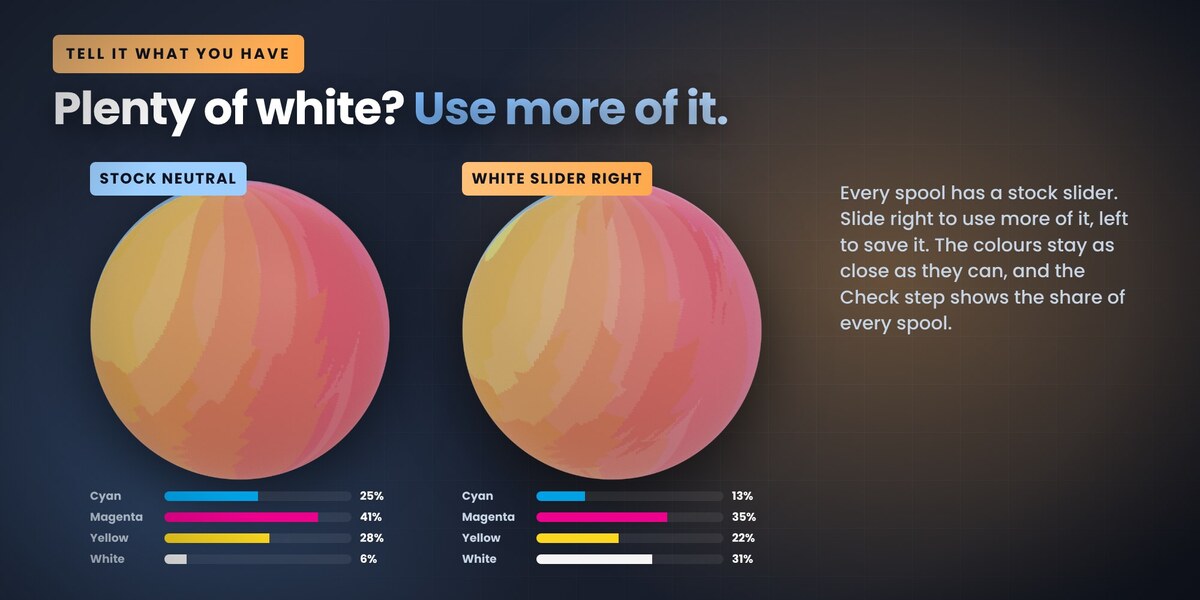
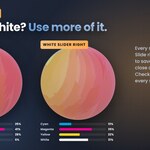
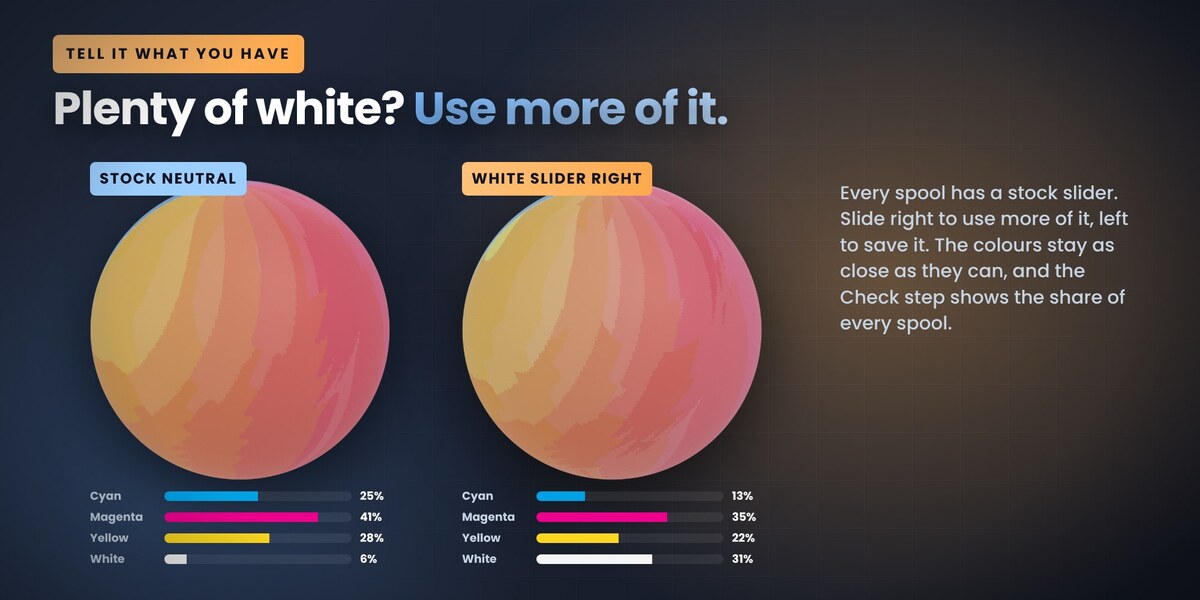
- I have plenty of white and little colour left. Can white do more of the work? Slide White to the right and the colours you are short of to the left. On the nigiri, magenta and yellow drop from 18% to 5% and tool changes from 178 to 123. The shrimp gets paler: the share of every spool before and after is in the Check step, so you decide.
- My opaque PLA shows every layer. In step 1, set Filament type to Opaque. Ordinary opaque PLA does not blend like filament made for colour mixing: each layer shows only its own colour. With Opaque the mixes are chosen for that, gentle slopes switch to cells sooner, and the first layer and flat faces get the one filament that looks most like their mix.
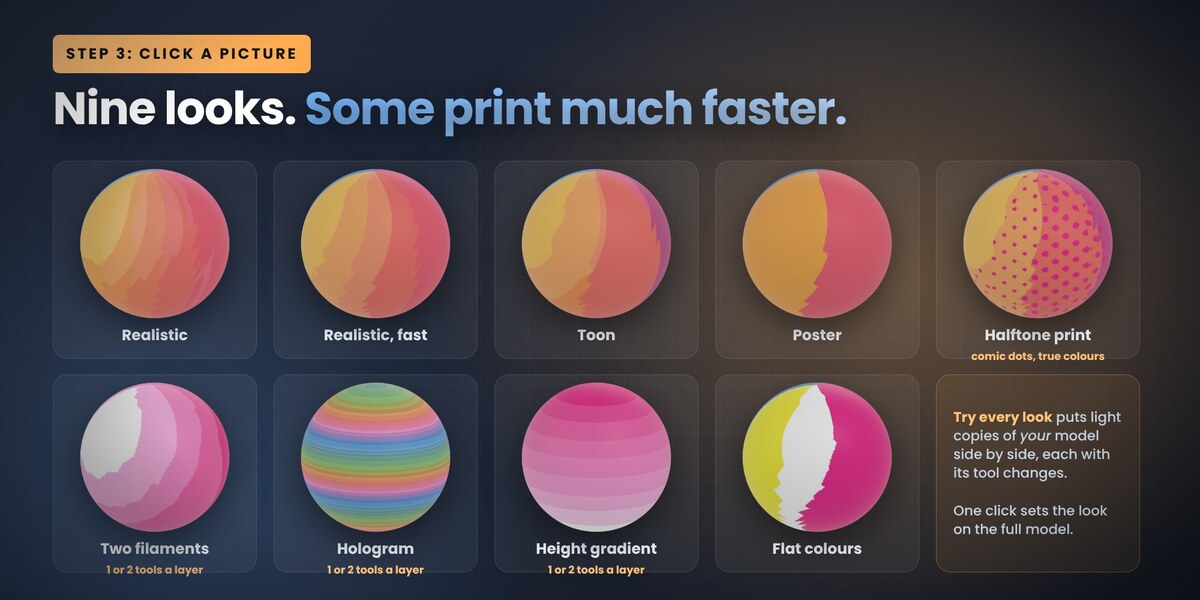
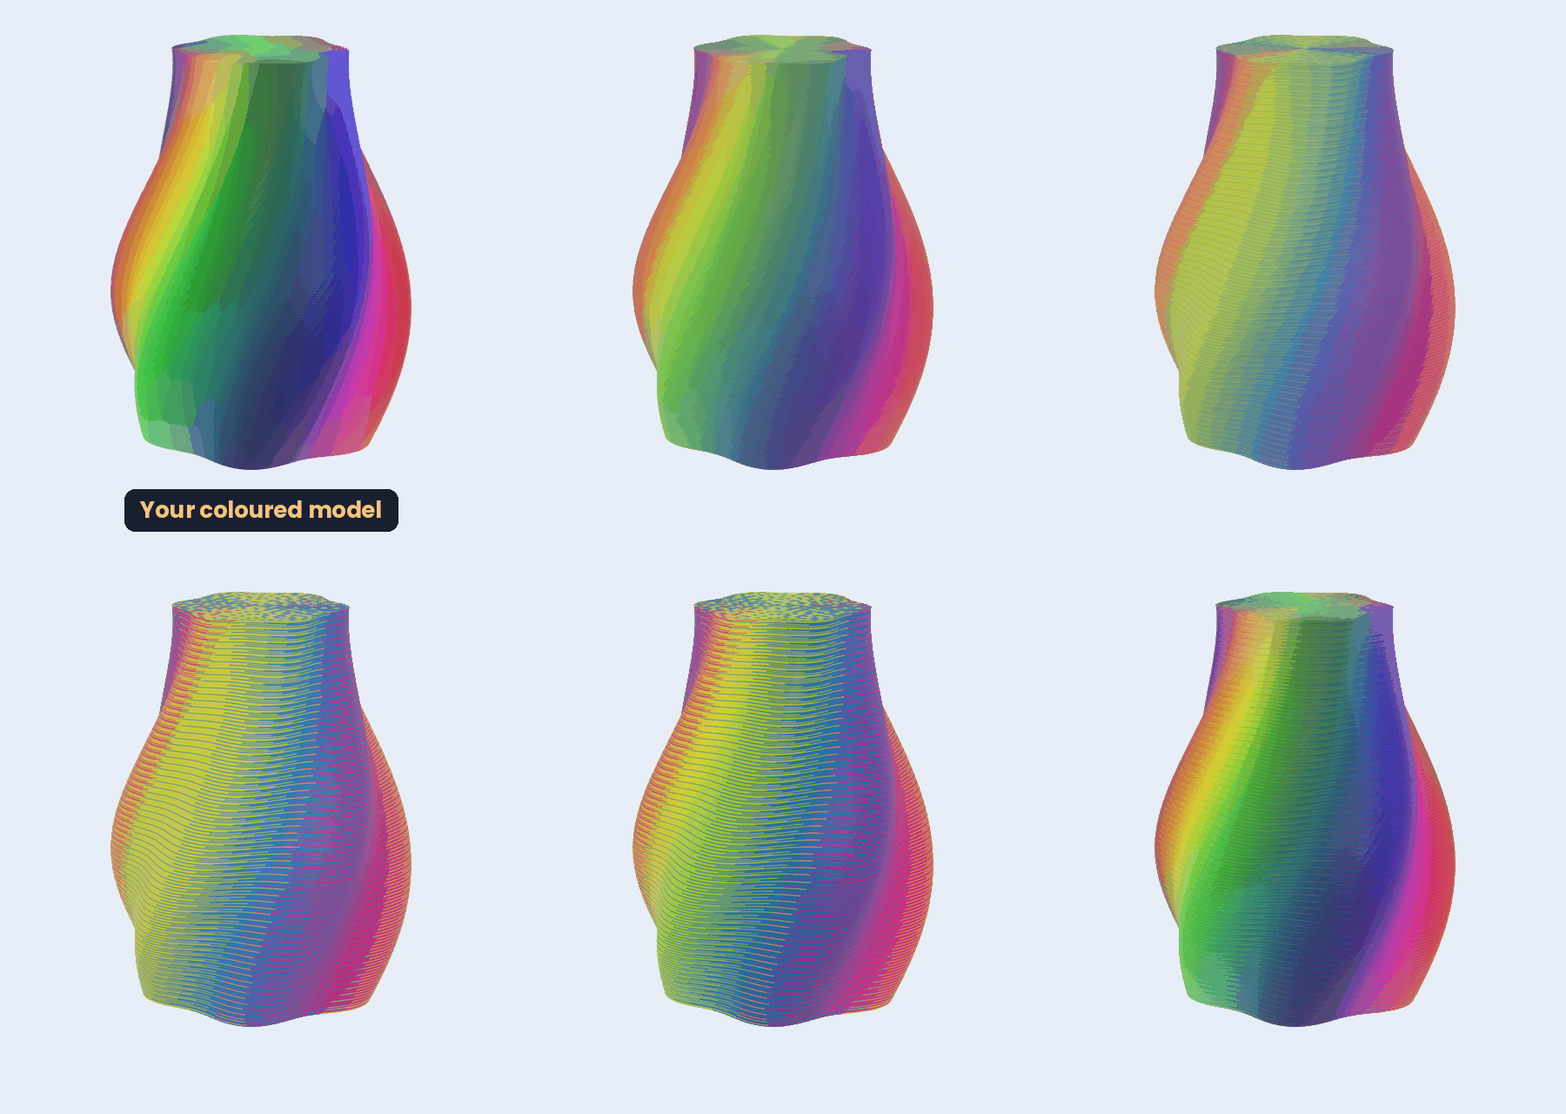
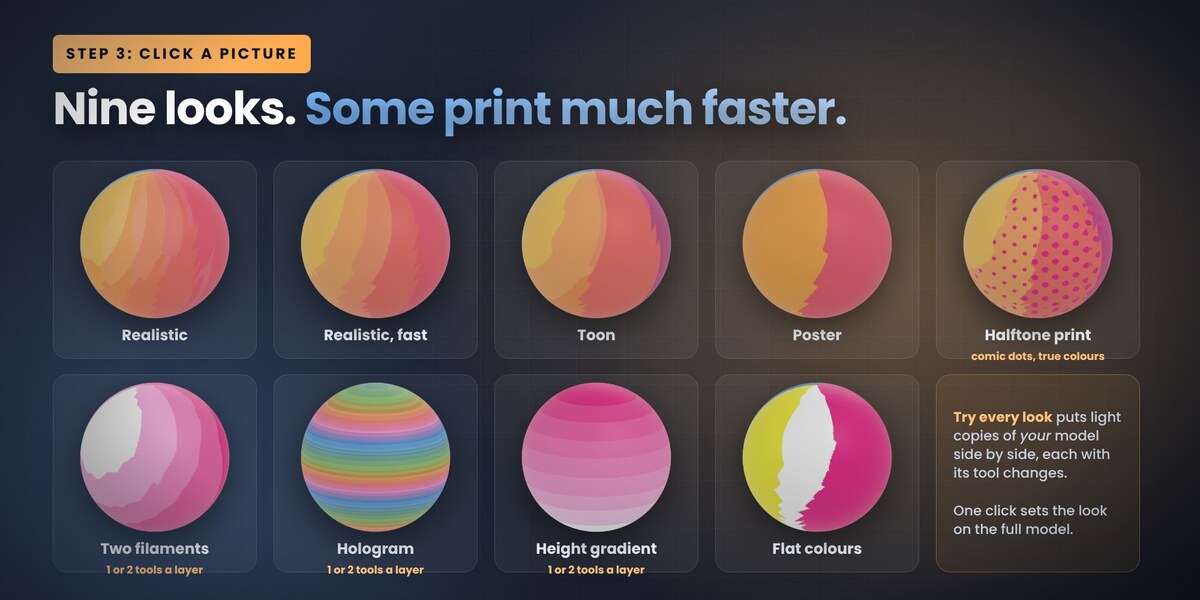
- Which look should I use? Click Try every look in step 3: light copies of your model appear side by side, one per look, each with its tool changes. The list marks the truest colours, the best balance and the fewest changes. One click on a name sets that look.
WHAT ENDS UP IN THE FILE
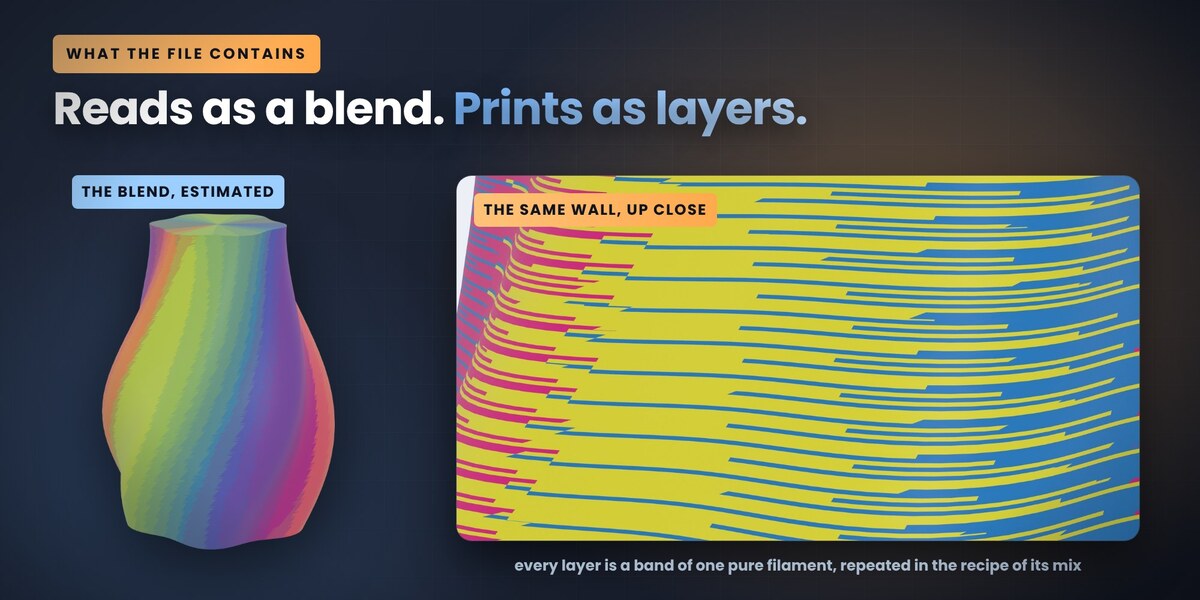
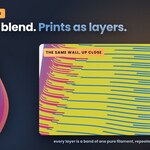
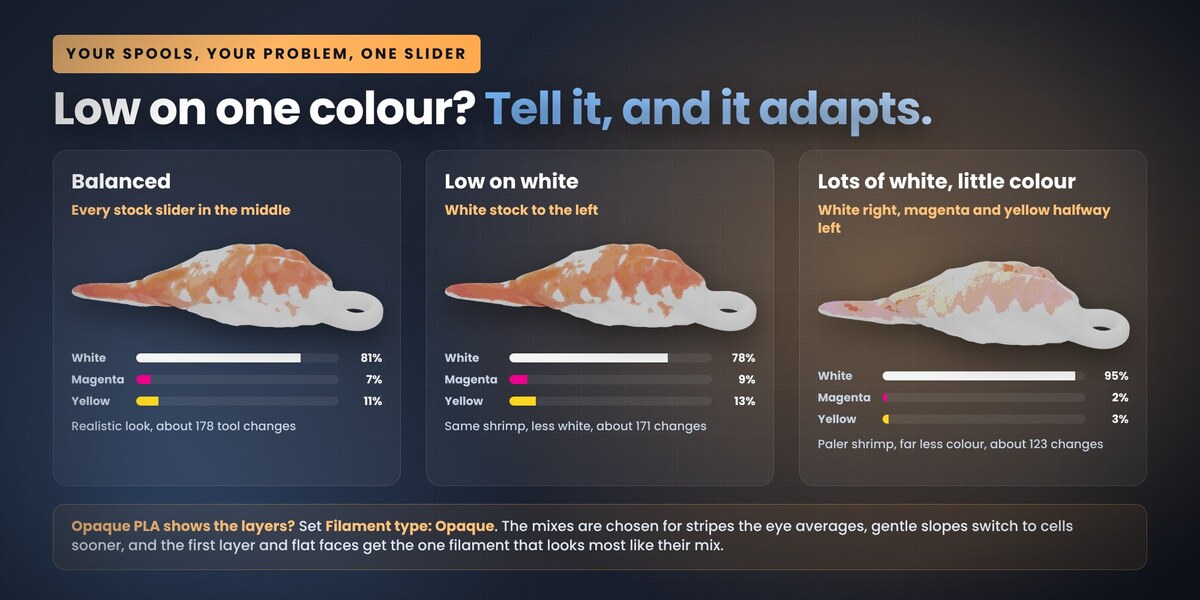
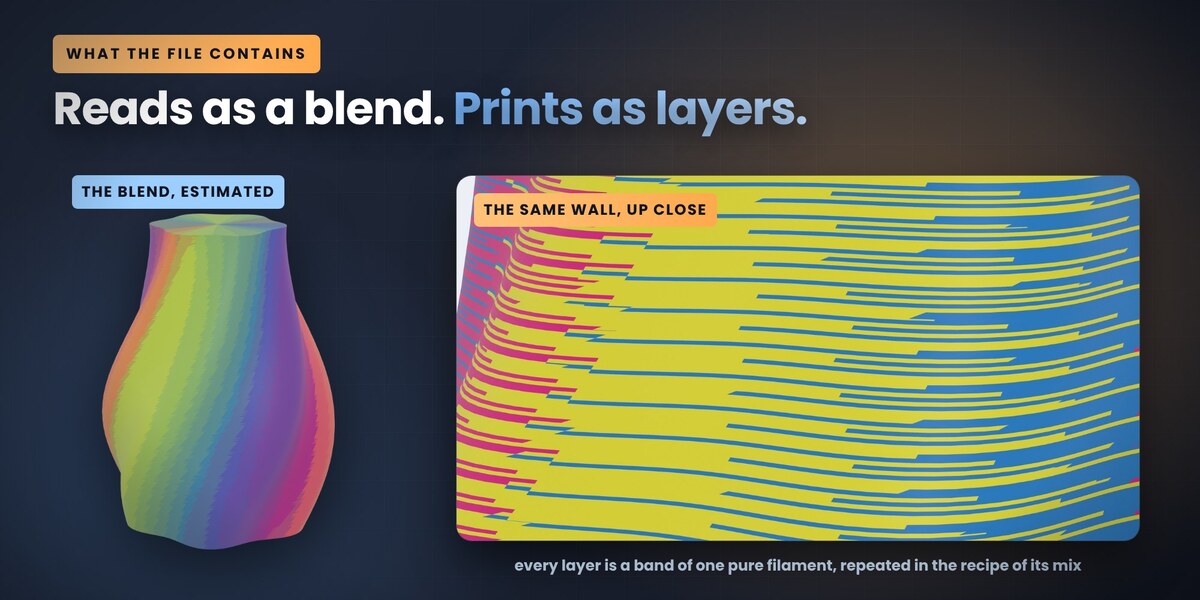
From a distance the model reads as blended colours. Up close it is plain layers: one band per layer, each band a single filament, repeated in the recipe of its mix. A mix of five parts yellow and three parts cyan is five yellow layers and three cyan ones out of every eight, spread as evenly as they can go.
The bands are cut on the same planes your slicer uses (you give the layer height and the first layer height), so one band is one layer. Every cut is shared with the neighbour faces: a closed model stays closed, and I check it for you in the panel.
BANDS ON WALLS, CELLS ON FLATS
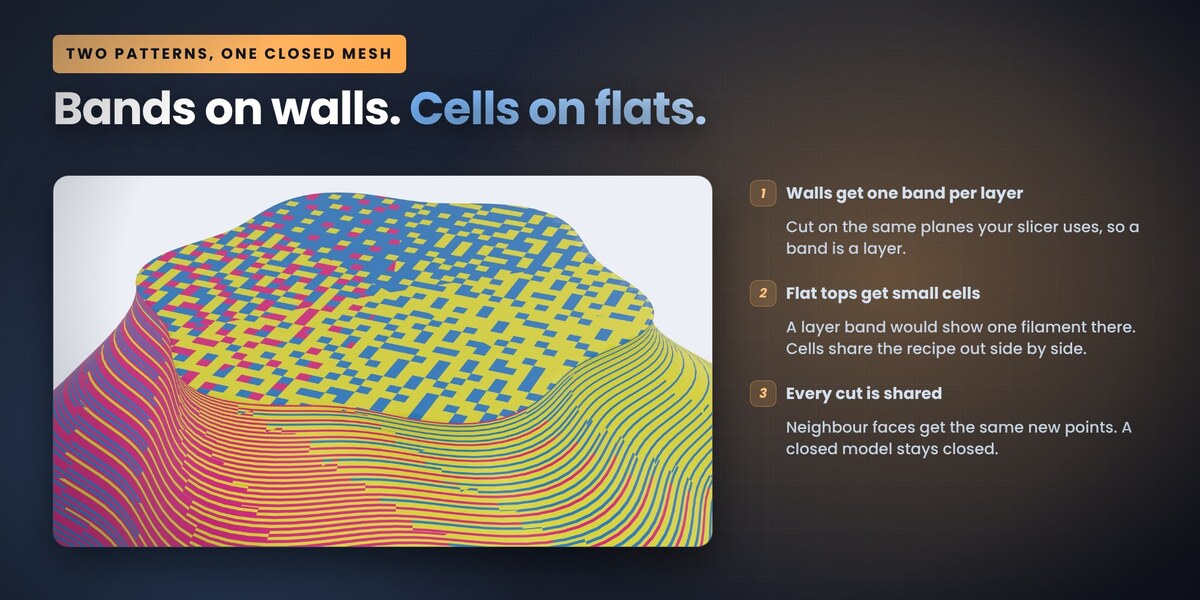
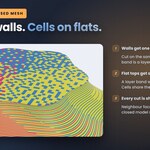
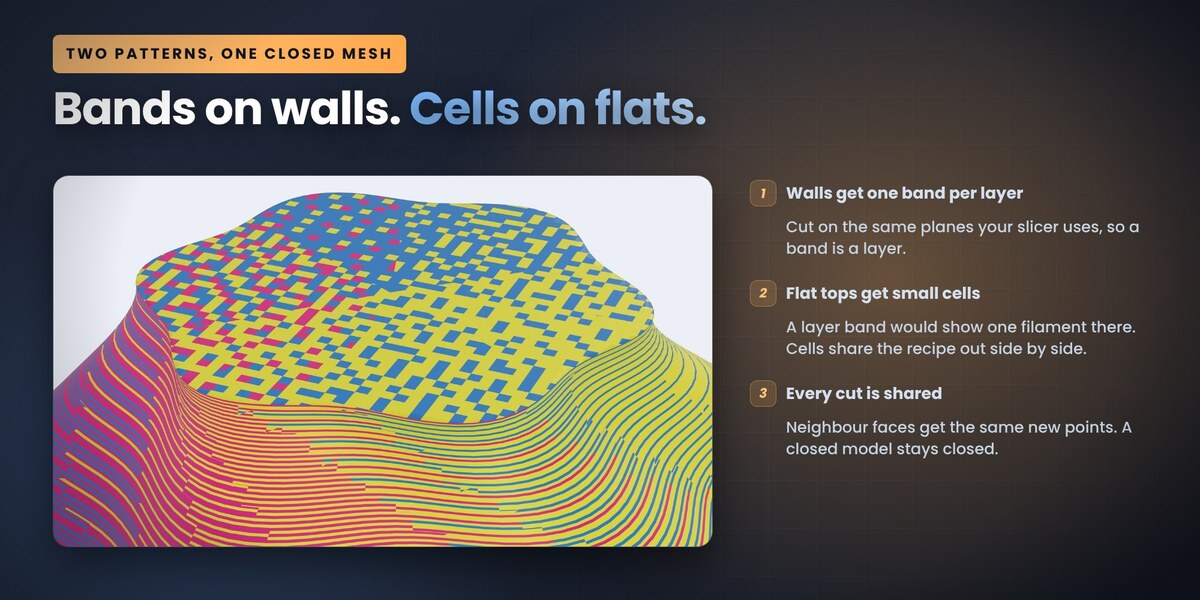
Layer bands blend well on walls. On a flat top they cannot: the whole top is one layer, so it would show one filament. There, and on gentle slopes where a band would look wider than you allow, the add-on switches to small cells, a halftone that shares the recipe out side by side. You can also ask for bands only (lightest file) or cells everywhere.
The cell size follows your nozzle: two extrusion lines is the smallest that prints clean, 0.84 mm on a 0.4 mm nozzle and 0.44 mm on a 0.2 mm one. Both nozzles are one click presets.
YOUR SPOOLS, YOUR STOCK
Load a ready set (cyan magenta yellow white, with black, red yellow blue, and others) or list your own spools, from two to eight, each with its real colour. The add-on finds the closest mix for every colour of the model, from a colour attribute, a texture or the materials.
Tell it what you have. Every spool has a stock slider. Running out of blue? Slide it left and the mixes lean on the other spools, keeping the colour as close as they can. A big box of white? Slide it right and more of the model is printed with white and less with the coloured spools, with the colours still there. The Check step shows the share of every spool before and after, so you see what you save. You can also switch a spool off without changing the slicer slots.
Translucent or opaque. Say what kind of filament you load. Filaments made for colour mixing let light through a few layers, so the colours multiply like inks. Opaque PLA does not: every layer shows only its own colour and the eye averages the stripes, and on the first layer or a flat face you see one filament and nothing else. With Opaque set, the mixes are chosen for that kind of blend, gentle slopes switch to cells sooner, and the first layer and flat faces cut in bands get the single filament that looks most like their mix.
For full control, open Fine control of the mixes: the cycle (how many layers a mix repeats over), how many filaments a mix may use, the least share of a filament, and mixes of mine, recipes you write part by part for the colours you choose.
LOOKS THAT SAVE TIME, IN ONE CLICK
Step 3 is a gallery: click a picture and every setting of that look is set for you.
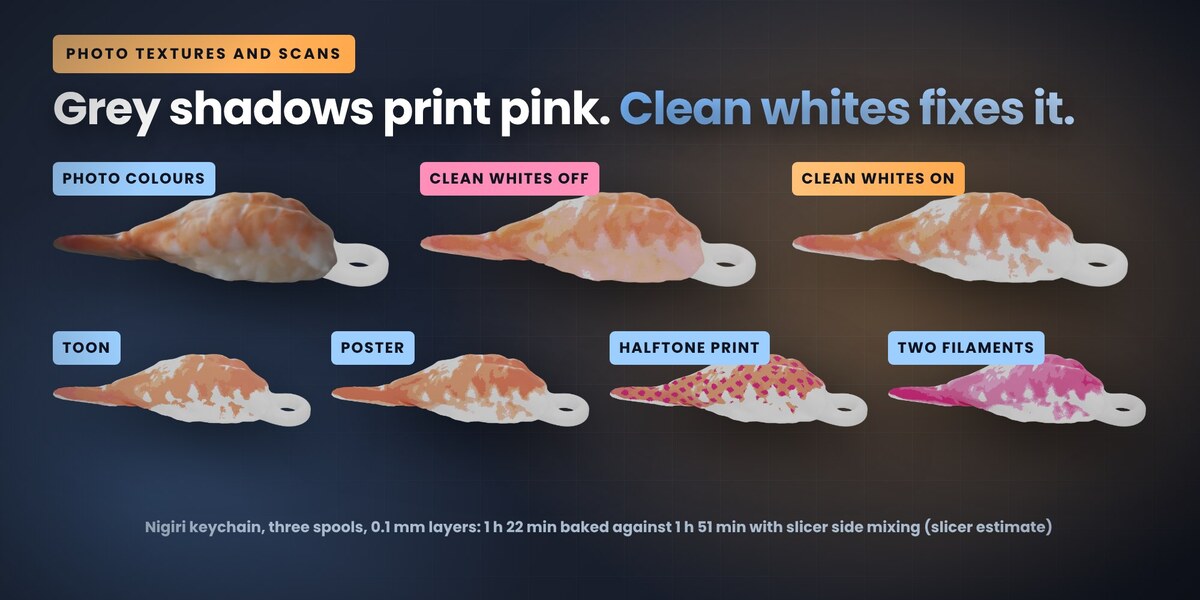
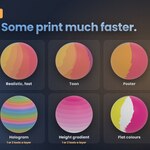
- Realistic and Realistic, fast: closest colours, or close colours with fewer tool changes.
- Toon: light and shade in a few flat steps, like a comic.
- Poster: a few bold flat colours, like a screen print.
- Halftone print: toon tones in their real colours, shaded with round dots like a colour comic page.
- Two filaments: the whole model from dark to light with two spools.
- Hologram: rainbow bands that follow the height, like a holographic foil.
- Height gradient: two spools fading from the bottom to the top.
- Flat colours: no mixing at all.
Two filaments, hologram and gradient need one or two tools a layer, whatever the model. A quick print that looks like a choice. Halftone print is there for the look: its dots add tool changes.
Try every look puts light copies of your own model next to it, one per look, each with a label: what it is for, about how many tool changes, how many mixes. The list marks the look with the truest colours, the best balance and the fewest changes, and one click on a name sets that look on the full model.
FROM A PHOTO OR A SCAN
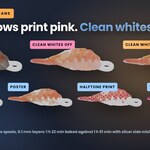
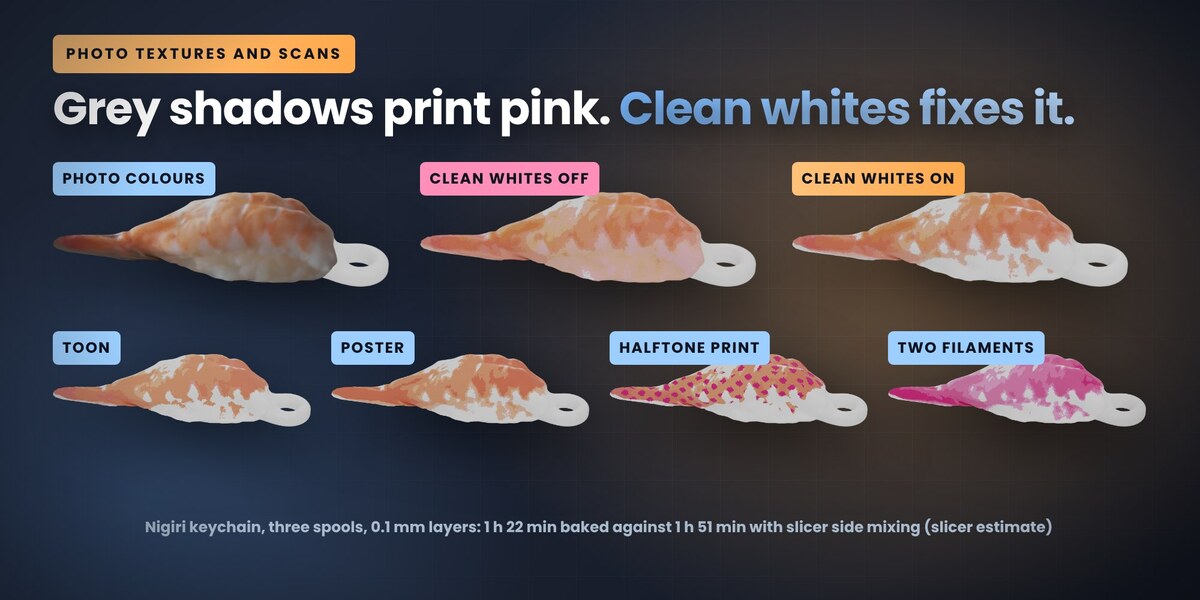
Photo textures and scans carry the light of the room: shadows, grey corners, beige where a white thing sat in the shade. A printer can only go darker by adding pigment, so that grey prints pink or peach. Fit to my filaments maps the light and shade of the texture onto what your spools can print, and Clean whites turns everything with almost no colour of its own into plain white, so rice stays rice.
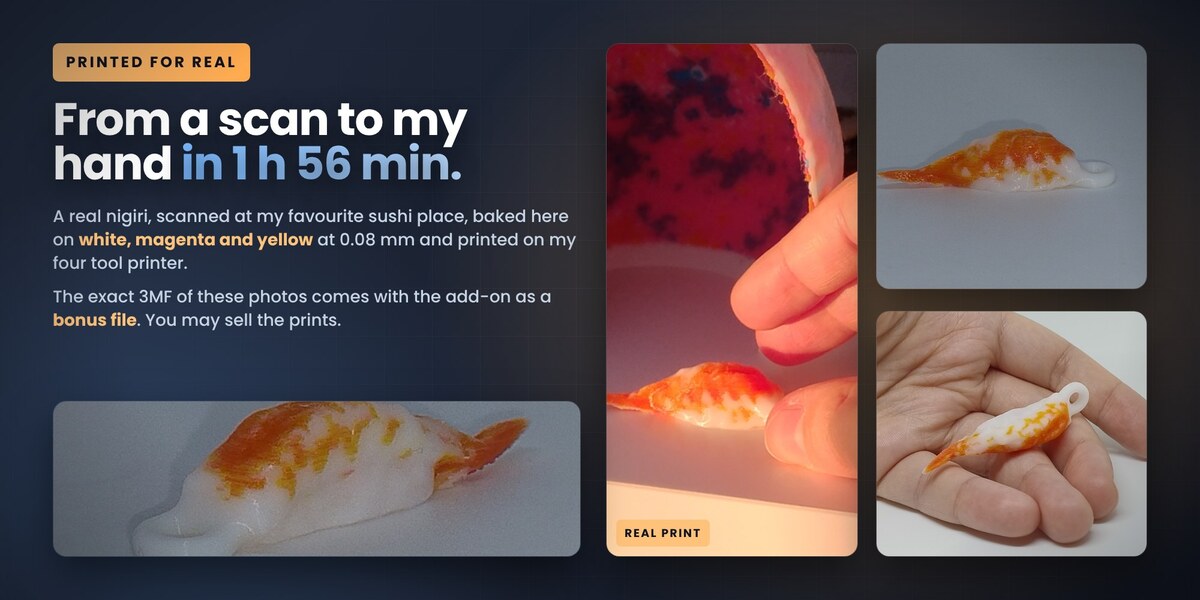
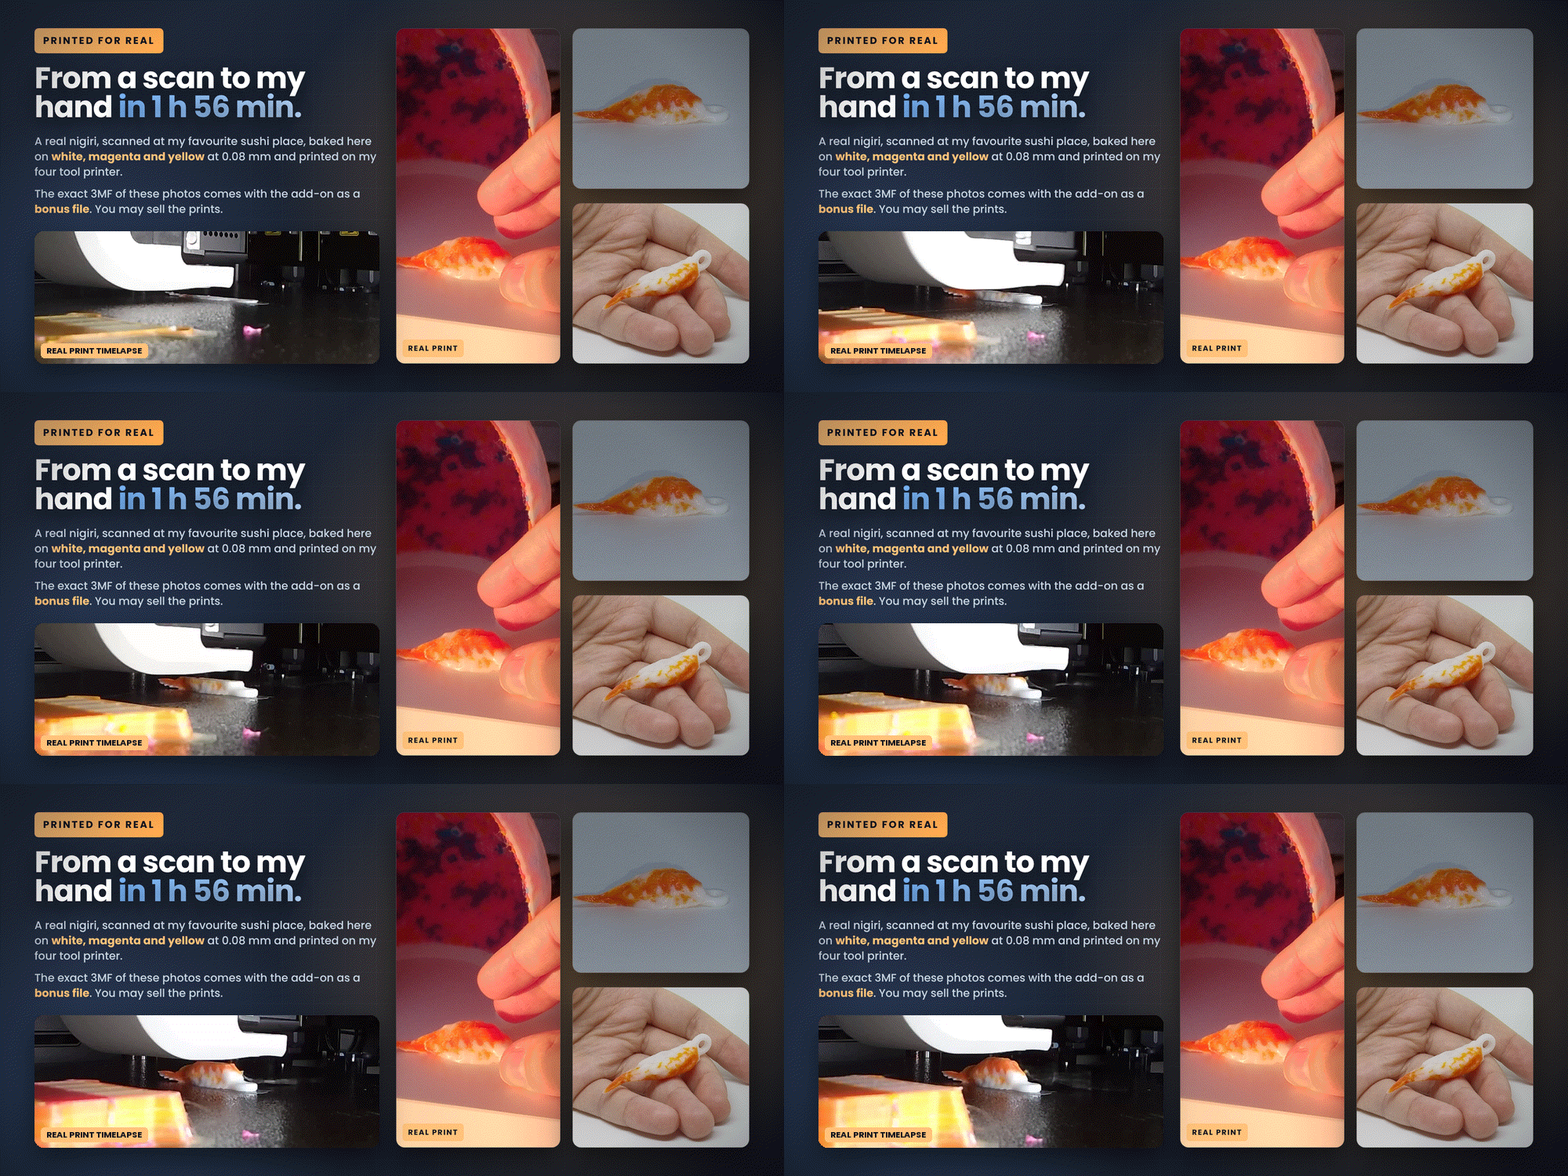
The nigiri keychain in the pictures is a real nigiri that I scanned at my favourite sushi place with Rego Scan, my scanner add-on that is coming soon, baked here on three spools (white, magenta, yellow). At 0.1 mm the slicer of my four tool printer gives 1 h 22 min and 163 tool changes, against 1 h 51 min and 235 changes with slicer side mixing on the same model. The 0.08 mm file is the one I printed, with an ordinary 0.4 mm nozzle, not a fine 0.2 mm one, and 0.08 mm layers. The filament was PLA made for full spectrum mixing by my printer's maker, not the usual CMY PLA for lithophanes. 1 h 56 min on the printer, and it fools the eye better than I hoped. With a 0.2 mm nozzle I expect it to look finer still.
PRINT TIME
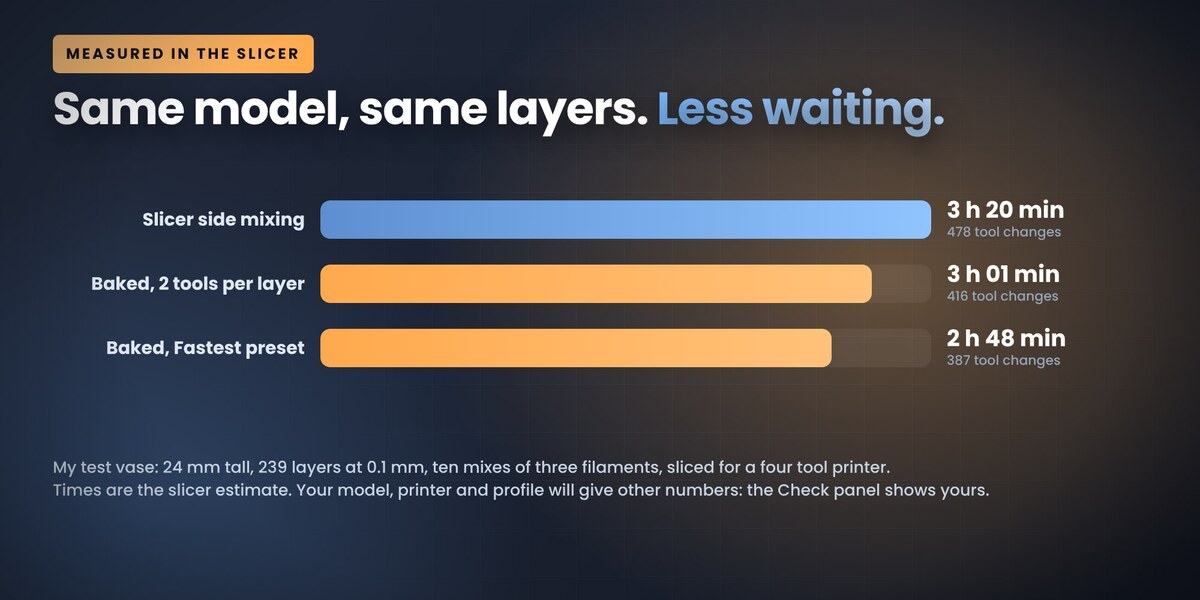
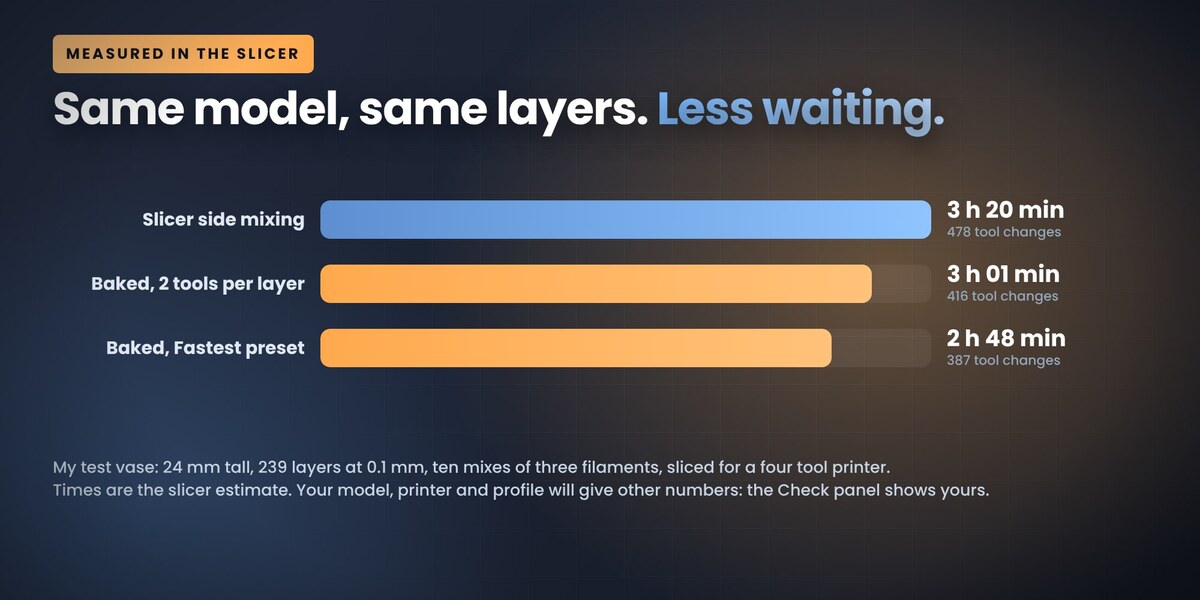
Colour mixing is slow because of tool changes, not because of plastic. A layer that needs three filaments costs two changes, on every layer. So the add-on plans the layers with that in mind:
- Share tools per layer: mixes take the same filament on the same layer whenever their recipes allow it.
- Tools per layer: a soft limit on how many filaments a layer may use. Recipes stay exact over the height, only the order moves.
- Inside filament: the one printed under the coloured skin is on every layer anyway, so the mixes lean on it.
- Layers per band and the layer height itself: thicker layers halve the print, and here you see what it does to the bands before you print.
I measured it by slicing the same test vase three ways (24 mm tall, 239 layers at 0.1 mm, ten mixes of three filaments, four tool printer). Slicer side mixing: 478 tool changes, 3 h 20 min. Baked with two tools per layer: 416 changes, 3 h 01 min. Baked with the Fastest preset: 387 changes, 2 h 48 min. On 233 of the 239 layers the sliced file used exactly the filaments the add-on had planned on the outer wall, and the others were almost all first and last layers. These are slicer estimates on one model. Yours will differ, which is why the panel shows the count for your model, with and without the speed options, before you export.
FILES FOR EVERY SLICER
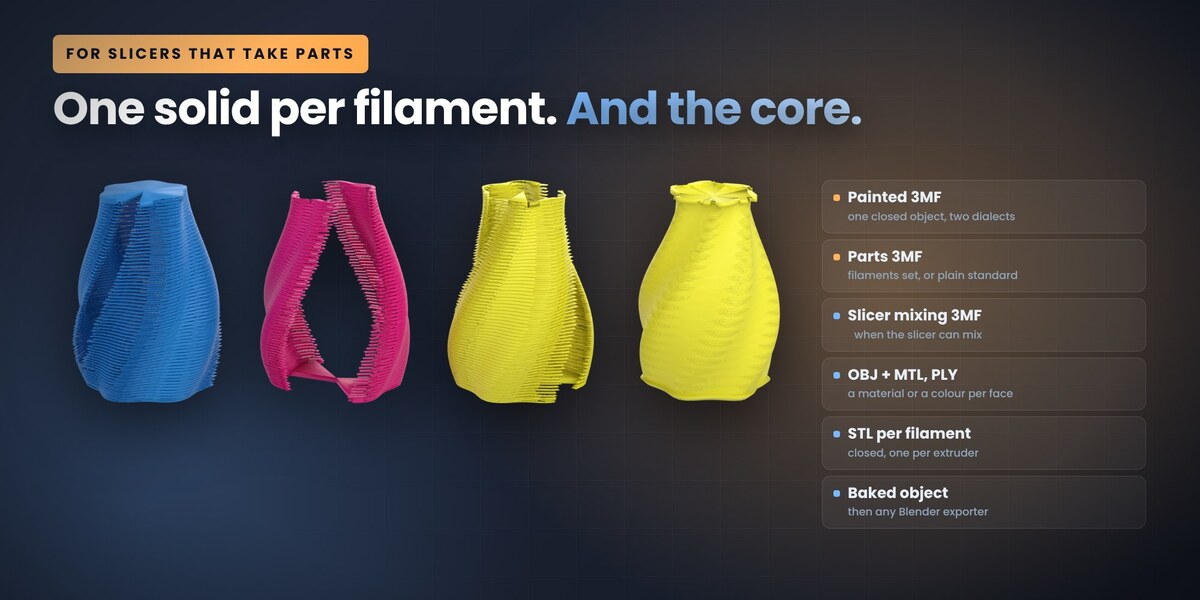
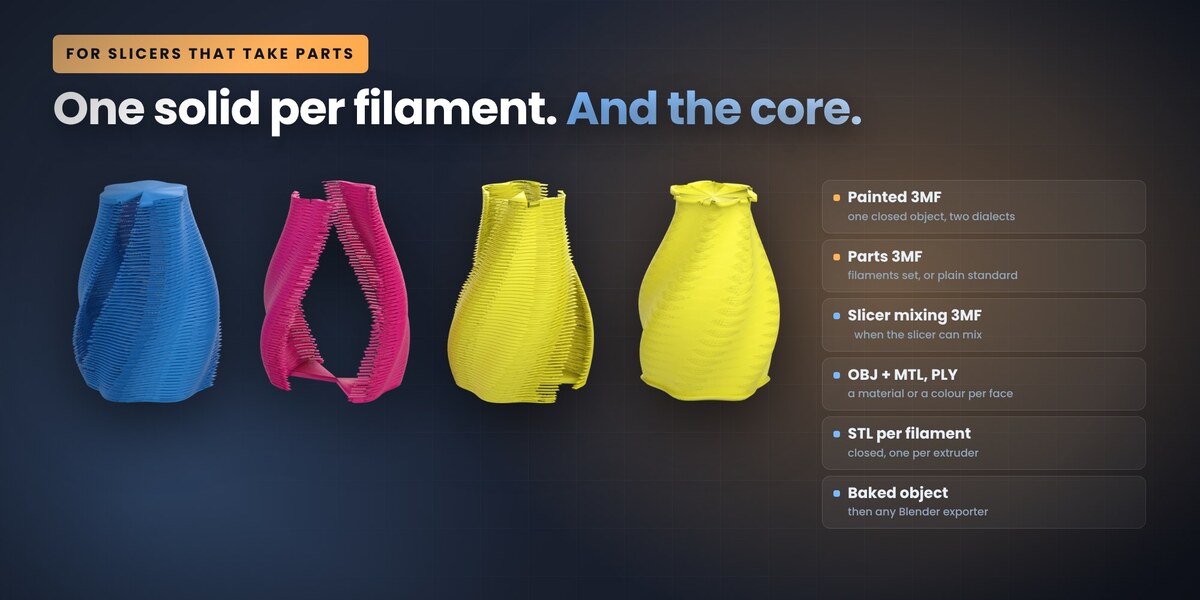
- Painted 3MF: one closed object, every triangle painted with a pure filament. Written in the two paint dialects used by the common slicer families.
- Parts 3MF: one closed solid per filament for the coloured skin, plus the core, with the filaments already set. Also as a plain standard 3MF with a colour per part, for everything else.
- Slicer mixing 3MF: when your slicer can mix, the same mixes as mixed filament rows. Useful to compare.
- OBJ + MTL with one group per filament, PLY with a colour on every triangle, STL per filament.
- Bake into a new object: the result stays in your scene, every face on a filament material, and any Blender exporter takes it from there (FBX, glTF, USD).
The skin of the solid parts is as deep as you say (two walls by default) and gets thinner by itself where the model is thin, so two skins never cross.
WORKS WITH MY OTHER ADD-ONS
If you already use 3MF Magic Solver or Print it Flexy!, their colour mixing 3MF files open here with one button. Filaments and mixes come back exactly as they were written, with no colour matching in between, and you can bake the same model for a slicer that cannot mix. The colour estimate, the recipes and the mixed filament rows are the same in all three add-ons. You do not need the other two to use this one.
WHAT IT DOES NOT DO
- It does not slice. You still need your slicer, set to the same layer height and first layer height you gave the add-on. Variable layer height breaks the bands.
- Cyan, magenta and yellow cannot make black. For dark colours add a black spool: the add-on takes up to eight.
- The blended colour you see is an estimate. Translucent filament, layer height and light change the real print.
- Sub layers, where a slicer splits mixed layers into thinner ones, stay a slicer feature. A baked file gets the same look by baking and slicing at the thinner height.
- Fine layers on a big model make a heavy file. The panel estimates the triangles first and stops before it gets out of hand.
What I have tested, and what I have not yet. Every release runs the whole add-on in Blender 5.3 without a window: closed meshes, recipes, every file kind, every look, the stock sliders, the gallery, the files of my other add-ons. The release zip itself is installed the way you install it and run in Blender 4.2, 4.5, 5.0 and 5.3 on Windows, and the panel is checked in a real Blender 5.3 window. The painted 3MF, the parts 3MF and the slicer mixing 3MF with the four tool project were sliced with the slicer of my own four tool printer, and the numbers above come from there. The second paint dialect, the standard parts 3MF, OBJ, PLY and STL are checked for structure only: I have not sliced them in every slicer yet. The day I do, I will say so here. If one of them opens wrong in your slicer, write to me and I will fix it.
A NIGIRI WITH A STORY, AND A BONUS FILE
I go out for sushi to celebrate my university exams. This week I passed my last one, so this little shrimp, and this add-on, carry a piece of my life. Buon appetito!
The exact 3MF of the photos, nigiri_keychain_fs_fine_008.3mf, comes with the add-on as a second download. It is set up for a four tool printer with a 0.4 mm nozzle: white, magenta and yellow, 0.08 mm layers. You may print it and sell the prints. The file itself is for you only: please do not share or resell it. Want to try it first? Pick the Free sample option at checkout: you get the same keychain for personal use, and you can print it before you buy the add-on.
COMING SOON: A SCANNER FOR 3D PRINTING
My next add-on is a scanner made for 3D printing, inside Blender. Rego Scan - 3MF Scanner turns photos of a real object into a colour model ready to print: as a full colour 3MF, or reduced to the spools you own.
It is built to work in tandem with Rego Spectrum and with 3MF Magic Solver. Scan an object, then bake its colours here for any multicolour slicer, or send them to slicer side mixing there. It is coming to Superhive soon: follow TastyVoxels to know when it is out.
NO AI INSIDE THE PRODUCT
There is no model, no inference, no telemetry, no network access and no data collection in this add-on. It is geometry and colour maths that run offline on your machine, the same way every time.
AI assists me while I work: it writes code with me and it translates my documentation into English, which is not my first language. I have been programming since long before generative tools were common, and I am the one who decides what the add-on does and checks what comes out: the closed meshes, the recipes within half a layer, the slicer runs.
SUPPORT AND UPDATES
Updates and support are included for good: no support period, no renewal fee. This is version 1.0.1, a first release, and every piece of feedback helps. Write to me through the chat here. Blender 4.2 or newer. Tested on Windows and Linux; it is plain Python, so macOS should behave the same, but I have not run it there yet. Licence GPL: the models you make with it are yours to print, share and sell.