Render Manager
 Individual


# Render Manager - Official Documentation
Welcome to the official documentation for **Render Manager**! This guide covers everything you need to know to install, configure, and get the most out of your new rendering workflow.
---
## 📥 1. Installation Guide
1. Download the `RenderManager.zip` file provided with your purchase. **(Do not unzip this file!)**
2. Open Blender and navigate to **Edit > Preferences > Add-ons**.
3. Click the **Install...** button in the top right corner.
4. Locate your downloaded `RenderManager.zip` and double-click it.
5. Check the box next to **Render Manager** to enable the addon.
6. Close the preferences window. In the 3D Viewport, press **`N`** on your keyboard to open the side panel, and click on the **Render Manager** tab.
---
## 🚀 2. Feature Breakdown & Usage
### 🎯 The Main Dashboard & Render Modes
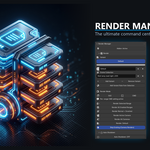
At the top of the Render Manager panel, you will find global settings and your primary render buttons.
* **GUI vs CMD Render Mode:**
* **GUI Mode:** Renders using the standard Blender user interface.
* **CMD Mode (Recommended):** Renders headlessly in the background using your system's command line. This frees up Blender's UI so you can keep working, prevents memory crashes on massive scenes, and often renders slightly faster! *(Note: Always save your `.blend` file before launching a CMD render).*
* **Skip Existing Frames:** If Blender crashes mid-render, check this box. When you restart the render, the addon will automatically scan your output folder and skip frames that are already finished!
### ⏱️ Render Ranges (Advanced Queueing)
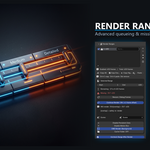
Instead of rendering your entire timeline at once, you can set up multiple custom frame ranges.
1. Click the **`+`** button under `Render Ranges` to create a new range.
2. Set your desired **Start** and **End** frames.
3. **Missing Frames Warning:** The addon actively monitors your output folder. If a frame is dropped or fails to save, a red warning will appear. Click **Rescan / Debug Frames** to update the counter.
4. **Overlapping Frames:** You can safely overlap ranges (e.g., 10-50 and 45-100). The addon intelligently manages this to ensure motion blur and physics caches remain perfectly intact.
5. Click **Render All Enabled Ranges** to process your entire queue!
### 📸 Camera & Collections Binding
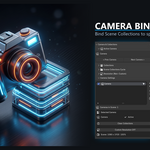
Tired of manually hiding and unhiding folders in the Outliner for different shots?
1. Navigate to the `Camera & Collections` panel.
2. Select your target camera from the dropdown (or cycle through them using the `< Prev` and `Next >` buttons).
3. Under the **Collections** section, click the **`+`** button.
4. Select the specific Scene Collections you want visible for this camera.
5. *Result:* When you click **Render All Cameras**, the addon will automatically switch to the camera, turn ON only the assigned collections, turn OFF everything else, and render the shot!
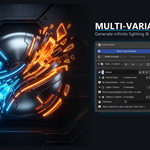
### 🎨 The Multi-Variant Engine
Generate endless variations of your scene (like different car paints, day/night lighting, or object swaps) completely automatically.
1. In the `Color Variants` panel, check **Multi-Variant Render**.
2. Click **Add Variant** and name it (e.g., "Neon Lighting").
3. Expand the variant to add rules:
* **Variant Rules:** Select an object, assign a new material, and click **`+`**. That material will only appear during this variant!
* **Lights / Planes:** Add specific light objects to this variant.
* **Objects / Collections:** Add specific meshes to hide/show them.
4. Click **Render: Default** (or Render All Enabled Ranges). The addon will cycle through every checked Variant, applying all your custom rules, and save them into neatly organized folders!
### 💤 Auto Shutdown
Rendering overnight? Expand the `Auto Shutdown` tab at the bottom of the panel and toggle it **ON**. Once your entire queue is 100% finished, the addon will trigger a 60-second countdown and safely shut down your PC.
---
## ❓ FAQ & Troubleshooting
* **Why did my CMD Render not update my recent changes?**
CMD mode reads directly from your saved `.blend` file on your hard drive, not your active RAM. You *must* press `Ctrl+S` to save your file before clicking a CMD render button!
* **How do I completely remove a variant rule?**
Simply click the little trash can icon next to the specific rule or material inside the Variant panel.
* **Is it safe to use my PC while CMD Rendering?**
Yes! CMD rendering happens in the background. However, rendering uses 100% of your CPU/GPU, so heavy tasks like gaming may slow down the render significantly.
---
*For further support, please reach out via the Superhive messaging system!*
$20
Have questions about this product?
Login to message
| Blender Extension Compatible | Yes |
| Published | 12 months ago |
| Blender Version | 4.2 - 5.2 |
| Extension Type | Add-on |
| Render Engine Used | Cycles, Eevee, Octane, Vray |
| License | GPL |