 kenmko


================================================================
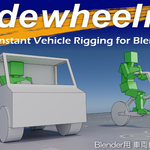
RideWheelRig Add-on Manual
Version 0.6.0
================================================================
━━━━━━━━━━━━━━━━━━━━━━━━━━━━━━━━━━
① About This Add-on
━━━━━━━━━━━━━━━━━━━━━━━━━━━━━━━━━━
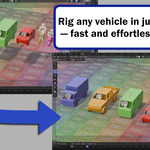
RideWheelRig is a Blender add-on for setting up vehicle driving
animations quickly and easily.
Regardless of the size of your vehicle or wheels, simply prepare
the required objects and the rig will be set up automatically —
for both 2-wheel and 4-wheel vehicles.
Ground tracking, suspension, steering, banking, pitch, and roll
are all calculated automatically, with no bones or constraints
required.
[Supported Version]
Blender 5.0
[Use Cases]
- Driving animations for cars, trucks, motorcycles, etc.
- Curve (path) following for cinematic shots
- Real-time ground tracking on uneven terrain
- Action scenes including jumps and air tricks
- Animation and film production
[Location]
3D Viewport → Sidebar (N key) → RideWheelRig tab
[Development Note]
This add-on was developed with the assistance of AI.
━━━━━━━━━━━━━━━━━━━━━━━━━━━━━━━━━━
② Installation
━━━━━━━━━━━━━━━━━━━━━━━━━━━━━━━━━━
Install RideWheelRig.py via Blender Preferences → Add-ons.
━━━━━━━━━━━━━━━━━━━━━━━━━━━━━━━━━━
③ Basic Usage
━━━━━━━━━━━━━━━━━━━━━━━━━━━━━━━━━━
The forward direction is assumed to be the +Y axis.
────────────────────────────────
◆ Preparation: Creating a Collection
────────────────────────────────
The add-on manages each vehicle by linking it to a single
Blender collection. Before building a rig, create a collection
and place all the vehicle's objects inside it.
The collection name becomes the vehicle's name in the list.
────────────────────────────────
◆ Required Objects
────────────────────────────────
[Common to all vehicles]
- Body mesh : The main vehicle body
- Ground mesh : Terrain object used for raycast ground detection.
All modifiers (e.g. Subdivision Surface) must be
applied before use.
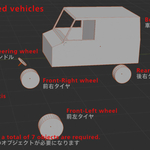
[4-wheel vehicles]
- Front-Left wheel (FL)
- Front-Right wheel (FR)
- Rear-Left wheel (RL)
- Rear-Right wheel (RR)
- Steering wheel (optional) : Steering wheel mesh
- Steering wheel axis (optional) : Empty defining the rotation axis
* Align the local Z rotation axis to match the direction the
steering wheel rotates.
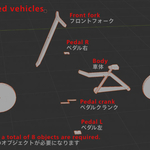
[2-wheel vehicles]
- Front fork : Part that rotates with the front wheel
- Steering axis : Empty defining the steering rotation axis
* Align the local Z rotation axis to match the direction the
front fork rotates.
- Front wheel
- Rear wheel
- Pedal crank (optional)
- Pedal R (optional)
- Pedal L (optional)
────────────────────────────────
◆ Adding a Vehicle to the List
────────────────────────────────
1. Open the "RideWheelRig" tab in the Sidebar.
2. Select the collection containing your vehicle objects, then
click the "+" button in the vehicle list to add a new entry.
3. Select the new entry and expand the "Objects" section.
4. Choose "4 Wheel" or "2 Wheel" as the vehicle type.
────────────────────────────────
◆ Picking (Assigning) Objects
────────────────────────────────
Steps:
1. Select the object you want to assign in the 3D Viewport.
2. Press the "Pick" button next to the corresponding slot.
3. Repeat for all slots.
When all required slots are filled, "✅ All set" is displayed.
If any required slot is missing, a warning appears and the rig
cannot be built.
* The steering wheel axis and steering wheel (4-wheel), and the
pedal crank and pedals (2-wheel) are optional — the rig can
be built without them.
────────────────────────────────
◆ Building and Removing the Rig
────────────────────────────────
[Build]
Press "Build Rig" to automatically place all necessary Empty
objects.
[Remove]
Press "Remove Rig" to delete all generated Empties, clear all
parent-child relationships, and restore objects to their
original positions.
────────────────────────────────
◆ Parameter Reference
────────────────────────────────
[Suspension (4-wheel only)]
Max Length (max_suspension)
Maximum travel distance for each wheel.
[Steering]
Sensitivity (steering_sensitivity)
Multiplier for how far the wheels turn relative to CarRoot's
yaw change. Higher values produce sharper steering.
Range: 0.1 – 20.0
Wheel Turn Ratio (4-wheel only, active when axis Empty is picked)
How many times the steering wheel rotates per unit of tire
steering angle.
Range: 0.1 – 50.0
[Bank]
Bank Sensitivity (bank_sensitivity)
How much the vehicle leans into curves.
0 = no lean; higher values = more lean.
Range: 0.0 – 200.0
Roll Sensitivity (roll_sensitivity)
How much the vehicle follows the lateral tilt of the terrain.
0 = always upright; 1 = fully follows ground slope.
Range: 0.0 – 1.0
[Gear (2-wheel only)]
Gear Ratio (gear_ratio)
How many times the pedal crank rotates per one rear wheel
revolution.
Range: 0.1 – 10.0
────────────────────────────────
◆ Motion Modes
────────────────────────────────
[Direct Mode]
Animate the CarRoot object directly with keyframes.
Enable "Auto face direction" to have CarRoot's orientation
calculated automatically from its movement direction.
To animate in reverse, uncheck "Auto face direction" and
keyframe the animation manually.
[Curve Follow Mode]
Select a curve object (Bezier, NURBS path, etc.) and a Follow
Path constraint will be applied to CarRoot automatically.
The curve can be swapped without rebuilding the rig — simply
select a new curve in the UI and it updates immediately.
Animate by keying the offset value in the Follow Path constraint
under Object Constraints.
────────────────────────────────
◆ Adding a Rider / Driver
────────────────────────────────
To attach a character to the vehicle, parent the hands and feet
to the rig after building it.
────────────────────────────────
◆ Jump Animation
────────────────────────────────
Jumps are controlled using the JumpOffsetEmpty object.
After building the rig, find "JumpOffsetEmpty_(vehicle name)"
in the Outliner and set keyframes on it.
────────────────────────────────
◆ Limitations
────────────────────────────────
[Roll direction (lateral slope) limit]
When the ground's lateral slope (roll direction) exceeds
approximately 25 degrees, the raycast origin may drop below
the ground surface, causing ground detection to fail.
This can result in unstable behavior such as a wheel suddenly
snapping to its maximum suspension position.
However, if the slope increases gradually, GroundEmpty tracks
the terrain incrementally while CarRoot also rises, so issues
are unlikely to occur in practice.
Be cautious near sudden drop-offs or abrupt steep inclines.
[Pitch direction (fore-aft slope) limit]
Pitch angle is hard-clamped at ±45 degrees in code.
On slopes steeper than 45 degrees, the vehicle body will not
tilt further.
The raycast has more headroom in the pitch direction than roll,
and gradual slopes up to near 45 degrees are tracked stably.
[Unsupported terrain and motion]
- Driving inside tubes, on tunnel ceilings, or any situation
where the vehicle's "up" points in a direction other than
world Z is not supported.
This add-on assumes CarRoot's world Z axis always points up.
- Raycast will not work correctly if the ground mesh has
unapplied modifiers such as Subdivision Surface.
Always apply modifiers before use.
- If using Shrinkwrap on CarRoot's path curve, apply it as well.
━━━━━━━━━━━━━━━━━━━━━━━━━━━━━━━━━━
④ Terms of Use
━━━━━━━━━━━━━━━━━━━━━━━━━━━━━━━━━━
RideWheelRig Add-on — Terms of Use
1. Personal and Commercial Use
This add-on is free to use for both personal and commercial
purposes, including commercial films, videos, and game
prototypes.
2. Modification
You are free to modify the source code of this add-on for
your own use.
3. Redistribution
Redistribution of this add-on to third parties — whether
modified or unmodified — is prohibited.
4. Disclaimer
The author accepts no responsibility for any damages arising
from the use of this add-on. Use at your own risk.
Have questions about this product?
Login to message
| Blender Extension Compatible | Yes |
| Published | 6 months ago |
| Blender Version | 5.0 |
| Extension Type | Add-on |
| Render Engine Used | Cycles, Eevee |
| License | Mit |