Selective Wireframe - Per-Object Wireframe Control For Blender
 Salman Naseem


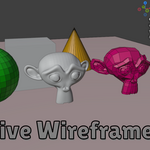
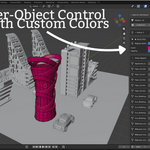

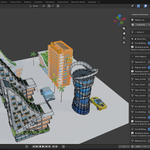
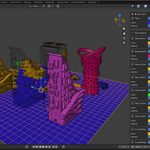
Selective Wireframe - How to Use Guide
📖 COMPLETE USER GUIDE
🚀 GETTING STARTED
Installation
For Blender 4.2+ and Blender 5.0:
- Download the
selective_wireframe.zipfile - Open Blender
- Go to Edit → Preferences
- Click on Get Extensions (left sidebar)
- Click the dropdown menu (⋮) in the top-right corner
- Select "Install from Disk..."
- Navigate to and select the
selective_wireframe.zipfile - Click "Install from Disk"
- The addon will appear in the extensions list
- Make sure it's enabled (checkbox should be checked)
For Blender 4.1 and earlier:
- Download the
selective_wireframe.zipfile - Open Blender
- Go to Edit → Preferences
- Click on Add-ons (left sidebar)
- Click the "Install..." button at the top
- Navigate to and select the
selective_wireframe.zipfile - Click "Install Add-on"
- Search for "Selective Wireframe" in the add-ons list
- Check the checkbox to enable it
Finding the Addon
Once installed and enabled:
- Open any scene with mesh objects
- In the 3D Viewport, press N to open the sidebar (if not visible)
- Look for the "Wireframe" tab
- Click it to see the addon panel
Location: 3D Viewport → Sidebar (N) → Wireframe Tab
⚙️ INITIAL SETUP
Step 1: Configure Your Viewport
Why this is needed: For wireframe colors to be visible, Blender's viewport needs to be set to display "Object" colors. The addon makes this easy!
How to do it:
- Open the Wireframe tab in the sidebar
- Look for the yellow warning box (if viewport isn't configured)
- Click the "Configure Viewport" button
What it does:
- Sets viewport shading Color Type to "Object"
- Ensures you're in Solid or Material Preview mode
- Automatically optimizes viewport for wireframe colors
Manual Setup (if needed): If you prefer to configure manually:
- Look at the top-right of the 3D Viewport
- Find the shading mode icons
- Click the Solid shading mode (third icon)
- Click the small down arrow next to it
- In the dropdown, find "Color"
- Change it from "Material" to "Object"
✅ You only need to do this once per Blender session!
🎨 BASIC USAGE
Enabling Wireframe on One Object
- Look at the list of objects in the addon panel
- Find the object you want to show wireframe for
- Click the "OFF" button next to its name
- The button changes to "ON" and turns blue
- Wireframe instantly appears on that object!
What you'll see:
- Wireframe overlay appears on the object
- Object icon changes from mesh icon to light bulb icon
- Color and Opacity sliders appear below
Changing Wireframe Color
Note: Colors only work in Solid shading mode!
- Make sure wireframe is enabled for the object
- Make sure you're in Solid shading mode
- Click the color picker next to "Color:"
- Choose your desired color
- Changes apply instantly - no need to click anything else!
Color Tips:
- Use red for urgent/error areas
- Use yellow for warnings or in-progress
- Use green for completed/verified areas
- Use blue for reference geometry
- Use orange for highlight/attention areas
Adjusting Opacity
- Make sure wireframe is enabled for the object
- Find the "Opacity" slider
- Drag the slider left (less visible) or right (more visible)
- Changes apply instantly as you drag!
Opacity Values:
- 0.0 = Completely transparent (invisible)
- 0.5 = Semi-transparent (subtle)
- 1.0 = Solid (maximum visibility)
Use Cases:
- Low opacity (0.2-0.4): Subtle reference wireframes
- Medium opacity (0.5-0.7): Background objects
- High opacity (0.8-1.0): Primary focus objects
Disabling Wireframe
- Find the object with wireframe enabled
- Click the "ON" button next to its name
- Button changes to "OFF"
- Wireframe disappears
- Original object color is restored automatically!
🔄 BATCH OPERATIONS
Enable All Objects
When to use:
- Quick scene-wide wireframe visualization
- Checking topology across entire scene
- Creating technical documentation
- Initial review of imported models
How to do it:
- Look for the gray box at the top of the panel
- Click the "Enable All" button (with checkbox icon)
- All mesh objects get wireframes enabled
- Each object uses its saved color (or default orange)
- Message shows how many objects were enabled
What happens:
- All mesh objects in the scene get wireframes
- Each keeps its individual color setting
- Opacity settings are preserved
- You can still adjust individual objects after
Disable All Objects
When to use:
- Quickly clear all wireframes
- Return to normal modeling view
- Clean up before rendering
- End of review session
How to do it:
- Look for the gray box at the top of the panel
- Click the "Disable All" button (with unchecked box icon)
- All wireframes are removed
- Original colors are restored for all objects
- Message shows how many objects were disabled
What happens:
- All wireframes turn off
- Original object colors restored
- Settings are saved (you can re-enable later)
- Scene returns to clean state
🎯 PRACTICAL WORKFLOWS
Workflow 1: Modeling Review
Scenario: You're reviewing your model and need to focus on specific areas.
Steps:
-
Start clean
- Click "Disable All" if any wireframes are on
- Viewport shows your model normally
-
Identify problem areas
- Navigate your model
- Spot areas needing attention
-
Highlight issues
- Enable wireframe on problem objects
- Set red color for critical issues
- Set yellow for minor issues
- Adjust opacity based on priority
-
Work through fixes
- Disable wireframe as you fix each object
- Visual progress tracking
- Clean viewport shows remaining work
-
Final check
- "Enable All" to see everything
- "Disable All" when satisfied
- Back to normal view
Workflow 2: Client Presentation
Scenario: Presenting model to client, need to highlight specific features.
Steps:
-
Prepare scene
- Disable all wireframes initially
- Clean, professional viewport
-
Identify hero objects
- Objects you want to emphasize
- Key features to showcase
-
Apply subtle wireframes
- Enable wireframe on hero objects
- Choose brand-appropriate color
- Set low opacity (0.3-0.5) for subtle effect
- Avoid visual clutter
-
Present and adjust
- Show client the view
- Adjust colors/opacity in real-time based on feedback
- Toggle objects on/off as discussion flows
-
Switch views
- "Disable All" for clean render view
- "Enable All" for technical discussion
- Quick switches keep presentation flowing
Workflow 3: Team Collaboration
Scenario: Multiple artists working on same scene, need clear communication.
Steps:
-
Establish color code
- Red: Needs urgent attention
- Yellow: In progress
- Green: Completed/approved
- Blue: Reference only
- Orange: Needs feedback
-
Each artist marks their objects
- Enable wireframe with appropriate color
- Clear visual status system
- No verbal communication needed
-
Daily review
- "Enable All" to see all statuses
- Quickly identify what needs work
- Reassign colors as work progresses
-
Handoff
- Clear visual communication
- Next artist sees exactly what's needed
- Efficient workflow
Workflow 4: Comparison Work
Scenario: Comparing different versions or variations of models.
Steps:
-
Import versions
- Load all versions into scene
- Position for comparison
-
Color code versions
- Version A: Blue wireframe
- Version B: Orange wireframe
- Version C: Green wireframe
- Set medium opacity (0.6) for clarity
-
Compare
- Quickly spot differences
- Color-coded for easy reference
- Toggle individual versions on/off
-
Decision making
- Disable rejected versions
- Keep best version visible
- Clear visual record of choice
💡 TIPS & TRICKS
Viewport Shading Modes
Solid Mode (Recommended for colors):
- ✅ Colors visible
- ✅ Opacity works
- ✅ Best for wireframe work
- Use this for color-based workflows
Material Preview Mode:
- ✅ Wireframes visible
- ❌ Colors not visible (materials control appearance)
- Use for material review while keeping wireframes
Rendered Mode:
- ✅ Wireframes visible
- ❌ Colors not visible (lighting controls appearance)
- Use for lighting review with wireframe reference
Wireframe Mode:
- ❌ Addon not needed
- Blender's native wireframe already shows everything
- Use addon in other modes for selective control
Quick Keyboard Shortcuts
While the addon doesn't add custom shortcuts, you can speed up your workflow:
- N - Toggle sidebar (show/hide panel)
- Z - Shading mode pie menu (quick switch to Solid)
- Tab - Edit/Object mode toggle
- Numpad / - Local view (isolate selected object)
Color Schemes for Different Tasks
Error Checking:
- Red: Critical topology errors
- Orange: Minor issues
- Yellow: Needs verification
- Green: Verified correct
Production Status:
- Red: Not started
- Yellow: In progress
- Blue: Waiting for approval
- Green: Approved/finished
Complexity Levels:
- Blue: Low poly/proxy
- Green: Medium detail
- Orange: High detail
- Red: Ultra-high poly
Object Types:
- Blue: Characters
- Green: Props
- Orange: Environment
- Purple: Special FX
Performance Considerations
The addon is very lightweight, but here are tips for optimal performance:
✓ Use batch operations wisely
- "Enable All" on 100+ objects is fine
- Blender handles this natively
✓ Color changes are instant
- No performance hit from adjusting colors
- Real-time updates are smooth
✓ Works with complex scenes
- Addon doesn't add geometry
- Only toggles native Blender properties
✓ Compatible with other addons
- No conflicts with other tools
- Works alongside your workflow
🔍 UNDERSTANDING THE INTERFACE
Main Panel Elements
1. Viewport Warning (if shown)
- Yellow alert box at the top
- Appears when Color Type isn't set to "Object"
- Click "Configure Viewport" button to fix
- Disappears once configured correctly
2. Statistics Box
- Shows total mesh objects in scene
- "Enable All" and "Disable All" buttons
- Quick access to batch operations
3. Active Counter (when applicable)
- Shows how many wireframes are currently enabled
- Appears only when at least one object has wireframe on
- Helps track how many objects you're working with
4. Object List
- Every mesh object in your scene
- Each gets its own control section
- Organized in a vertical list
5. Per-Object Controls Each object section shows:
-
Object name with icon
- Light bulb icon = wireframe ON
- Mesh icon = wireframe OFF
-
ON/OFF toggle button
- Click to enable/disable wireframe
- Blue when ON, gray when OFF
-
Color picker (only in Solid mode)
- Click to choose RGB color
- Changes apply instantly
-
Opacity slider (only in Solid mode)
- Drag to adjust transparency
- 0 = invisible, 1 = solid
-
Info message (in Material/Render modes)
- "Wireframe active"
- Reminder to switch to Solid for colors
Setup Guide Panel
Located below the main panel, collapsed by default:
- Click the triangle next to "Setup Guide" to expand
- Contains step-by-step instructions
- Explains manual viewport setup
- Shows useful tips
- Has support links and resources
Sections:
- Quick Setup - Fast start guide
- Manual Viewport Setup - For manual configuration
- Tips - Helpful reminders
- Support & More - Links to resources
🆘 TROUBLESHOOTING
Problem: Addon doesn't appear in sidebar
Solution:
- Make sure addon is enabled in Preferences
- Press N to show sidebar if hidden
- Look for "Wireframe" tab
- Try restarting Blender
Problem: "Configure Viewport" button doesn't work
Solution:
- Make sure you're in the 3D Viewport
- Try clicking it again
- Manually set Color Type to "Object" in shading menu
- Check that you have a 3D viewport visible
Problem: Colors don't change when I adjust them
Solution:
- Verify wireframe is enabled (toggle should say "ON")
- Check that you're in Solid shading mode
- Make sure Color Type is set to "Object"
- Try toggling wireframe off and on again
Problem: Object stays colored after disabling wireframe
Solution: This shouldn't happen in version 1.0.0+
- Try toggling wireframe on and off again
- Manually reset object color in object properties
- If it persists, report as a bug
Problem: Wireframe not visible at all
Solution:
- Check that toggle button shows "ON"
- Try adjusting opacity (might be set to 0)
- Check that object is actually a mesh
- Try "Enable All" to see if it's a single-object issue
- Verify object isn't hidden or on disabled layer
Problem: Panel is empty or shows "No mesh objects"
Solution:
- Confirm you have mesh objects in your scene
- Check that objects aren't hidden
- Try adding a cube to test
- Make sure you're looking at the right scene
Problem: Addon stopped working after Blender update
Solution:
- Check if addon needs updating for new Blender version
- Disable and re-enable the addon
- Reinstall the addon
- Check for updates on the marketplace
📞 GETTING HELP
Documentation
- This guide covers most use cases
- README.md in addon package has additional info
- Setup Guide panel in addon has quick reference
Video Tutorials
- Check BeingAnimator YouTube channel: https://www.youtube.com/BeingAnimator
- Tutorial videos cover installation and usage
- Real-world examples and tips
Direct Support
- Email: [email protected]
- Please include:
- Blender version
- Addon version
- Description of issue
- Screenshots if possible
Community
- Share tips with other users
- Marketplace reviews and comments
- Social media (@BeingAnimator)
🎓 LEARNING RESOURCES
Beginner Level
- Install addon
- Practice on simple scenes (3-5 objects)
- Master basic enable/disable
- Experiment with colors
- Try batch operations
Intermediate Level
- Use in real modeling projects
- Develop personal color coding system
- Practice viewport mode switching
- Integrate into review workflow
- Use with multiple objects
Advanced Level
- Develop team-wide workflows
- Create presentation templates
- Integrate with production pipeline
- Combine with other addon workflows
- Optimize for specific project types
✨ BEST PRACTICES
- Establish color standards early in projects
- Use descriptive colors that make sense to your team
- Keep opacity subtle for non-distracting overlays
- Clean up after reviews - disable when not needed
- Save color schemes by keeping template files
- Batch operations for efficiency
- Viewport configuration once per session
- Regular updates - keep addon current
Enjoy using Selective Wireframe!
For more tools and tutorials, visit:
- https://salmannaseem.com
- https://www.youtube.com/BeingAnimator
- https://superhivemarket.com/creators/salmannaseem07
Created with ❤️ by BeingAnimator (Salman Naseem)

Discover more products like this
modeling overlay viewport wireframe color-wireframe wireframe per object opacity Visualization