Shader Creator
 Foraii studio
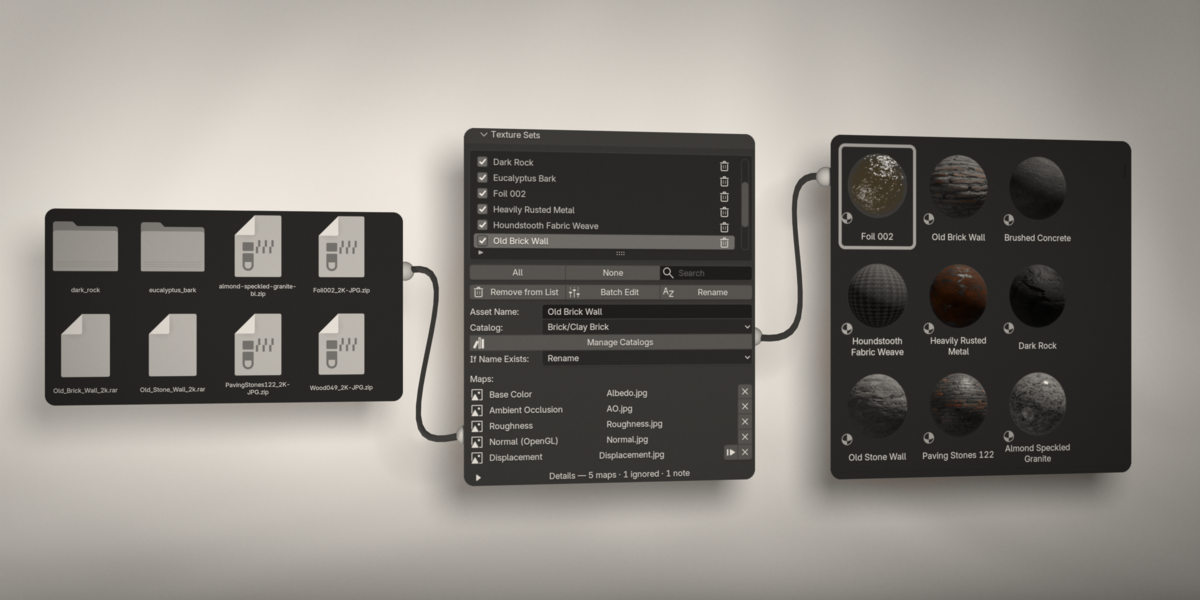
Shader Creator turns folders of PBR textures into finished materials with previews, sorted into catalogs and ready in the Asset Browser. This guide walks through every part of it.
Install
- Download the Shader Creator ZIP from SuperHive. Don't unzip it.
- In Blender, open Edit > Preferences > Get Extensions.
- Click the drop-down arrow at the top right and choose Install from Disk. Pick the ZIP.
- Make sure Shader Creator is ticked under Add-ons.
- In the 3D Viewport, press N to open the sidebar and click the Shader Creator tab.
You can also drag the ZIP straight into the Blender window.
Shader Creator needs Blender 5.1 or 5.2.
Quick start
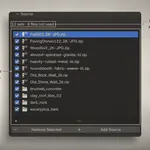
- Add a source. In Source, click Add Source and pick folders of textures, archives or a few images. Shift or Ctrl picks several at once.
- Check the sets. Every texture set found appears under Texture Sets. Untick any you don't want.
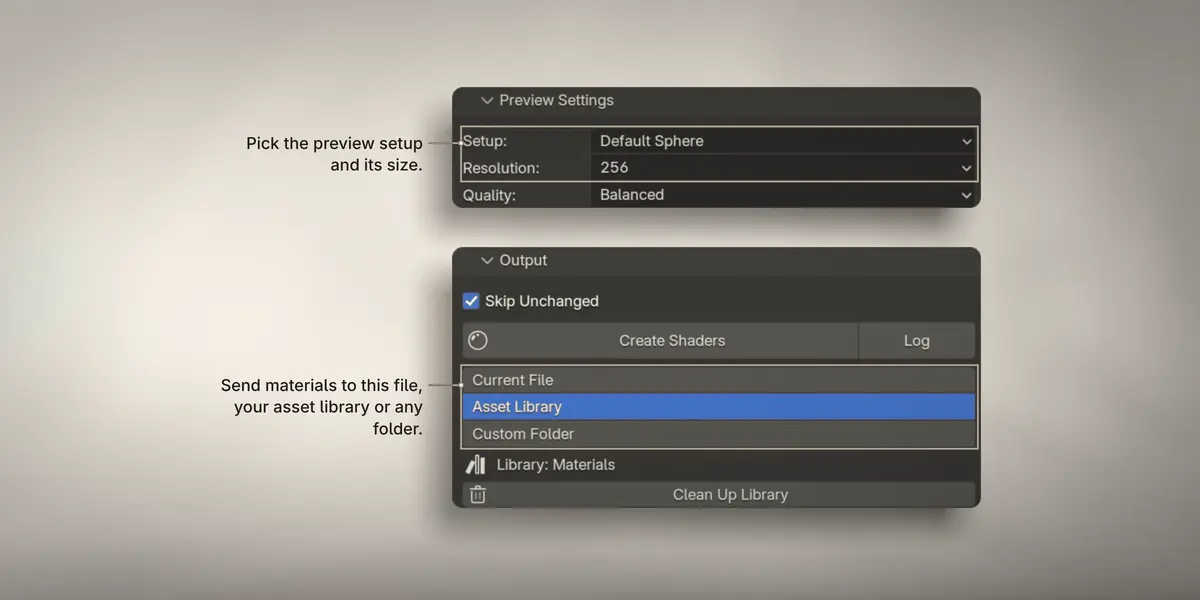
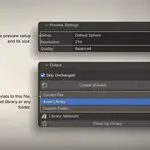
- Pick where they go. Under Output, choose Current File, Asset Library or Custom Folder.
- Create. Press Create Shaders. If something stops it, a popup says what to fix.
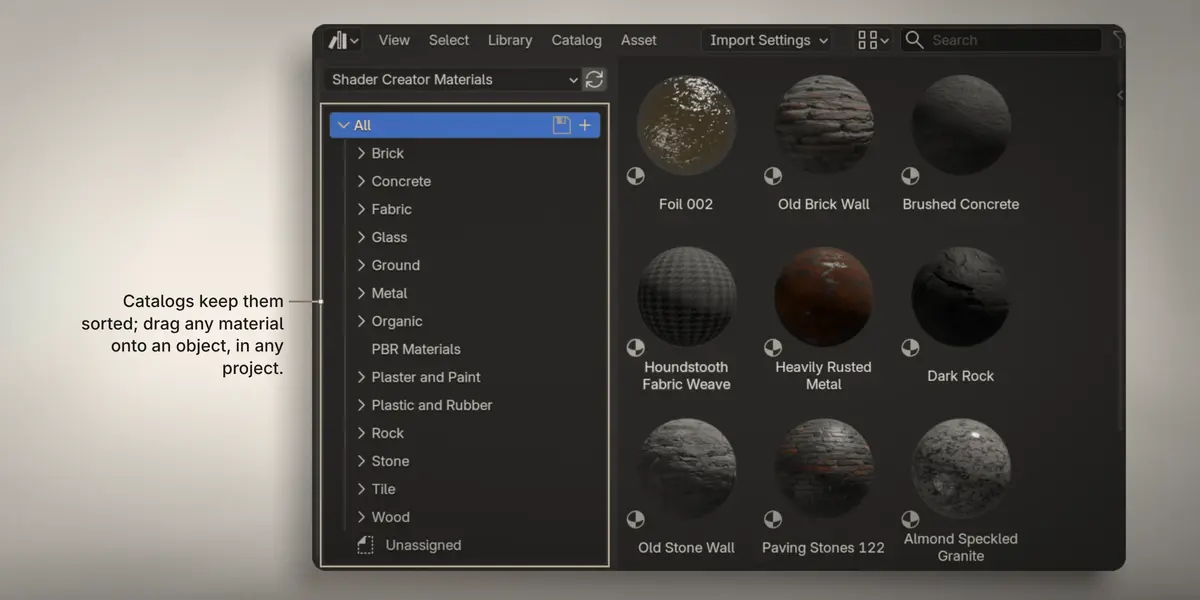
Your materials now have previews, and catalogs if you gave them one. Open the Asset Browser to see them.
The panels, top to bottom: Source, Texture Sets, Shader Settings, Preview Settings, Output.
Source
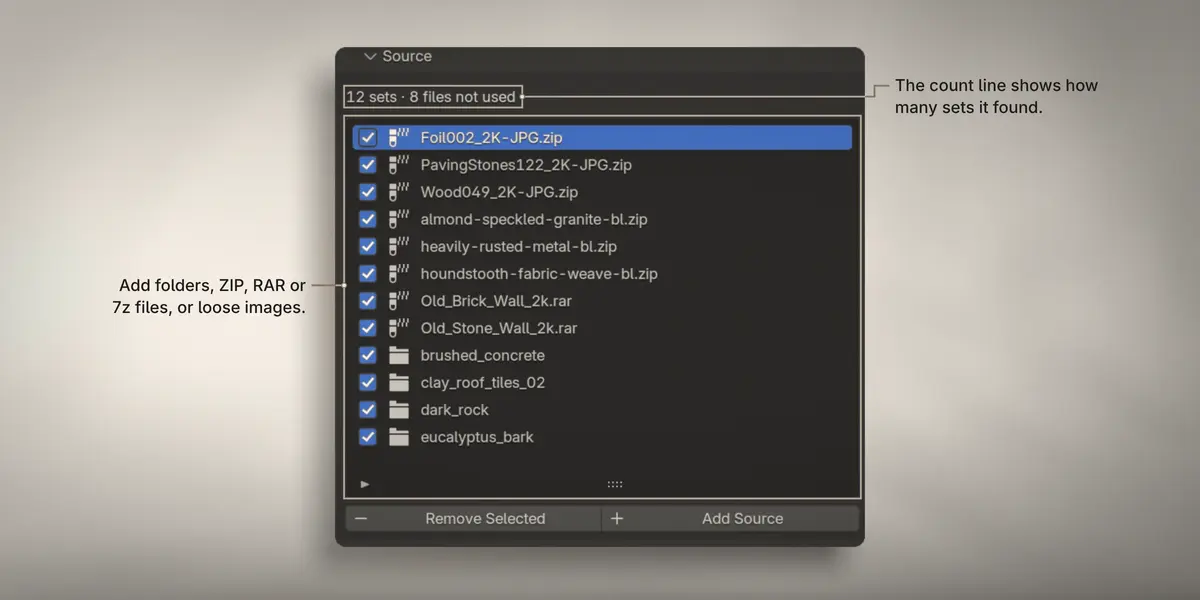
A source is where your textures are. It can be:
- a folder, with any number of texture sets inside, also in sub-folders;
- an archive: ZIP, RAR or 7z;
- one or more image files.
Archives are read as they are; you don't unpack them. ZIP works on its own. RAR and 7z need a free reader:
- Windows: install 7-Zip.
- macOS: nothing to install.
-
Linux: install 7zip or unrar with your package manager. On Debian or Ubuntu, 7zip reads RAR only with its extra package
7zip-rar(orp7zip-rar); unrar always does.
The line at the top counts what was found: sets and files not used.
Remove Selected removes the ticked sources and their sets from the list. Every source is ticked when you add it, so one click clears them all; untick the ones you want to keep. It doesn't touch any files.
Texture Sets
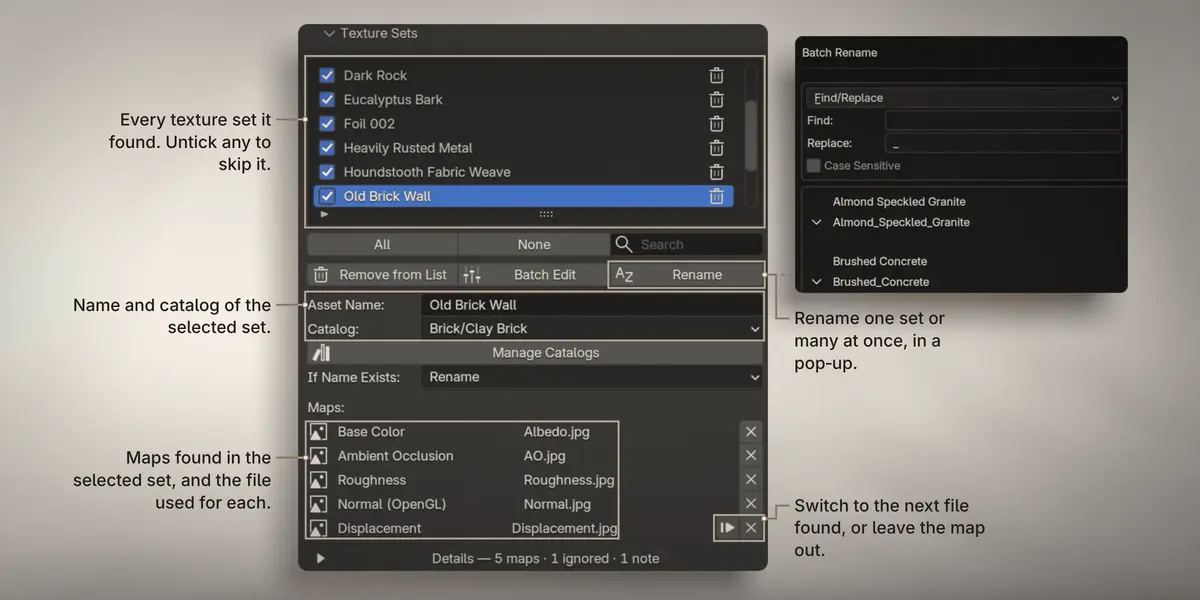
This list shows every texture set found. Tick the sets you want to create.
Click a set to see its details:
- Asset Name is the material's name. Names come from the files, with numbers split off, like "Bricks Sloppy Red 001".
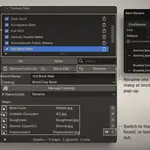
- Catalog is where it goes in the Asset Browser. When there are catalogs, Shader Creator picks one from the name; change it if you like. A set with no match stays Unassigned. Create Catalog (it reads Manage Catalogs once there is one) adds or removes catalogs, or adds the starter set: Wood, Metal, Stone and more. This works in a file you haven't saved yet; the catalogs are written next to it when you save.
- If Name Exists decides what happens when a material with that name already exists: Skip, Overwrite or Rename. In Current File, Overwrite never replaces a material linked from another .blend file; that set is left alone.
- Maps lists which file fills each slot: Base Color, Roughness, Normal and so on. When a pack has more than one candidate for a slot, like two color variations, the arrow button switches between them. The X button clears a slot.
- Details lists every file in the set and what happened to it: used, ignored or merged, and why.
Under the list:
- All / None tick or untick every set. Search filters the list.
- Remove from List removes the ticked sets from the list. It doesn't touch any files.
- Batch Edit gives every ticked set the same catalog, material options or preview setup in one go.
-
Rename renames every ticked set. Stack simple steps: Find/Replace, Set Name, Strip Characters, Change Case and Number. Set Name can use parts of each set, like
{name},{catalog},{resolution}and{source}. The window shows every new name before you press OK.
Shader Settings
These apply to the selected set. Use Batch Edit to apply them to many sets.
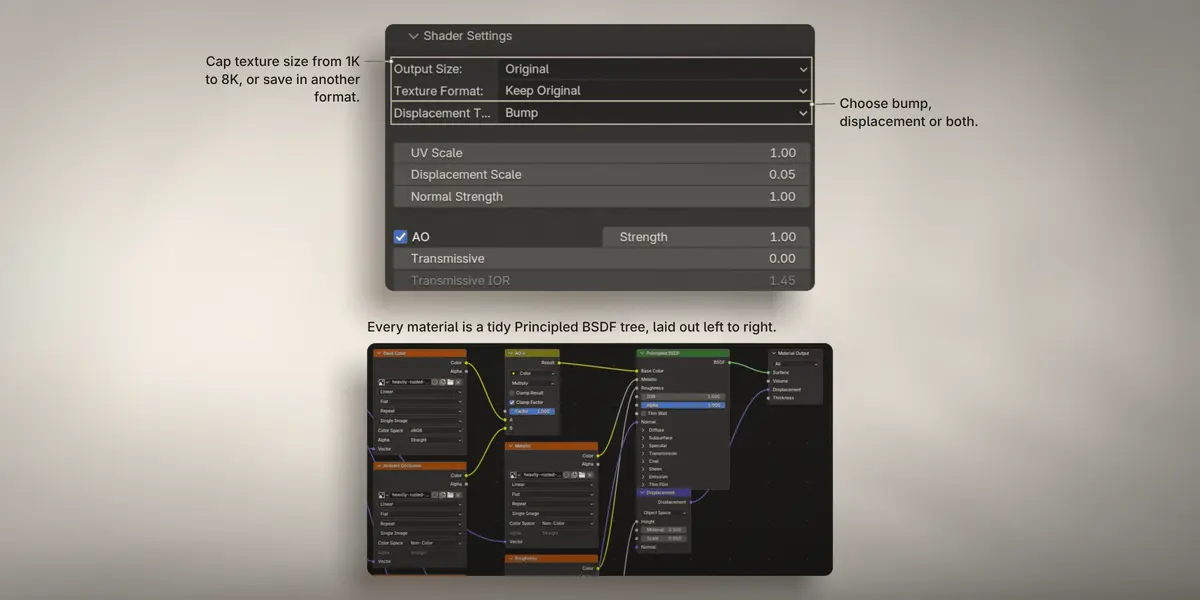
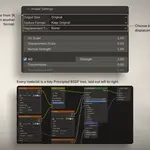
- Output Size caps texture size at 1K, 2K, 4K or 8K. Bigger textures are scaled down in the copy and the size in the file name is updated, so "Wood_4K" becomes "Wood_2K". Textures are never scaled up. Original keeps them as they are.
- Texture Format saves the textures in another format: PNG, JPEG, WebP, AVIF, TIFF, OpenEXR and more, with a Quality slider. Data maps like normals and roughness are never saved in a lossy format: they go to lossless WebP or OpenEXR instead. Keep Original leaves the files as they are.
- Displacement Type chooses Bump, true Displacement, or Both.
- UV Scale and the strength sliders change the material, for the maps the set has.
- AO multiplies the ambient occlusion map into the color. If a pack's AO map is completely black, it is left out and the set says so.
- Transmissive and Transmissive IOR are for glass-like materials.
Preview Settings
Sets how the preview is rendered: the scene (Setup), the Resolution, and the Quality (Fast, Balanced or High).
Output
Choose where materials go:
- Current File keeps them in the file you have open, with the textures packed inside.
- Asset Library writes them to the Shader Creator library: one file per catalog, plus its own copy of the textures. The library is added to the Asset Browser on the first Create into it. The library folder is set in the add-on preferences.
- Custom Folder uses the same layout in any folder. Pick a .blend file instead of a folder to pack everything into that one file.
Shader Creator never adds catalogs on its own. The first time you create into an Asset Library that has none, it asks once whether to add the starter catalogs. Tick Do Not Ask Again to stop the question; the starter catalogs stay in Manage Catalogs.
Create Shaders
Create Shaders sits in Output, above the output choice.
When something stops Create Shaders, a popup says what is wrong and how to fix it. When only some sets can be made, it asks first: Create Anyway or Cancel. The Log button next to Create Shaders shows what the last scans and Creates did.
Skip Unchanged, with Overwrite or Rename, skips shaders that are already built and whose textures and settings haven't changed. So creating again doesn't make a second copy.
Press Create Shaders. Each set is built, its preview is rendered in Cycles, and it's saved. The panel shows the progress. Esc or Cancel stops the run. Nothing of a cancelled run is kept, except a library file it had already saved; the Log names that file.
When it's done, each set shows a tick. If a set failed, it shows a red icon and the Log says what went wrong.
Clean Up Library
When you choose Asset Library under Output, you'll see Clean Up Library. Over time, a library can keep texture folders no material uses any more. This button finds them.
- It only looks at folders Shader Creator made, inside the library's textures folder.
- A folder counts as used when any library file, or the file you have open, uses it.
- Before anything is deleted, a window lists the unused folders and their size. Nothing is deleted until you press Delete.
- Deleting can't be undone. Projects that appended these materials earlier may still use their textures.
Setup Check
To check your setup, open Edit > Preferences > Add-ons > Shader Creator and look under Setup Check. It lists your Blender version, the library folder and the archive readers, and what to fix.
Your own file names
Shader Creator knows the usual words for each map, like albedo, diffuse or col for color. If your files use other words, you can add them.
- Find Blender's config folder (use 5.1 instead of 5.2 if that's your version):
- Windows:
%APPDATA%\Blender Foundation\Blender\5.2\config - macOS:
~/Library/Application Support/Blender/5.2/config - Linux:
~/.config/blender/5.2/config
- Windows:
- In it, make a folder called
shader_creator, and in that a file calledaliases.json. - Write only your additions. For example, to read "farbe" as color and "rauh" as roughness:
{ "slots": { "base_color": ["farbe"], "roughness": ["rauh"] }}- Restart Blender and scan again.
Your words are added to the built-in ones.
Tips and fixes
- My materials don't show in the Asset Browser. Create into the Asset Library once: that adds the library to the Asset Browser. If the Asset Browser is already open, press its Refresh button.
- A map is missing or wrong. Open the set, read Details, and pick the right file with the arrow button.
- Previews are slow. Turn on your GPU in Edit > Preferences > System > Cycles Render Devices, or set Preview Quality to Fast.
- "Converted nothing". When a file is already in the format you chose, it's kept as it is, so it doesn't lose quality. The report says so.
- Where is the default library? In Blender's user data folder, outside the add-on, so updating or removing Shader Creator never deletes it.
Getting help
Send me a message on SuperHive. It helps to attach a diagnostic report: in Edit > Preferences > Add-ons > Shader Creator, under Support, click Export Diagnostic Report. It contains your Blender version and settings, but no texture paths.
Shader Creator is made by Mortada Foraii. It's free software under the GPL license, version 3 or later.
 Included
Includes 12 months of
- Support from Foraii studio
- Product updates
Extend this product’s Support Period +12 months: 50% of product price
Have questions before purchasing?
Login to message
| Blender Extension Compatible | Yes |
| Published | about 13 hours ago |
| Blender Version | 5.1 - 5.2 |
| Extension Type | Add-on |
| Render Engine Used | Cycles, Eevee |
| License | GPL |

Discover more products like this
principled bsdf material library Texture import PBR asset library udim batch-rename asset-browser batch materials