Shelfy
 Ivan Arsic
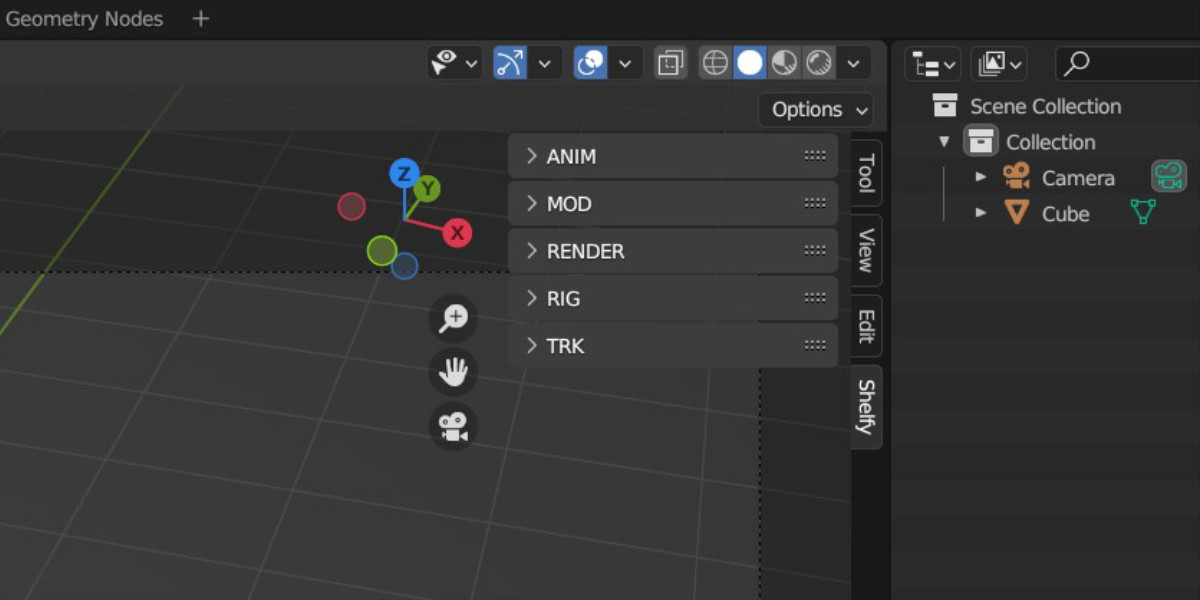
HOW TO USE:
Glossary:
- "shelf": folder containing Python scripts
- "repository": folder containing "shelves"
1. Install
First, you need to install this addon (from blender addon installer just pick the zip file) and initialize it (enable it).
This will create a shelfy folder in your user-home like:
"C:/Users/USERNAME/.studiosetup/blender/shelfy"
or
"/home/USERNAME/.studiosetup/blender/shelfy)"
Also, "paths.txt" will be created in root of this folder.
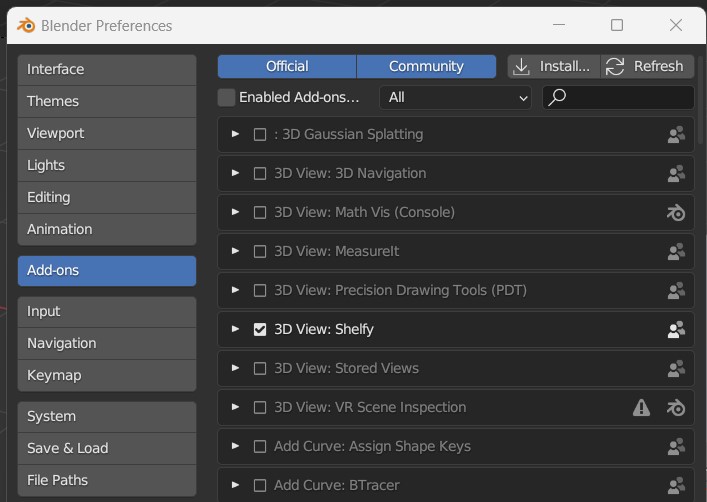
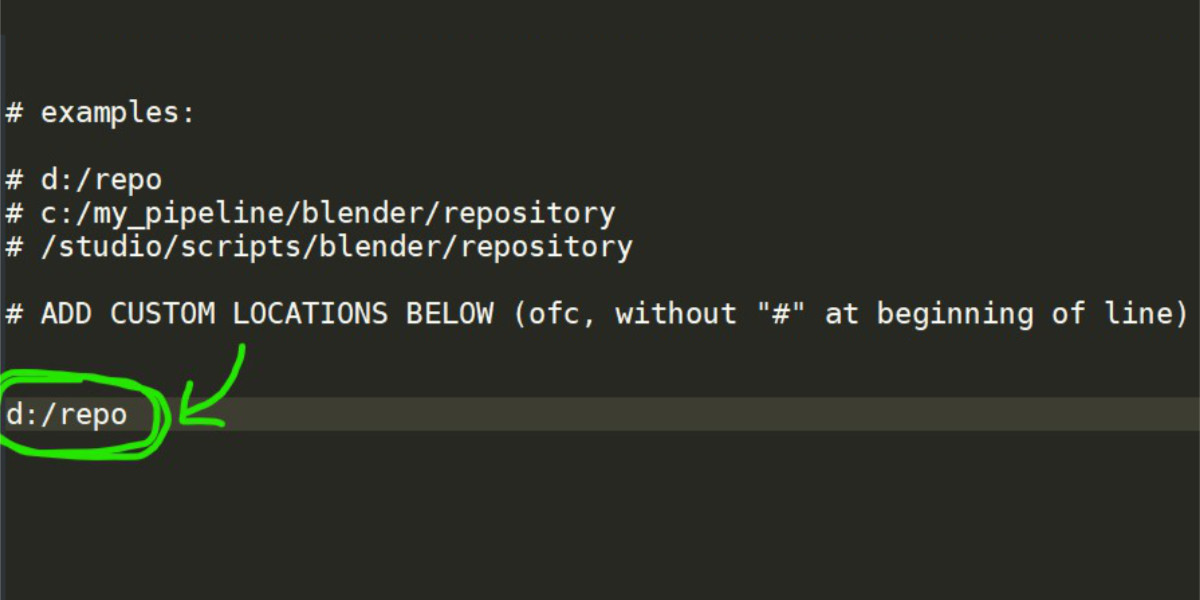
2. Add your repository folders to paths.txt
Edit "paths.txt" located in root of this folder to add paths of your repositories like:
- studio wide repository
- personal shelves repository
- per project shelves repository
- per department repository
(do NOT mix this with paths.txt located at the addon installation location, that one is just used as a template)
When you finish adding your paths, go to the next step.
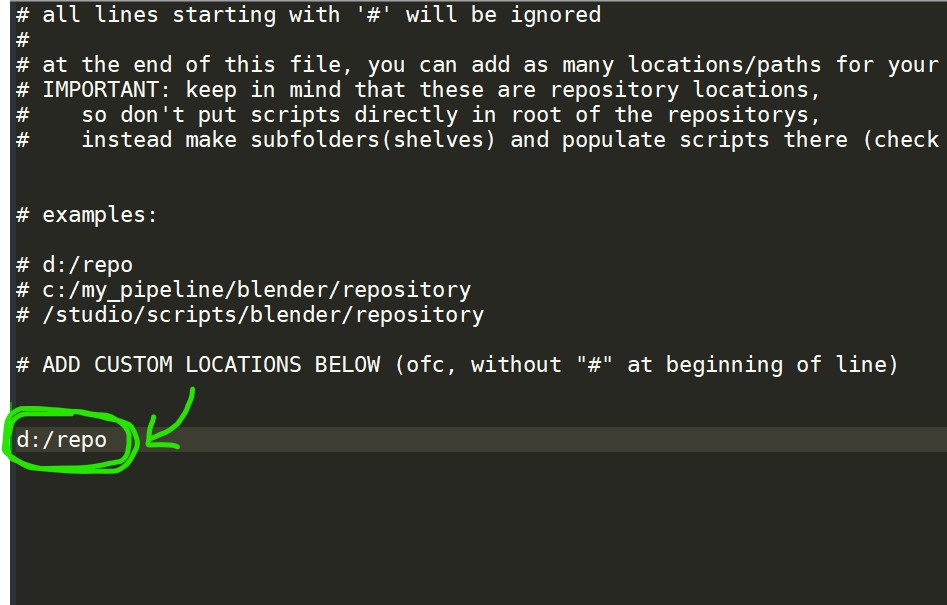
3. Populate repos. with folders(shelves), and scripts
Now all you want to do is:
- create folders in your repository (folder names will be shelf names inside Blender)
- fill those folders with scripts
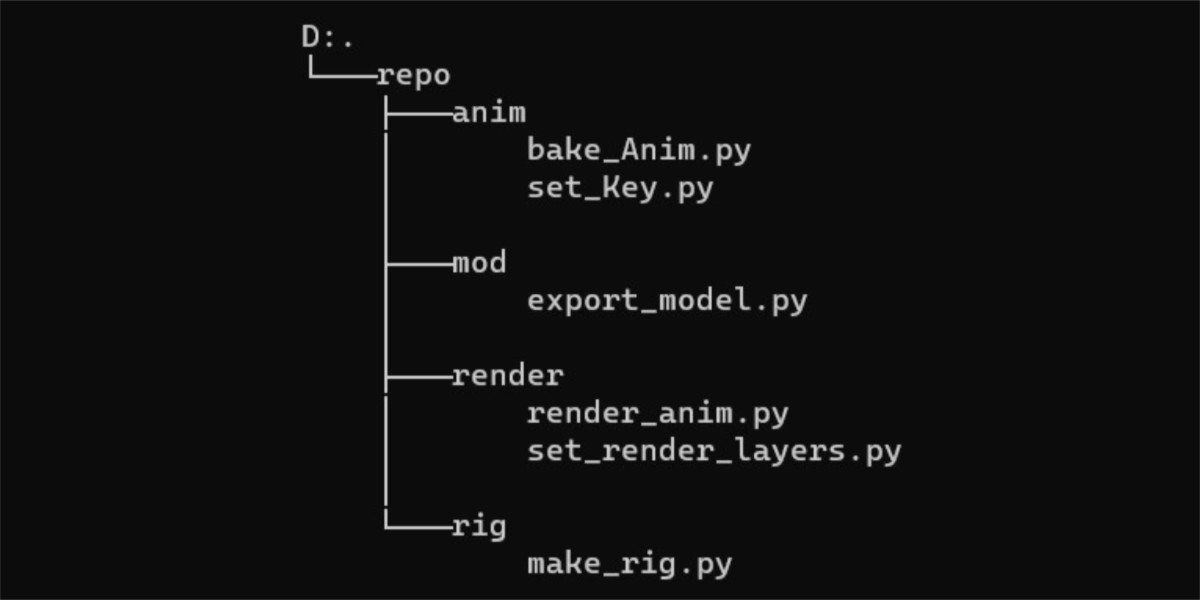
folder structure example: 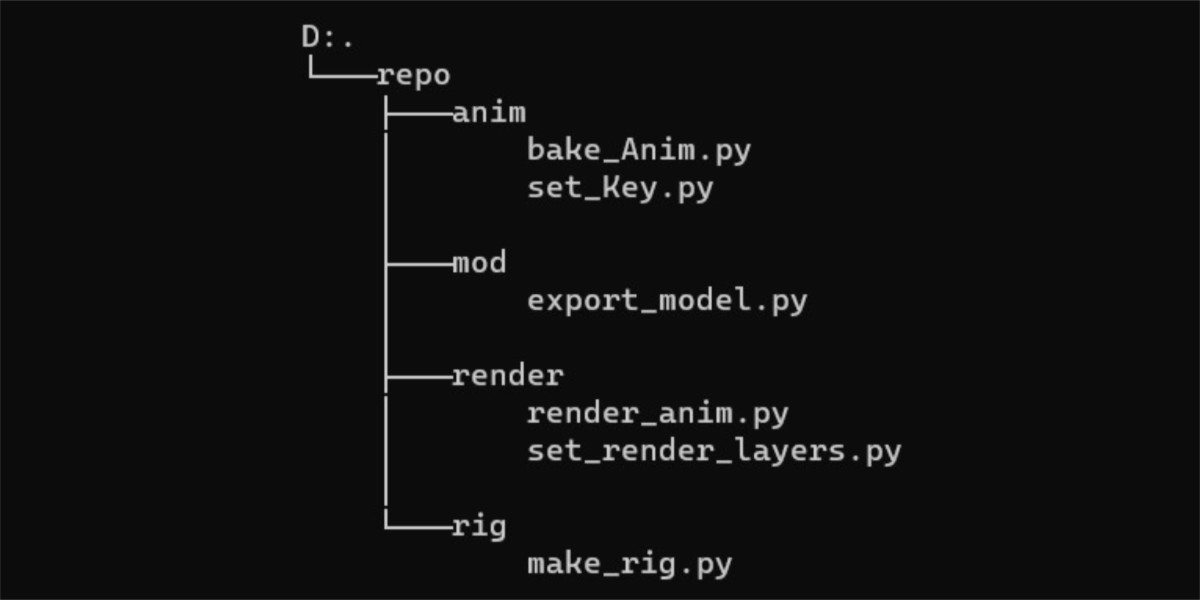
So, its allways: /repository/shelf/script.py
NAMING (optional):
- by default, buttons will be named simply by scripts filename
- or you can add custom button labels by adding this as first line of your .py script (replace "My button" text, ofc):
#name:My button
4. Restart Blender
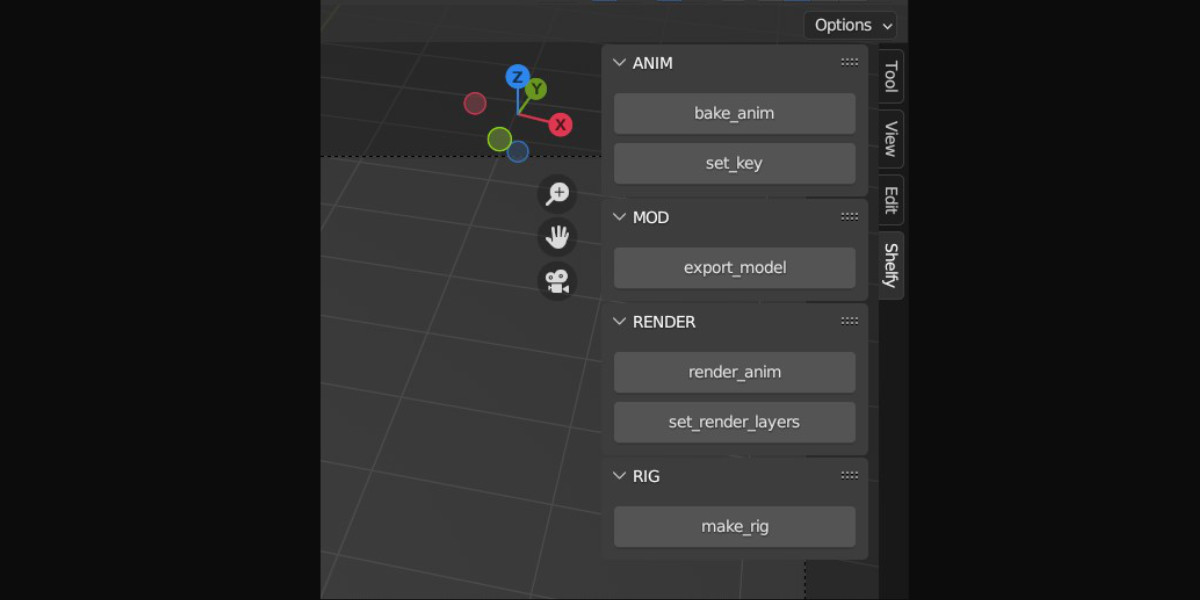
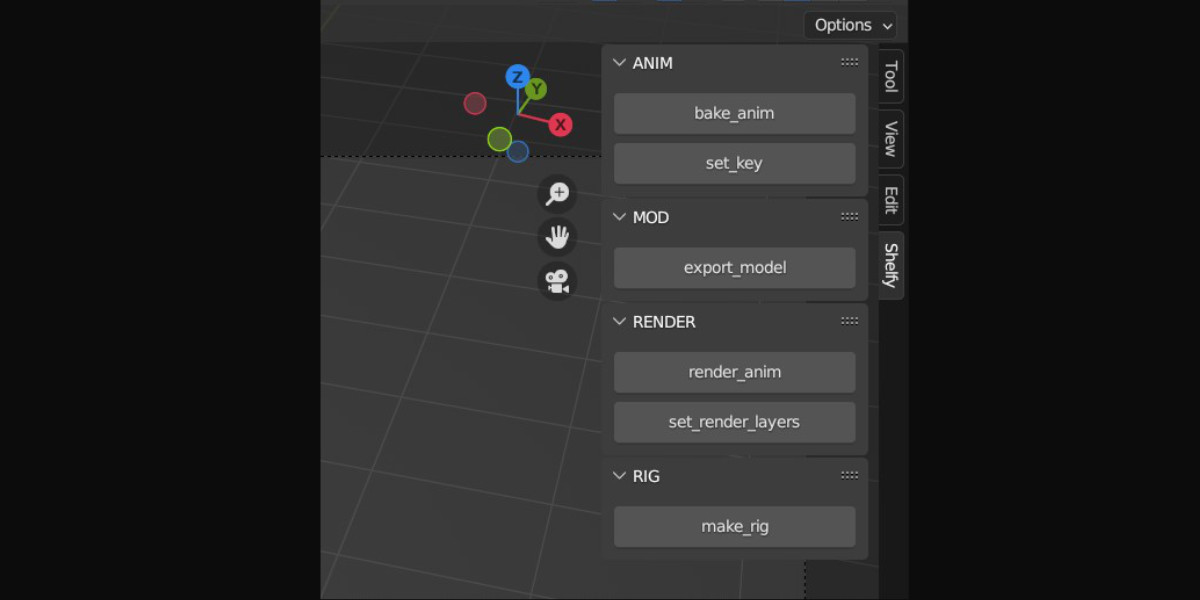
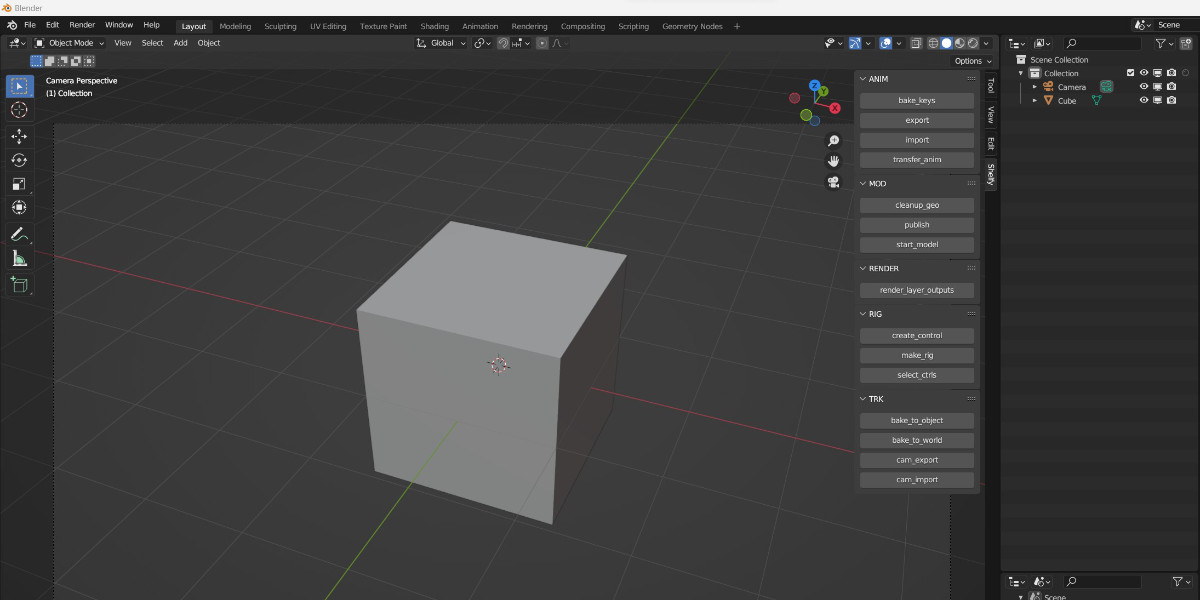
Finally, restart Blender, and Shelfy tab should appear on the side menu of 3D VIEW (shortcut "n")
Notice:
if the Shelfy tab doesn't appear, it most likely means that you didn't
populate your shelf-dirs with scripts. If that's not the case, check the
system console for possible errors (Blender>>Window>>Toggle
System Console)
Have in mind that scripts i used in these
examples DO NOT come with addon. You have to populate your repository
with your own scripts.
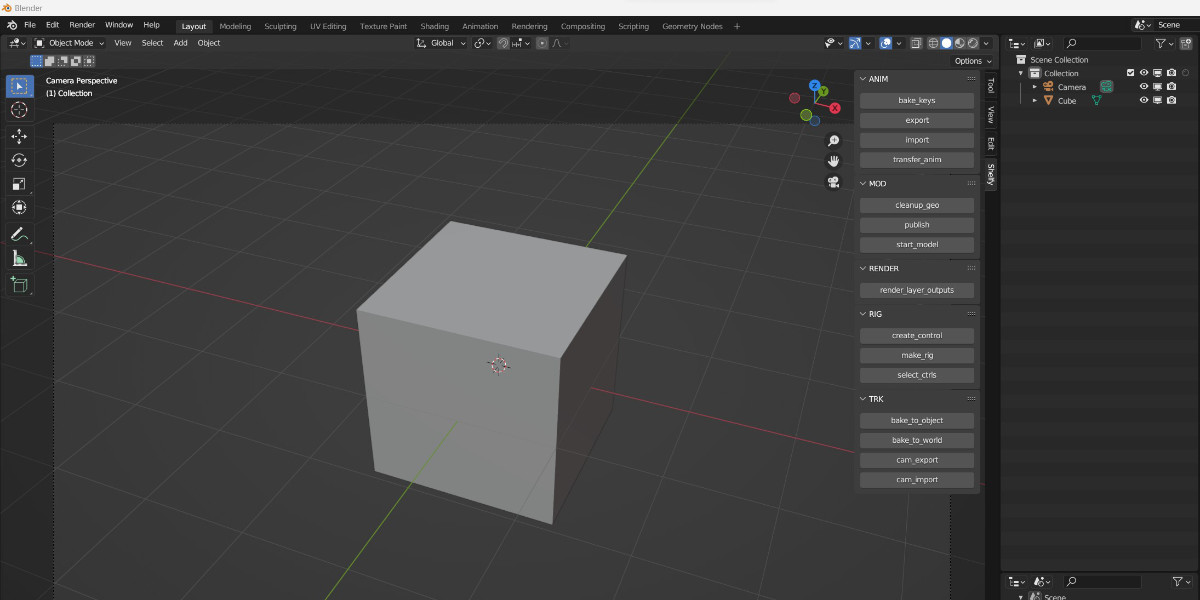
Another example, with more scripts:
-
$9
Freelancers / Hobbyist
-
$55
-
$155
Have questions about this product?
Login to message
| Published | over 2 years ago |
| Blender Version | 3.6 |
| License | GPL |
