Nimis 350 Professional Sci-Fi Design Systems
 SirCharles.DESIGN


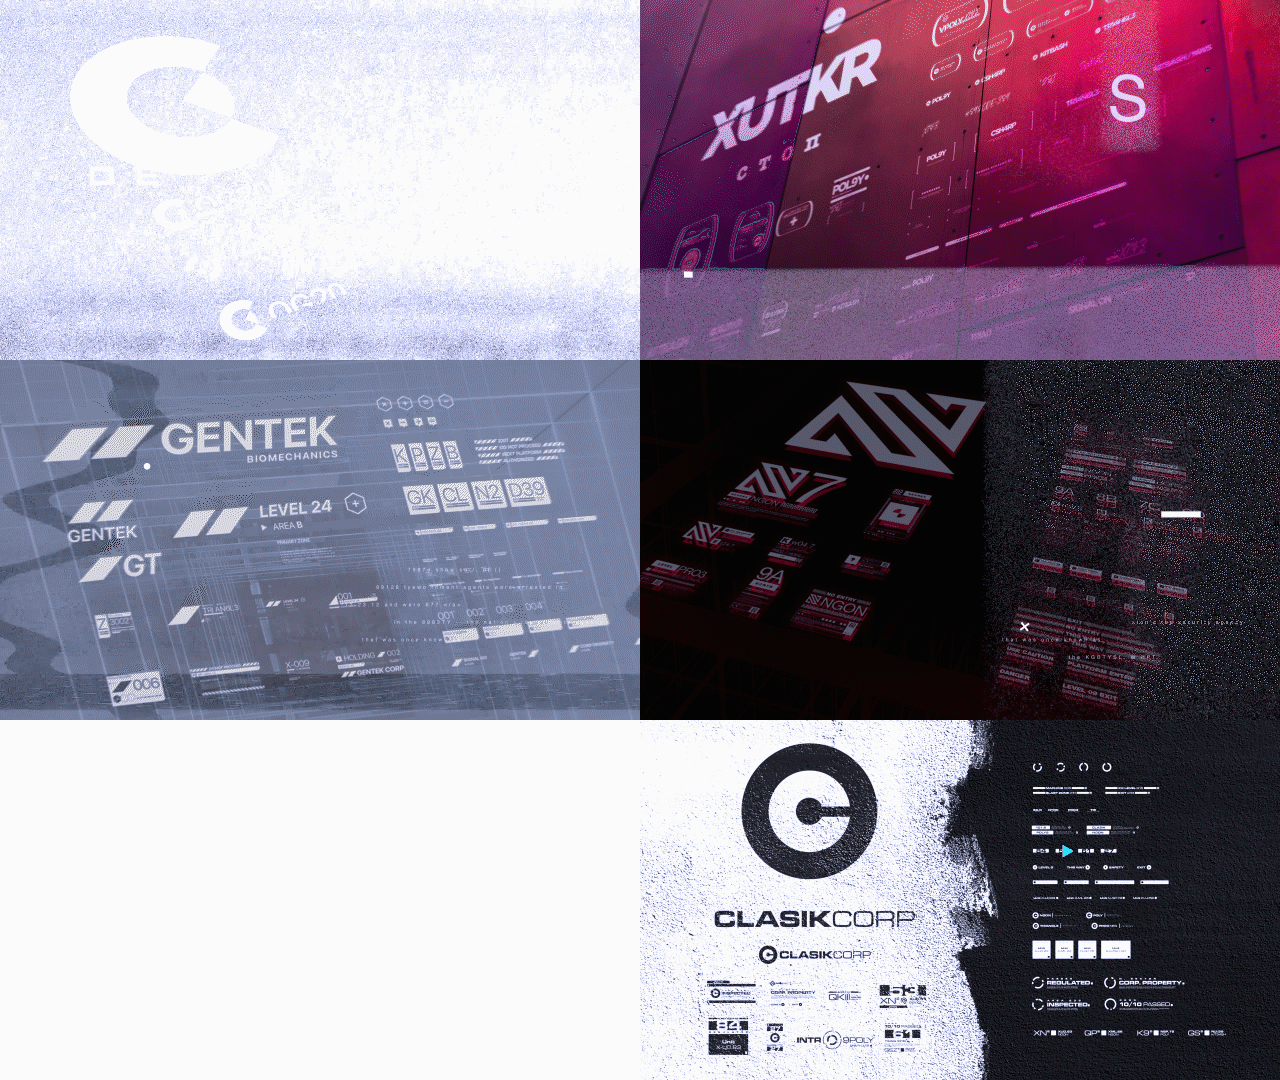
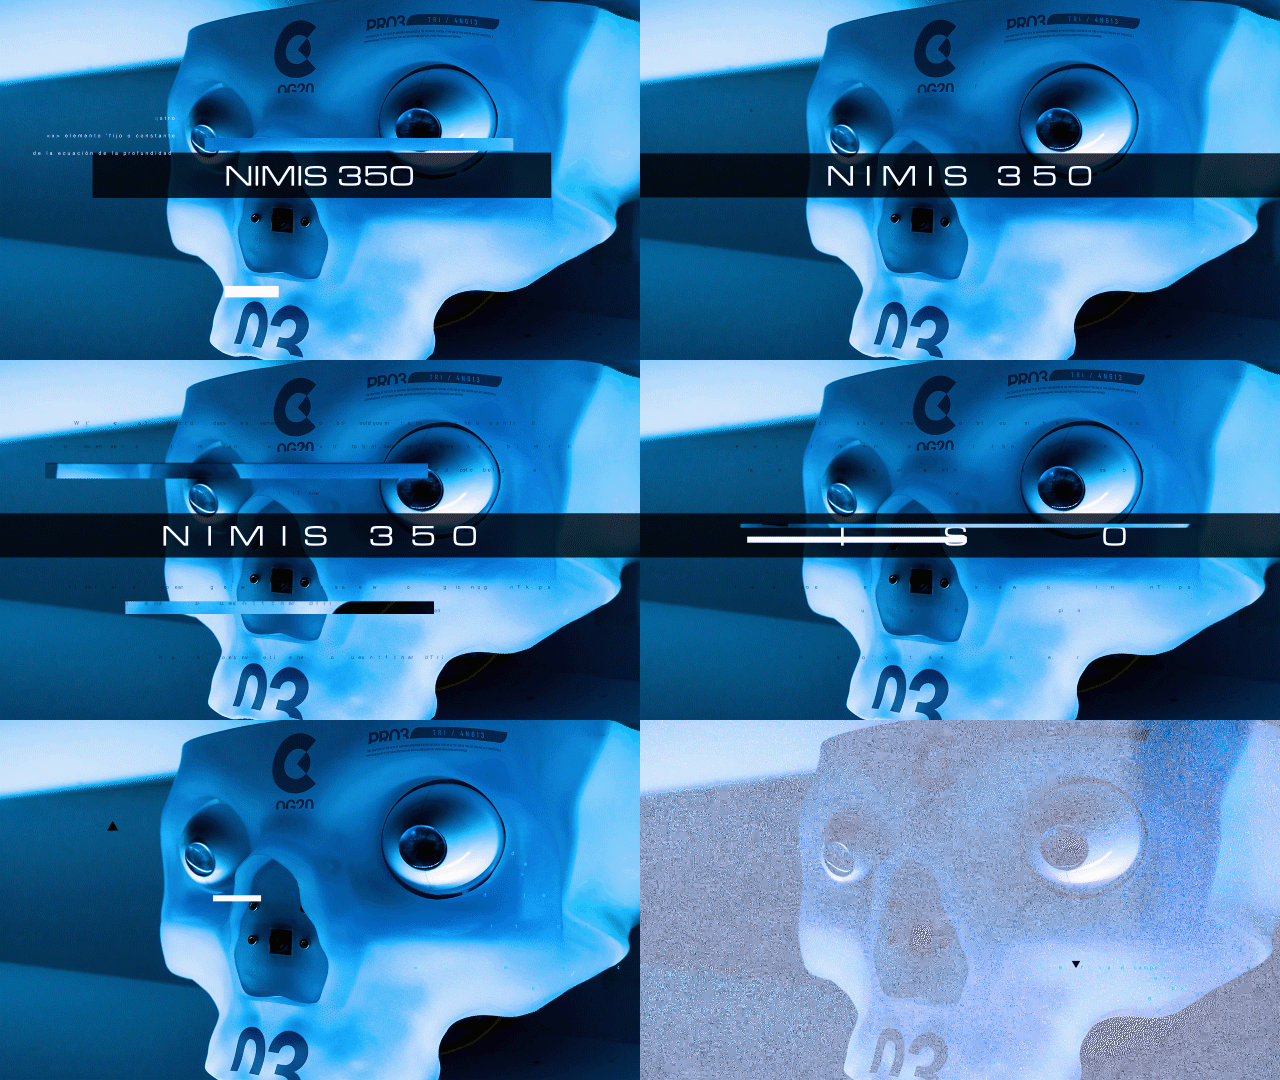


INSTALLATION & SETUP
Quick Start (3 Steps to Get Creating)
1. Download & Extract
- Download your NIMIS 350 package from your BlenderMarket library
- Extract the ZIP file to a location you'll remember (we recommend: Documents/3D Assets/NIMIS_350/)
- Keep all three resolution folders organized together
2. Choose Your Resolution
- 4K - High-resolution renders, close-ups, print work
- 2K - Standard game dev, real-time applications, VR/AR
- 1K - Mobile games, performance-critical projects, background elements
3. Import into Your Software
- Navigate to your chosen resolution folder
- Import PNG files directly into your project
- Reference the folder structure guide below for easy navigation
You're ready to create!
FILE STRUCTURE & ORGANIZATION
Root Directory Layout
NIMIS_350/
├── 4K_Decals/
│   ├── 01_CLASIKCORP/
│   ├── 02_NEONEX_Industries/
│   ├── 03_DRAGON_INC/
│   ├── 04_GENTEK_Biomechanics/
│   ├── 05_XUTKR_Allied/
│   └── 06_OG20/
├── 2K_Decals/
├── 1K_Decals/
├── License_Agreement.pdf
└── README.txt
Naming Convention
All decals follow a consistent naming pattern:
NIMIS_[Brand][Number][Description].png
Examples:
- NIMIS_CLASIKCORP_001_Logo_Primary.png
- NIMIS_NEONEX_045_Warning_Exit.png
- NIMIS_DRAGON_023_Symbol_Kanji.png
This naming system allows you to:
- ✓ Quickly identify brand families
- ✓ Sort and filter in your file browser
- ✓ Find specific decals across projects
- ✓ Maintain organized asset libraries
THE 6 COMPLETE CORPORATE IDENTITY SYSTEMS
All decals are provided in neutral grey tones, allowing you to customize them to any color palette your project requires using your software's material/shader systems.
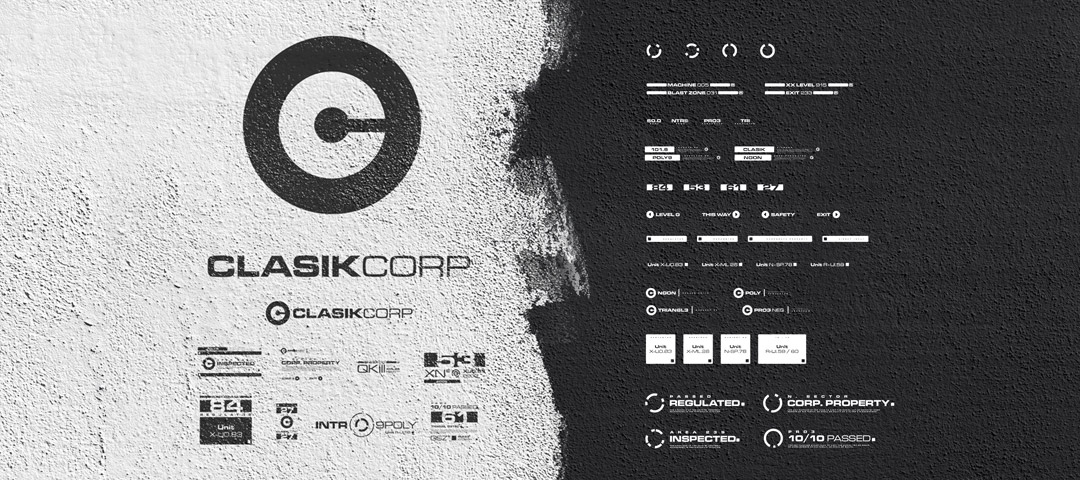
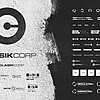
01 - CLASIKCORP (59 decals)
Brand Identity: Industrial space-tech corporate aesthetics
Visual Language:
- Bold circular logo with strong geometric presence
- Clean, authoritative typography
- Industrial-grade technical specifications
- Corporate inspection and compliance markings
Best For:
- Heavy industrial facilities and manufacturing complexes
- Corporate space stations and orbital platforms
- Government and military installations
- Large-scale infrastructure projects
- Authoritative institutional environments
Design Philosophy:
CLASIKCORP represents the industrial backbone of tomorrow. Its stark, uncompromising aesthetic speaks to strength, reliability, and industrial standards. The circular logo suggests both precision machinery and corporate omnipresence—a brand built for durability and trust in extreme environments.
Usage Tips:
- Ideal for establishing corporate ownership and institutional authority
- Works exceptionally well in high-contrast lighting scenarios
- Layer with weathering for authentic industrial wear
- Place on large surfaces (doors, walls, containers) for maximum impact
- Combine with technical diagrams for authentic industrial detailing
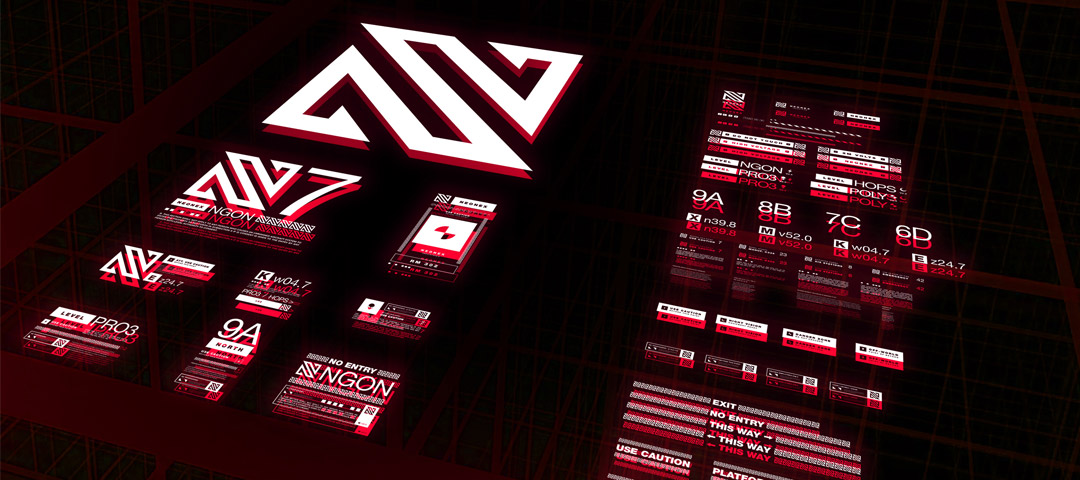
02 - NEONEX INDUSTRIES (63 decals)
Brand Identity: High-visibility safety and warning systems
Visual Language:
- Angular, attention-grabbing geometric logo
- High-contrast warning symbols and directional indicators
- Emergency and safety protocol graphics
- Hazard communication elements
Best For:
- Emergency systems and evacuation routes
- Hazardous area demarcation
- Safety equipment and warning labels
- High-traffic industrial zones
- Critical infrastructure signage
Design Philosophy:
NEONEX is designed to be seen—immediately and unmistakably. The aggressive angular logo ensures instant recognition in critical situations. This is safety design that demands attention, with every element optimized for legibility under stress, poor lighting, or emergency conditions.
Usage Tips:
- Essential for creating realistic safety and warning systems
- Perfect for dim or emergency-lit environments
- Use near actual hazards in your scenes for authentic environmental storytelling
- Combine with flashing or glowing effects for active warning systems
- Strategic placement guides player/viewer attention to important areas
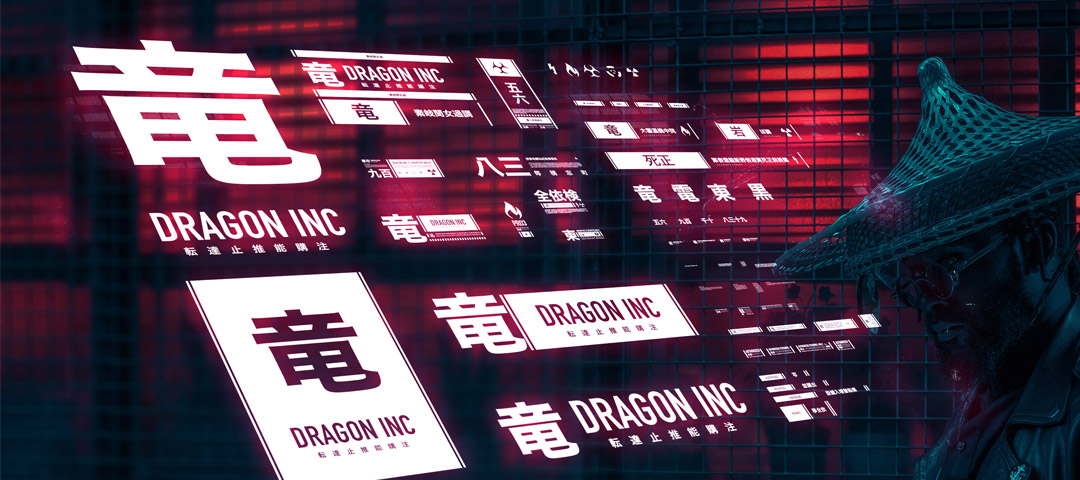
03 - DRAGON INC. (61 decals)
Brand Identity: Strength through tradition. Eastern-influenced, international brand.
Visual Language:
- Prominent use of Chinese characters (龍 - dragon)
- Balance of Eastern calligraphy and modern corporate design
- International bilingual branding elements
- Authoritative yet culturally rooted aesthetic
Best For:
- International corporations with Eastern heritage
- Multinational manufacturing and shipping operations
- Cultural fusion environments and trade hubs
- Prestigious brands emphasizing legacy and tradition
- Asia-Pacific corporate presence
Design Philosophy:
DRAGON INC. bridges centuries of tradition with cutting-edge enterprise. The dragon symbol—representing power, wisdom, and good fortune in Eastern culture—anchors a brand identity that speaks to both heritage and innovation. This is a corporation that honors its roots while commanding global respect.
Usage Tips:
- Perfect for establishing cultural diversity in sci-fi worlds
- Creates authentic international corporate presence
- Mix with Western corporate brands for realistic multinational environments
- Use to suggest premium quality and traditional craftsmanship values
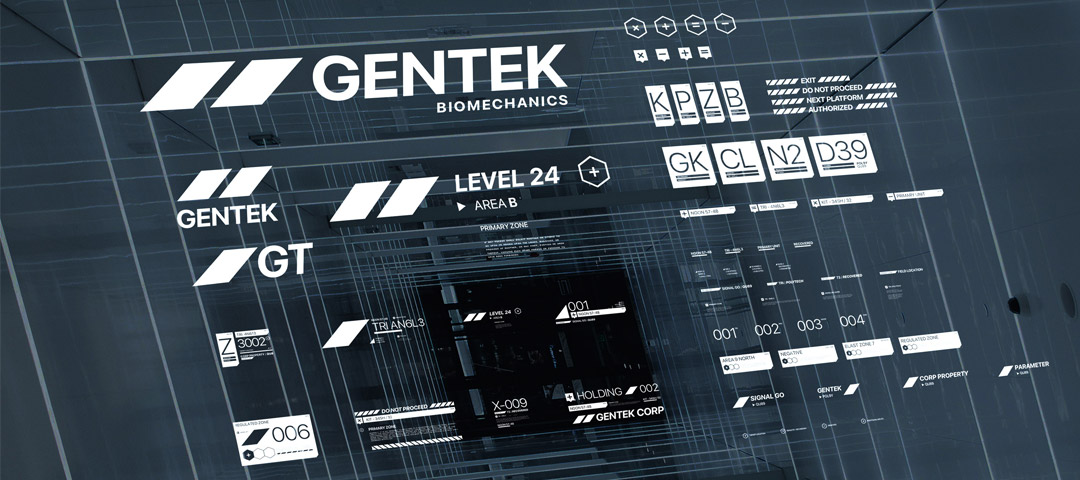
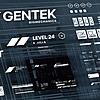
04 - GENTEK BIOMECHANICS (63 decals)
Brand Identity: Genetic engineering and biotech aesthetics
Visual Language:
- Clean corporate minimalism
- Diagonal racing stripes suggesting forward progress
- Precise, clinical typography
- Biomedical certification and classification markings
- Scientific protocol and containment labels
Best For:
- Medical facilities and research laboratories
- Biotech corporations and pharmaceutical companies
- Clinical environments and testing facilities
- Genetic engineering installations
- Advanced healthcare and augmentation centers
Design Philosophy:
GENTEK represents the clinical precision of cutting-edge biotechnology. The pristine aesthetic speaks to sterile laboratory conditions, while the diagonal stripes suggest rapid advancement and breakthrough innovation. This is the brand of a company operating at the frontier of human enhancement and genetic possibility.
Usage Tips:
- Essential for medical and laboratory environments
- The clean aesthetic contrasts beautifully with grimy industrial settings
- Use to suggest sterile, controlled environments
- Perfect for containment warnings and biohazard protocols
- Combine with technical readouts for authentic scientific detailing
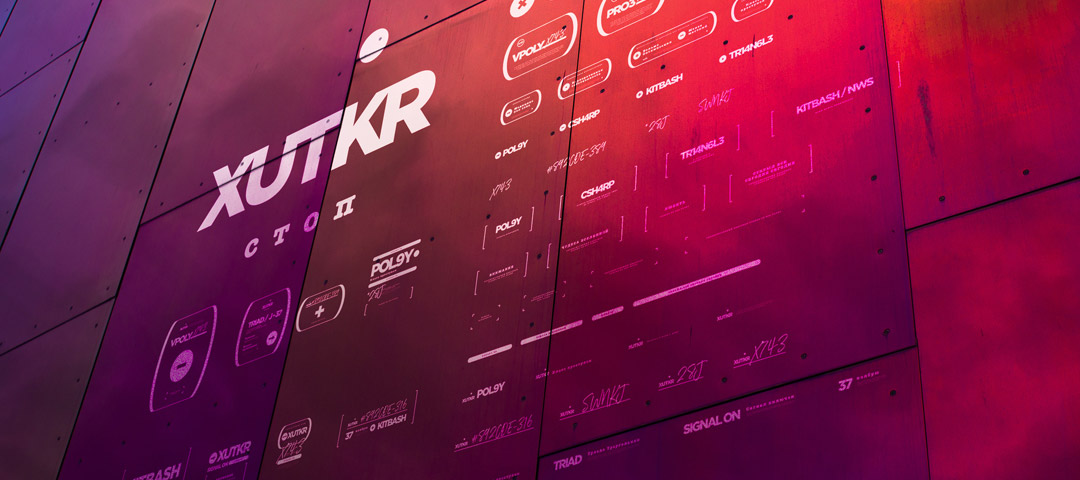
05 - XUTKR ALLIED (60 decals)
Brand Identity: Reliable & accountable. Swiss-inspired with soft curves and sharp lines contrasted by hand-written elements.
Visual Language:
- Elegant curved geometric forms
- Sharp angular elements balanced with organic shapes
- Hand-written technical notations and signatures
- Premium, accountable aesthetic
Best For:
- Precision manufacturing and quality-focused corporations
- Financial institutions and audit systems
- Swiss-style reliability and accountability branding
- Premium product certification and approval marks
- Human-centric technology companies
Design Philosophy:
XUTKR ALLIED merges Swiss precision with human accountability. Hand-written elements introduce a personal, accountable touch often absent in corporate design. This brand says: "We're precise, but never impersonal. Our technology serves humanity, not the other way around."
Usage Tips:
- Hand-written elements add authenticity and human scale
- Perfect for premium products and quality certification marks
- Use to suggest trustworthy, human-centered corporate culture
- Works beautifully with emission/glow shaders
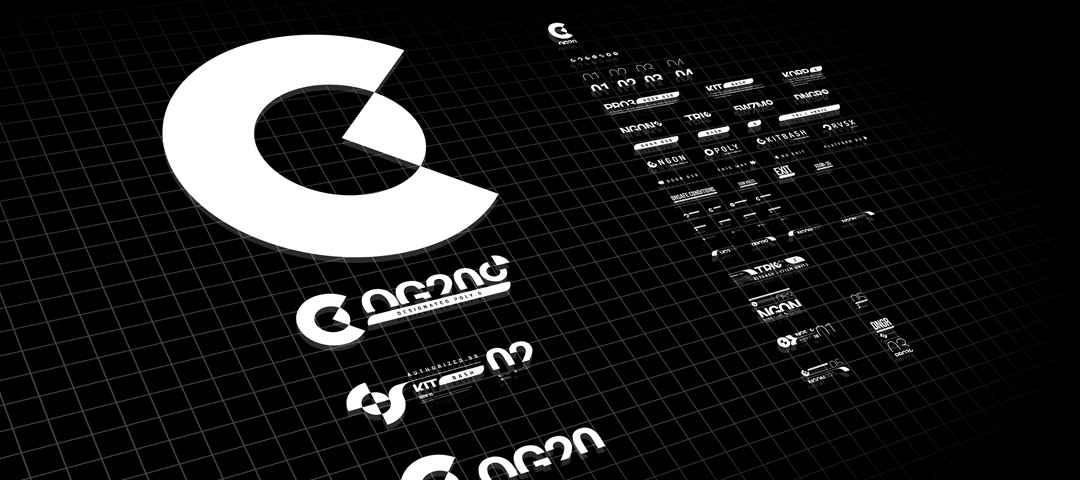
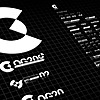
06 - OG20 (66 decals)
Brand Identity: Precision and the future of innovative industries
Visual Language:
- Bold circular "C" logo with technical precision
- Minimalist aesthetic
- Grid-based technical design language
- Innovation-focused branding elements
- Future-forward corporate positioning
Best For:
- Aerospace and advanced propulsion companies
- Innovation hubs and R&D facilities
- Tech startups and disruptive industry leaders
- Precision engineering and manufacturing
- Forward-thinking corporate environments
Design Philosophy:
OG20 embodies the precision of tomorrow's industries. The strong circular logo suggests both a focusing lens and the cyclical nature of innovation—what's cutting-edge today becomes the foundation for tomorrow. The grid-based aesthetic and technical precision communicate a company built on exacting standards and revolutionary thinking.
Usage Tips:
- Perfect for futuristic corporate presence
- Grid background makes it ideal for technical environments
- Strong logo works well at any scale
- Neutral tones allow easy color customization
- Use to establish advanced technology and innovation themes
BRAND COMBINATION STRATEGIES
Creating Realistic Multi-Vendor Environments
The Lived-In Universe Approach:
Real industrial and corporate environments feature products and systems from multiple manufacturers. Mix brands strategically:
Example: Industrial Facility
- Primary Structure: CLASIKCORP (facility owner/operator)
- Safety Systems: NEONEX (specialized safety vendor)
- Equipment: DRAGON INC. (international supplier)
- Medical Bay: GENTEK (biotech specialist)
Example: International Space Station
- Western Modules: OG20 and CLASIKCORP
- Eastern Modules: DRAGON INC.
- Safety Systems: NEONEX (universal standard)
- Life Support: GENTEK and XUTKR
Brand Hierarchy in Scenes
Establish Visual Hierarchy:
- Primary Brand (60% of decals) - Who owns/operates this space?
- Secondary Brands (30% of decals) - Major equipment/system vendors
- Tertiary Brands (10% of decals) - Component suppliers and specialists
This creates authentic visual complexity while maintaining clear environmental storytelling.
SOFTWARE-SPECIFIC WORKFLOWS
BLENDER (Standard Workflow)
Method 1: Direct Image Texture
- Select your object and enter Edit Mode
- Add a new material in the Shading workspace
- Add an Image Texture node
- Load your chosen NIMIS decal PNG
- Connect to a Mix Shader to blend with base material
- Adjust placement using UV coordinates or texture mapping nodes
Method 2: Using as Decal with Shrinkwrap
- Add a plane (Shift+A > Mesh > Plane)
- Scale to approximate decal size
- Apply material with decal texture
- Add Shrinkwrap modifier targeting your model
- Position plane over desired surface area
- Adjust Shrinkwrap offset for perfect surface placement
Pro Tip: Use the "Clipping" option in Shrinkwrap for curved surfaces.
BLENDER WITH KIT OPS
Setup:
- Install KIT OPS addon (https://gum.co/kitops)
- Create a KPACK folder in your KIT OPS library
- For each decal you want quick access to:
- Create a simple plane with the decal material applied
- Export as FBX/OBJ to your KPACK folder
- Refresh KIT OPS library
Usage:
- Select your model
- Open KIT OPS INSERT menu
- Browse to your NIMIS KPACK
- Click decal to instantly place on surface
- Adjust using KIT OPS scaling and rotation tools
Installation Tutorial: https://youtu.be/05LkAZBZIn0
Custom PNG Tutorial (For importing your own PNG files just as they are in the NIMIS 350 Epic Decal Set): https://youtu.be/eM9MaKLVE2k?si=rBTJMC2OXfuOuXqD&t=230
Advantages:
- Instant placement with mouse click
- Real-time visual feedback
- Non-destructive workflow
- Easy repositioning and scaling
BLENDER WITH DECALMACHINE
Setup:
- Install DECALmachine addon
- Navigate to DECALmachine preferences
- Add NIMIS 350 folder as a decal library
- DECALmachine will automatically recognize PNG files
Usage:
- Select your model
- Activate DECALmachine (default: D key)
- Browse your NIMIS library
- Click to project decal onto surface
- Decal automatically wraps around geometry
Installation Tutorial: https://youtu.be/iKNtCkGOWvY
Advanced Features:
- Parallax mapping for depth
- Automatic UV handling
- Smart surface wrapping
- Decal stacking and blending
UNITY
Import:
- Create Assets/Textures/NIMIS_350/ folder structure
- Drag decal folders into Unity project
- Unity automatically imports PNG files as textures
Usage Method 1: UI Elements
- Use directly as UI sprites
- Perfect for HUD elements, menus, overlays
Usage Method 2: Decal Projector (URP/HDRP)
- Create new Decal Projector
- Assign NIMIS decal to projector material
- Position projector over surface
- Adjust projection size and angle
Usage Method 3: Standard Shader
- Create new material
- Assign decal to Albedo texture slot
- Enable transparency (Rendering Mode: Transparent)
- Apply to quad/plane positioned over surface
UNREAL ENGINE
Import:
- Drag PNG files into Content Browser
- Unreal automatically creates Texture assets
- Organize in Content/Textures/NIMIS_350/ structure
Usage Method 1: Deferred Decals
- Create new Material with Domain set to "Deferred Decal"
- Add Texture Sample node with your NIMIS decal
- Connect RGB to Base Color
- Connect Alpha to Opacity
- Place Decal Actor in level
- Assign material and adjust projection
Usage Method 2: Widget/UMG
- Use directly in UI widgets as images
- Perfect for HUD, menus, and overlays
Pro Tip: Set decal blend mode to "Translucent" for layering multiple decals.
SUBSTANCE PAINTER
Import:
- Create custom smart material or drag onto surface
- Add Fill layer with NIMIS decal as alpha
Usage:
- Create new Fill layer
- Add NIMIS decal to the layer's alpha channel
- Adjust blend mode for desired effect
- Use projection/wrapping tools for complex surfaces
Advanced Workflow:
- Use as stencil for custom grunge patterns
- Combine with generators for automatic placement
- Layer multiple decals with different blend modes
ADOBE PHOTOSHOP/ILLUSTRATOR
Direct Usage:
- Open/Place PNG files directly
- Alpha transparency automatically recognized
- Use as layers in compositions
- Resize and color as needed
Best For:
- Concept art and pre-visualization
- Custom texture atlas creation
- Marketing materials and presentations
- Post-processing of renders
BEST PRACTICES & PRO TIPS
Resolution Management
Starting Projects:
- Begin with 4K assets during creative phase
- Maintain maximum flexibility for changes
- Down-sample later during optimization
Performance Optimization:
- Use 2K for most in-game applications
- Reserve 4K for hero assets and close-ups
- Use 1K for distant/background elements
Quality vs. Performance Balance:
| Asset Type | Recommended Resolution |
|---|---|
| Close-up/Hero Assets | 4K |
| Standard Game Assets | 2K |
| Mobile/Background | 1K |
| UI Elements | Match platform specs |
Layering & Composition
Creating Visual Depth:
- Base layer: Large identity/branding decals (primary brand)
- Mid layer: Technical information and warnings (secondary brands)
- Detail layer: Small text, wear patterns, minor vendor marks
Opacity Strategy:
- Primary information: 100% opacity
- Secondary elements: 70-85% opacity
- Weathering/grunge: 40-60% opacity
- Subtle aging: 20-40% opacity
Color Coordination:
- Use consistent brand families within zones
- Vary saturation more than hue for cohesion
- Consider color psychology for different areas (red for danger, blue for medical, etc.)
Authenticity & Realism
Placement Strategies:
- Place NEONEX warnings near actual hazards
- Put corporate identity marks (CLASIKCORP, OG20) on doors and access points
- Add GENTEK labels near medical/bio equipment
- Include XUTKR quality marks on precision instruments
- Position DRAGON INC. on shipping containers and international goods
Wear Patterns:
- More wear on high-traffic areas
- Edge damage on corners and protrusions
- Fading from environmental exposure
- Dirt accumulation in recesses
- Consider the story: Is this brand new or decades old?
Scale Accuracy:
- Reference real-world signage sizes
- Consider viewing distance in your scene
- Maintain legibility at intended viewing angles
- Use variation in sizes for visual interest
Common Pitfalls to Avoid
✗ Over-saturation: Too many bright decals compete for attention
✓ Solution: Use muted colors for secondary elements, let key brands dominate
✗ Perfect uniformity: Everything looks brand new and identical
✓ Solution: Vary wear, color shift, opacity, and rotation
✗ Floating decals: Decals not properly adhering to surfaces
✓ Solution: Use proper projection methods or shrinkwrap
✗ Scale inconsistency: Mixing wildly different scales randomly
✓ Solution: Establish size logic based on decal function and viewing distance
✗ Over-crowding: Too many decals create visual noise
✓ Solution: Apply "less is more," focus on storytelling not decoration
✗ Brand confusion: No clear corporate hierarchy in environment
✓ Solution: Establish primary brand owner, then add vendor brands logically
PROJECT-SPECIFIC WORKFLOWS
GAME DEVELOPMENT
Asset Preparation:
- Create master material with decal slots
- Use texture atlasing for multiple small decals
- Set up LOD chain with resolution variants
- Implement decal pooling for runtime performance
Optimization Checklist:
- ✓ Use appropriate resolution per LOD level
- ✓ Compress textures for target platform
- ✓ Batch similar materials together
- ✓ Profile draw calls and texture memory
Brand Strategy for Games:
- Establish 2-3 primary corporate brands for your game world
- Use NEONEX universally for safety/tutorial hints
- Mix brands to suggest a living, commercial universe
- Consider creating lore around brand rivalries or partnerships
ARCHITECTURAL VISUALIZATION
Photorealistic Integration:
- Match lighting to photography references
- Add subtle imperfections and weathering
- Vary instances slightly for realism
- Consider environmental context (indoor/outdoor, climate)
Client Presentations:
- Use 4K for final renders
- Ensure brand accuracy if representing real facilities
- Provide options with/without certain corporate branding
- Document decal placements for consistency across views
Corporate Identity in Arch Viz:
- Use CLASIKCORP or OG20 for institutional authority
- Add GENTEK for medical/research facilities
- Include XUTKR for premium quality messaging
- Position brands where clients would see them (entrances, lobbies)
FILM & ANIMATION
Production Pipeline:
- Establish art direction early (which brands exist in this world?)
- Create decal placement guides for continuity
- Build library of frequently used combinations
- Version control for multi-shot projects
Continuity Management:
- Photograph/screenshot decal placements
- Use consistent scaling across shots
- Maintain decal library versioning
- Document any custom colors or modifications
Storytelling Through Brands:
- Corporate logos tell viewers about power structures
- DRAGON INC. suggests international/Eastern influence
- GENTEK implies biotech/medical themes
- Brand density suggests wealth (pristine) or decay (worn)
TROUBLESHOOTING
Problem: Decals appear pixelated in my render
Causes:
- Using 1K/2K for extreme close-ups
- Insufficient texture resolution relative to screen space
- Compression artifacts from software
Solutions:
- Use 4K variant for close-up shots
- Check texture import settings (disable compression if needed)
- Ensure proper UV scaling
- Increase render samples/resolution
Problem: Alpha transparency isn't working
Causes:
- Material not set to support transparency
- Alpha channel not connected in shader
- Render engine limitations
Solutions:
- Enable transparency in material settings (Blend Mode: Alpha Blend)
- Verify alpha channel connection in node setup
- Check render engine supports transparency
- Ensure PNG file actually contains alpha (view in image editor)
Problem: Decals look flat/don't integrate with surface
Causes:
- Missing normal/bump information
- No lighting variation
- Lack of surface interaction
Solutions:
- Add subtle normal map variation around decal edges
- Use ambient occlusion or cavity maps
- Adjust roughness/specularity to match surface
- Add slight edge wear or grunge overlay
- Consider adding a subtle emission for certain brands (NEONEX, XUTKR)
Problem: Colors don't match my scene
Causes:
- Different color space/gamma settings
- Lighting environment affects perception
- Monitor calibration differences
Solutions:
- Convert to your project's color space
- Adjust hue/saturation in shader
- Use color grading in post-processing
- Test under various lighting conditions
- Match color temperature to environment
Problem: Performance issues with many decals
Causes:
- Too many unique materials
- High-resolution textures everywhere
- Draw call overhead
- Memory constraints
Solutions:
- Use texture atlasing to combine decals
- Down-sample to 2K/1K where possible
- Batch materials when possible
- Implement LOD system
- Use decal projection systems efficiently
- Consider baking frequently-used decals into base textures
TECHNICAL SPECIFICATIONS
File Format Details
PNG Format:
- Bit Depth: 8-bit per channel
- Color Space: sRGB
- Channels: RGBA (Red, Green, Blue, Alpha)
- Compression: Lossless PNG compression
Alpha Channel:
- Pure transparency workflow
- No pre-multiplied alpha
- Clean edge anti-aliasing
- Binary and gradient transparency support
Resolution Specifications
| Resolution | Dimensions | File Size (avg) | Best Use Cases |
|---|---|---|---|
| 4K | 4096 x 4096 | 8-15 MB | Close-ups, print, hero assets |
| 2K | 2048 x 2048 | 2-4 MB | Standard game dev, real-time |
| 1K | 1024 x 1024 | 0.5-1 MB | Mobile, background, UI |
Total Collection Size:
- Complete package (all resolutions): ~3.5GB
- 4K only: ~2GB
- 2K only: ~800MB
- 1K only: ~200MB
System Requirements
Minimum:
- 4GB RAM
- 10GB free storage
- Graphics card with 2GB VRAM
- Any software supporting PNG textures
Recommended:
- 16GB+ RAM
- 20GB+ free storage (all resolutions)
- Modern graphics card with 4GB+ VRAM
- SSD for faster asset loading
ADDITIONAL RESOURCES
Video Tutorials
KIT OPS Integration:
Import PNG: https://youtu.be/eM9MaKLVE2k?si=uZPFZlLcMUCU1SRo&t=230
KPACK Installation: https://youtu.be/05LkAZBZIn0
DECALmachine Integration:
Installation & Usage: https://youtu.be/iKNtCkGOWvY
Recommended Reading:
- Blender Documentation: Texture Mapping & UV Unwrapping
- Unity Manual: Decal Projector Component
- Unreal Engine Docs: Deferred Decals
- PBR Texture Theory: Understanding Material Workflows
SUPPORT & CONTACT
Need Help?
Technical Support:
[email protected]
- File/download issues
- Software compatibility questions
- Technical troubleshooting
License Questions:
[email protected]
- Usage rights clarification
- License upgrades
- Commercial use questions
General Inquiries:
[email protected]
- Feature requests
- Feedback and suggestions
- Partnership opportunities
Response Time: Typically within 24-48 hours
QUICK REFERENCE CHECKLIST
First-Time Setup
- Download and extract ZIP file
- Choose resolution folder for your project
- Review the 6 brand identity systems
- Import into your primary software
- Test a few decals to verify workflow
- Save your license documentation for reference
Starting a New Project
- Determine appropriate resolution (4K/2K/1K)
- Identify which brands fit your world/story
- Plan brand hierarchy (primary, secondary, tertiary)
- Set up material/shader templates
- Create test composition to verify aesthetic
- Document your brand placement strategy
Optimization Phase
- Review all decal resolutions used
- Down-sample where possible
- Batch similar materials together
- Test performance on target hardware
- Verify no duplicate textures loaded
- Document final asset list for team
LEARNING PATH SUGGESTIONS
Beginner: Start with CLASIKCORP and NEONEX
- Strong, recognizable logos
- High contrast for easy visibility
- Simple to apply with immediate impact
- Build confidence with workflow
Intermediate: Explore DRAGON INC., GENTEK, and OG20
- More nuanced brand identities
- Practice layering techniques
- Develop style consistency
- Learn multi-brand composition
Advanced: Master all six brands and create cohesive environments
- Integrate all brand systems strategically
- Create complete environmental narratives
- Develop custom workflows and automation
- Build authentic lived-in universes
FINAL TIPS FOR SUCCESS
The Corporate Identity Approach
Think of these decals as more than decoration—they're world-building tools. Each brand represents a corporation with its own values, market position, and aesthetic philosophy. When you choose which brands appear in your scenes, you're telling a story about:
- Power structures (who owns what?)
- Cultural diversity (DRAGON INC. suggests Eastern influence)
- Technological focus (GENTEK = biotech, OG20 = innovation)
- Quality levels (pristine XUTKR vs. weathered CLASIKCORP)
- Safety culture (prominent NEONEX = safety-conscious)
Remember:
- Less is often more - don't overcrowd your surfaces
- Every decal should serve the story or environment
- Consistency in brand usage creates believability
- Variation in wear and aging adds realism
- Real environments mix multiple vendors naturally
Most Importantly:
Have fun and experiment! These decals are tools for your creativity. Try unexpected brand combinations, push boundaries, and create something unique. Build worlds where corporations compete, collaborate, or dominate—let the brands tell your story.
Document Version: 1.0
Last Updated: October 2025
Product: NIMIS 350 - Epic Decal Set
© 2025 SirCharles.DESIGN. All rights reserved.
Have questions about this product?
Login to message
| Sales | 100+ |
| Dev Fund Contributor | |
| Published | over 7 years ago |
| Blender Version | 2.6x - 4.5 |
| Render Engine Used | Arnold, Blender-Internal, Blender-Game-Engine, Cycles, Eevee, Freestyle, Luxrender, Mental-Ray, Octane, Vray, Yafaray |
| License | Royalty Free |
Discover more products like this
sci fi sircharles.design decalmachine decal sircharles 3d decals blender decal pack kit ops nimis 350