Sirius Lights
 Infiniteration


1. Introduction
What is Sirius Lights?
Sirius Lights is a Blender add-on designed to create and manage advanced light collections with speed, flexibility, and precision.
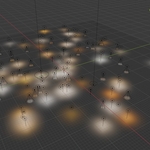
It allows you to generate large numbers of lights in structured patterns (circles, spheres, grids, curves, and meshes), apply randomized transformations, and control their colors and properties in a single unified interface.
The add-on is especially useful for:
Creating cinematic or stylized lighting rigs.
Rapidly iterating different lighting setups for scenes.
Distributing lights across objects, curves, or meshes.
Managing consistency across animations with automatic updates and caching.
Key Features
Automated Light Collections: Instantly create and start to manage grouped lights with one click.
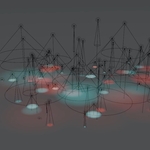
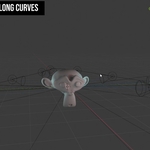
Flexible Placement Modes: Arrange lights in circles, grids, spheres, along curves, or across mesh faces/vertices.
Advanced Randomization: Control randomness of position, rotation, and color using seed paths for reproducible results.
Dynamic Light Properties: Batch edit power, type, softness, tracking, spot settings, and more.
Color Systems: Choose from HSV sliders, Kelvin temperatures, range modes, or textures.
Presets: Save and reuse custom lighting setups, or load built-in templates.
Performance Optimizations: Handlers and caching prevent slowdowns, even with large collections.
Animation-Friendly: Properties update automatically with handlers, avoiding manual re-application frame by frame.
Supported Blender Versions
Fully compatible with Blender 3.0.0 and above
Works in both Eevee and Cycles render engines.
2. Installation & Setup
2.1 Downloading the Add-on
The add-on is provided as a single .zip archive
Do not unzip it — Blender installs add-ons directly from .zip files.
2.2 Installing in Blender
Open Blender.
Go to the top menu:
Edit → Preferences → Add-ons.At the top-right corner, click Install….
Select the provided Sirius Lights .zip file
Blender will install the add-on automatically.
2.3 Enabling the Add-on
In the Preferences → Add-ons list, search for Sirius Lights.
Enable it by checking the box ✅.
Once enabled:
Blender registers the add-on.
A new SiriusLights tab will appear in the 3D Viewport Sidebar (N-panel).
2.4 First-time Setup Checklist
After enabling the add-on:
✅ The ⭐ Sirius Lights panel should appear in the N-panel of the 3D Viewport.
✅ The panel should contain a “Create new collection” button.
✅ Clicking the button generates a new light collection in the Outliner.
3. User Interface Overview
Open the 3D Viewport.
Press N (or move your cursor to the right-hand sidebar).
Look for the SiriusLights tab.
Inside, you’ll find the main panel:
⭐ Sirius Lights
3.1 ⭐ Sirius Lights (Main Panel)
Create new collection → adds a new SiriusLights collection.
Active Collection → dropdown to select the currently active collection.
Source Object → assign an object as the origin for lights.
Use Source Scale → lights follow the scale of the source.
Use Source Rotation → lights follow the rotation of the source.
Track To → assign a tracker object that lights will aim at.
Tracking Influence → slider (0–1) for how strongly lights follow the tracker.
Count of Points → number of lights when using Eevee.
Count of Points Cycles → number of lights when using Cycles.
Grid Size → number of lights per row/column in Grid mode.
Master Seed Path → global randomization seed (affects placement, rotation, and color).
Seed Path Type → choose the randomness algorithm:
Default
Fractal (with Fractal Octaves, Perlin Amp Decay, Fractal Scale)
Perlin (with Fractal Scale, Fractal Octaves, Perlin Amp Decay)
Wave (with Wave Frequency, Wave Amplitude)
3.2 🔄 Translations
Controls the arrangement of lights in 3D space.
Mode → choose the placement mode:
Circle (with Light Array Angle)
Sphere (with Sphere Mode, Sphere Twist Factor, Random Path)
Grid (with Grid Size)
Curve (with Select Bezier Curve, Cyclic Toggle)
Mesh (with Mesh Object, Mesh Mode, and sub-options)
Scale → scales spacing between lights
Location Randomization:
Direction → Default, Tracker, or Source.
This setting controls how random offsets are applied when scattering lights. It decides whether randomness is applied freely in all directions, or biased toward a specific reference object.
Default
Random offsets are applied uniformly in all directions (X, Y, Z).
Lights spread randomly without preference to a target.
Best for organic scatter or “noisy” layouts.
Tracker
Random offsets are biased toward the Tracker object (value can be over 1)
Works well when you want lights to “cluster” toward the focus point.
Source
Random offsets are biased relative to the Source Object (the one assigned in the Source Object setting).
Amplitude → slider for strength of random offsets.
Location Seed Path → randomization seed.
Rotation Randomization:
Rotation Randomization Seed → generates random rotations.
Lamp Rotations → slider for manual rotation control.
:
3.3 💡 Lights
Controls the physical properties of the lights in the active SiriusLights collection.
Light Type → Dropdown:
Point
Spot
Area
Random (assigns random types to lights in the collection)
Light Power → Slider (watts)
Base brightness of all lights.
Power Multiplier → Slider
Scales brightness for quick adjustments without changing base power.
Normalize Light at Tracker → Checkbox
Ensures total light reaching the Tracker stays consistent, even if lights move closer/farther.
Light Radius / Size → Slider
Physical emitter size (affects shadow softness).
For point/spot lights → radius.
For area lights → width/height.
Spot Cone Angle → Slider (degrees, 0–180)
Width of spotlight cones.
Spot Blend / Softness → Slider (0–1)
Controls the falloff at the edge of spotlight cones.
Cone Scale Seed → Integer field
Adds variation in cone angle between lights.
Tracking Influence → Slider (0–1)
Strength of the Track To constraint (how much lights aim at the Tracker).
Diffuse Factor → Slider (0–1)
Contribution to diffuse shading (surface brightness).
Specular Factor → Slider (0–1)
Contribution to reflections/highlights.
Volume Factor → Slider (0–1)
Contribution to volumetric lighting (fog, atmosphere).
3.4 🎨 Color
Controls the coloring of all lights in the active SiriusLights collection.
Color Seed Path
This is the random seed value specifically for color variation.
Every time you change it, Blender regenerates the random sequence that determines how colors are distributed across your lights.
Think of it like shuffling the deck:
Same Min/Max Hue/Sat/Brightness ranges → different random assignment to each light.
Two different seed values give you two different “color patterns,” even if the settings are otherwise identical.
Useful when you want multiple variations of the same setup, but with different random results.
Color Path Power
This controls the strength/amount of influence that the seed has on the colors.
At 0 → the seed has no effect; all lights stay at the base Hue/Sat/Val.
At 1 → the seed applies normally (full randomization within your ranges).
Above 1 → the random variations are exaggerated, making colors more widely separated or pushed harder into the range extremes.
Color variation scale
This setting controls how wide the spread of colors is across your lights.
It acts like a multiplier on the hue variation, expanding or compressing the range you defined with Minimum Hue and Maximum Hue.
Base Hue → Slider (0–1) Can be set to be over 1 and under 0 to rotate hue.
Randomized Color Ranges
Minimum Saturation → Slider
Maximum Saturation → Slider
Minimum Brightness → Slider
Maximum Brightness → Slider
Minimum Hue → Slider (0–1)
Maximum Hue → Slider (0–1)
(Together, these define ranges — each light will pick a random value within the range.)
Kelvin Mode (Color Temperature)
In this mode, light colors are defined using Kelvin temperature values, just like real-world lighting.
Warmer temperatures = reddish/orange light (like candles or tungsten bulbs).
Cooler temperatures = bluish/white light (like daylight or overcast skies).
How it Works
When you switch to Kelvin mode (usually via a dropdown in the Color panel), each light’s color is calculated from its Kelvin temperature.
The Kelvin Brightness Multiplier slider lets you scale brightness independently from color — useful because warmer tones often appear dimmer, and cooler tones brighter.
Typical Kelvin Ranges
1000–3000K → Warm (candles, tungsten lamps).
4000–5000K → Neutral white (fluorescent, early morning).
6000–10000K → Cool (daylight, overcast, electronic light).
Why Use Kelvin Mode?
For realistic lighting setups (studio, architectural, product rendering).
To match real-world references easily (e.g., daylight at noon ~6500K).
To avoid all lights looking identical, the add-on provides Kelvin randomization:
Kelvin Min → Lower bound of the Kelvin range (e.g., 2000K = very warm orange).
Kelvin Max → Upper bound of the Kelvin range (e.g., 8000K = cool blue).
Each light is randomly assigned a value within this range.
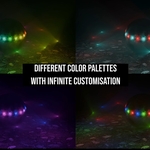
📦 Palette Mode
Complementary
Uses two opposite colors on the hue wheel (e.g., Blue & Orange).
Great for strong contrast and cinematic lighting.
Analogous
Uses three colors next to each other on the hue wheel (e.g., Blue–Teal–Green).
Produces a harmonious, natural look.
Triadic
Uses three evenly spaced colors (120° apart, e.g., Red–Green–Blue).
Creates a balanced but vibrant scheme, ideal for stylized or playful lighting.
Tetradic (Double Complementary)
Uses four colors, made of two complementary pairs (e.g., Blue & Orange + Red & Green).
Offers the richest palette with maximum variety, but requires balance to avoid looking chaotic.
Best for complex, colorful scenes like concerts or abstract designs.
Monochromatic
Uses shades, tones, and tints of a single hue (e.g., multiple blues from sky to navy).
Produces a unified, atmospheric look with subtle variation.
Perfect for mood lighting and cohesive renders.
Palette Controls
Base Hue
Shifts the entire palette around the color wheel.
Example: Complementary palette at Base Hue = 0 gives Red/Green; at Base Hue = 0.15 it becomes Orange/Blue.
Base Saturation
Controls how vivid the palette colors are.
Lower values → pastel tones.
Higher values → strong, punchy colors.
Palette Distribution Scale
Adjusts how palette colors are spread across the lights.
At 1.0 → lights are evenly assigned across the palette.
At <1.0 → colors cluster more closely (more lights share the same color).
At >1.0 → palette colors are exaggerated or “stretched out” (some lights may repeat extreme colors).
3.5 🎨 FX
The FX panel controls dynamic and time-based effects for lights, letting you simulate natural flicker, electronic glitches, or stylized rhythmic lighting. These settings modulate light power and color over time, making lights feel “alive” instead of static.
Flicker Controls
Minimum Intensity → Sets the lowest brightness that lights will dip to during flicker.
Maximum Intensity → Sets the peak brightness lights will reach during flicker.
Speed → Controls how fast the flicker cycles (low = slow candlelight, high = rapid strobe).
Smoothness → Adjusts how sharp or gradual the flicker transitions are:
High smoothness → soft, wave-like dimming/brightening.
Low smoothness → jittery, harsh stutter-like flicker.
Harmony / Chaos → Governs whether all lights flicker together or independently:
Harmony → synchronized flicker across all lights.
Chaos → each light flickers differently, creating a randomized field of movement.
Glitch Controls
Glitch Malfunction Factor → Introduces abrupt “cut-out” or overblown moments, imitating a broken bulb, neon sign, or faulty wiring. Higher values = stronger malfunction effect.
Glitch Sensitivity → Determines how often lights respond to the malfunction factor. Higher sensitivity = more frequent glitches.
Randomization
Seed → Randomizes flicker/glitch patterns while keeping them reproducible. Different seed values create unique but repeatable variations.
-
$20
+ Support & Lifetime updates
-
$40
Support my developing (content is the same)
Have questions about this product?
Login to message
| Sales | 10+ |
| Published | about 1 year ago |
| Blender Version | 3.0 - 4.5 |
| Extension Type | N/A |
| Render Engine Used | Cycles, Eevee |
| License | GPL |
