Smart Materials Manager
 kartikay A Mathur




Smart Materials Manager - Documentation
Overview
Smart Materials Manager is a Blender add-on that streamlines material management using the Asset Browser. It enables users to apply, organize, and manage materials efficiently with a one-click workflow. The add-on integrates automatic asset categorization, batch material application, and cleanup tools to enhance efficiency in material handling.
Features
One-Click Material Application: Quickly apply materials to selected objects.
Asset Browser Integration: Uses Blender's Asset Browser for better material organization.
Material Categorization: Organize materials into predefined or custom categories.
Batch Operations: Apply materials to multiple objects at once.
Automatic Cleanup: Removes duplicate materials to keep projects optimized.
Easy Setup: Automatically creates and configures a dedicated materials folder.
UI Panels for Easy Access: Access features directly from the Properties Editor and Shader Editor.
Installation
Download the ZIP file from Blender Market or GitHub.
Open Blender and navigate to:
Edit > Preferences > Add-ons > Install...Select the ZIP file and click Install Add-on.
Enable the add-on by checking the box next to Smart Materials Manager.
-
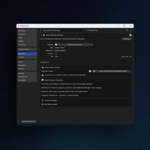
Set up the materials folder in the Addon Preferences:
Go to
Edit > Preferences > Add-ons > Smart Materials ManagerSelect or create a folder for your materials.
Click Setup SMM Folder to initialize.
Getting Started
1. Setting Up Asset Library
After installation, you need to set up a material library:
Go to
Edit > Preferences > Add-ons > Smart Materials ManagerSelect a Materials Folder where all Smart Materials will be stored.
Click Setup SMM Folder to automatically generate default categories (
Metals, Wood, Plastic, etc.).Add this folder to Blender’s Asset Libraries under
Preferences > File Paths > Asset Libraries.
2. Applying Materials
Select an object in the 3D Viewport.
Open the Properties Editor > Materials Tab.
Click Apply SMM Material to apply a material from the library.
3. Saving Materials to Library
Select a material in the Shader Editor.
Click Save Material to SMM Library.
Choose a category and name for the material.
Click Confirm to save it as an asset.
4. Managing Categories
Click Add Category in the SMM Panel to create a new category.
Move materials to different categories using Move Materials to Category.
5. Batch Applying Materials
Select multiple objects.
Choose Batch Apply Materials.
Select either Same Material for all or Random Distribution.
Click Apply.
6. Cleanup Duplicate Materials
Click Remove Duplicate Materials to automatically remove duplicate SMM materials.
Optionally, enable Auto Clean on Save in preferences.
UI Panels
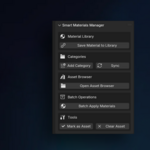
1. Properties Editor Panel
Located in Properties > Materials Tab, it provides access to:
Material Library (List of available Smart Materials)
Apply Material (Apply materials to objects)
Save to Library (Store custom materials)
Batch Apply (Apply to multiple objects)
Cleanup Tools (Remove duplicates)
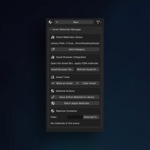
2. Shader Editor Panel
Located in Shader Editor > Sidebar, it provides:
Quick Save to Library
Category Management
Batch Operations
Asset Browser Access
Troubleshooting
1. Add-on Not Appearing
Ensure the add-on is enabled in
Edit > Preferences > Add-ons.Restart Blender after installation.
Check the Blender version (
4.3.0or later required).
2. Materials Not Applying
Ensure the object has a valid mesh.
Confirm that the material is correctly assigned in the Asset Browser.
Check if the materials folder is properly set up in the preferences.
3. Missing Asset Library
Make sure the Materials Folder is registered as an Asset Library in
Preferences > File Paths > Asset Libraries.Try manually adding the folder and restarting Blender.
Future Updates
Planned features:
Live Material Previews
Material Import from External Libraries
Support for Shader Node Groups
For updates, visit: Blender Market Page / GitHub.
Support & Feedback
For bug reports and feature requests, visit:
Bug Tracker: GitHub Issues
Support Page: Blender Market Support
Credits
Developed by Kartikay Mathur.
License
This add-on is licensed under Proprietary License
For more details, refer to the full license document included in the add-on package.
Have questions about this product?
Login to message
| Blender Extension Compatible | Yes |
| Published | over 1 year ago |
| Blender Version | 4.3 |
| Extension Type | Add-on |
| Render Engine Used | Cycles, Eevee |
| License | GPL |