 CONTOR


Sounder Documentation
📖 Getting Started
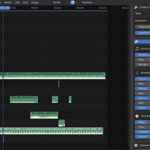
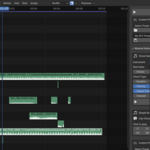
Sounder is located in the Video Sequence Editor sidebar. Open the VSE, press N to show the sidebar, and click the Sounder tab.
🔊 Sound Effects Generator
Quick Start with Presets
- Click any preset button to instantly generate that sound
- Click the arrow icon next to a preset to load its settings into the Custom Generator
- Generated audio appears immediately on your VSE timeline
Custom SFX Generator
- Synthesis Mode: Choose from Basic, FM, Additive, AM, Subtractive, or Granular
- Waveform: Select Sine, Square, Triangle, Sawtooth, Pulse, or Noise types
- Frequency: Adjust pitch (20Hz - 20kHz)
- Duration: Set sound length (0.1 - 30 seconds)
- Output Volume: Control final loudness before placing on timeline
Effects
- Enable Effects checkbox to access all effects
- Drive & Crush: Distortion (grit/aggression), Bitcrush (lo-fi digital)
- Modulation: Tremolo (volume pulsing), Vibrato (pitch wobble), Chorus (thickness)
- Time & Space: Delay (echo), Reverb (room ambience)
- Fade & Pitch: Fade In/Out, Pitch Envelope (rising/falling sweeps)
- Click Clear button to reset all effects to defaults
🎹 Musical Instruments
Chord Generation
- Select from 22 instruments (Keyboards, Synths, Orchestral, Woodwinds, Bells, Bass)
- Choose root note (C, C#, D, etc.) and octave (1-8)
- Select chord type: Major, Minor, Diminished, Major 7th, Minor 7th
- Adjust velocity (volume/intensity) and duration
- Click Generate Chord
Simple Notes
- Click any note button (C, D, E, F, G, A, B or sharps/flats)
- Uses current instrument and settings from Chord Generation above
- Perfect for quick single-note generation
Effects for Music
- Fade In/Out: Smooth volume transitions
- Pitch Envelope: Rising or falling pitch over time
- Distortion: Add harmonic grit
- Saturation: Warm, tube-style saturation
- Reverb: Spatial ambience
- Corpus: Acoustic resonance modeling (simulates instrument body)
- Click Clear button to reset all effects
🎼 Multi-Note Editor
Building Sequences
- Click Open Multi-Note Editor button in the sidebar
- Select instrument and set default duration
- Click notes in top row to add single notes
- Click notes in bottom row to add chords
- Enable Auto-Chain Notes to automatically place new items after the previous one
- Edit each item's note, octave, chord type, start time, duration, and velocity
- Click Generate Audio when ready
Tips
- The editor stays open - edit and regenerate as many times as needed
- All effects from the Music section apply to the entire sequence
- Use presets to save complete musical phrases
💾 Preset System
Saving Presets
- Configure your sound with all parameters and effects
- Enter a name in the Preset Name field
- Click Save Preset
- Preset is saved with all settings, effects, and parameters
Loading Presets
- Select a preset from the dropdown list
- Click Load Preset
- All settings are instantly restored
Custom Preset Location
- Set a custom folder in File Locations section of main panel
- Applies to all preset types (SFX, Music, Multi-Note)
- Great for keeping presets with project files or sharing with team
🎹 MIDI Recording
Setup
- Click Install MIDI Support button (one-time setup)
- Restart Blender completely
- Connect your MIDI keyboard before opening Blender
- Close other MIDI applications (DAWs, virtual pianos, etc.)
Recording
- Select your MIDI device (or Computer Keyboard (Virtual))
- Choose instrument for playback
- Enable Monitoring to hear notes as you play
- Enable Play Timeline to record along with your project
- Click Start MIDI Recording
- Play your MIDI device or computer keyboard
- Click Stop & Generate Audio
Virtual Keyboard Layout
- Lower Octave (C3-C4): Z X C V B N M , (white keys) | S D G H J (black keys)
- Middle Octave (C4-B4): Q W E R T Y U (white keys) | 2 3 5 6 7 (black keys)
- Upper Octave (C5-G5): I O P [ ] (white keys) | 9 0 (black keys)
- Middle C (C4) starts on the 'Q' key
🎤 Audio Recording (Windows/Linux)
⚠️ macOS Users: Audio recording is not available on macOS due to system microphone security restrictions. Please use QuickTime Player, Audacity, or GarageBand instead.
Setup
- Click Install sounddevice Library button (one-time setup)
- Restart Blender completely
- Windows: Check microphone permissions in Settings > Privacy > Microphone
- Linux: May need to install ALSA libraries:
sudo apt-get install libasound2-dev
Recording
- Select your input device from dropdown
- Set max duration (0 = unlimited, stop manually)
- Click Start Recording
- Click Stop Recording or press ESC when done
- Audio appears on your timeline
⚙️ Settings
File Locations
- Audio Output: Where generated audio files are saved (default: temp folder)
- Preset Location: Custom folder for all presets (default: Blender config folder)
- Leave blank to use defaults
Output Settings
- Channel: Which VSE channel to place audio on (1-128)
- Output Volume: Final volume level before placing on timeline
- Audio strips are placed at the current frame
💡 Tips & Tricks
- Non-destructive workflow: Generate unlimited variations - nothing affects your timeline until you click Generate
- Layer sounds: Generate multiple sounds on different channels and mix in the VSE
- Pitch Envelope tricks: Use rising pitch (0.5→2.0) for sirens, falling pitch (2.0→0.5) for whooshes
- Preset library: Build a collection of your favorite sounds and share with your team
- MIDI with timeline: Enable Play Timeline to record MIDI along with your video
- Clear Effects: Use the Clear button when experimenting to quickly reset
- Multi-Note Editor: Save entire musical phrases as presets for reuse
❓ Troubleshooting
MIDI Issues
- If no devices appear: Close other MIDI apps and restart Blender
- If "backend missing" error: Click Install MIDI Support and restart
- Only one application can use MIDI at a time
Audio Recording Issues
- If library not found: Click Install and restart Blender completely
- Windows: Check microphone permissions in system settings
- macOS: Recording not supported - use external software
Audio Quality
- All audio generated at 48kHz, 16-bit quality
- Use Output Volume to prevent clipping (keep below 0.8 for heavy effects)
- Generated files are WAV format for maximum quality
Requires Blender 4.2+ | Video Sequence Editor
❓ Frequently Asked Questions
General Questions
Q: Where do I find Sounder in Blender?
A: Open the Video Sequence Editor, press N to show the sidebar, and click the Sounder tab.
Q: Does Sounder work without installing any extra libraries?
A: Yes! All core features (SFX, Music, Multi-Note Editor) work immediately. MIDI and Audio Recording require optional libraries that can be installed with one click.
Q: Where do the generated audio files go?
A: By default, temporary folder. You can set a custom output directory in the File Locations section. Audio appears automatically on your VSE timeline.
Q: Can I use Sounder for commercial projects?
A: Yes! All sounds you generate with Sounder are yours to use commercially without restrictions.
Q: What audio quality does Sounder generate?
A: 48kHz, 16-bit WAV files - professional broadcast quality.
Sound Effects Questions
Q: What's the difference between preset SFX and the Custom Generator?
A: Preset buttons generate sounds instantly with pre-configured settings. The Custom Generator lets you create and modify sounds from scratch. Click the arrow icon next to any preset to load its settings into the Custom Generator for tweaking.
Q: How do I make a laser sound sweep downward?
A: Enable Pitch Envelope and set Start Pitch higher than End Pitch (e.g., Start: 2.0, End: 0.5). Add Fade Out for a more natural decay.
Q: Can I layer multiple effects?
A: Yes! Enable Effects and adjust multiple parameters. Effects are applied in optimal order automatically.
Q: My sound is too quiet/loud. What should I do?
A: Adjust the Output Volume slider before generating. Start around 0.7-0.8 if using heavy effects to prevent clipping.
Musical Instruments Questions
Q: How many instruments are included?
A: 22 instruments: Piano, Electric Piano, Organ, Synth Lead, Synth Pad, Strings, Choir, Ah Choir, Synth Vocal, Flute, Clarinet, Oboe, Recorder, Chimes, Glockenspiel, Harp, Vibraphone, Music Box, Bass Drum, Bass Synth, Electric Bass, and Sub Bass.
Q: Can I play multiple notes at once?
A: Use the Chord Generation feature or the Multi-Note Editor to create chords and sequences.
Q: What chord types are available?
A: Major, Minor, Diminished, Major 7th, and Minor 7th.
Q: Can I apply effects to instruments?
A: Yes! Musical instruments support Fade In/Out, Pitch Envelope, Distortion, Saturation, Reverb, and Corpus effects.
Multi-Note Editor Questions
Q: What's the difference between the top and bottom note rows?
A: Top row adds single notes. Bottom row adds chords. Both use the current instrument and settings.
Q: What does Auto-Chain Notes do?
A: When enabled, each new note/chord automatically starts when the previous one ends. Great for building melodies quickly.
Q: Can I edit notes after adding them?
A: Yes! Click any note to select it, then edit its properties. The editor stays open so you can regenerate as many times as needed.
Q: Do effects apply to individual notes or the whole sequence?
A: Effects apply to the entire generated sequence. Each note can have individual velocity, but effects are global.
Preset System Questions
Q: What gets saved in a preset?
A: Everything! All parameters, effects settings, instrument choice, duration, velocity, etc. Multi-Note presets even save the complete note sequence.
Q: Where are presets stored?
A: Default: Blender config folder. You can set a custom location in File Locations to keep presets with your project or share with your team.
Q: Can I share presets with other people?
A: Yes! Presets are simple JSON files. Copy them from your preset folder and share. Recipients place them in their preset folder.
Q: Can I organize presets into folders?
A: Presets are automatically organized by type (sfx, music, multinote). Within each type, they appear alphabetically in the dropdown.
MIDI Recording Questions
Q: Does MIDI Recording work on Mac?
A: Yes! MIDI Recording works on macOS, Windows, and Linux. Only Audio Recording is unavailable on macOS.
Q: My MIDI keyboard isn't showing up. What should I do?
A: 1) Close other MIDI apps (DAWs, virtual pianos), 2) Connect keyboard before opening Blender, 3) Restart Blender, 4) If still missing, click Install MIDI Support and restart.
Q: Can I use my computer keyboard as a MIDI device?
A: Yes! Select "Computer Keyboard (Virtual)" from the MIDI device dropdown. No setup required. Check the User Guide > Keyboard Layout section for the key mapping.
Q: Can I hear the notes as I play them?
A: Yes! Enable "Enable Monitoring" in the MIDI Recording panel. Use "Test Audio" button to verify it's working.
Q: Can I record MIDI while my timeline plays?
A: Yes! Enable "Play Timeline While Recording" to sync your MIDI performance with your video project.
Audio Recording Questions
Q: Why doesn't Audio Recording work on my Mac?
A: macOS security restrictions prevent Blender's Python environment from accessing the microphone. Use QuickTime Player, Audacity, or GarageBand to record, then import the audio file into Blender.
Q: My microphone isn't in the device list (Windows).
A: Check Settings > Privacy > Microphone and ensure Blender has permission to access your microphone.
Q: Can I record system audio (desktop audio)?
A: On Windows, yes - if you have a "Stereo Mix" or similar device enabled in sound settings. On Linux, use PulseAudio monitor devices.
Q: How long can I record for?
A: Set Max Duration (0 = unlimited). For unlimited recording, click Stop manually or press ESC when done.
Effects Questions
Q: What's the difference between Distortion and Saturation?
A: Distortion is harsher and adds aggressive harmonics (good for SFX). Saturation is warmer and tube-like (good for music). Both add grit but in different ways.
Q: What does Corpus do?
A: Corpus simulates acoustic resonance - like the body of an instrument vibrating. It adds warmth and natural resonance to musical instruments.
Q: How do I create a siren effect?
A: Use the Siren preset, or enable Pitch Envelope with alternating start/end values and add Vibrato for warble.
Q: My effects sound too extreme. How do I make them subtle?
A: Most effects have a Mix parameter (0-100%). Lower the mix value to blend more of the dry signal. Start around 20-30% for subtle effects.
Q: What does the Clear button do?
A: Resets all effects to default values. Great for starting fresh when experimenting.
Troubleshooting
Q: Audio is clipping/distorting (not the effect).
A: Lower the Output Volume to 0.7 or below, especially when using multiple effects. Heavy effects can increase overall volume.
Q: Generated audio appears on the wrong channel.
A: Check the Channel setting before generating. Each generator has its own channel setting.
Q: Installation says "sounddevice/mido not found" even after installing.
A: You must completely close and restart Blender after installation. The libraries won't be available until restart.
Q: My question isn't answered here.
A: Check the full documentation sections above, or contact support through your marketplace profile.
Have questions about this product?
Login to message
| Blender Extension Compatible | Yes |
| Sales | 20+ |
| Dev Fund Contributor | |
| Published | about 1 year ago |
| Blender Version | 4.2 - 5.1 |
| Extension Type | Add-on |
| Render Engine Used | Cycles, Eevee |
| License | GPL |
Discover more products like this
video editing vse sfx audio sound template 3DMotionGraphics video sequencer sound effects Music motion video mograph daw animation video sequence editor sequencer motion graphics