Sprite Atlas Maker
 Diego Hay Ochani Santos de Almeida


How to install
- Go to the "Edit" window > "Preferences" > "Add-ons" > "Install"
- Look in your directory for the compressed file and select it.
- Activate it in the addons window
and it will be installed.
How to Use
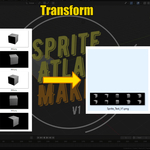
Go to the image editor window, and in the side menu, pressing the "N" key you will see a new tab called "Sprite Atlas"
We'll have a few options for editing the atlas creation process:
Folder - to link to the folder where the separate image files are located.
Filter - to filter the file format if there are other types in the same folder.
Recursive - to add subfolders within the main folder.
Sort by - to define the order in which the files will be read to be distributed by the atlas. They can be sorted alphabetically or by modification date.
Scan Files - to check the number of files read to generate the atlas.
Columns - to set the number of columns you want in your atlas. This number will be divided by the number of files and will also define the number of rows.
Padding - the distance in pixels between sprites within the atlas.
Force Resize - to resize if there are files with a different resolution than the others, making them all the same size and thus being able to generate the atlas.
Power of Two - to transform all file resolutions, including the atlas resolution, into multiples of two, widely used for game engines, among other processes.
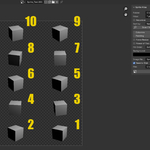
Fill Order - defines how the images will be distributed within the atlas, from top to bottom, left to right, among other patterns.
Background - defines the background color including the alpha channel.
Image Name - used to define the name the image will have within Blender.
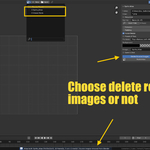
Delete Source Images - If you want to delete the reference images to assemble the atlas, leave this box checked. If you want to import the reference images, keep it unchecked.
Save to Disk - to export the image to a specific directory, it is necessary to define the path and also add the name in the input bar.
Note:
1 - If you don't check the "Save to disk" box, you will need to manually save the image using Blender's "Save as image" option.
2 - If there is an image with a different resolution than the others in the folder and the "Force resize" option is not checked, a generation error will occur.
3 - Atlas generation time varies depending on the number of images, their weight, and resolution. Even if Blender indicates that it is not responding, wait until generation is complete.
4 - In this version (1.1.2), all reference images are loaded into Blender so that the atlas can be generated. They remain in Blender unless you manually delete them or save only the atlas image, set it as a fake user, and restart Blender, causing all other images to automatically disappear.
(Fixed in version 2.0.0)
5 - This add-on allows you to perform this process without exiting Blender, requiring the use of other image editing software.
Have questions about this product?
Login to message
| Published | about 1 year ago |
| Blender Version | 3.0 - 4.5 |
| Render Engine Used | Cycles |
| License | GPL |

Discover more products like this
hayart generate-image sprite-atlas-maker image-maker atlas-maker spritesheet Atlas image join-image image-group Sprite