Install Surface Flow 2 and confirm that it is ready to use.
Requirements Add-on version: 2.1.0 • Documentation updated: August 15, 2026 Surface Flow 2 requires Blender 4.5 or newer. The Smart and Surface Axis Source modes require Blender 5.1 or newer.
Install Surface Flow
Download the Surface Flow ZIP file from your Superhive account.
In Blender, open Edit → Preferences → Add-ons.
Open the menu in the upper-right corner and choose Install from Disk.
Select the downloaded ZIP file and confirm the installation.
Updating from an Earlier Version
Follow the normal installation steps above and install the Surface Flow 2.1.0 ZIP file. Blender will update the existing add-on to the new version.
If Surface Flow does not appear Close Blender completely and open it again. Then return to Preferences → Add-ons, search for Surface Flow, and make sure it is enabled.
Add Surface Flow to Your Objects
Surface Flow can be added to multiple objects at the same time:
Make sure you are in Object Mode, then select all the objects you want to deform.
Shift-click the target surface last so it becomes the active object.
Right-click and choose Surface Flow. This entry is provided because custom modifier listings can prevent the add-on from appearing correctly in the Add Modifier menu.
Surface Flow will be added to the selected objects, and the active object will automatically be assigned as their Target.
You can also add Surface Flow from Add Modifier → SurfaceFlow → Surface Flow, or add it like a standard Geometry Nodes modifier. Text and Curve objects can now receive the modifier directly. Mesh, Text, Curve, Surface, and Metaball objects can be used as targets. In earlier versions, Surface Flow had to be added to Text and Curve objects manually.
Surface Flow Adds the modifier to every selected object and uses the active object as the target surface.
Surface Flow + Parent Objects Performs the same setup and also parents the selected objects to the active target object.
Installation complete If the Surface Flow modifier appears on the selected objects and the active surface is assigned as their Target, everything is ready.
A complete guide to the Surface Flow modifier and every main control.
Video Tutorial
Quick Start
In Object Mode, select the objects you want to deform.
Shift-click the target surface last so it becomes the active object.
Right-click and choose Surface Flow. The right-click entry is useful when a custom modifier listing prevents the add-on from appearing correctly in the Add Modifier menu.
Surface Flow is added to the selected objects, and the active object is assigned as their Target.
Alternatively, add Surface Flow through Add Modifier → SurfaceFlow → Surface Flow or like a standard Geometry Nodes modifier.
Important Tips
Normals: Surface Flow relies heavily on correct surface normals. Always check the target’s normals and fix them when necessary.
Smoothing: In almost all cases, use Shade Smooth on the target surface.
Origin Placement: Keep the source object’s origin inside or near the center of its mesh. Poor origin placement can produce incorrect deformation.
Face Geometry: Avoid very long, thin faces on the target surface. Nearest-point calculations can become unreliable on highly elongated triangles and may produce noisy results.
Sharp Edges: Surface Flow can still struggle with perfectly sharp 90° edges. In most cases, adding a very small bevel to the target surface produces much cleaner results. The walking algorithm continues to improve with every update, so edge handling will keep getting better over time.
Target
Object used as the wrapping target. Mesh, Text, Curve, Surface, and Metaball objects are supported as targets. When Surface Flow is added through the right-click or modifier-menu workflow, the active object is assigned automatically. Text and Curve objects can now receive the modifier directly; in earlier versions, it had to be added to them manually.
Inputs
Self Object Enables the Self Object menu and includes the current object in the wrapping calculation.
Consider as Rigid: Keeps the Self Object rigid instead of deforming it during the wrap.
Separate Rigid Island: Treats each disconnected mesh island in the Self Object as a separate rigid piece.
Rigid Meshes Collection of meshes that keep their shape while following the surface.
Deformable Meshes Collection of meshes that deform with the surface wrap.
Parent every object in the Rigid Meshes and Deformable Meshes collections to the object that has the Surface Flow modifier. This keeps all collection objects moving with it when the modifier object is moved. Remove the Surface Flow modifier from the objects inside these collections because it is not needed on them. Do not include the object that has the Surface Flow modifier in either collection.
Axis Setup
Defines how Surface Flow determines the forward wrapping direction and the axis that faces the target surface.
Axis Source Choose how Surface Flow builds the wrapping axes. Smart works best for most cases. Local and Global use object or world axes. Surface uses the target surface normal.
Smart: Detects a suitable axis setup automatically. Requires Blender 5.1 or newer.
Local: Uses the object’s local axes.
Global: Uses the world axes.
Surface: Uses the target surface normal for the Surface Axis and calculates the Flow Axis with the Smart method. Requires Blender 5.1 or newer.
Object Origin Keep the source object’s origin near the center of its mesh in most cases. Surface Flow uses the origin in several calculations; for example, reconstruction begins from the point on the target surface nearest to the origin.
Flow Axis The axis that flows forward along the target surface. The Guide controls this axis. The default is X.
Surface Axis The axis that aligns with the target surface normal. The default is Z.
Reverse Surface Reverses the surface direction.
Wrapping
Controls how much of the source mesh follows the target and how the surface calculation is performed.
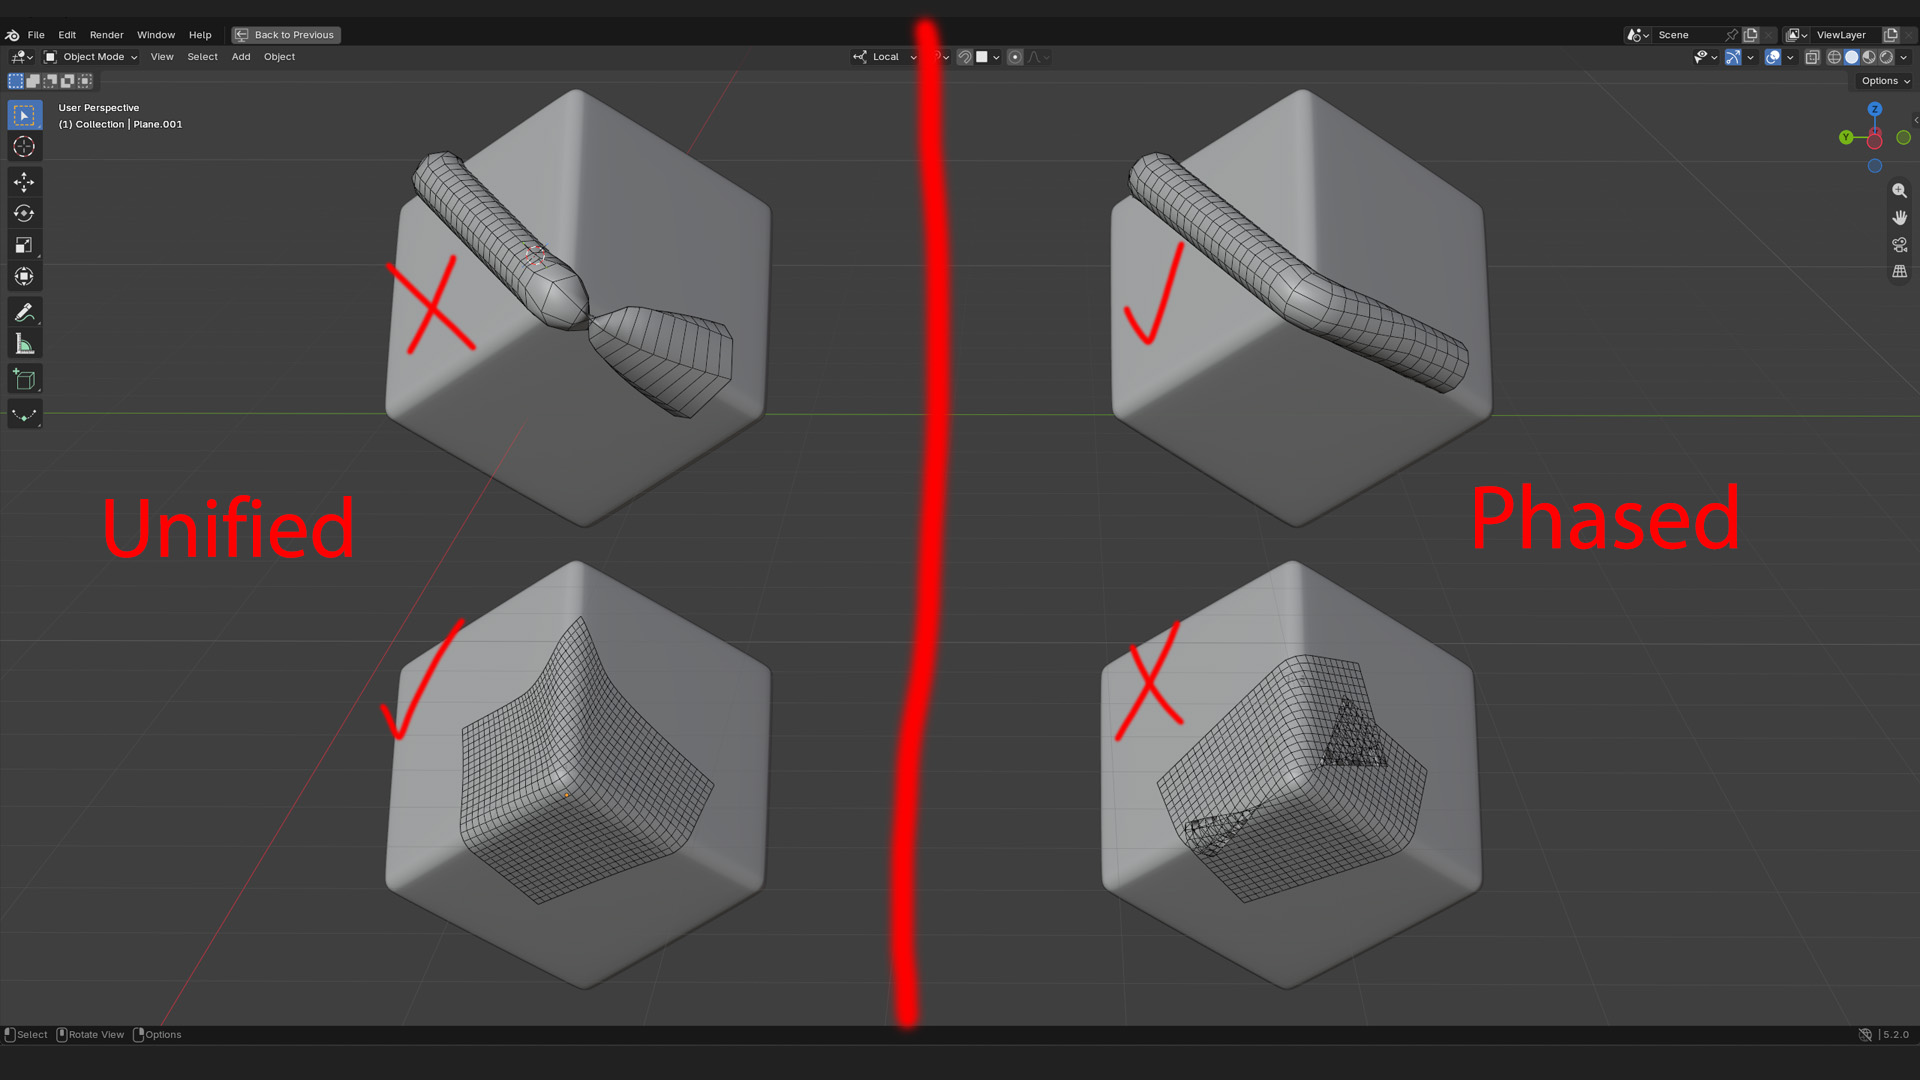
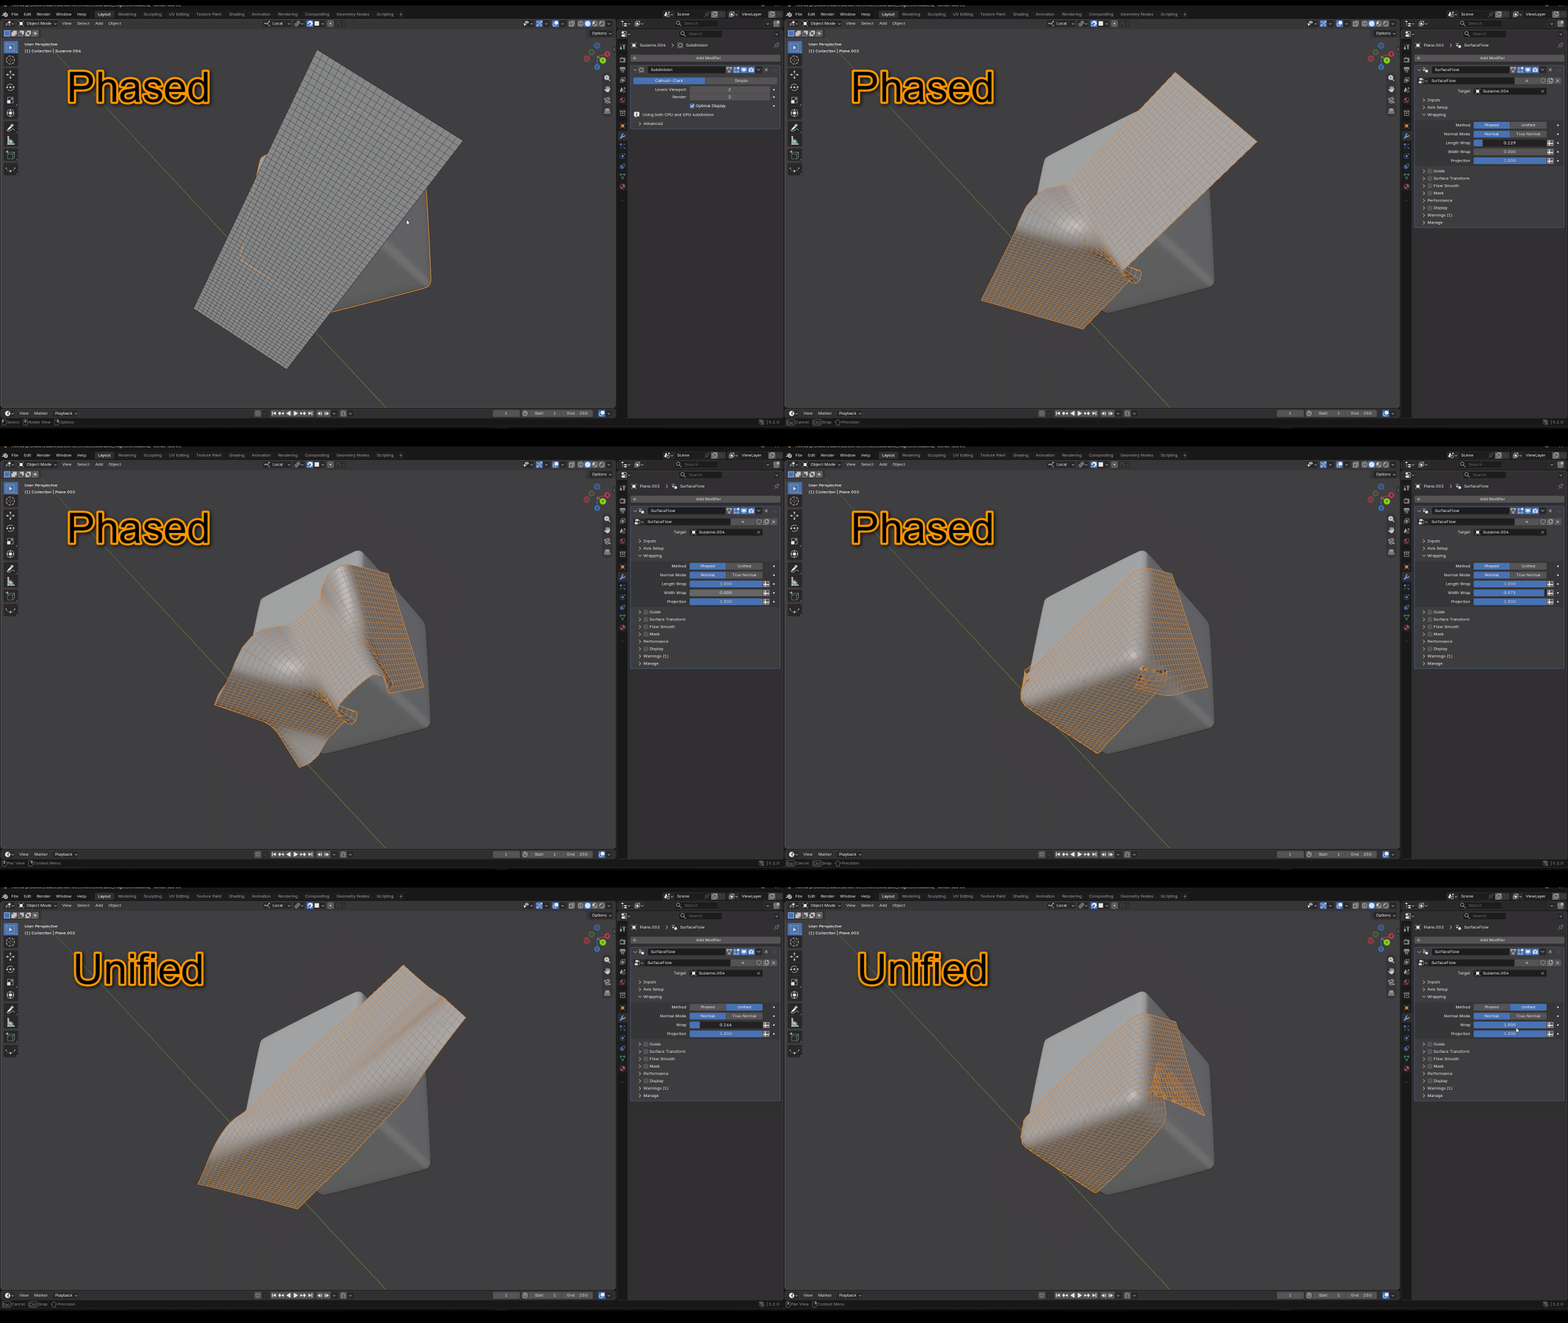
Method Controls how the wrapping is calculated. Guided provides the best performance for extremely long shapes, Phased simulates the flow across the target, and Unified is recommended for square or panel-like shapes.
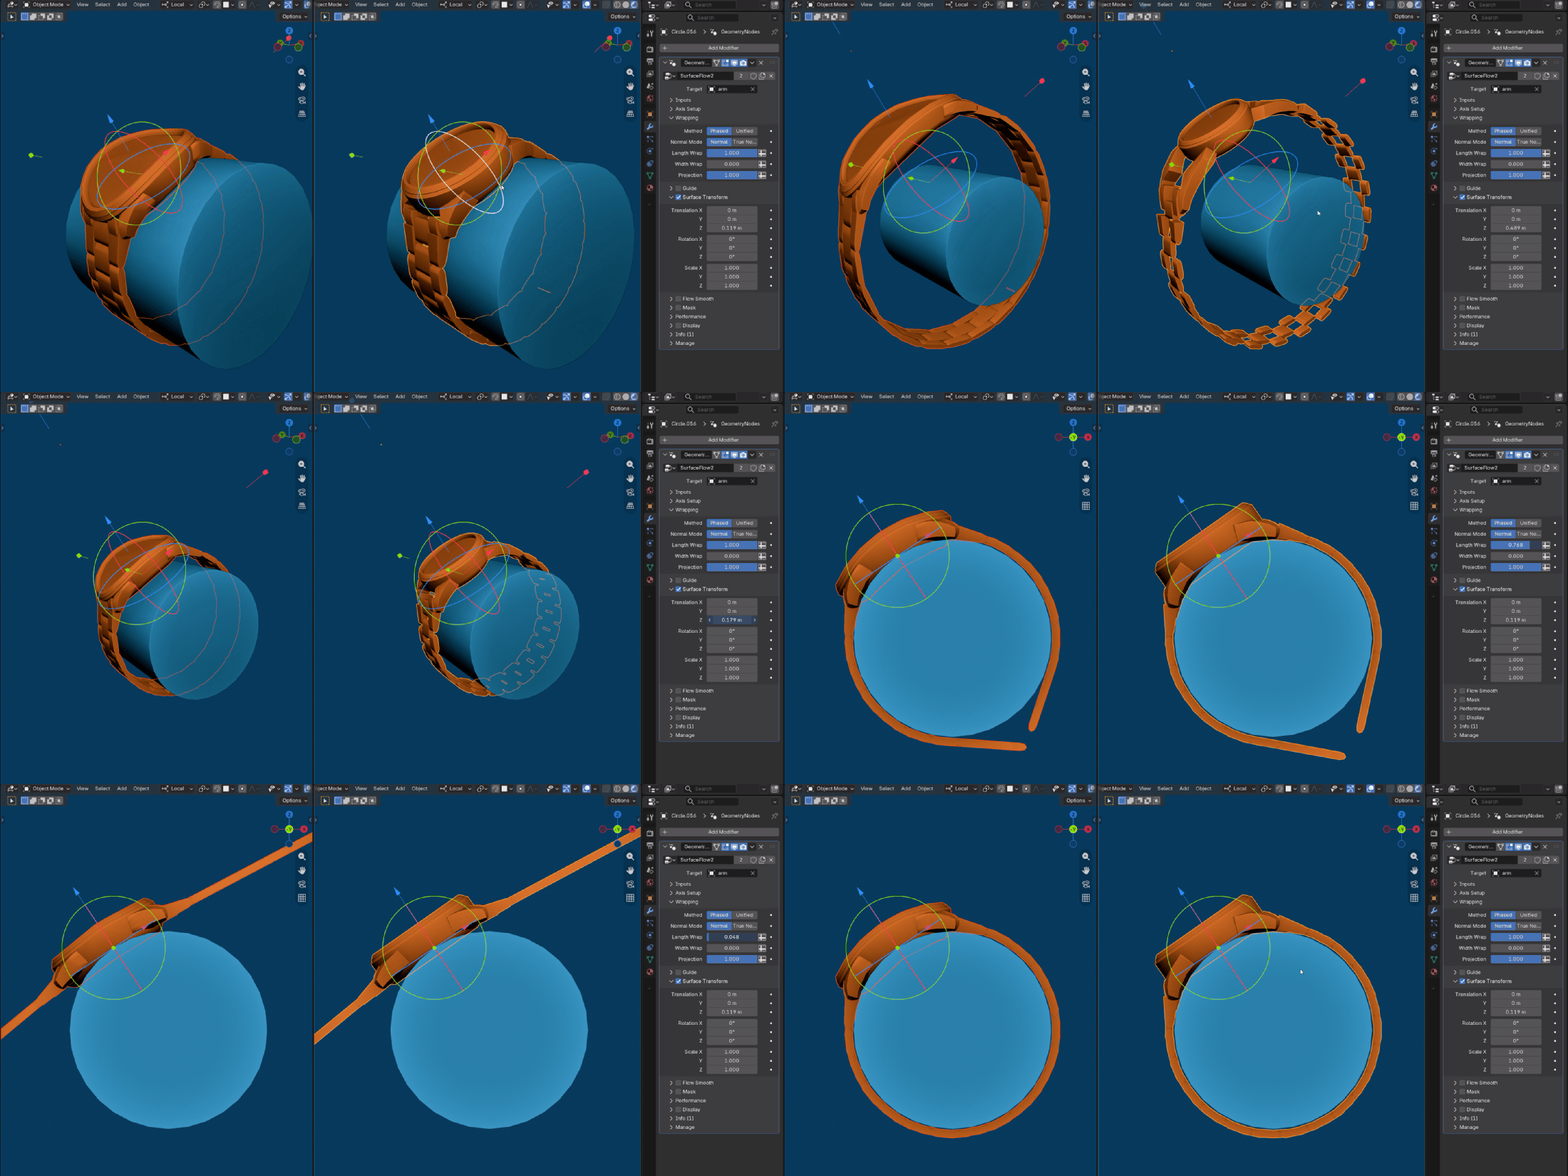
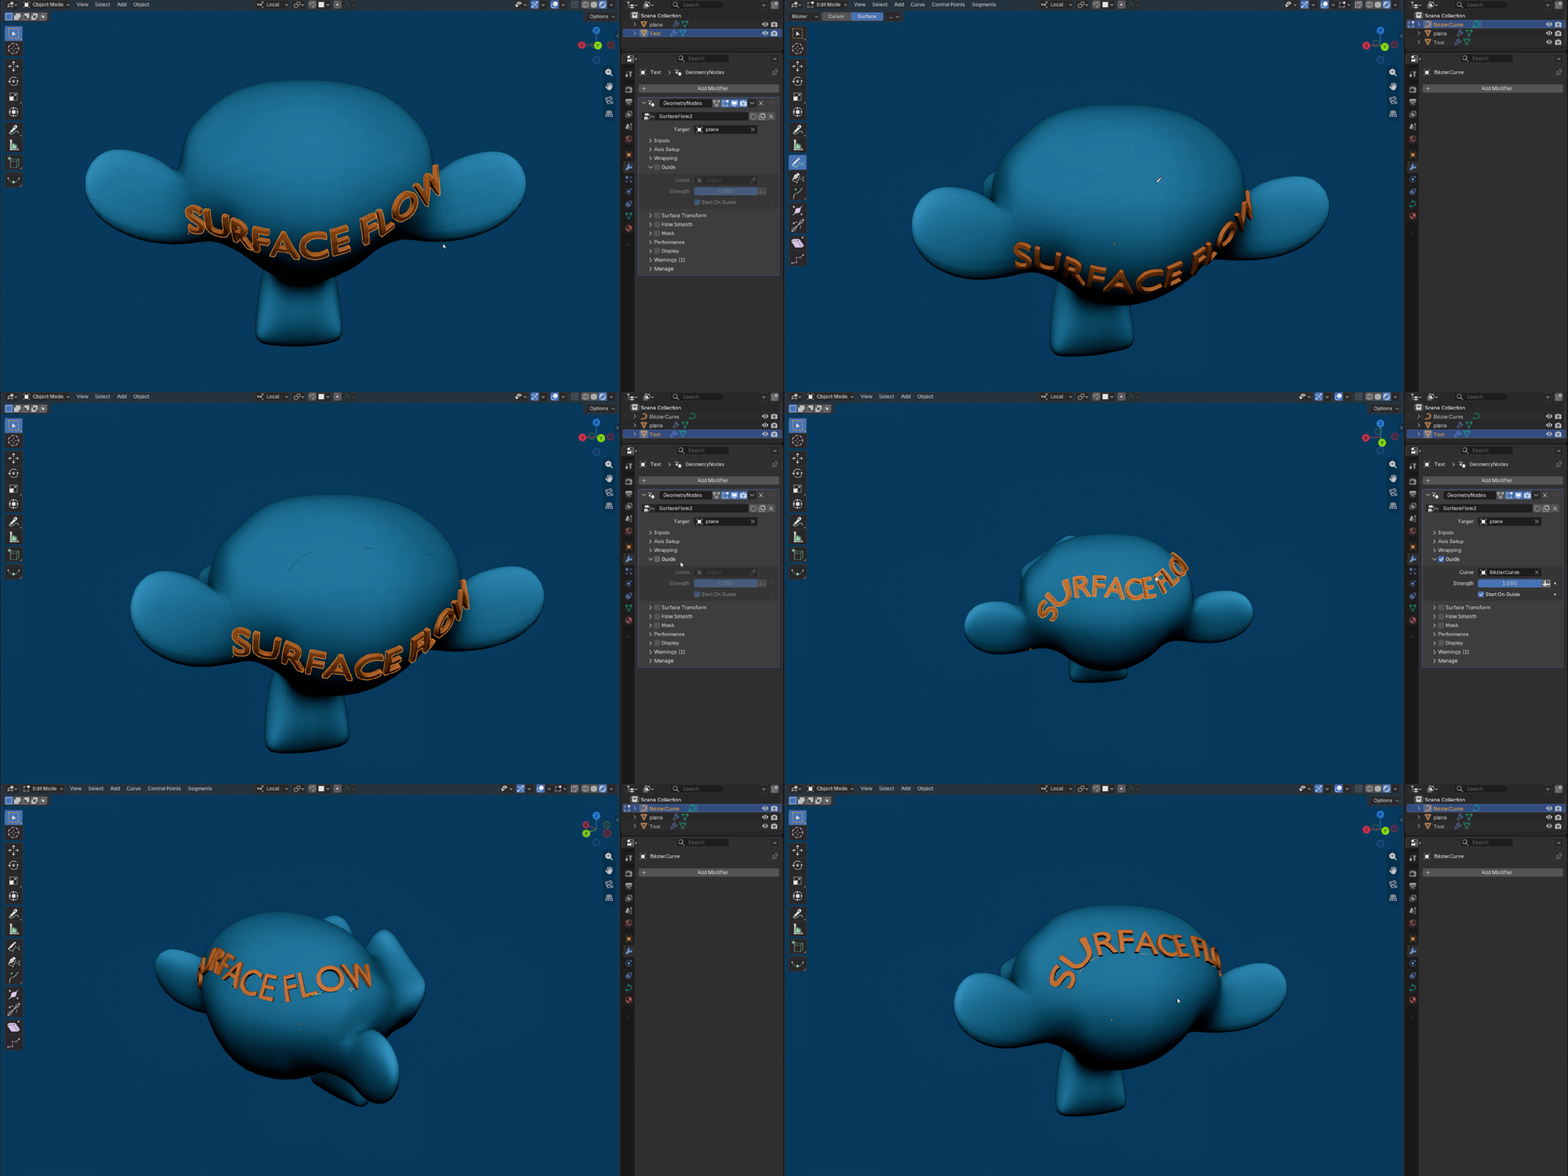
Phased: Simulates the flow across the target and works well for long shapes such as a watch strap or belt. A guide curve can influence the simulated direction, but crossing or self-intersecting guides may confuse the flow.
Guided: Designed for extremely long meshes and real-time performance. It requires a guide curve and samples that curve along the Flow Axis instead of simulating the flow. Use it for objects such as ribbons or tape wrapping around a character's arm. Guided also handles crossing guide curves reliably.
Unified: Recommended for panels and other square-shaped meshes.
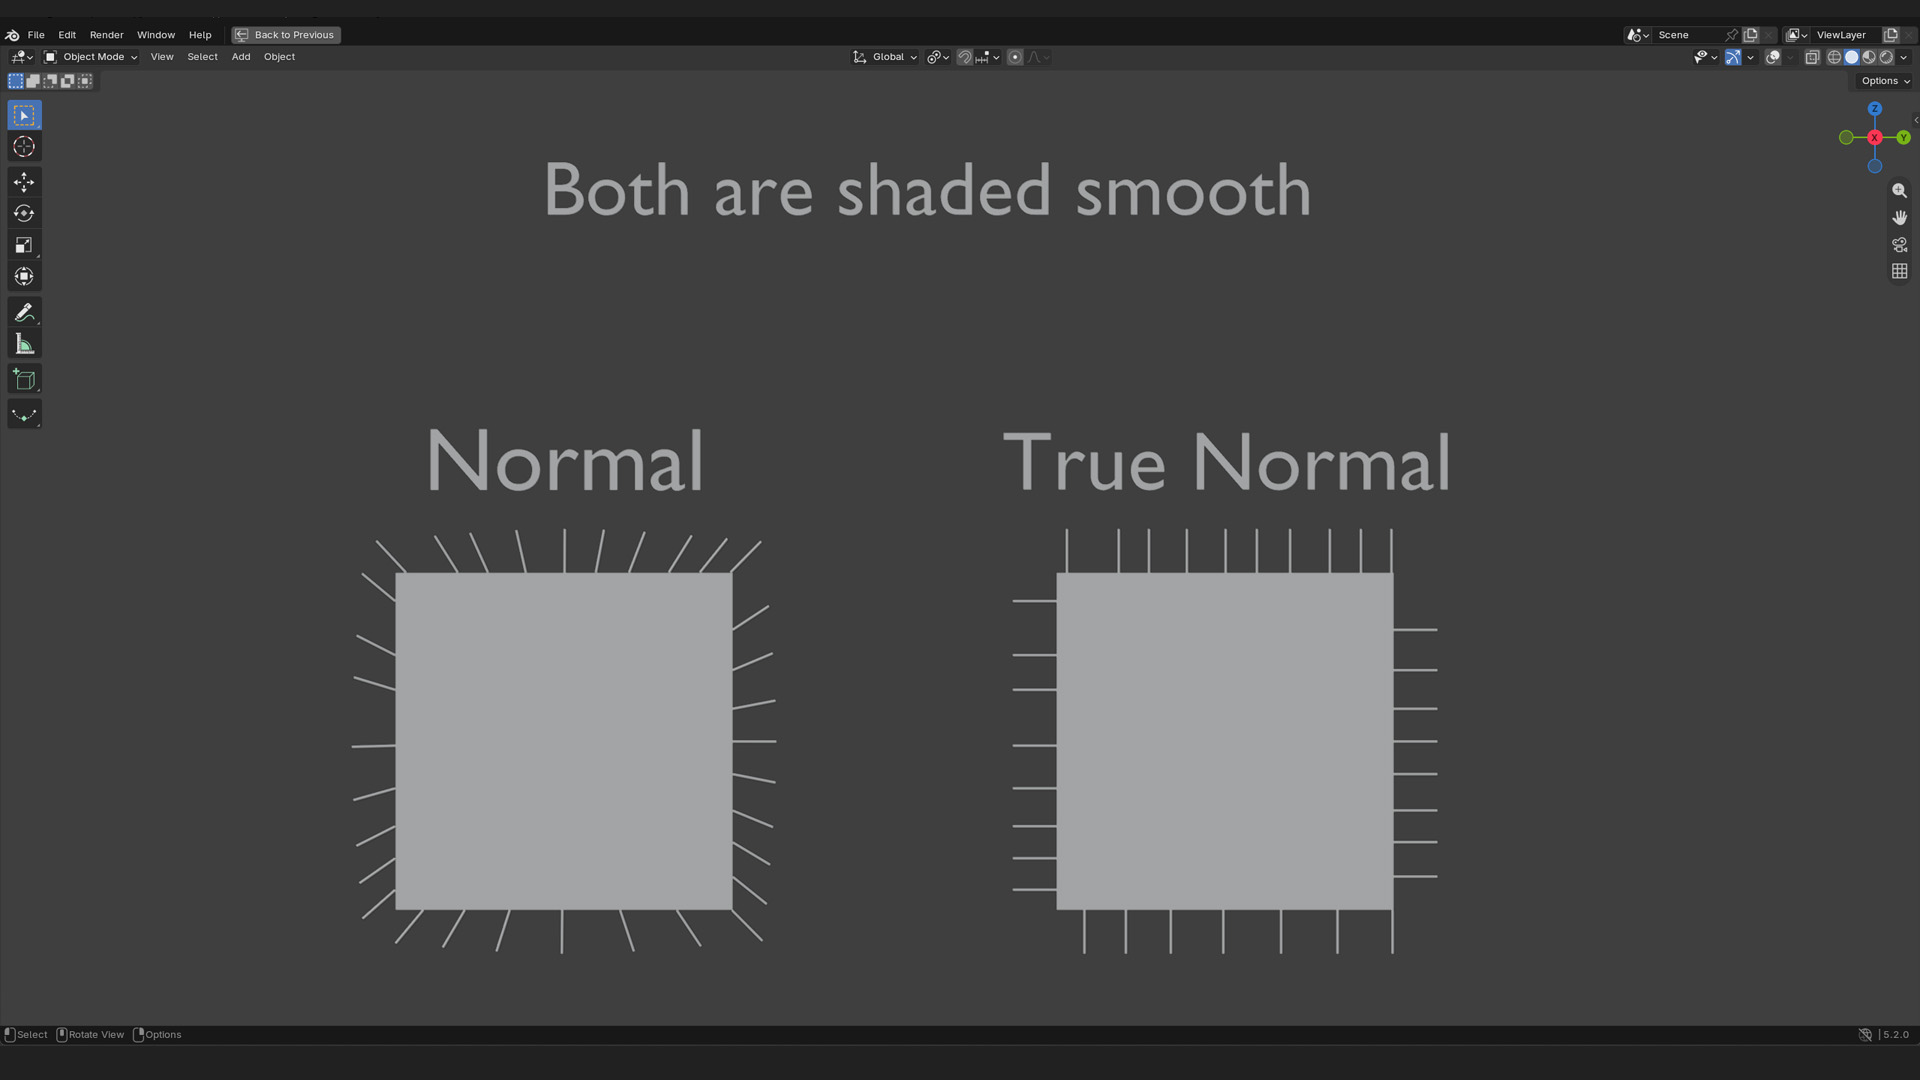
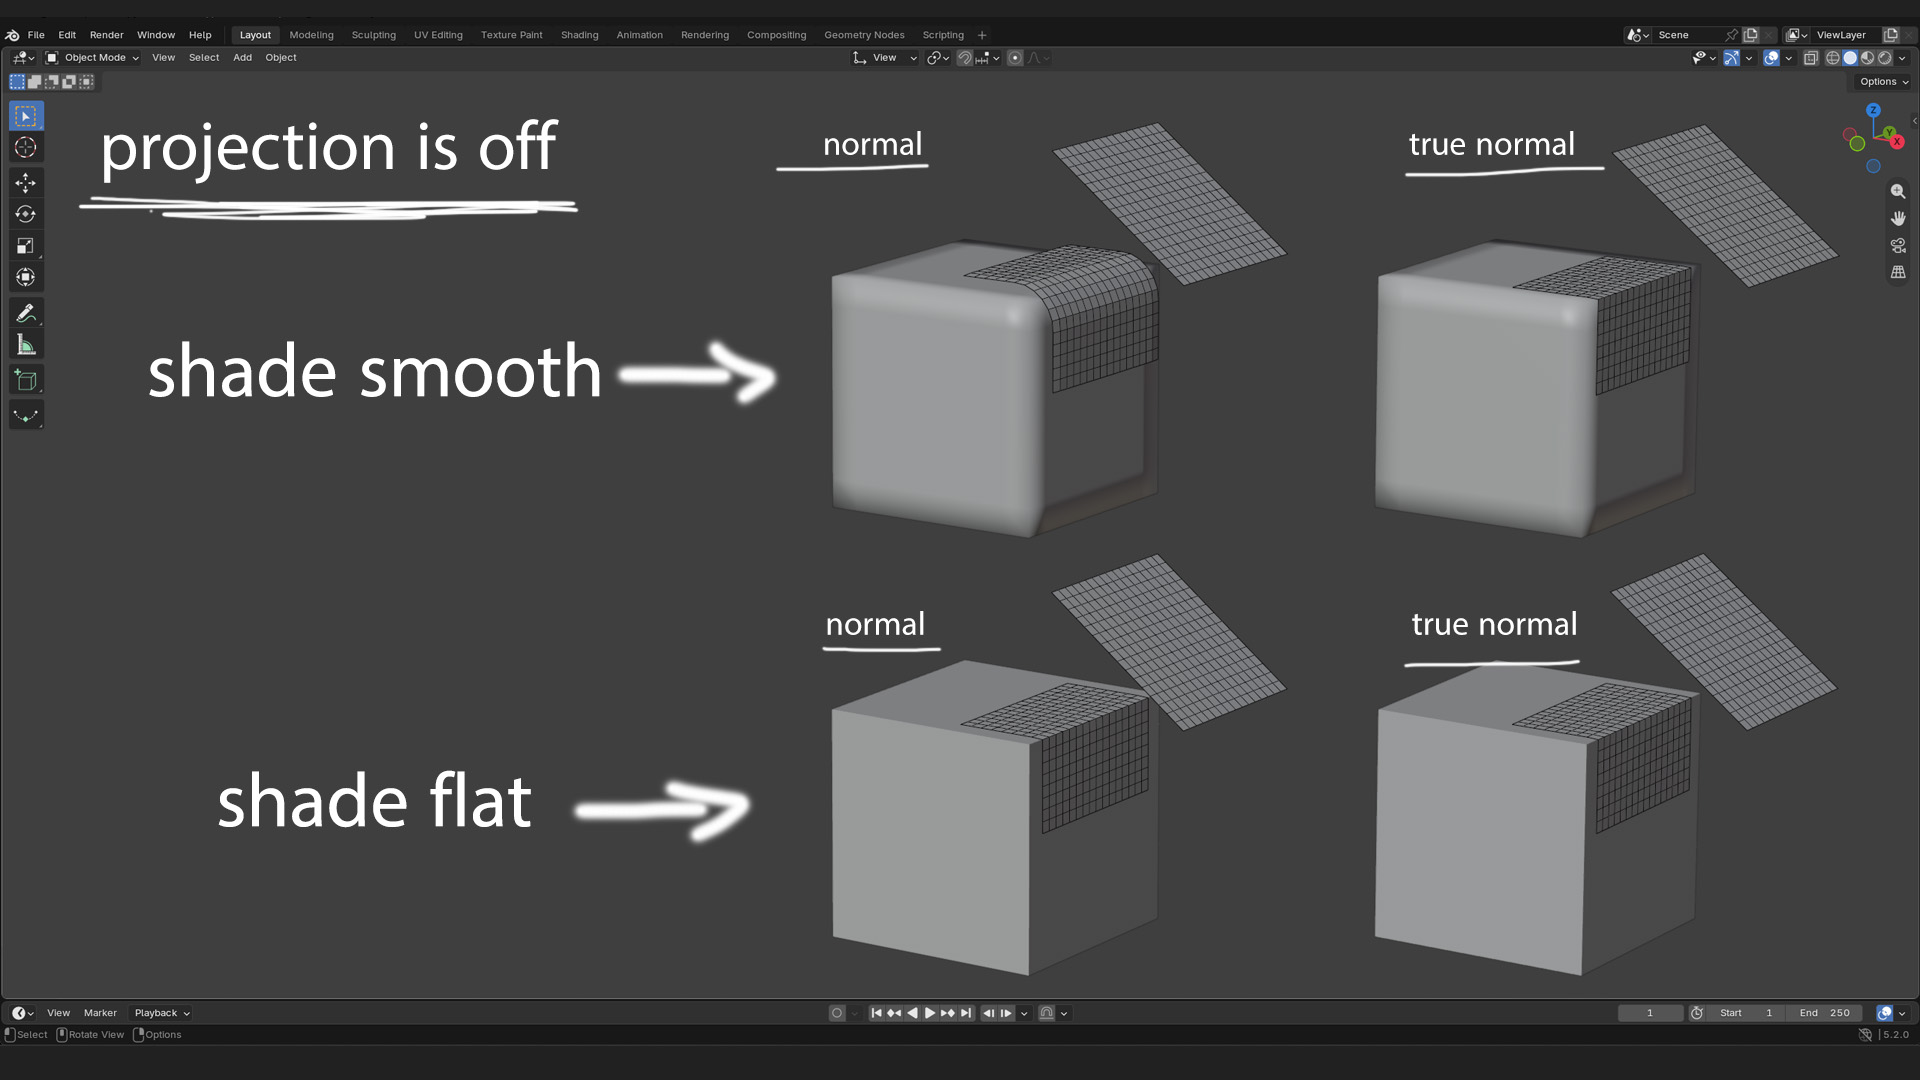
Normal Mode Controls which surface normals are used during wrapping.
Shading: Uses the target's shaded normals. Shade the target surface Smooth for this mode to have an effect; otherwise, the result may look the same as Geometric. The target's shading directly influences the wrapping result.
Geometric: Uses the mesh's geometric face normals, equivalent to Shade Flat.
Wrap (Visible in Unified Method) Controls how much of the source mesh is wrapped along the target surface.
Length Wrap (Visible in Phased Method) Controls how far the mesh wraps along the Length direction, which is the Flow Axis.
Width Wrap (Visible in Phased Method) Controls how far the mesh wraps along the Width direction, perpendicular to the Flow Axis.
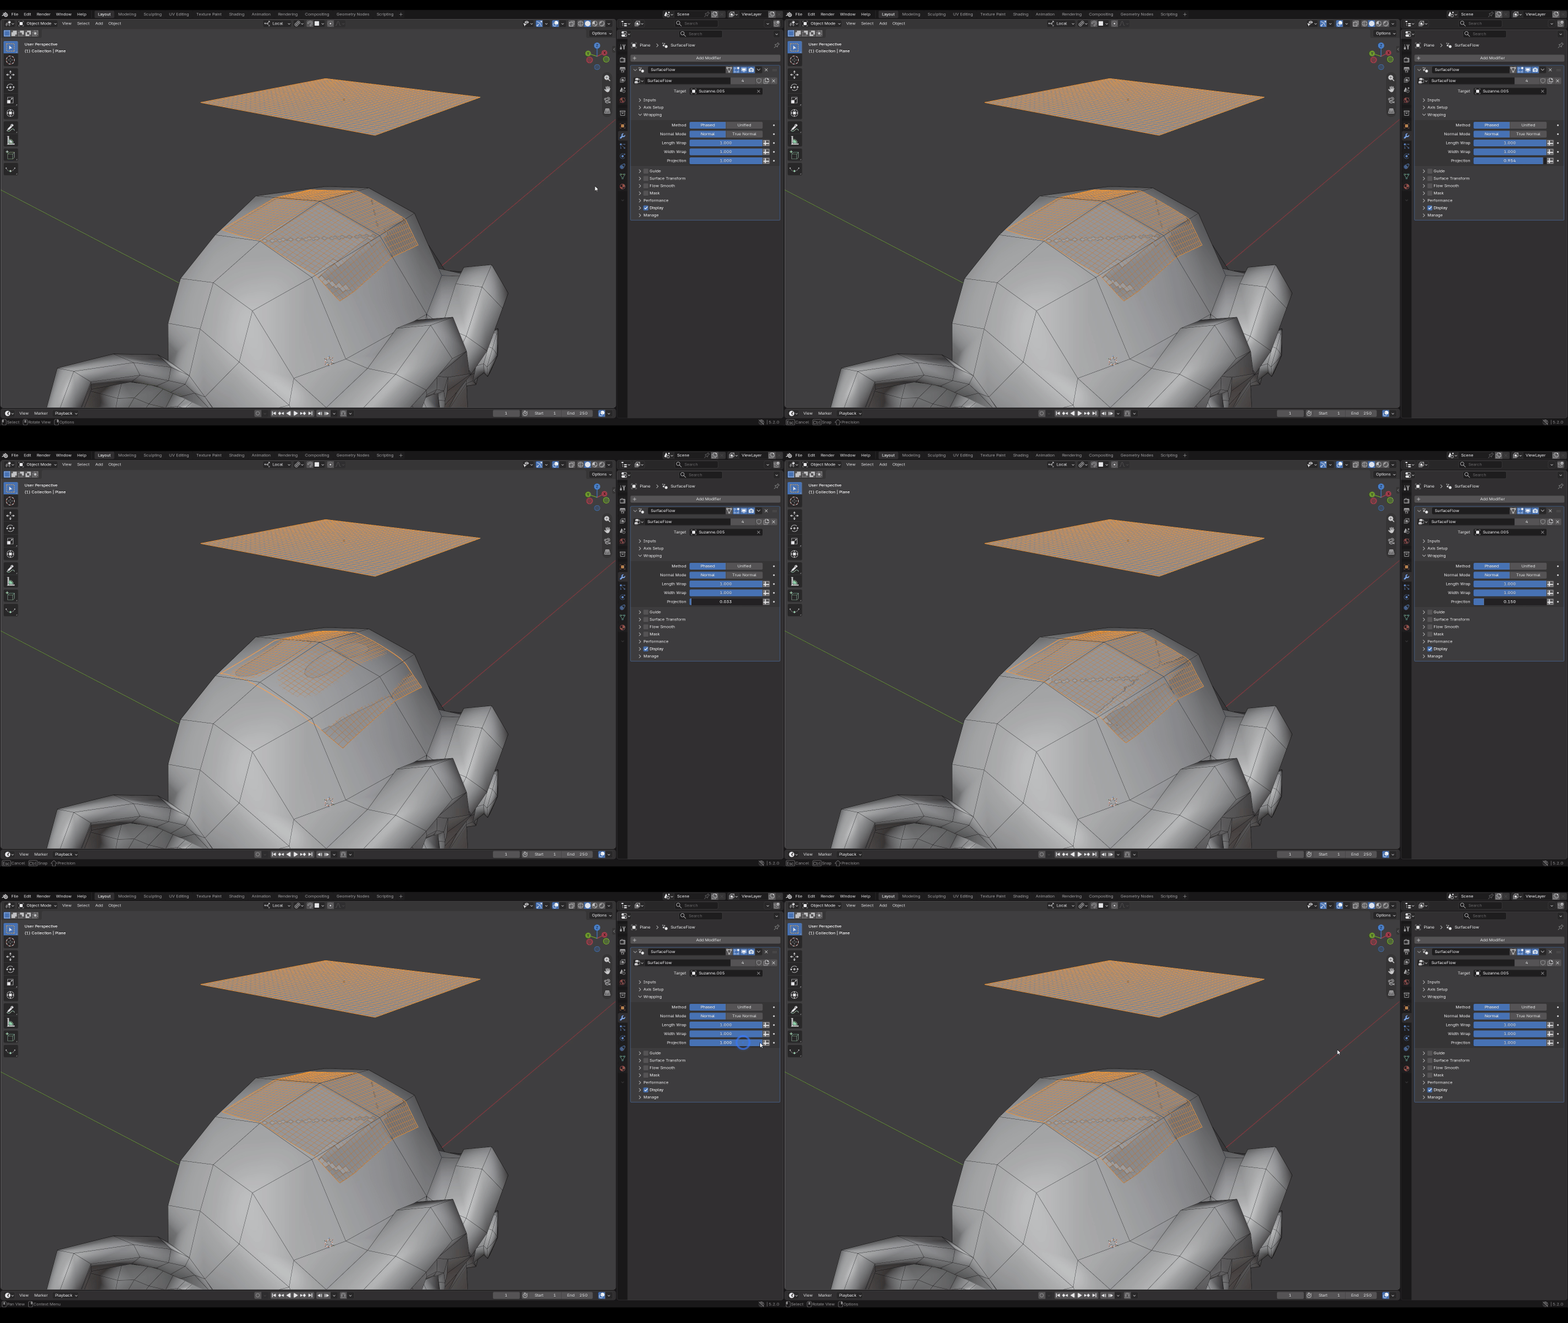
Projection Controls how strongly the mesh is projected onto the target surface. If the target is low-poly but you want smooth deformation, shade the target correctly, disable Projection, and increase the Viewport Quality or custom Quality value in the Performance section. In Guided, Projection is applied to the curve-sampled result rather than to a simulated surface walk, so its behavior differs from Phased and Unified.
Guide
Uses a curve to control the Flow Axis. Guide is supported when the Wrapping Method is set to Phased or Guided. In Guided, selecting a guide curve is required.
Guide crossings In Phased, a guide curve that collides with or crosses itself may confuse the simulated flow direction. Guided fixes this problem and handles crossing guide curves reliably.
Guide Enables the guide-curve controls in Phased. In Guided, the guide is always used and a guide curve must be selected. The guide controls the Flow Axis.
Curve Curve object used to guide the wrapped mesh.
Guide Strength (Visible in Phased Method) Controls the influence of the guide curve on the simulated flow direction.
Start On Guide (Visible in Phased Method) Moves the mesh to the point on the guide curve nearest to the source object’s origin before wrapping starts. The origin position matters, so keep it near the center of the source mesh.
Stretch to Fit Curve (Visible in Guided Method) Stretches the source along the Flow Axis so it fills the available length of the guide curve from start to end. Disable it to preserve the source object's original length.
Radius Influence (Visible in Guided Method) Controls how strongly the guide curve's Radius values scale the wrapping at each point along the curve, just like the radius of a standard curve.
Reverse (Visible in Guided Method) Reverses the direction in which the source follows the guide curve, swapping the guide's start and end direction.
Resample (Visible in Phased and Guided Methods) Resamples the guide curve before it is evaluated, creating more evenly spaced points and a cleaner flow along the curve.
Guide curve quality The smoothness and resolution of the guide curve directly affect the result in both Phased and Guided. A coarse or low-resolution curve can produce visible distortion, so smooth the curve or enable Resample when necessary.
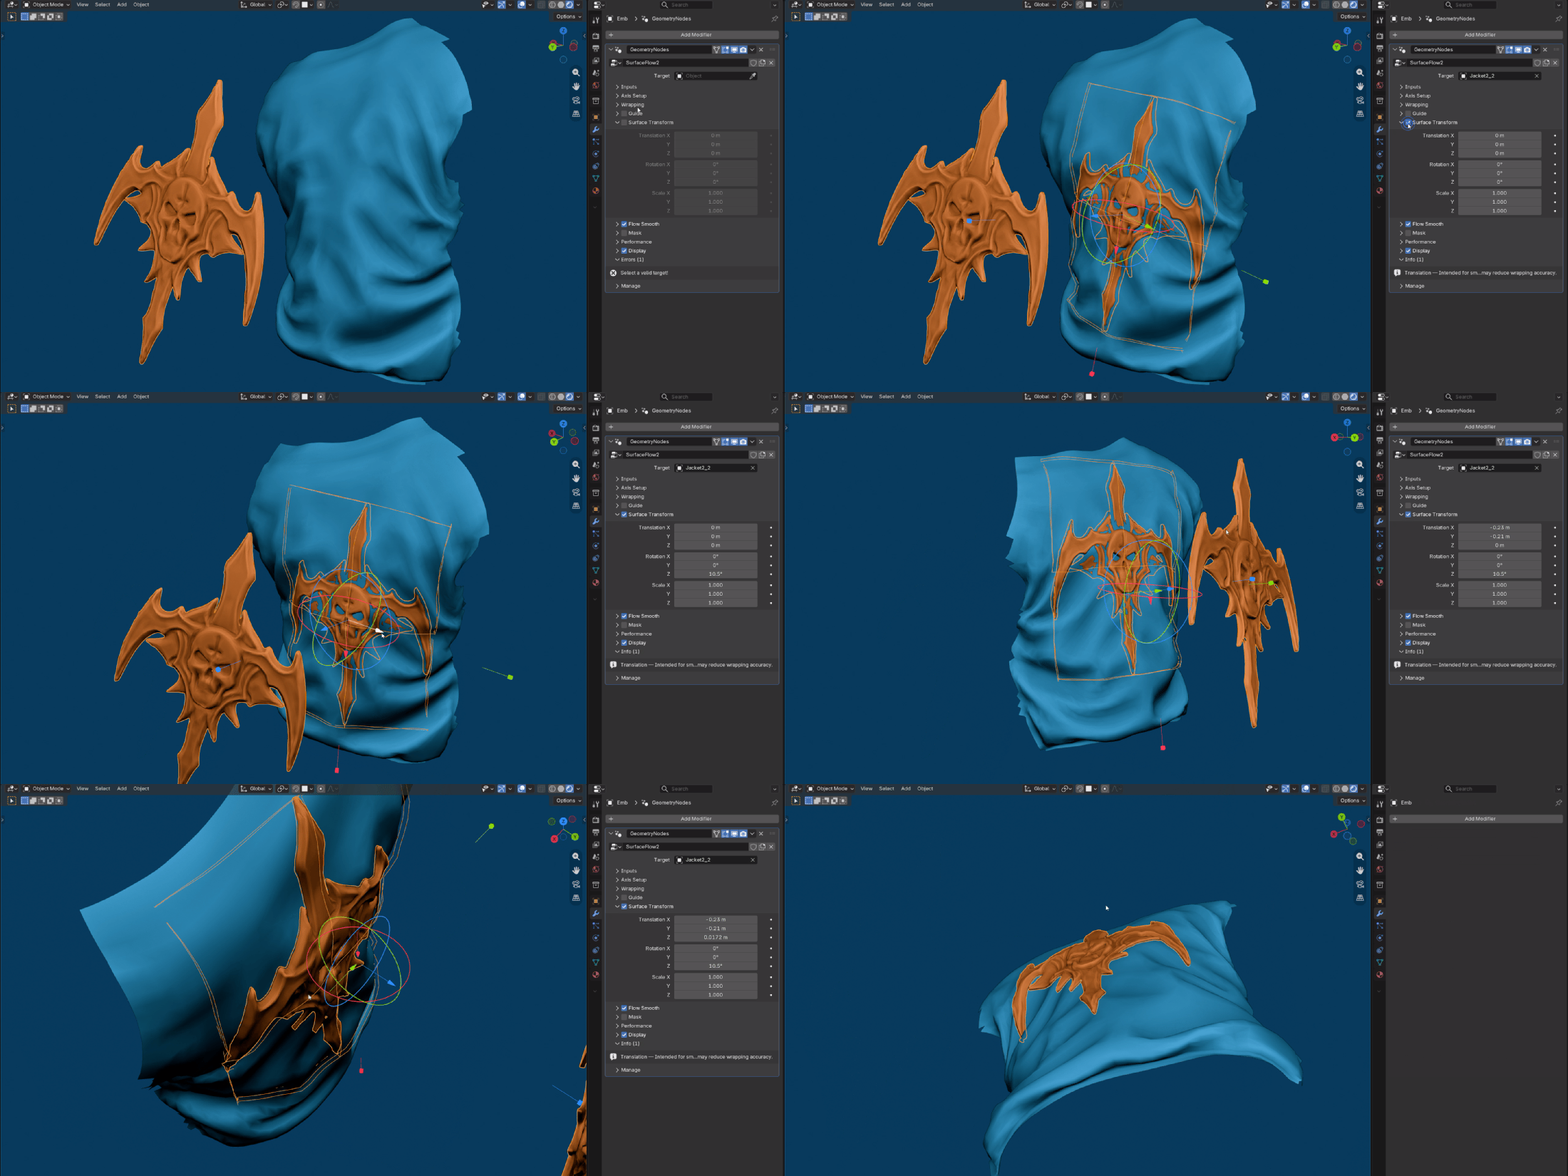
Surface Transform
Enables surface-aware transform controls.
Surface Transform Enables Translation, Rotation, and Scale controls that operate in the wrapped surface coordinate system.
Translation Moves the wrapped result along the surface-based axes.
Rotation Rotates the wrapped result around the surface-based axes.
Scale Scales the wrapped result along the surface-based axes.
Translation is intended for small adjustments. Large values may reduce wrapping accuracy. Make sure the Surface Flow modifier is selected; otherwise, the transform gizmo will not be visible.
Flow Smooth
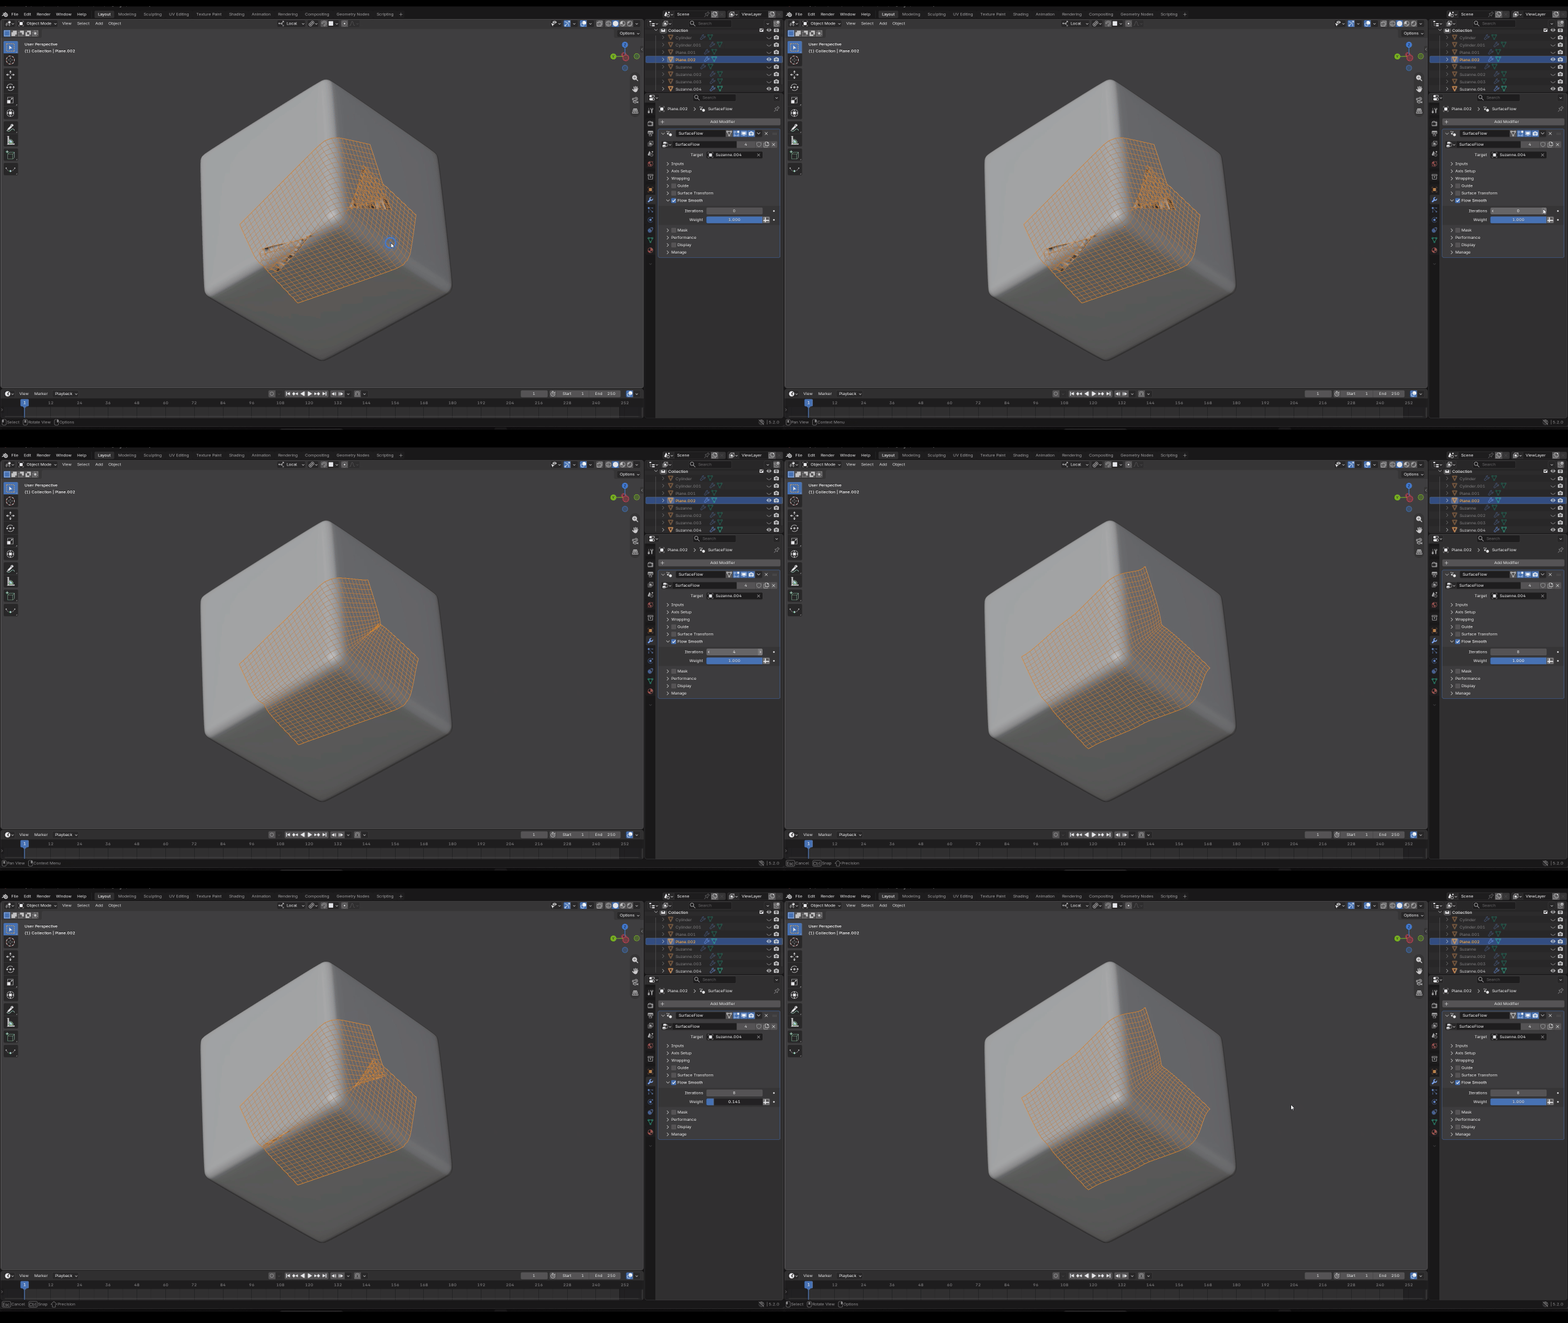
Smooths the walking direction used to move points across the surface. It does not smooth the final mesh itself.
Flow Smooth Enables smoothing for the walking direction field.
Iterations Number of smoothing passes applied to the walking direction field.
Weight Controls the strength of each direction-smoothing pass.
Mask
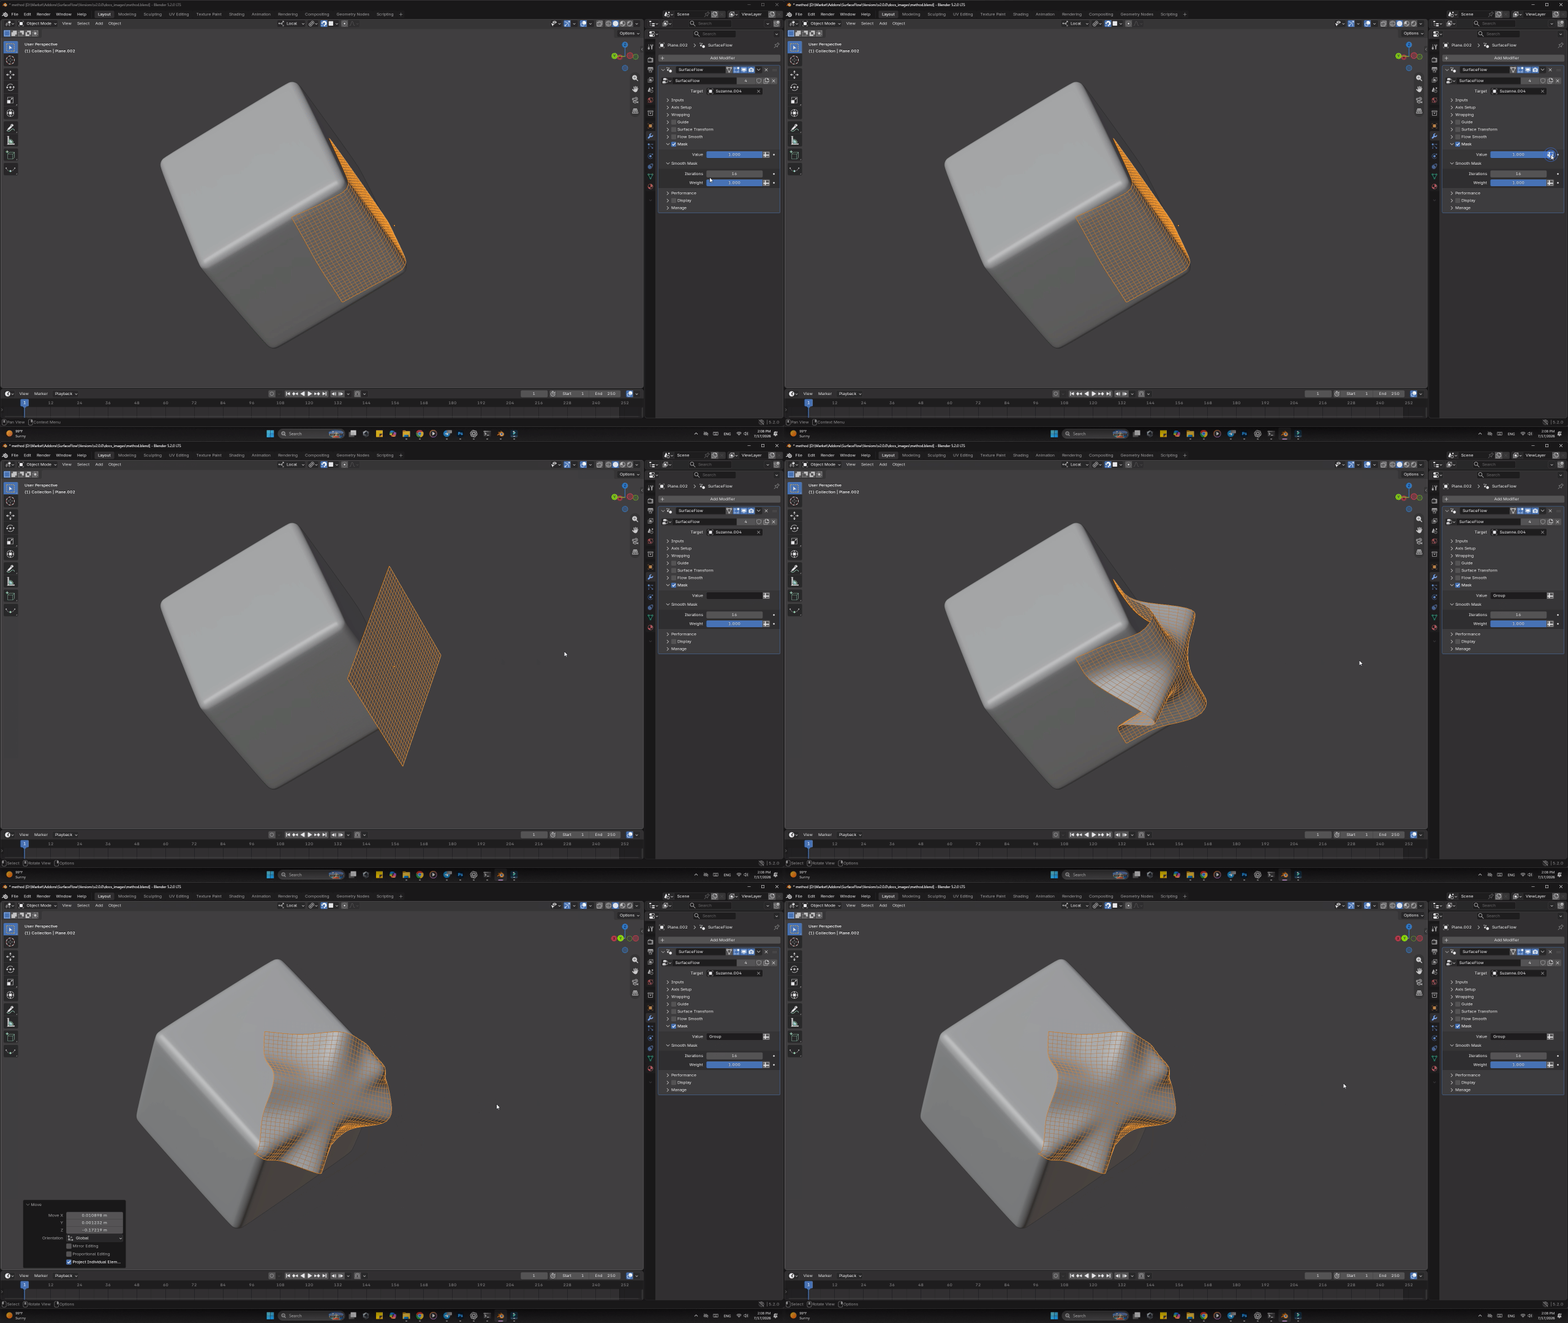
Controls where the wrapping effect is applied.
Mask Enables the mask controls.
Value Controls the overall mask strength. 0 disables the effect, while 1 applies it fully.
Smooth Mask — Iterations Smooths the mask values to create softer transitions. Iterations sets the number of smoothing passes applied to the mask; higher values create softer transitions.
Smooth Mask — Weight Controls the strength of each mask-smoothing pass.
Performance
Balances wrapping accuracy against calculation speed in the viewport and final render.
Viewport Quality Sets the wrapping quality. Higher values improve accuracy but may be slower.
Quality (Viewport Custom Value) Controls the precision of the viewport flow calculation.
Use Separate Render Quality Uses a different quality setting for final renders. When disabled, the render uses the same quality as the viewport.
Render Quality Sets the wrapping quality used during rendering. Higher values improve accuracy but may be slower.
Quality (Render Custom Value) Controls the precision of the render flow calculation.
Surface Flow has no fixed quality limit. Higher quality and longer wraps require more computation, so the practical limit depends on your hardware and scene complexity.
Display
Shows helpful previews for debugging and orientation.
Display Enables the display-preview controls.
Axes Displays the generated wrapping axes for debugging and orientation.
Bounding Box Displays the source mesh bounding box for debugging and orientation.
Show Original Mesh Displays the original unwrapped source mesh.
 Playful Pixel