TextPainter
 CStudio.ao
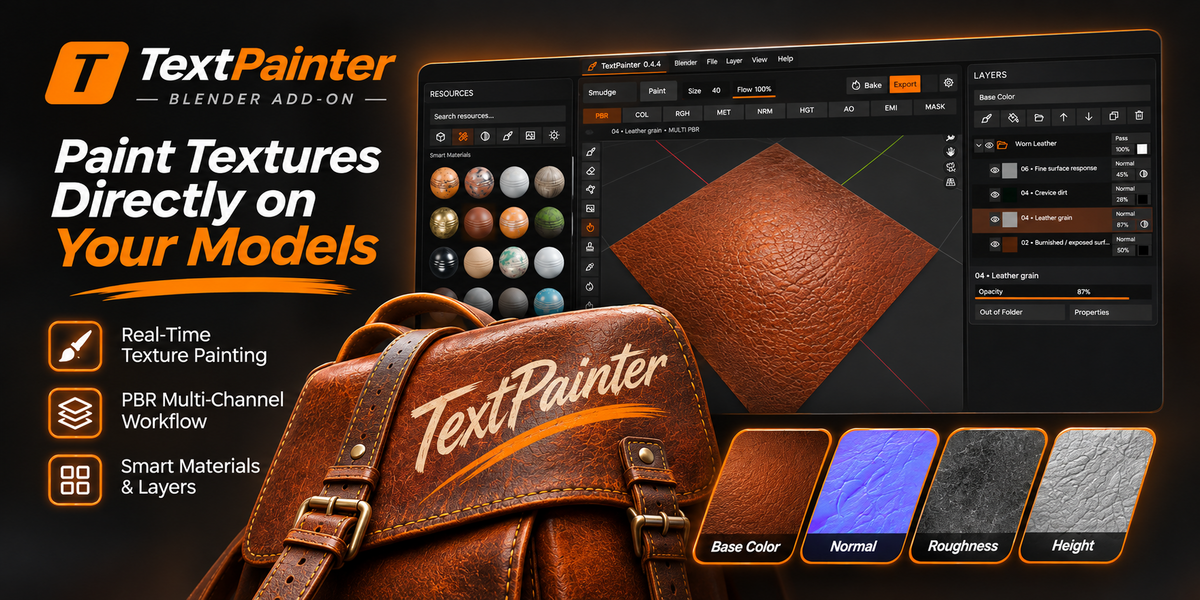
TextPainter — User Documentation
Version: 0.4.4
Software: Blender
Category: Texture Painting & PBR Material Authoring
1. Introduction
TextPainter is a texture-painting and material-authoring add-on designed to bring a dedicated painting workflow into Blender.
Its integrated workspace combines a material resource library, painting tools, multi-channel PBR controls, a layer-based editing system, and texture baking and export tools.
This documentation introduces the main interface components and explains a typical workflow from preparing a 3D model to producing texture maps.
2. Installation
Download the TextPainter add-on package from your Superhive purchase page.
Open Blender.
Navigate to Edit → Preferences.
Open the Add-ons or Get Extensions section, depending on your Blender version.
Choose Install from Disk from the available installation menu.
Select the ZIP containing the actual TextPainter add-on.
Enable TextPainter if Blender does not enable it automatically.
Open the TextPainter workspace.
Important: If your purchase includes multiple archives, install the add-on archive rather than the documentation or marketing assets.
3. Getting Started
To prepare a new painting project:
Open Blender and create or import a mesh.
Select the object you want to texture.
Prepare suitable UV coordinates if you intend to use UV-based texture mapping.
Open the TextPainter workspace.
Locate the Resources shelf on the left.
Choose a Smart Material or prepare a painting layer.
Select the appropriate painting tool and PBR channel.
Adjust the brush settings and begin painting.
For predictable texture results, start with a simple, UV-unwrapped mesh before moving on to complex assets.
4. Workspace Overview
The TextPainter interface is divided into several functional areas.
Resources Shelf
Located on the left side of the workspace, the Resources shelf provides access to texture and material assets.
The library includes material categories and searchable resources. Smart Material previews help artists visually identify the material they want to use.
Use the search field to locate resources and select the appropriate asset for your project.
Main 3D Viewport
The central viewport displays the model and provides the primary surface for texture painting and material evaluation.
Use Blender's standard viewport navigation to inspect the object from different angles.
Painting Toolbar
The painting toolbar provides access to painting and editing tools, including Paint and Smudge.
The available brush controls include:
Brush Size
Brush Flow
Active painting mode
PBR channel selection
Adjust these settings according to the desired painting effect.
Layers Panel
Located on the right, the Layers panel provides a structured overview of the texture composition.
Available controls include layer visibility, ordering, folders, opacity, blending options, and layer properties.
Image Preview
The lower workspace area provides an image editor for inspecting texture data associated with the painting project.
5. Smart Materials
Smart Materials help accelerate the creation of textured surfaces by combining material properties and surface details.
To work with a Smart Material:
Open the Resources shelf.
Select the Smart Materials category.
Browse or search for a material.
Choose a suitable material preview.
Apply the material through the available resource workflow.
Inspect the result in the viewport.
Adjust the relevant layer properties.
The library shown in TextPainter 0.4.4 includes examples such as worn leather, rusty iron, dusty plastic, wood, and painted or weathered surfaces.
6. Painting Tools
Paint
Use the Paint tool to apply strokes to the active texture or painting layer.
Adjust Size to control the brush footprint and Flow to control the amount of paint applied.
Before painting, verify that the correct object, layer and texture channel are active.
Smudge
Use the Smudge tool to manipulate existing texture details and create transitions between painted regions.
Smudge is useful for softening painted features and blending surface details.
7. PBR Channels
TextPainter provides controls for working with multiple physically based rendering channels.
The workspace displays channels including:
| Channel | Purpose |
|---|---|
| Base Color | Surface color |
| Roughness | Microsurface reflection behavior |
| Metallic | Metallic material response |
| Normal | Fine surface direction details |
| Height | Height and relief information |
| Ambient Occlusion | Local occlusion information |
| Emission | Emissive surface information |
| Mask | Controls affected regions |
Select the appropriate channel before editing. Some channels require additional material or shader configuration for their effects to appear as expected.
8. Layers and Masks
The layer system provides organized control over your texture composition.
Layer Management
Use the Layers panel to inspect the current layer stack, create and organize layers, adjust opacity, and control visibility.
Layers may also be organized into folders for more manageable projects.
Opacity and Blend Modes
Opacity determines the contribution of a layer. Blend modes control how a layer interacts with other layers in the stack.
Experiment with these settings to produce different material variations.
Masks
Masks can be used to control which portions of a layer influence the final result.
When a layer produces an unexpected effect, inspect its mask, visibility, opacity and active channel.
9. Procedural Layer Properties
TextPainter includes procedural controls in its layer properties.
The visible controls include procedural source selection, pattern parameters, scale, seed, projection, and channel-specific settings.
These options help create repeatable surface details without painting every feature manually.
10. Baking and Exporting
The TextPainter workspace includes dedicated Bake and Export controls.
A typical finishing workflow is:
Review the final material layers.
Verify the active PBR channels.
Check the appearance of the textured model.
Use Bake when your workflow requires baked texture data.
Open Export and configure the options presented by your installed version.
Select the appropriate output destination and export the textures.
Inspect the exported results before using them in another application.
Available export formats and baking options depend on the installed release.
11. Saving Your Work
Save your Blender project regularly using File → Save or Save As.
When moving a project between computers, ensure that any external images and texture resources remain available. Blender's packing and file-path tools may be useful for project portability.
12. Troubleshooting
TextPainter does not appear in Blender
Verify that the add-on is installed and enabled. Restart Blender if necessary and inspect the TextPainter workspace.
The brush does not affect the object
Check the selected mesh, active layer, painting tool, channel selection, UV data and layer visibility.
The material looks different than expected
Inspect the active PBR channels, shader configuration, layer opacity and material assignment.
A procedural texture is too large or too small
Review the Scale and Projection settings in the relevant layer properties.
The exported textures do not look correct
Check the source channels, baking settings and export configuration. Compare the exported maps against the original project.
13. Support
For installation questions, technical assistance, bug reports or product-related support, use the Message Support feature on the TextPainter Superhive product page.
When reporting an issue, include your Blender version, TextPainter version, operating system, steps to reproduce the problem and any relevant screenshots or error messages.
 Included
Includes 12 months of
- Support from CStudio.ao
- Product updates
Extend this product’s Support Period +12 months: 100% of product price
Have questions before purchasing?
Login to message
| Blender Extension Compatible | Yes |
| Published | about 3 hours ago |
| Blender Version | 4.5 - 5.2 |
| Extension Type | Add-on |
| Render Engine Used | Blender-Game-Engine, Cycles |
| License | GPL |
