Texture Linker - One-Click Auto-Link & Fix Missing Texture Paths
 peterz



Installation Guide
Method 1: Install from Blender Market
- Download the addon ZIP file (do not extract)
- Open Blender, go to Edit > Preferences > Add-ons
- Click Install... and select the downloaded ZIP file
- Search for "TextureLinker" in the addon list
- Check the checkbox next to the addon to enable it
Method 2: Manual Installation
- Extract the addon files to Blender's addon directory:
- Windows: %APPDATA%\Blender Foundation\Blender\[version]\scripts\addons\
- macOS: ~/Library/Application Support/Blender/[version]/scripts/addons/
- Linux: ~/.config/blender/[version]/scripts/addons/
- Restart Blender
- Enable the addon in Preferences > Add-ons
Interface Overview
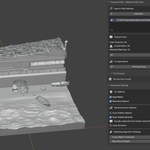
The addon panel is located in the 3D View Sidebar (press N to open), under the "TextureLinker" tab.Main Panel
Contains core functionality:- Search Path Settings
- Add/remove search directories
- Enable/disable paths
- Texture Scan
- Scan button
- Statistics (total, invalid count, affected materials)
- Fix Operations
- Preview fixes
- Apply fixes
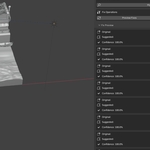
Preview Panel
Displays fix suggestions:- Original path
- Suggested path
- Match confidence (High/Medium/Low)
- Match type (Exact/Fuzzy)
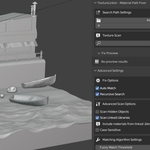
Advanced Settings Panel
- Fix Options
- Auto match (fuzzy matching)
- Recursive search
- Advanced Scan Options
- Scan hidden objects
- Scan linked libraries
- Case sensitive
- Matching Algorithm Settings
- Fuzzy match threshold (0.0-1.0)
- Max search depth (1-50)
Quick Start
Step 1: Scan Textures
- Open a project with missing textures
- Open the TextureLinker panel in the sidebar
- Click "Scan Textures"
- Review the statistics
Step 2: Add Search Paths
- Click "Add Path" to select folders containing textures
- Or click "Add Current Path" to use the project directory
Step 3: Preview Fixes
- Click "Preview Fixes"
- Check suggested paths and confidence levels in the preview panel
- Verify before proceeding
Step 4: Apply Fixes
- Click "Apply Fixes"
- Wait for processing to complete
- Check results and rescan if needed
Feature Details
1. Texture Scanning
Supported Node Types:- Image Texture (TEX_IMAGE)
- Environment Texture (TEX_ENV)
- Point Density (TEX_POINTDENSITY)
- PNG, JPG/JPEG, BMP, TIFF, TGA, EXR, HDR
- Scan Hidden Objects: Include materials from hidden objects
- Scan Linked Libraries: Include materials from linked libraries (enabled by default)
- Scan results cached for 30 seconds
- Auto-refreshes when materials change
- Manual force refresh available
2. Search Path Management
Adding Paths:- Manual selection: Click "Add Path" and select a folder
- Auto-add: Click "Add Current Path" (requires saved file)
- Enable/Disable: Checkbox controls whether path participates in search
- Remove path: Click X button next to path
- Path validation: Only existing valid directories are used
- Prioritize adding project root directory
- Add commonly used asset library paths
- Avoid adding overly large system directories (e.g., C:\)
3. Path Matching Algorithm
Matching Priority:- Exact Match (EXACT)
- Filenames match exactly
- Confidence: 100%
- Case-Insensitive Match
- Same filename, different case
- Confidence: 90%
- Fuzzy Match (FUZZY)
- Uses similarity algorithm (requires enabling)
- Confidence: Calculated based on similarity (0.0-1.0)
- Uses SequenceMatcher to calculate filename similarity
- Only matches files with the same extension
- Threshold can be set (default: 0.5)
- Target: texture_diffuse.png
- Found: texture_diffuse_v2.png → High confidence
- Found: diffuse_texture.png → Medium confidence
- Found: tex_diff.png → Low confidence (may be filtered)
4. Preview System
Preview Content:- Original path: Current (invalid) path
- Suggested path: Found new path
- Confidence: Match quality (percentage)
- Match type: EXACT/FUZZY
- High (≥90%): Green ✓, safe to apply directly
- Medium (70-89%): Yellow ?, review recommended
- Low (<70%): Red ✗, manual verification needed
- High confidence can be applied directly
- Medium/Low confidence requires checking filename and path
- If preview is unsatisfactory, adjust search paths or threshold
5. Applying Fixes
Fix Process:- Scan all invalid textures
- Find matches in search paths
- Update image node's filepath property
- Update statistics
- Shows currently processed material name
- Shows completion progress
- Operation can be cancelled
- Number of successful fixes
- Number of failures (if any)
- Updated statistics
- Rescan recommended after fixing
- Save project before fixing
- Some cases may require manually reloading images
6. Highlight Invalid Textures
Functionality:- Automatically selects objects containing missing textures
- Visually displays problematic objects in viewport
- After scanning textures, click "Highlight Invalid"
- Related objects will be selected
- View selected objects in Outliner
Advanced Settings
Fix Options
Auto Match:- Enable fuzzy matching
- Default: Enabled
- Recommendation: Enable when dealing with inconsistent filenames
- Search subfolders
- Default: Enabled
- Recommendation: Enable when textures are scattered in subfolders
Advanced Scan Options
Scan Hidden Objects:- Include materials from hidden objects
- Default: Disabled
- Recommendation: Enable for comprehensive scanning
- Include materials from linked libraries
- Default: Enabled
- Note: Linked library materials may not be directly fixable (depends on permissions)
- Whether exact matches are case-sensitive
- Default: Disabled
- Recommendation: Keep disabled for Windows users
Matching Algorithm Settings
Fuzzy Match Threshold:- Range: 0.0 - 1.0
- Default: 0.5
- Explanation:
- 0.5: More lenient, may match more files
- 0.8: More strict, only matches highly similar files
- Recommendation: Start at 0.5, adjust based on results
- Range: 1 - 50
- Default: 10
- Explanation: Limits folder depth for recursive search
FAQ
Q1: Scan shows 0 textures?
A: Possible causes:- Materials not using nodes (check material settings)
- Texture nodes not connected to images (check node editor)
- Image format not supported (check file extension)
Q2: Preview found file, but texture still missing after applying fix?
A: Possible causes:- File permission issues
- Path format issues (relative vs absolute paths)
- Manual reload needed: Press R in image editor to reload
Q3: Fuzzy matching can't find file?
A: Try:- Lower fuzzy match threshold (e.g., 0.3)
- Check if file extensions match
- Verify search paths are correct
- Enable recursive search
Q4: Can't fix materials from linked libraries?
A: Linked library materials may be restricted by permissions. Try:- Fix in original file
- Or make linked library local (Make Local)
Q5: Addon interface shows in English?
A: Check:- Blender language settings (Edit > Preferences > Interface > Language)
- Addon auto-detects system language
- Can manually set language in scene properties (if supported)
Q6: Scanning is slow?
A: Optimization tips:- Reduce number of search paths
- Avoid adding overly large system directories
- Disable recursive search (if textures are in same directory)
- Use caching mechanism (wait 30 seconds before rescanning)
Troubleshooting
Issue: Addon won't load
Solution:- Check Blender version (requires 3.6+)
- Check console for errors (Window > Toggle System Console)
- Verify addon files are complete
- Try reinstalling
Issue: Textures still not displaying after fix
Solution:- Open image in image editor, press R to reload
- Check if image node is connected to material output
- Verify file path is correct (check in image properties)
- Try using absolute paths instead of relative paths
Issue: High memory usage
Solution:- Reduce number of search paths
- Lower max search depth
- Disable auto cleanup cache (if enabled)
- Regularly clear operation history (if supported)
Issue: Some texture formats not recognized
Solution:- Supported formats: PNG, JPG, JPEG, BMP, TIFF, TGA, EXR, HDR
- Other formats need to be converted to supported formats
- Or manually load images in Blender
$7
Have questions about this product?
Login to message
Discover more products like this
material fix texture fixer path repair missing textures texture linker texture scanner Asset Manager path fixer addon blender broken textures workflow tool material path