Top Layer - Add Procedural Dirt, Grime And Liquid Effects
 GhostVertex


Installation
If you have installed the demo version of Top Layer and have now purchased the full version of Top Layer, please follow the steps described here by first uninstalling the demo version, restarting Blender, and then installing the full version.
Download the correct version of the
add-on for your blender version. The Blender version is always in the
name of the add-on. If you cannot find your blender version, simply use
the next lower version. For example, if you are using blender 4.4, but
you can only find blender 4.3 in the downloads, this means that no
updates were necessary for blender 4.4 and you can use the version for
4.3 for blender 4.4.
Leave the .zip file as it is. Do not unpack it!
Now you can simply put the .zip file into your open blender window. Confirm that you want to install it and that's it.
Here you can see it: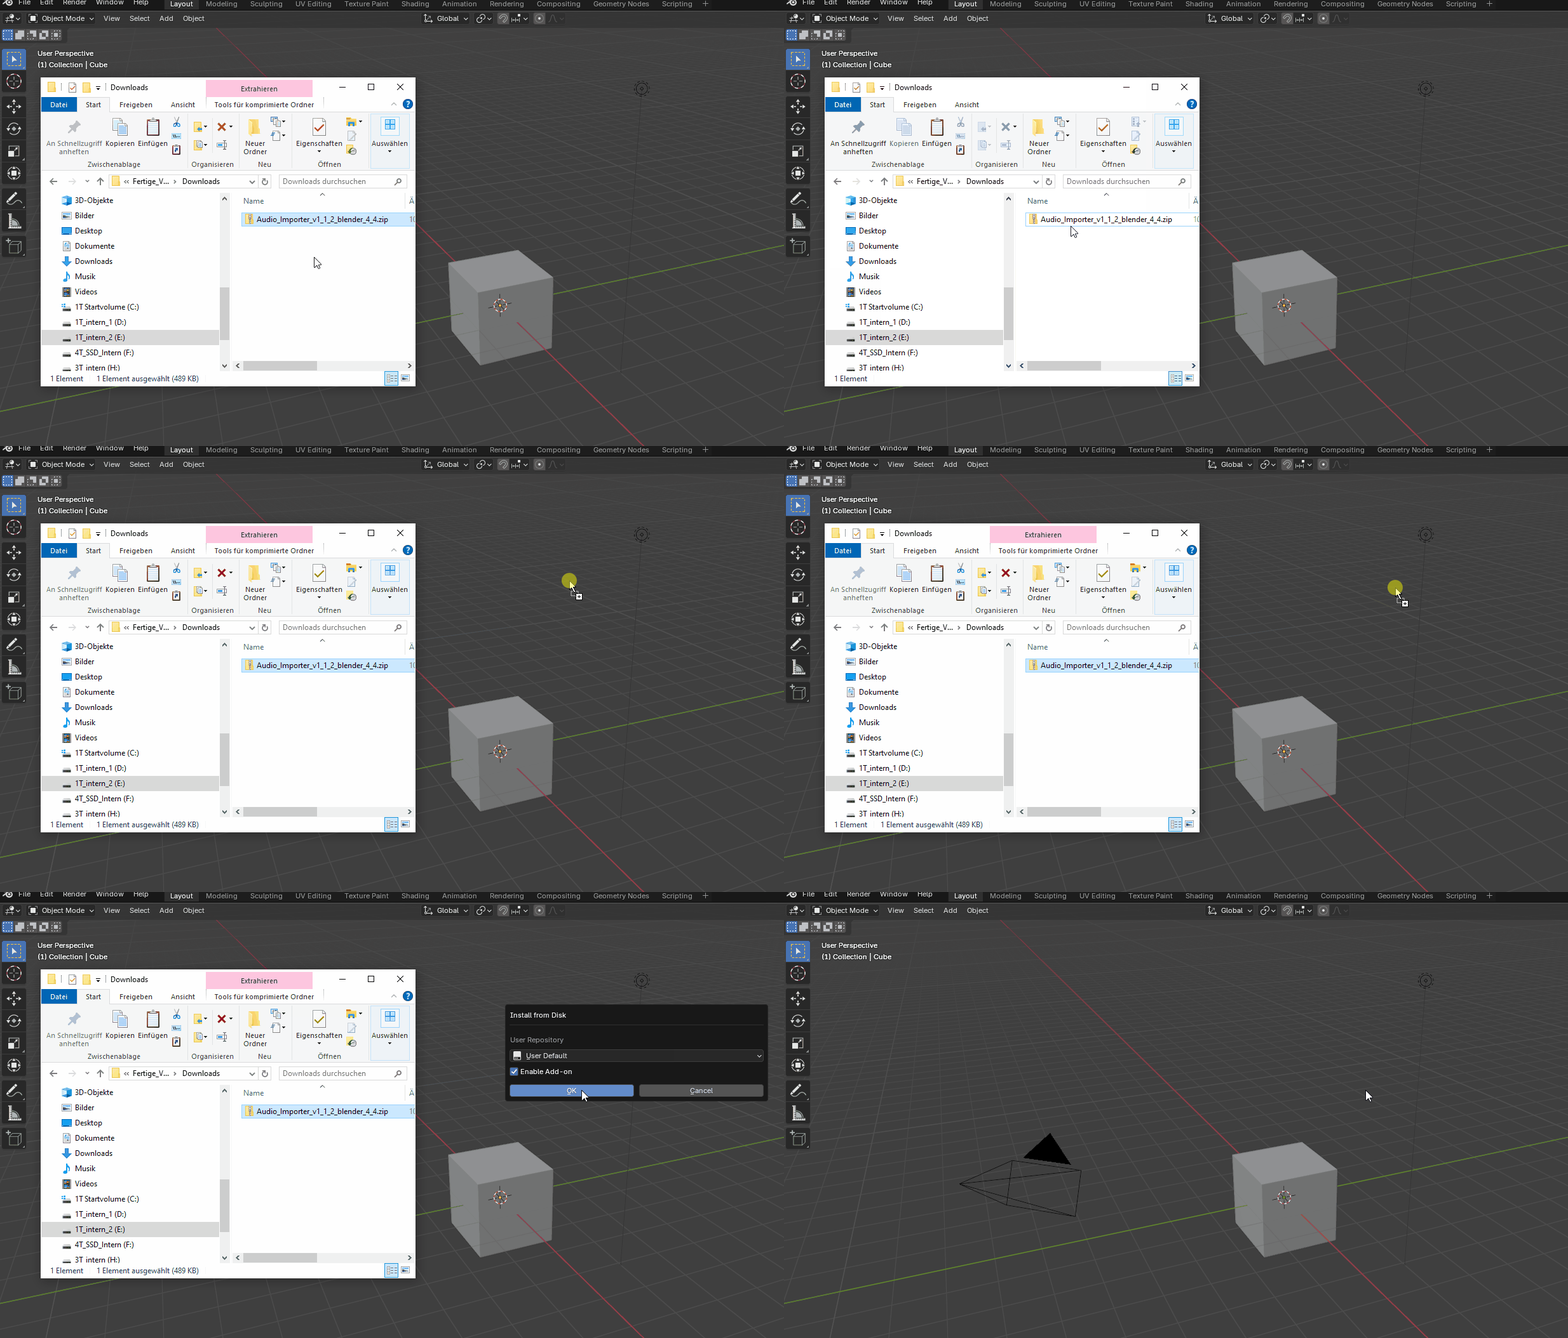
Uninstall
To uninstall the add-on, follow the steps in the following image: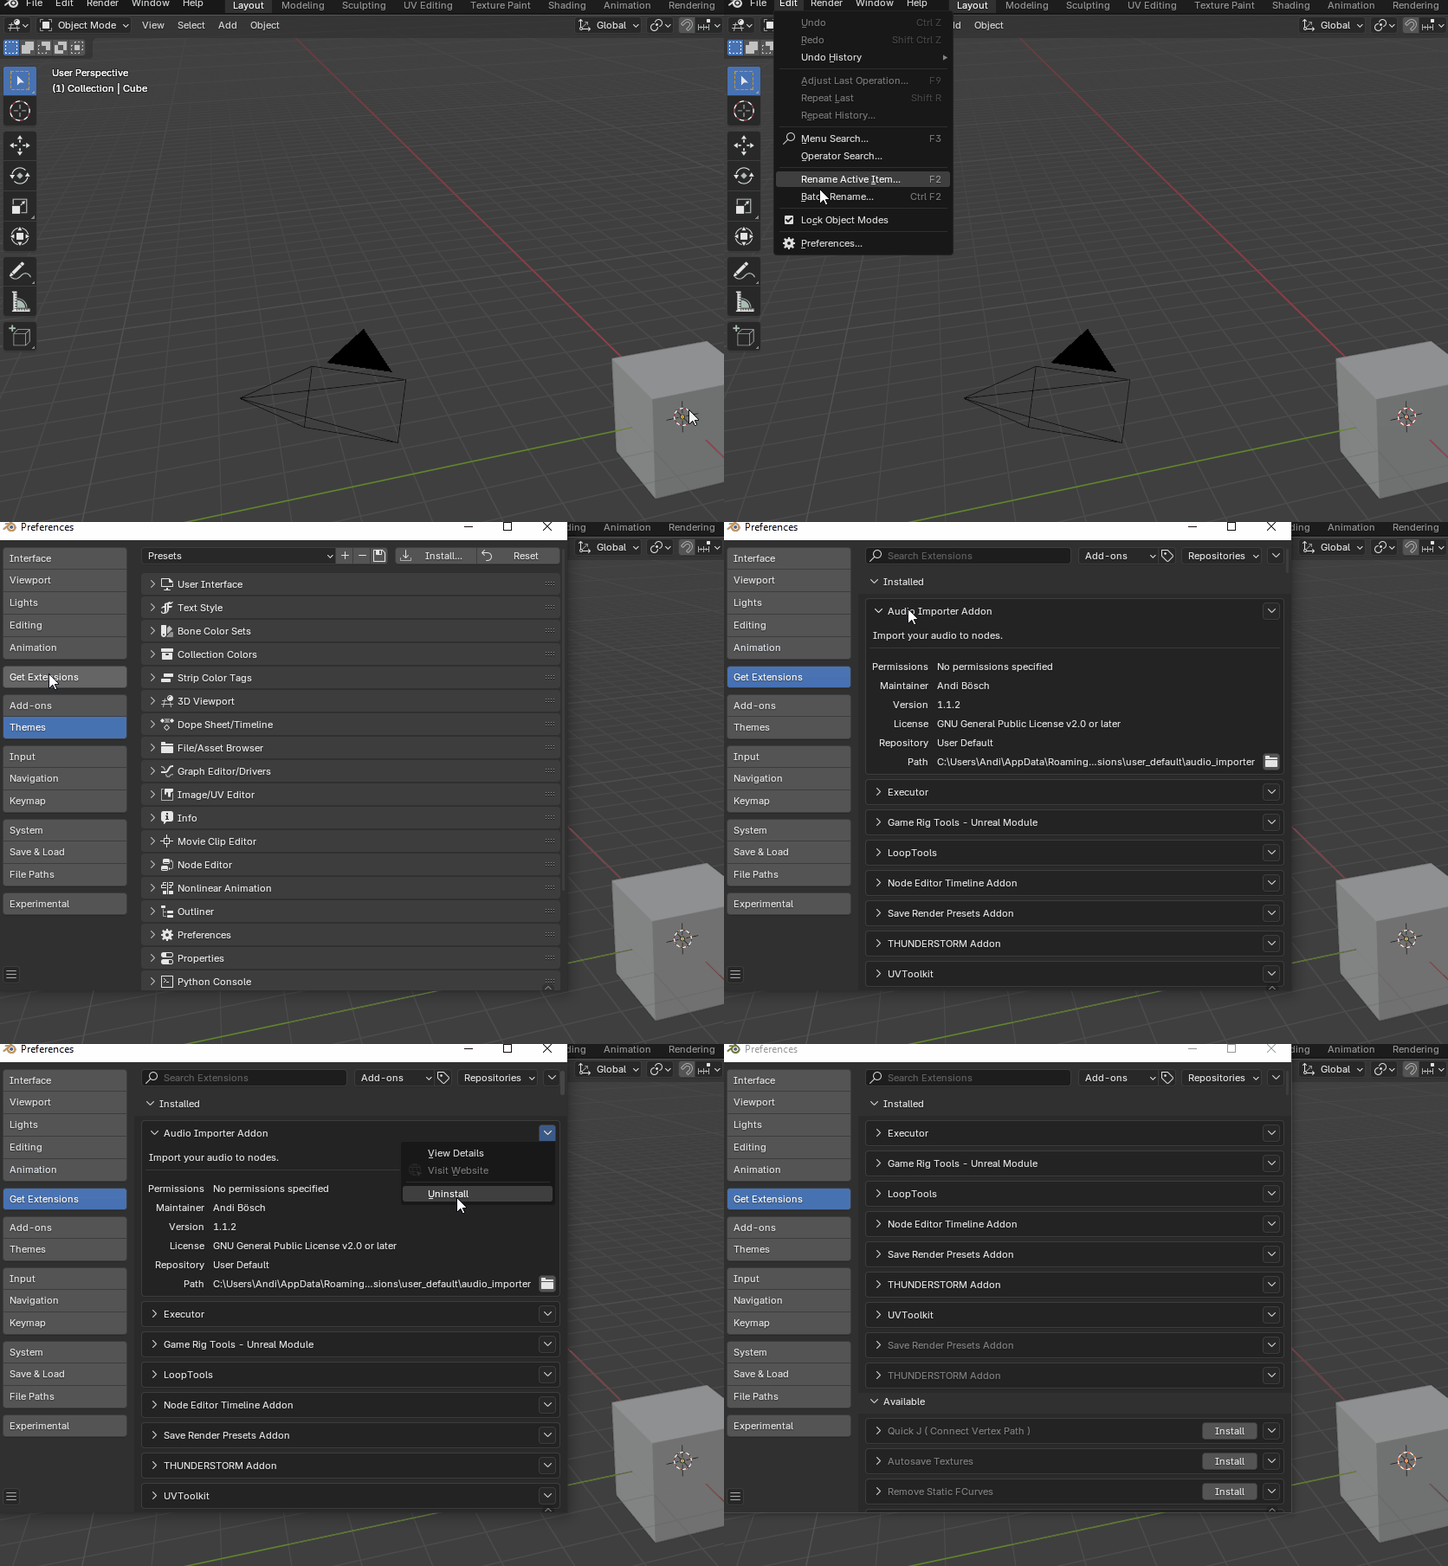
Upgrade
If
you want to install a new version of the add-on, uninstall the add-on
first, restart blender and then install the new version of your add-on.
It
is very important that you restart blender, otherwise there may be
problems and crashes because various things are still saved in blender.
If you installed the demo version of Top Layer first, the process is exactly the same as upgrading to a new version of Blender. First uninstall the demo, restart Blender, and then install the full version of Top Layer.
Top Layer Add-on
After installation, you will find the Top Layer add-on in the N-Panel in the 3D Viewport.
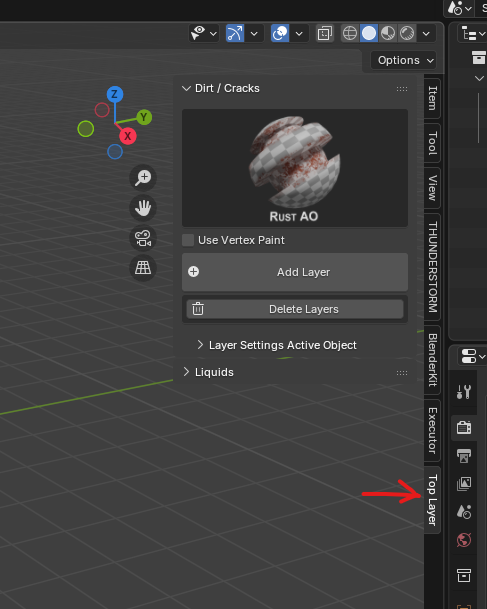
The add-on has two categories: Dirt/Cracks and Liquids. When you click on the asset image, all available effects in the respective category will be displayed.
There are several dirt layers with AO at the end of their names. This means that the layer is only applied in geometrically tight spaces. It should be noted that AO (Ambient Occlusion) remains fixed in one place in Cycles, while its position in Eevee changes slightly depending on the perspective. This is important to know if you want to create animations. If you want to render an animation with an AO effect using Eevee, it is better to choose an effect without AO and then use Vertex Paint to achieve the desired result.
If you are using the demo version, only 2 dirt effects and 1 liquid effect are included.
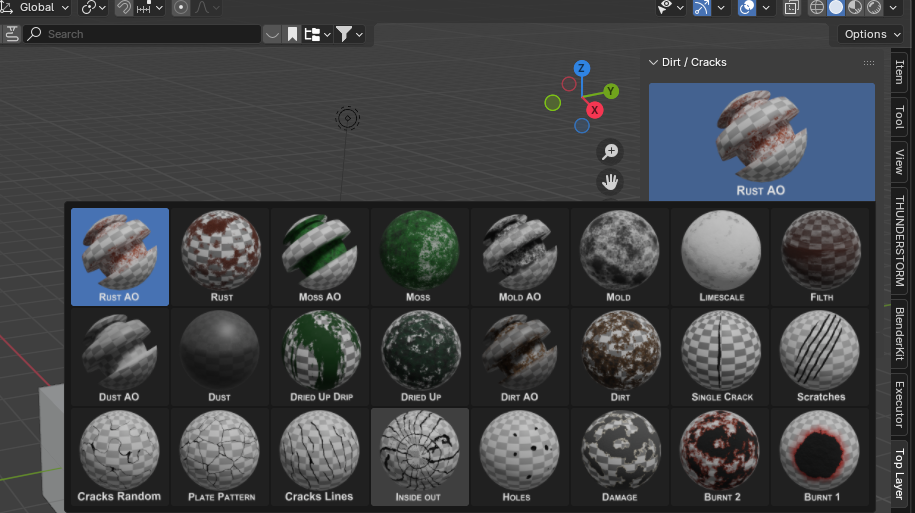
Add an effect
Select the effect you want to apply, then select the objects you want to apply the effect to and click “Add Layer” to add the effect.You can select objects generously, because if an object has no material, it will simply be ignored—for example, cameras and empties.However, an object MUST have at least one material for the effect to be applied.
The center of the effect is always where you have placed the 3D cursor. So if you add an effect but cannot see it, you may have placed the 3D cursor too far away from the object that should receive the effect.
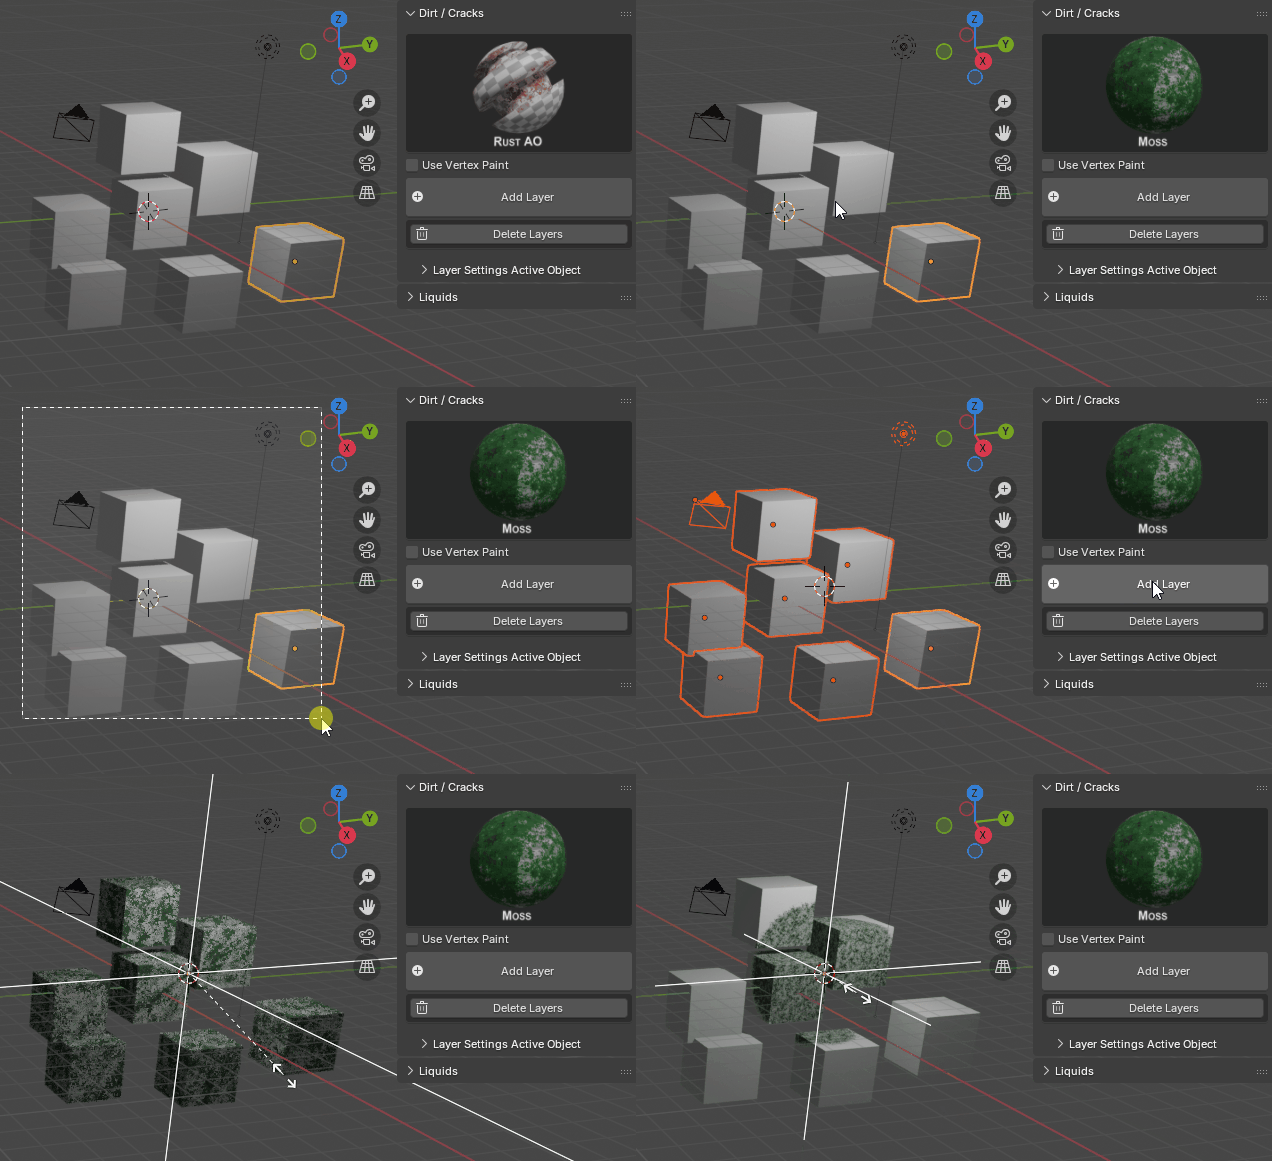
Please note that Eevee always takes a while for the effects to appear. Cycles is much faster.
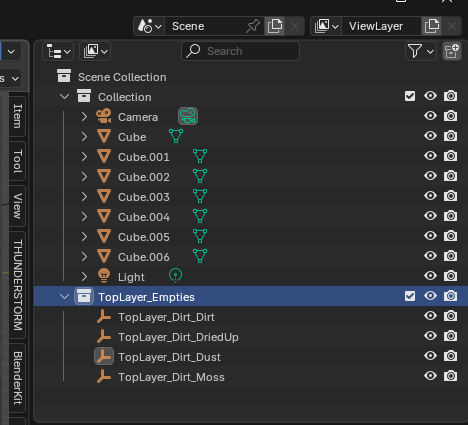
As you can see in the image above, an empty is then added, which is also selected at the same time. With this empty, you can reposition the center of the effect and adjust its size and rotation.
All empties are placed in the “TopLayer_Empties” collection so that you can always find them easily. The empties are named after the effects.
Manipulate the effects
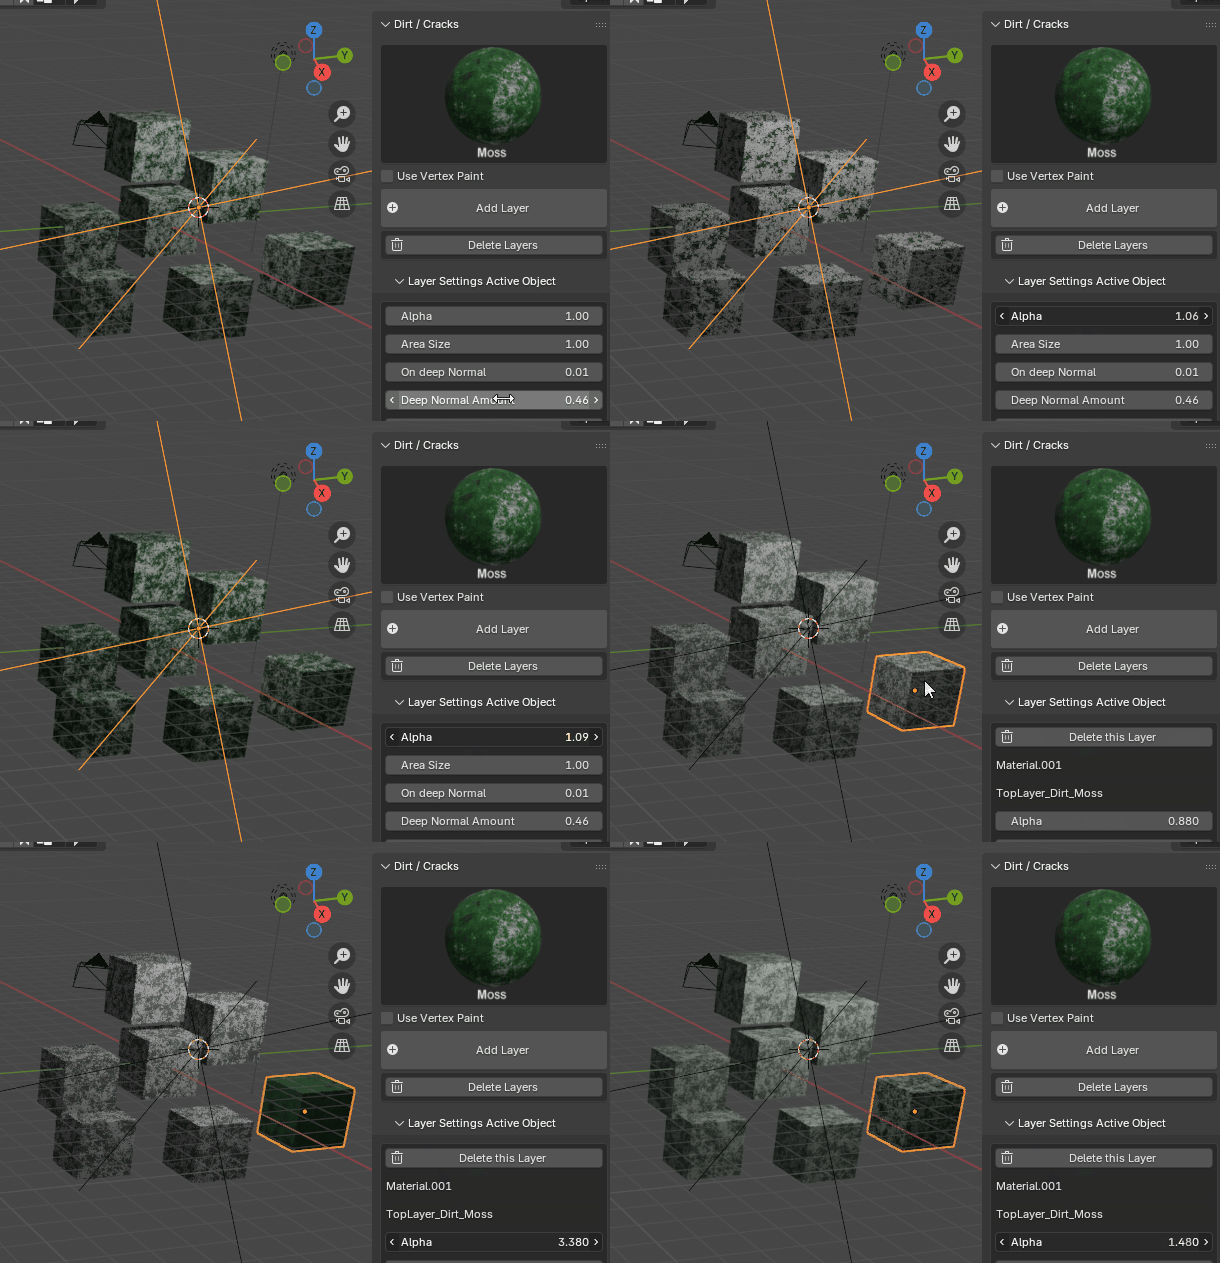
In
addition, Empty gives you control over the effect for all objects to
which the effect has been applied. This allows you to change the color
for all of them, for example. However, if you only want to change
something about one object, select that object. This gives you access to
the settings for that object only. The parameters can be found under
“Layer Settings Active Object.”
The names of the various parameters are chosen appropriately. However, to understand exactly what they do, it is best to simply test what happens when you change the value. Unfortunately, the description would not be visible in the panel anyway, so I have not included it.
Please note, however, that you can only change settings per object if the objects have different materials.
Delete the effects
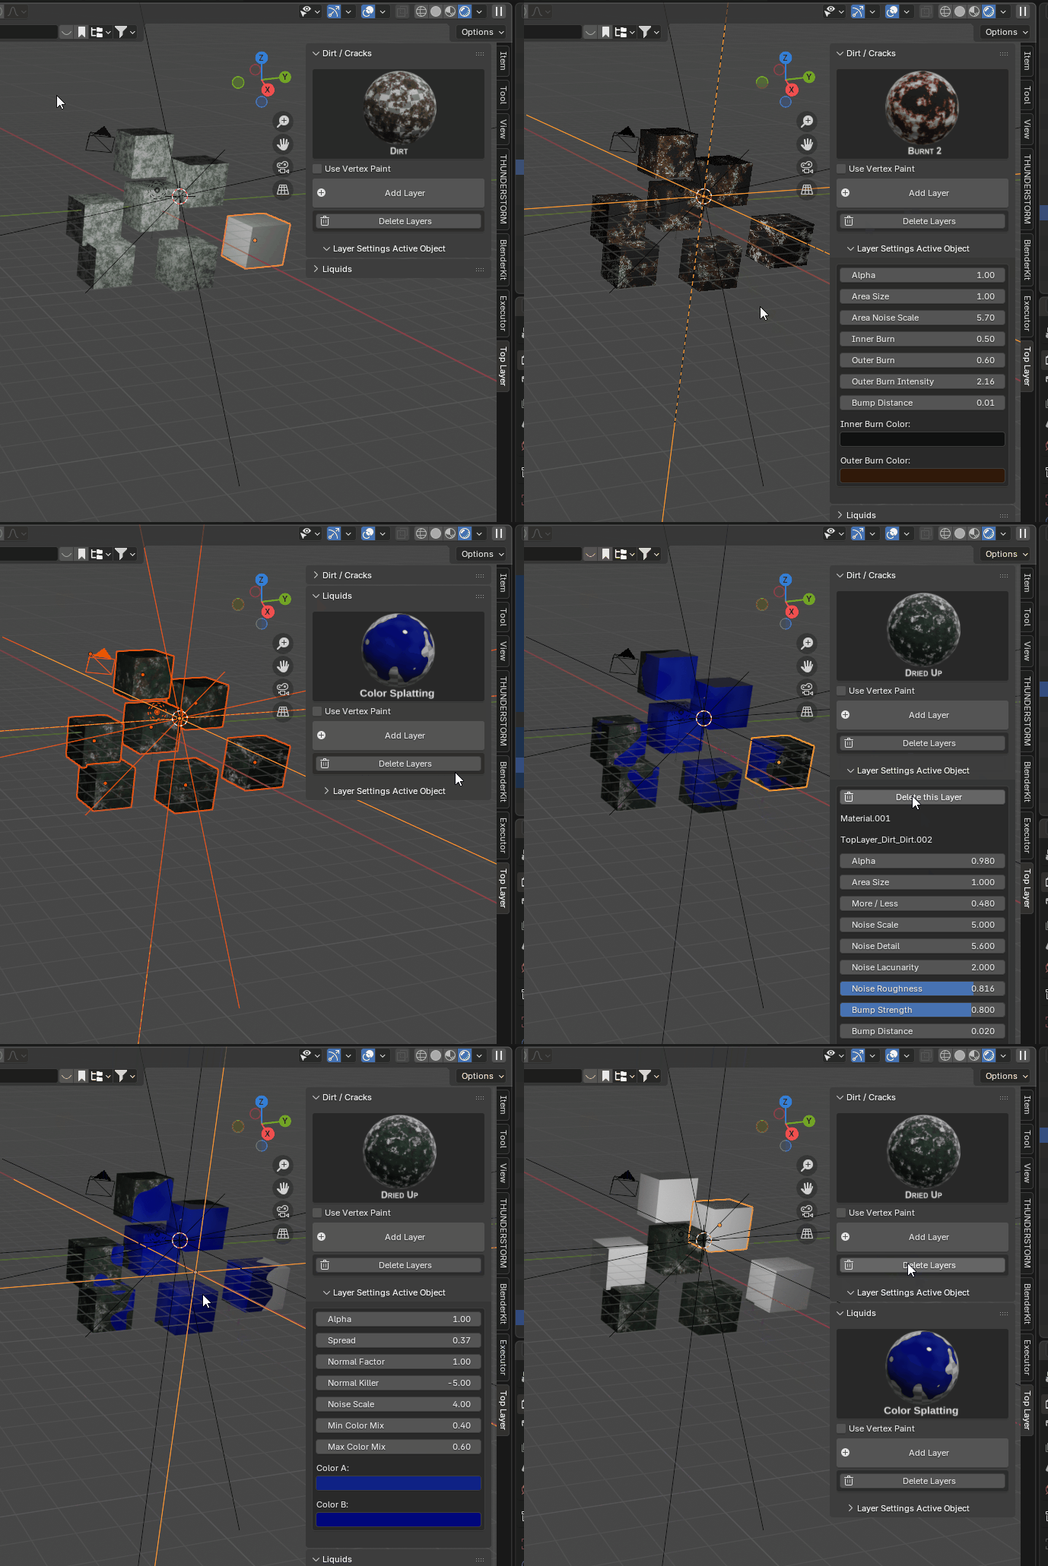
You can add as many different effects as you want.
There are several ways to remove them: Either remove a single effect in an object under “Layer Settings Active Object” using the “Delete this Layer” button. Or you can remove all effects from an object with “Delete Layers” or remove an effect from all objects that is linked to the empty with its name, also using the “Delete Layers” button. The empty itself is also deleted.
In Layer Settings Active Object, you can see the names of the materials and the names of the effects so that you know exactly what you are doing.
Vertex Paint
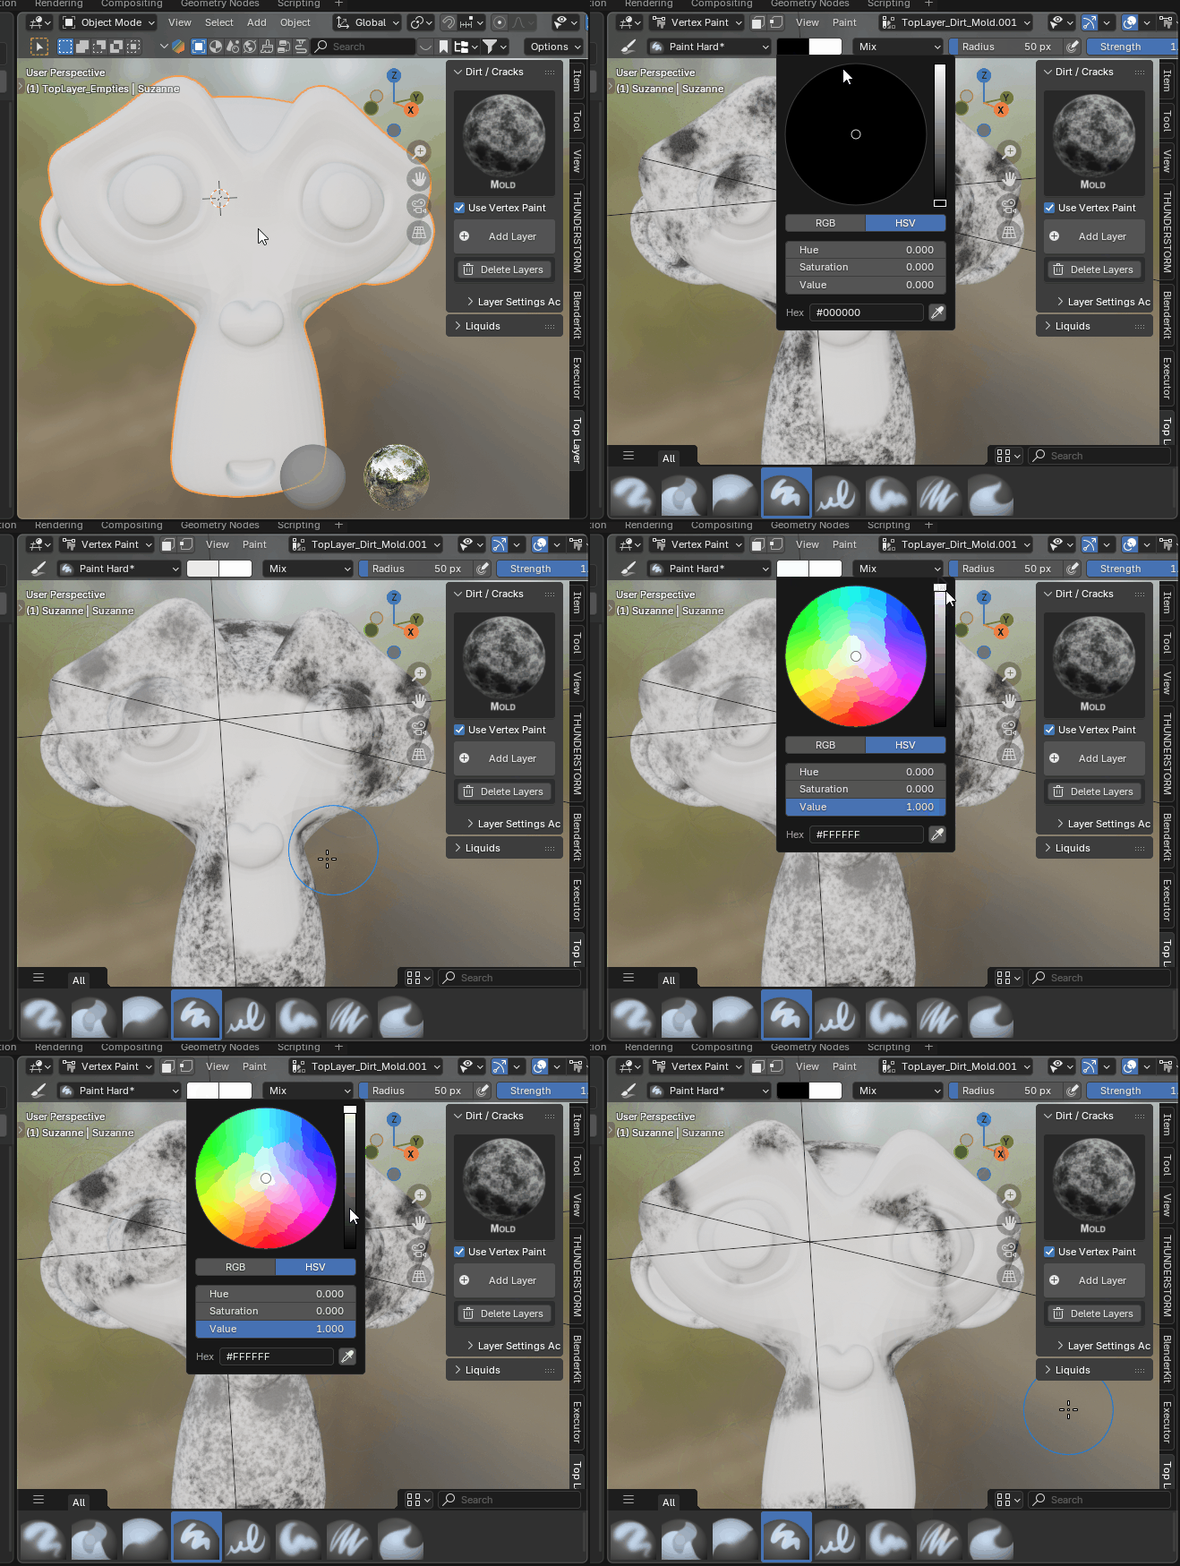
Want to control exactly where the effects go? Use Vertex Paint. You can easily activate this in the Top Layer panel and get started.
A Vertex Paint attribute is automatically added to all selected objects, and you are put into Vertex Paint Mode so you can start removing the effect right away. Unfortunately, it is not currently possible to edit multiple objects in Vertex Paint Mode, so you have to edit the objects individually.
Special
There are two node types that require some explanation.
The “Dripping” effects cause liquids to drip over edges. The height of the Empties can be used to specify how deep the dripping will be.
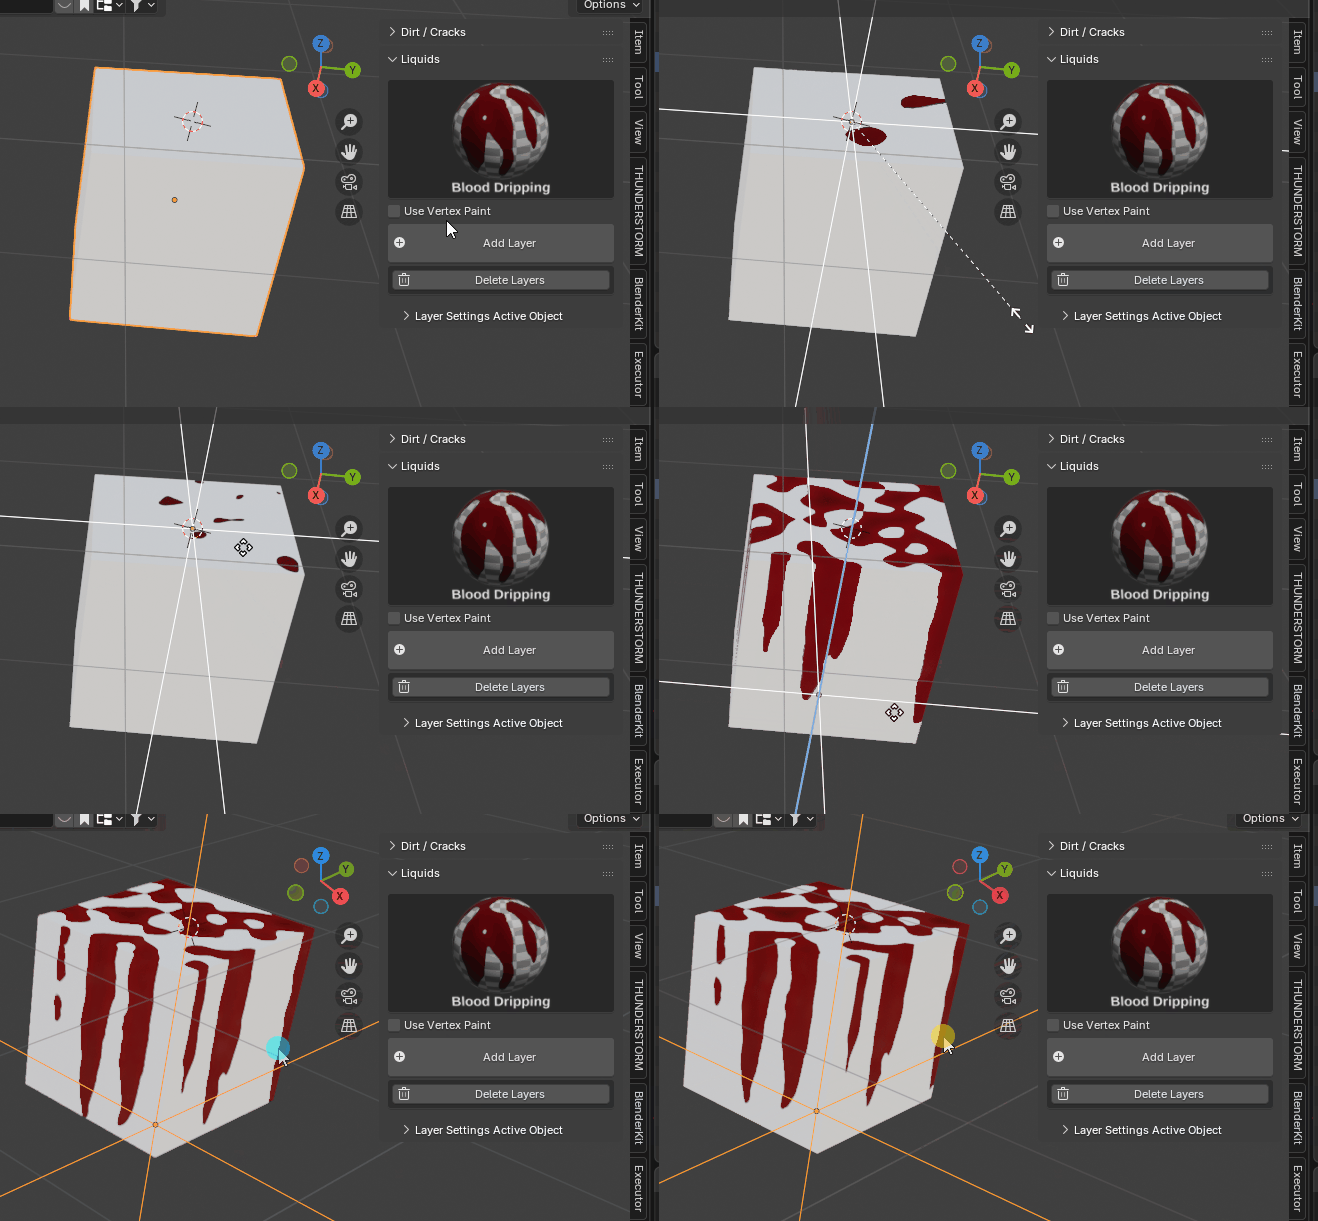
The “Single Crack” and “Scratches” effects. The cracks are also
fully procedural. The problem is that I can't know which axis the effect
is applied to. To set this correctly, simply rotate the empty until the
scratches look right.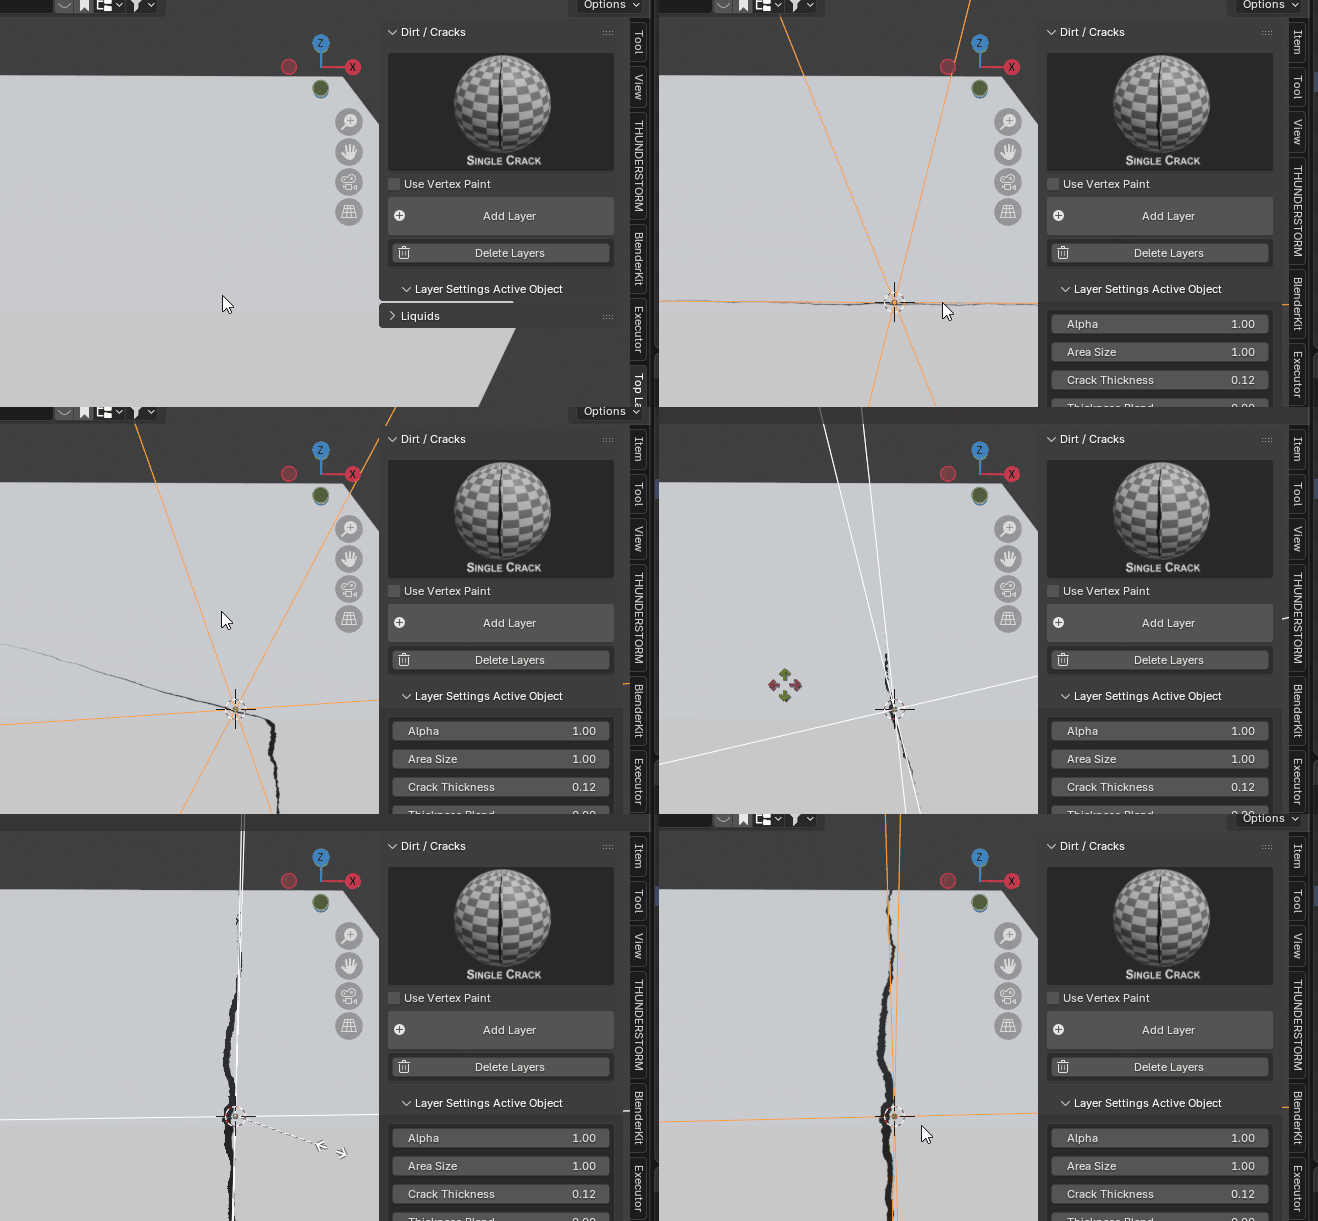
What exactly the add-on does:
Node groups are added to all materials in a selected object.
The Top Layer Effect is added directly after the material output. It is designed for a single material output. If problems occur, you may have more than one material output node.
These node groups are automatically linked to the “Normal” of the last node before the material output.If the last node before the material output does not have a Normal input, another Normal is simply searched for and used in the node tree.If no Normals are available, no Normal is linked.
If the desired normals are not linked, the normals can also be linked manually.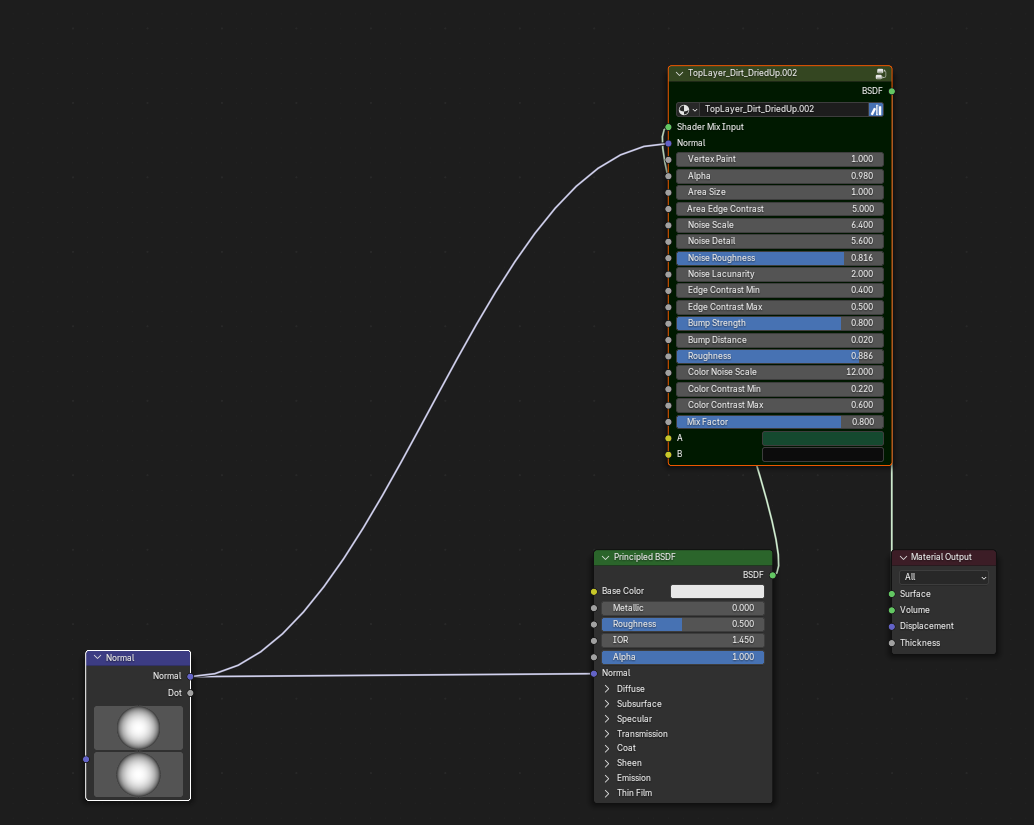
If you have enabled “Vertex Paint,” an Attribute Node will also be added, which provides the necessary Vertex Paint attributes.
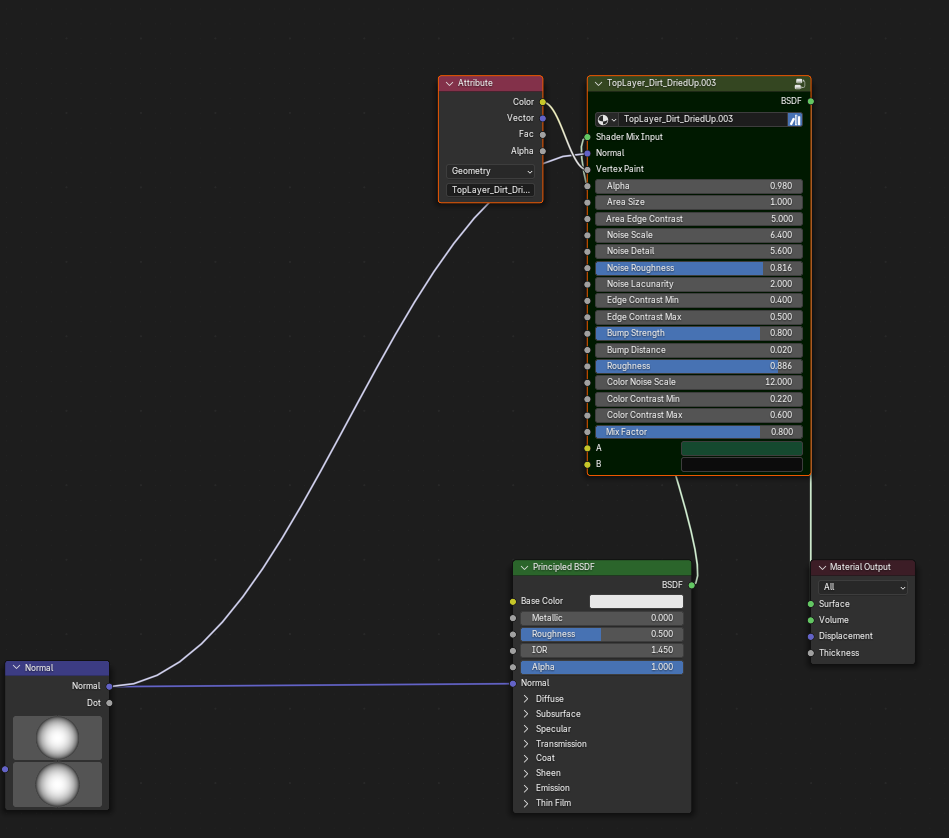
A color attribute (vertex paint) is also added with the name of the relevant effect.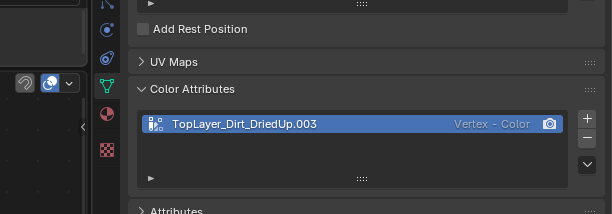
limitations
- The normals are not transferred from effect to effect. I tried that and was not satisfied with the result. It simply looked much better when I stuck with the original normals.
- Since the effects are procedural and work via coordinates, they are not suitable for rigs. If you want to move an object, you simply have to remember to animate the empty as well, or parent the empty to a moving object.Of course, the effects can still be baked, which makes them applicable to rigs as well.
If you have any further questions, please feel free to contact me via Superhive.
-
$1
Try before you buy.
-
$19.90
Commercial use
Have questions about this product?
Login to message
| Blender Extension Compatible | Yes |
| Sales | 10+ |
| Dev Fund Contributor | |
| Published | 11 months ago |
| Blender Version | 4.5 - 5.2 |
| Extension Type | Add-on |
| Render Engine Used | Cycles, Eevee |
| License | GPL |