 wans7
wans7



==============================================================
When it comes to topology, many users prefer automatic solutions because they require less manual work. Yes, automatic topology is one of the fastest and easiest approaches. However, achieving the desired result often means constantly adjusting settings and wondering, “Is this the right value?” Then you run it again… and again… searching for the perfect result.
This workflow can feel unpredictable. Increase the settings too much, and you may get overly dense results. Reduce them too much, and the quality may suffer. It becomes a cycle of trial and error without knowing exactly when the result will look right.
So, is there a better way to solve it?
==============================================================
INTRODUCTION TO TOPOVISION
Every problem should have an answer — and one of the answer should make the workflow easier, smarter, and more reliable.
For me, that answer is TopoVision Addon.
What can this addon offer? What makes it different for Automatic Retopology?
Traditional Automatic Retopology works by entering values and waiting for the result. If the result is not good enough, users need to adjust the settings and run the process again. This creates a workflow filled with guessing, testing, and repeating until the mesh finally looks right.
But with TopoVision Addon, the workflow becomes smarter and more visual.
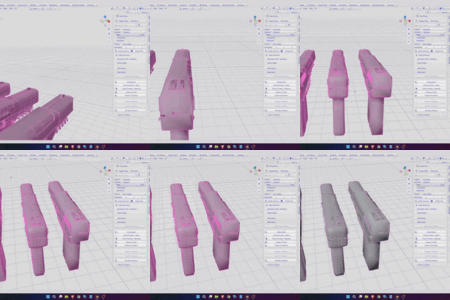
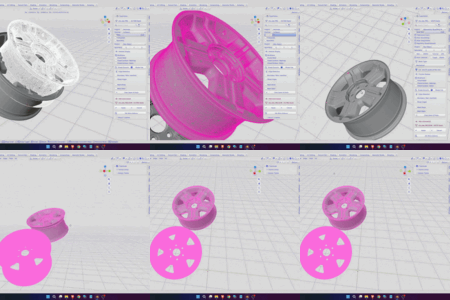
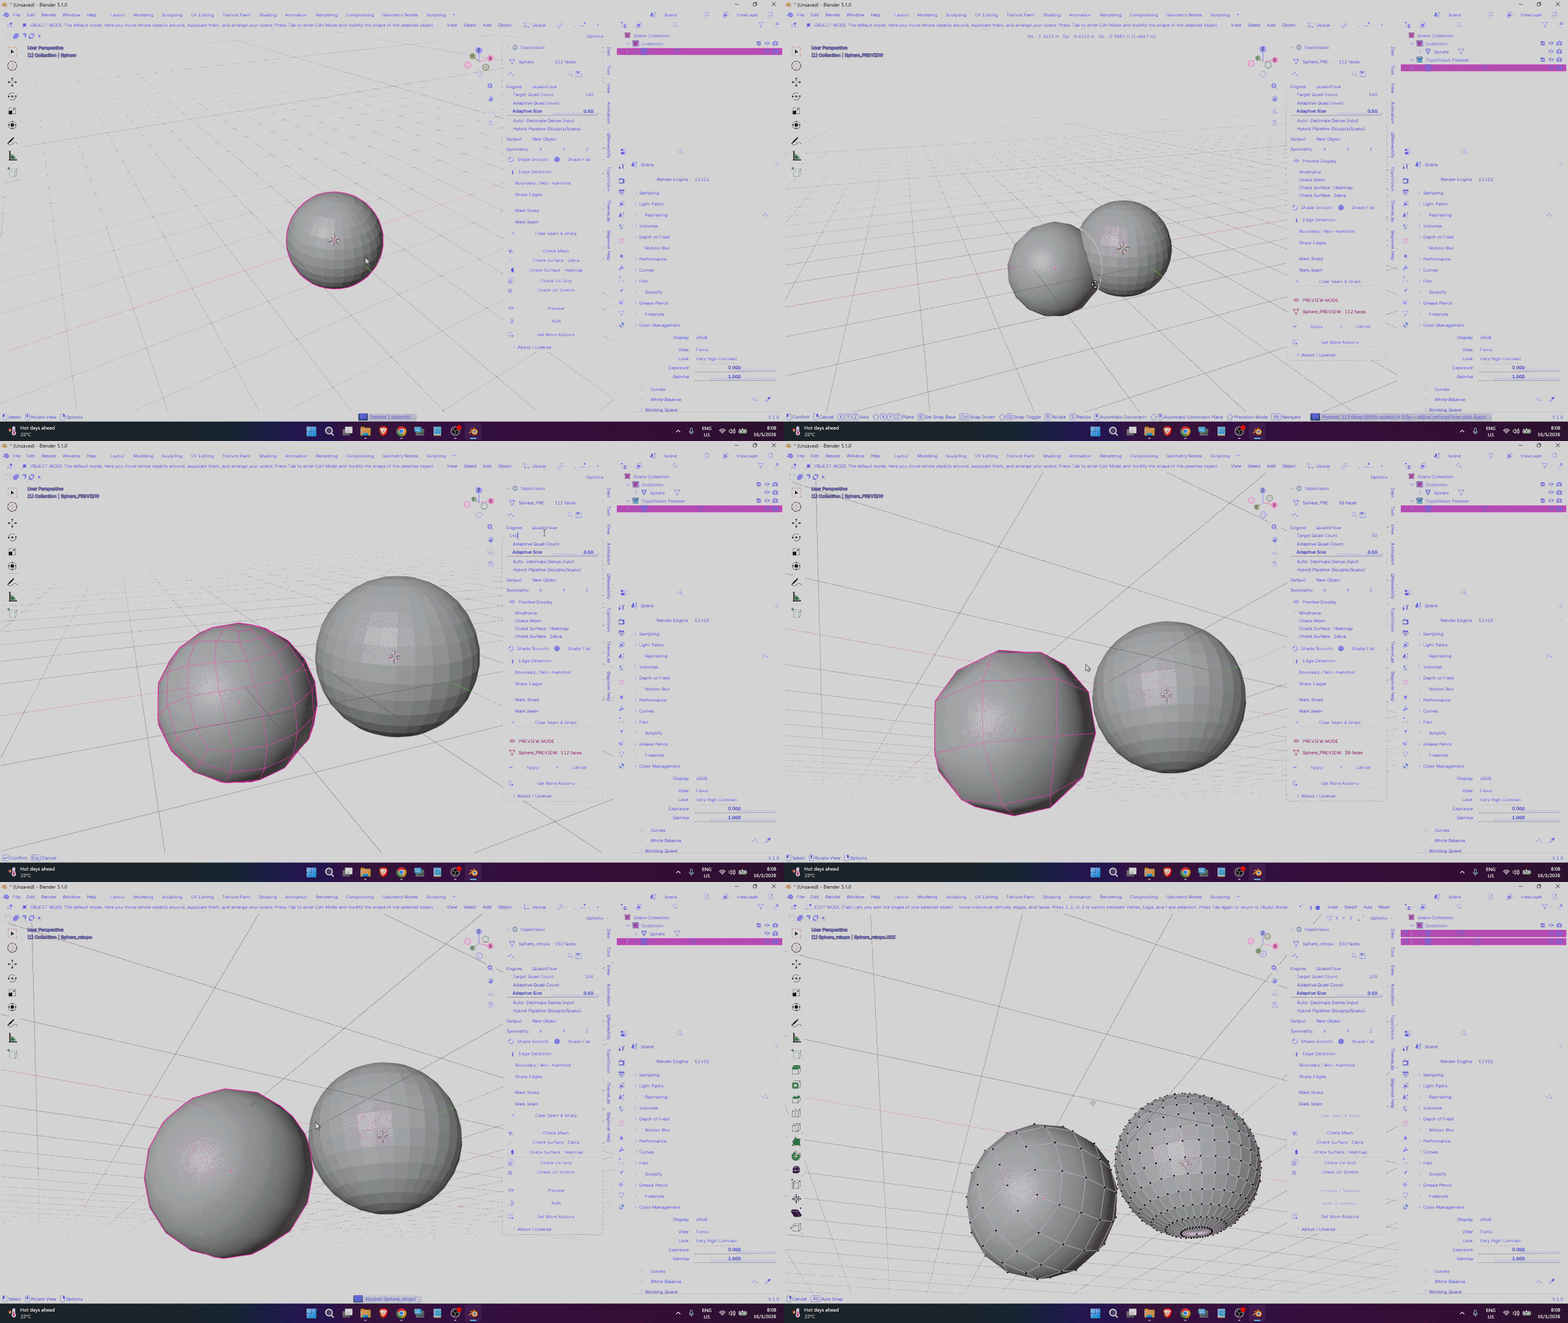
Instead of only typing values and waiting for the best result, TopoVision lets you preview the result instantly — even before the topology mesh is generated. This means users can clearly see how density, edge flow, and polygon distribution will look in real time while adjusting the settings.
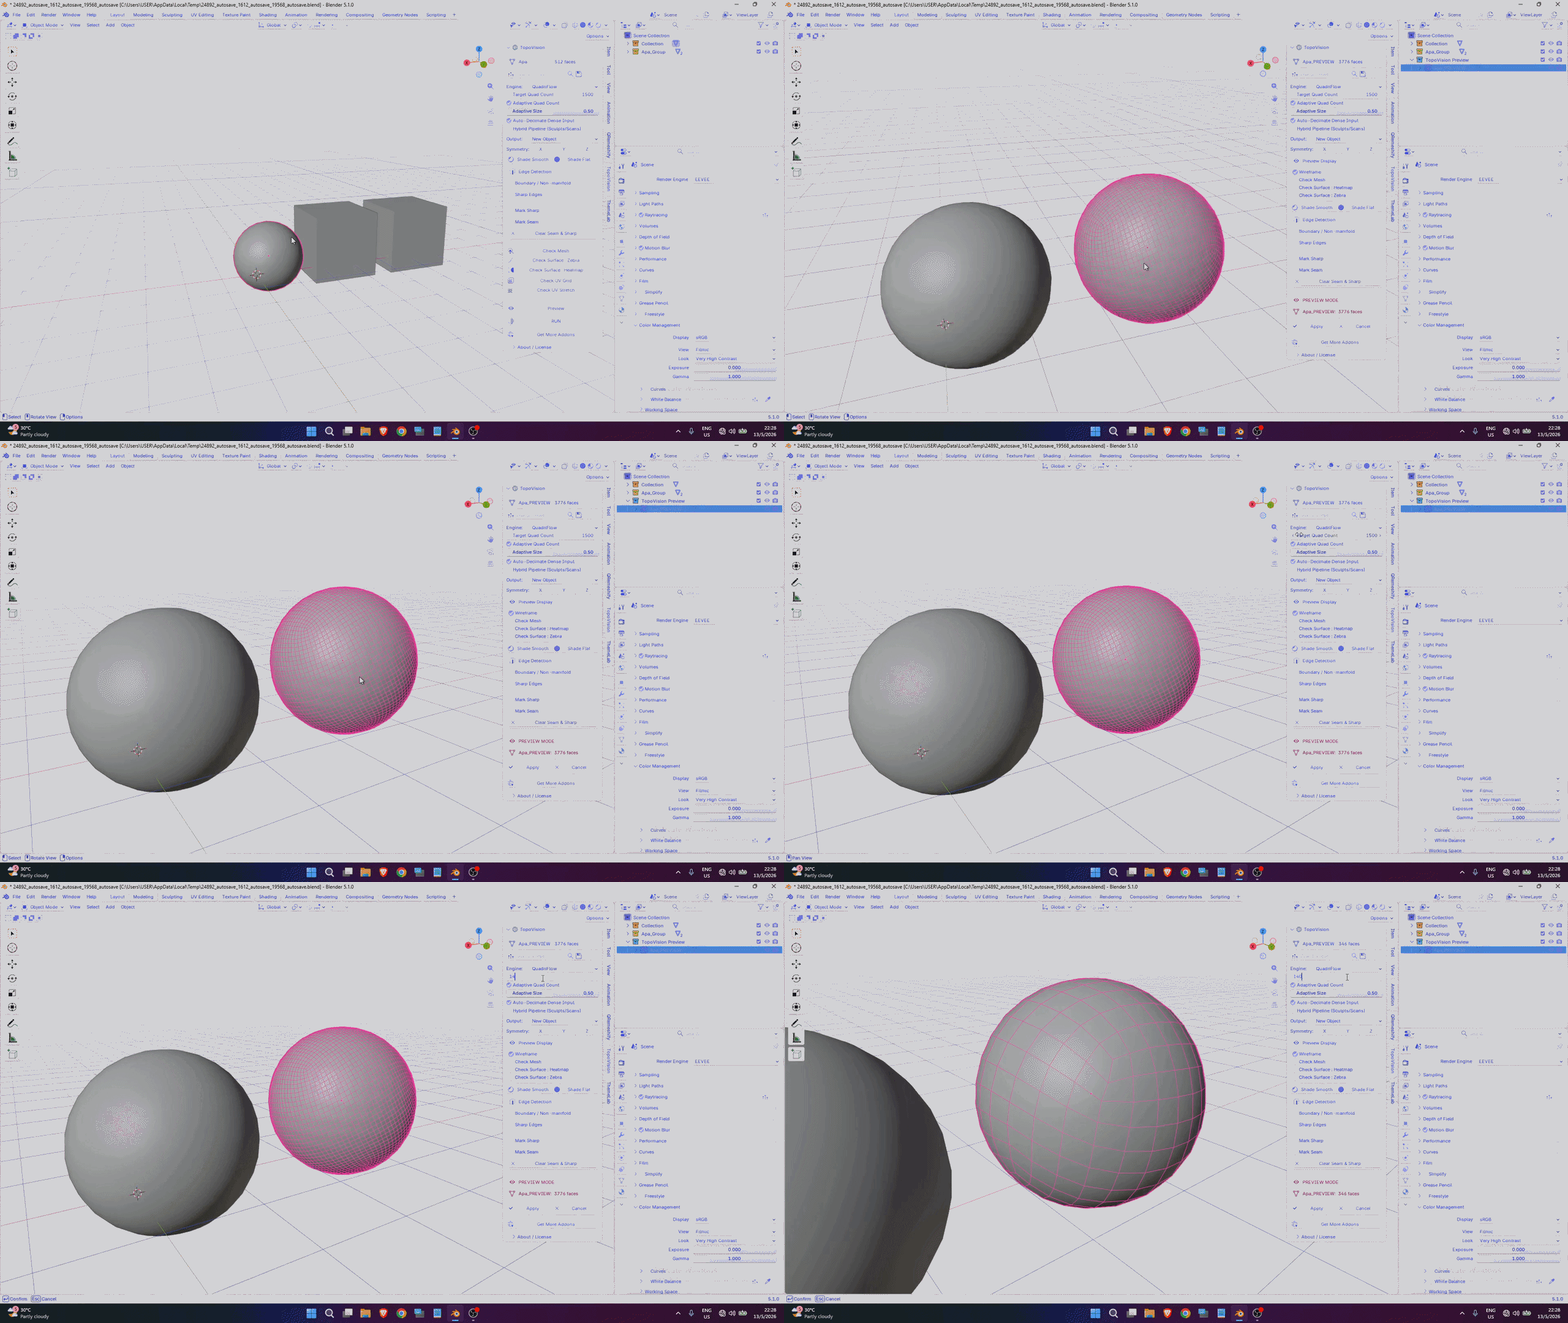
In Short TopoVision Addon can :
- Real-time topology preview before generation
- Instant visual feedback while adjusting values
- Smarter density control without guesswork
- Reduced trial-and-error process
- Easier control for both beginners and professionals
- More confidence before applying the final result
==============================================================
How It Works ? It’s super simple. You just need to.
-> Select your mesh
-> Hit Preview button
-> Active Wireframe ( if you want to check Mesh Topology )
-> Adjust the settings
-> Once satisfied, simply click Done
-> Mesh generated.
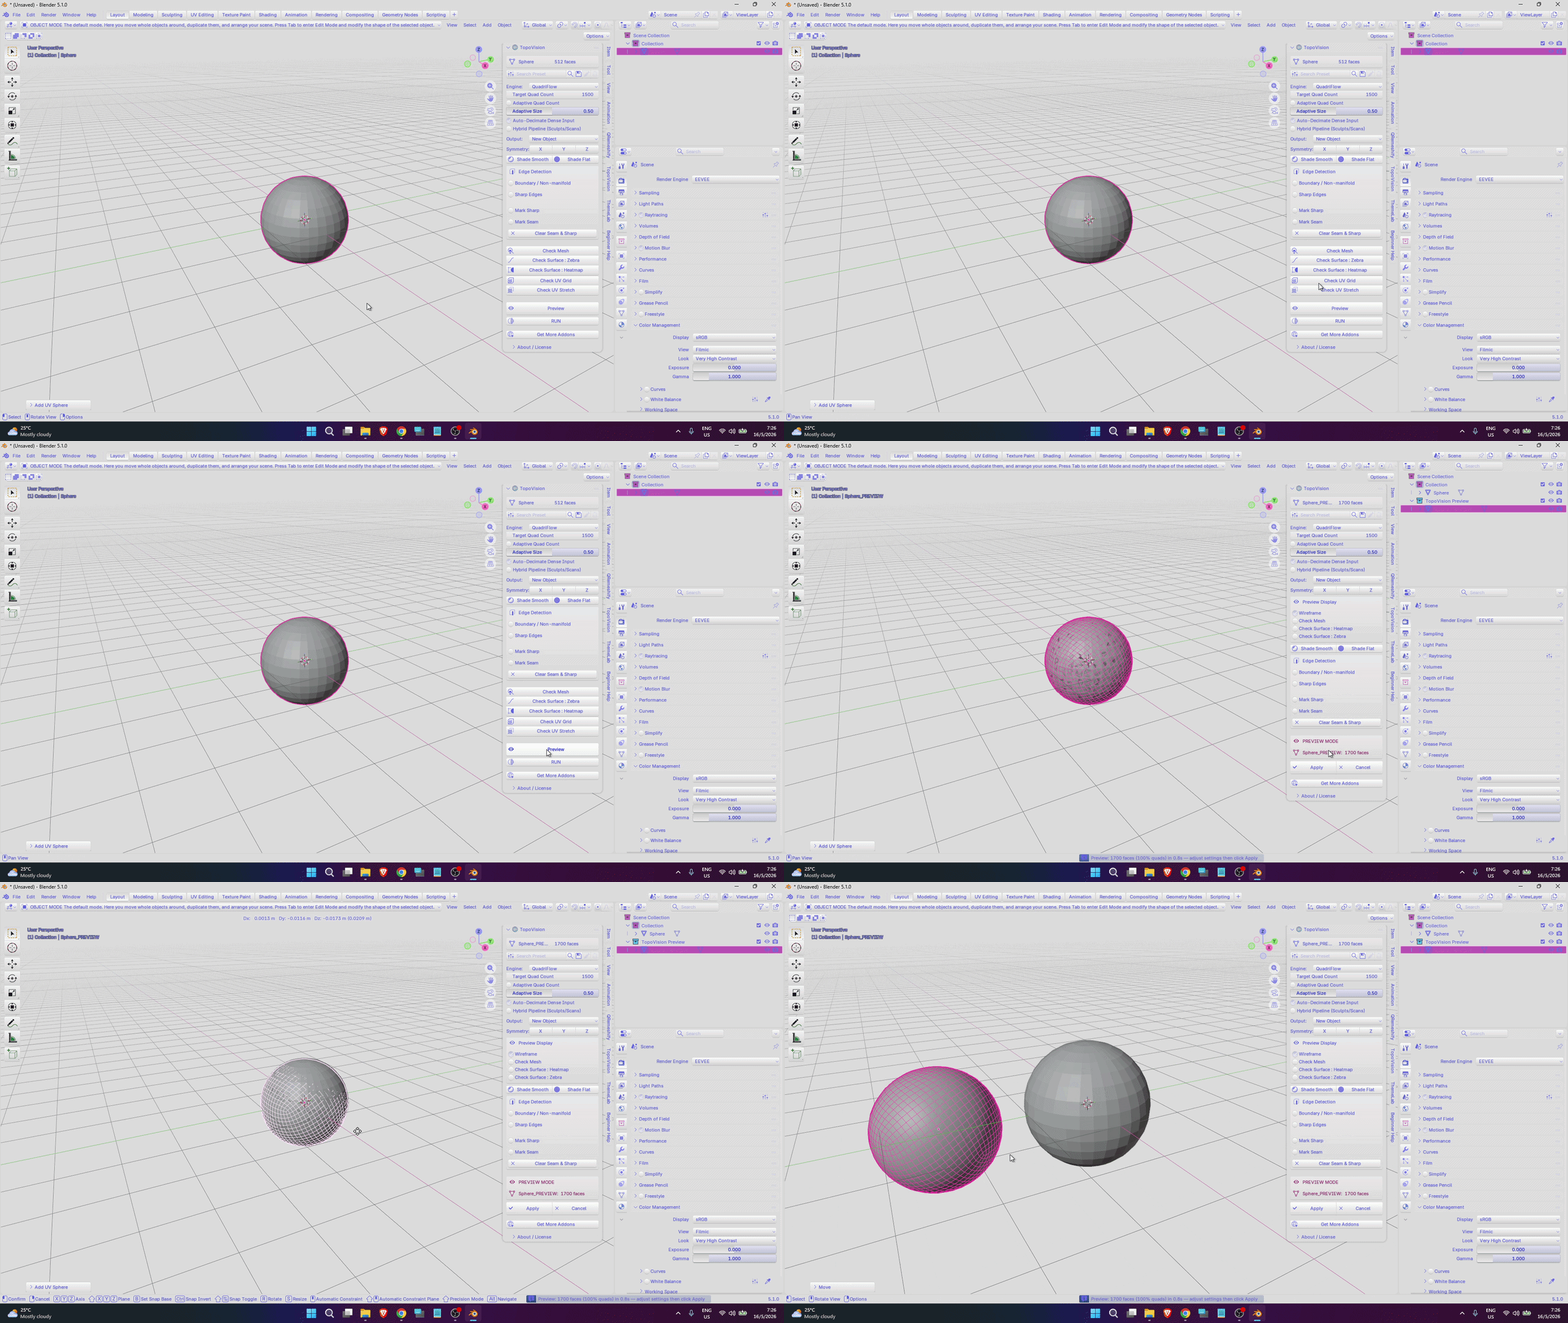
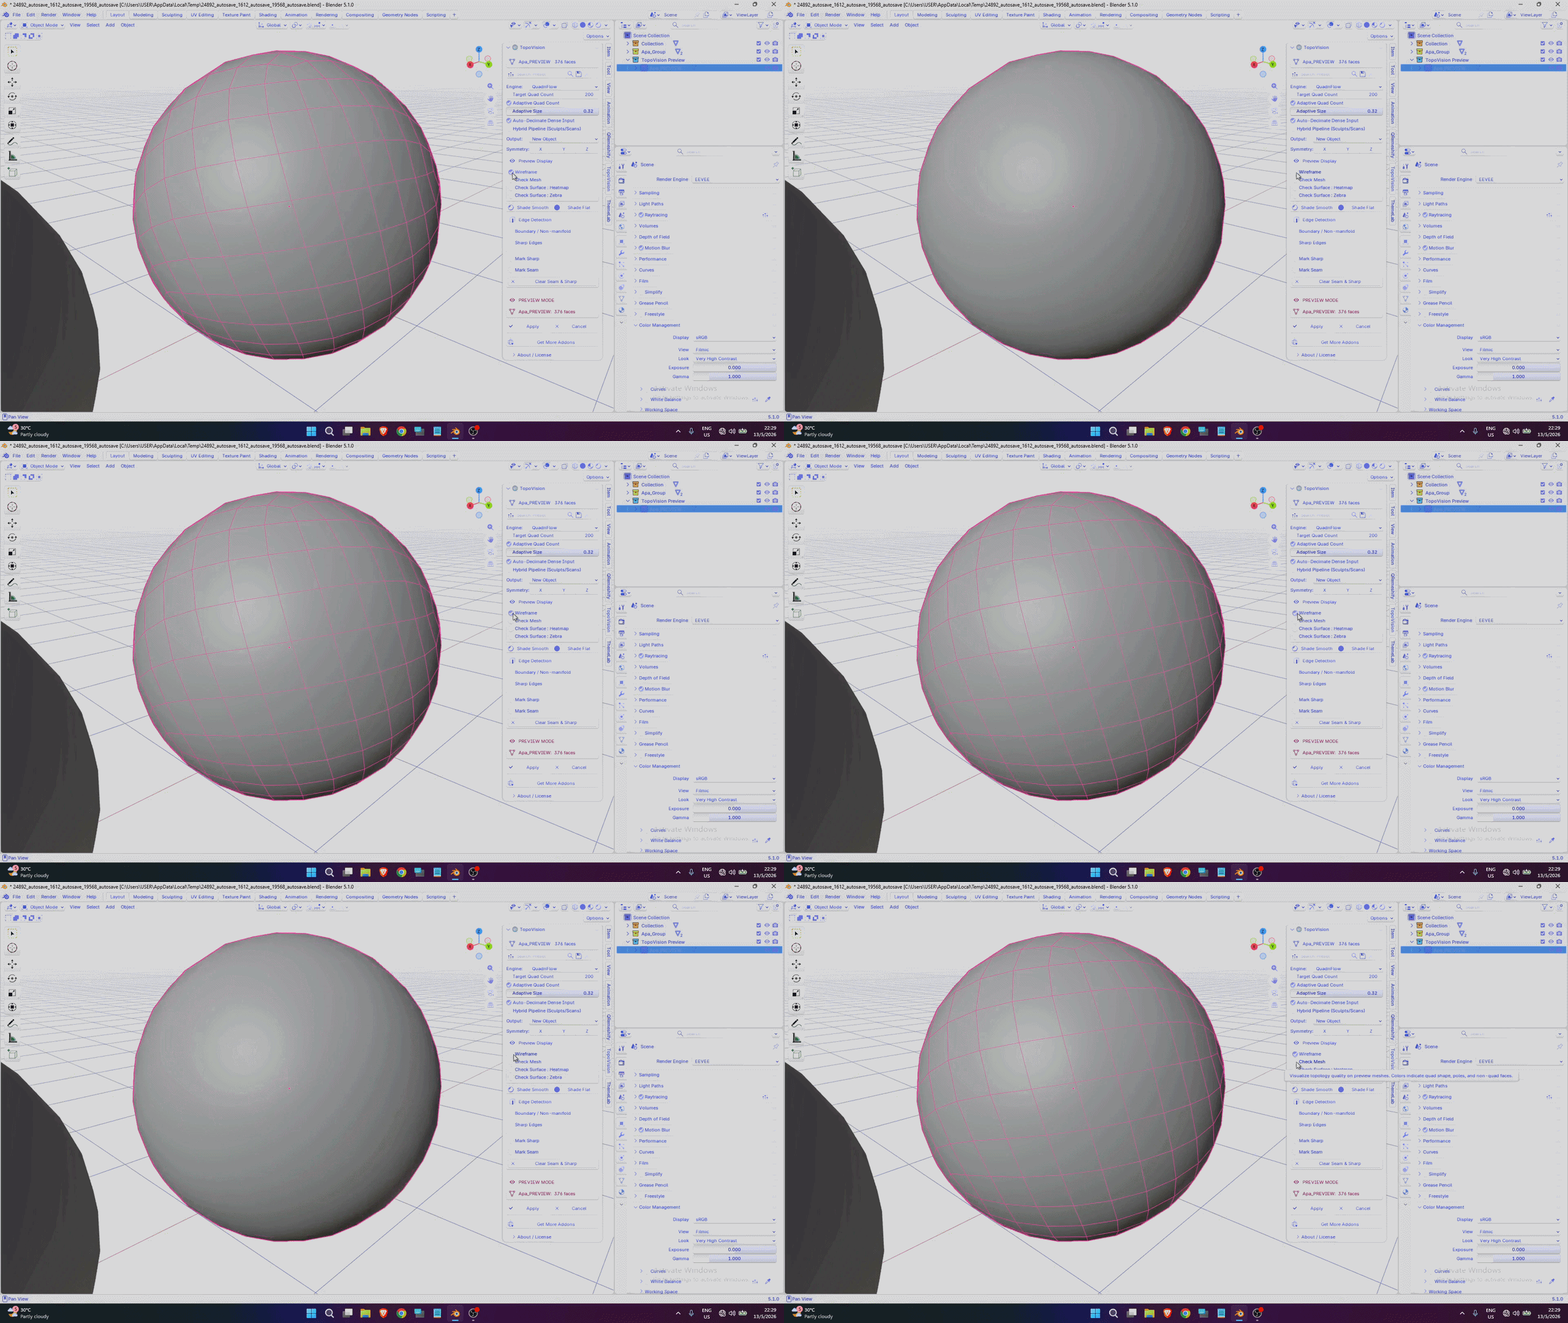
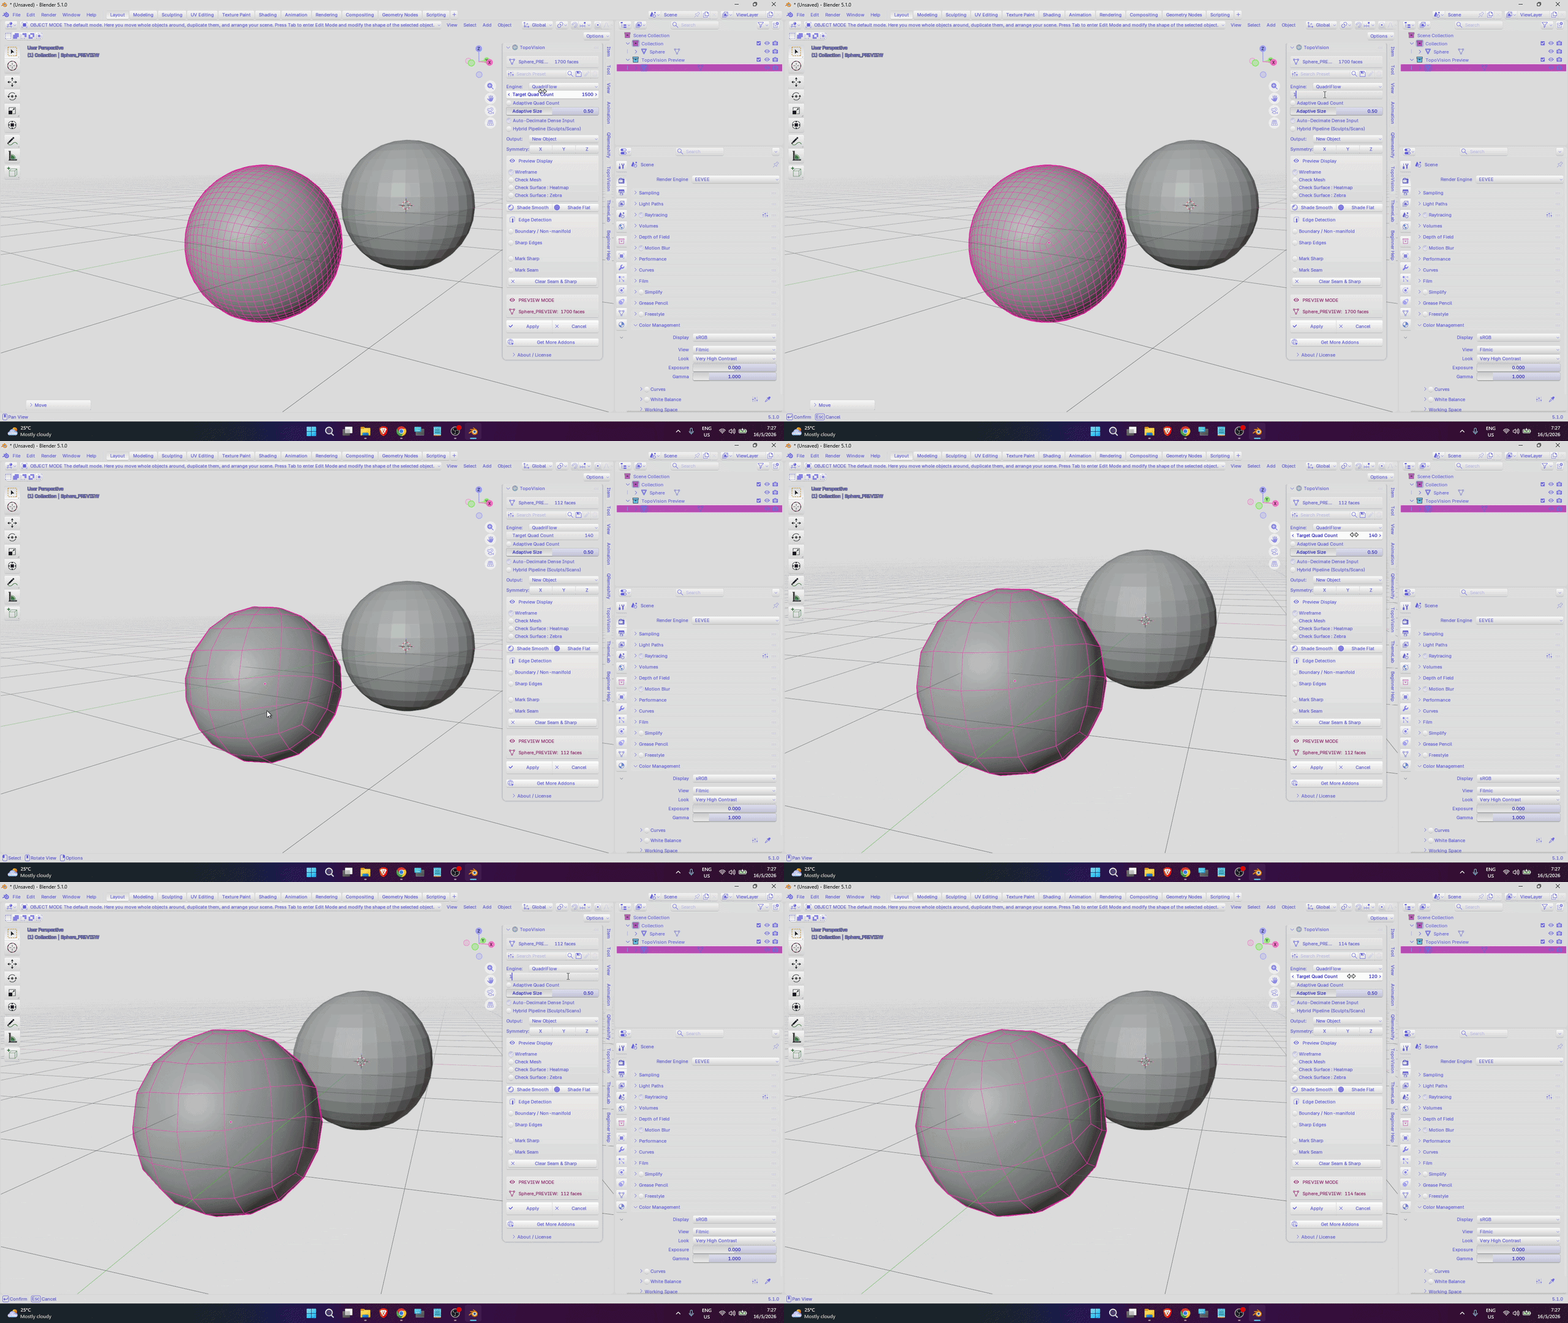
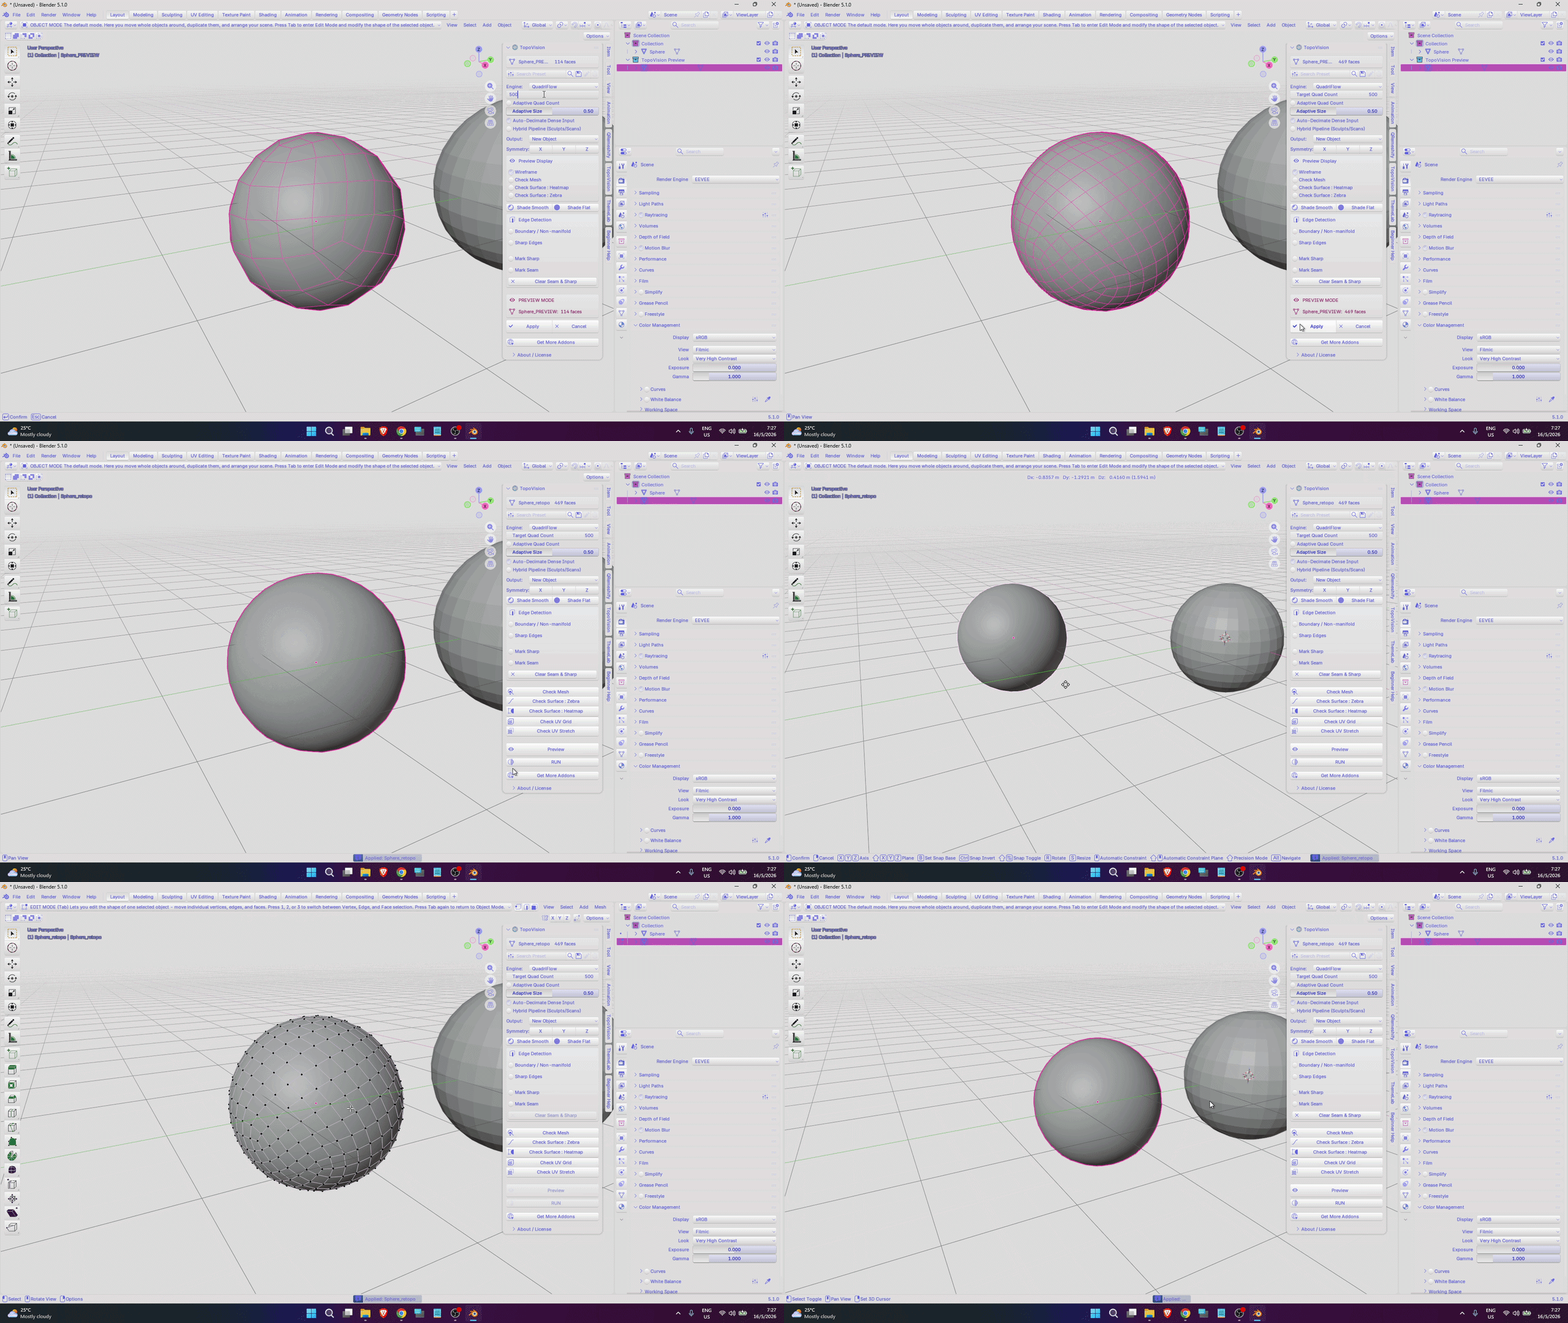
How easy is it? I’ll let you decide for yourself.
Already found the perfect settings?
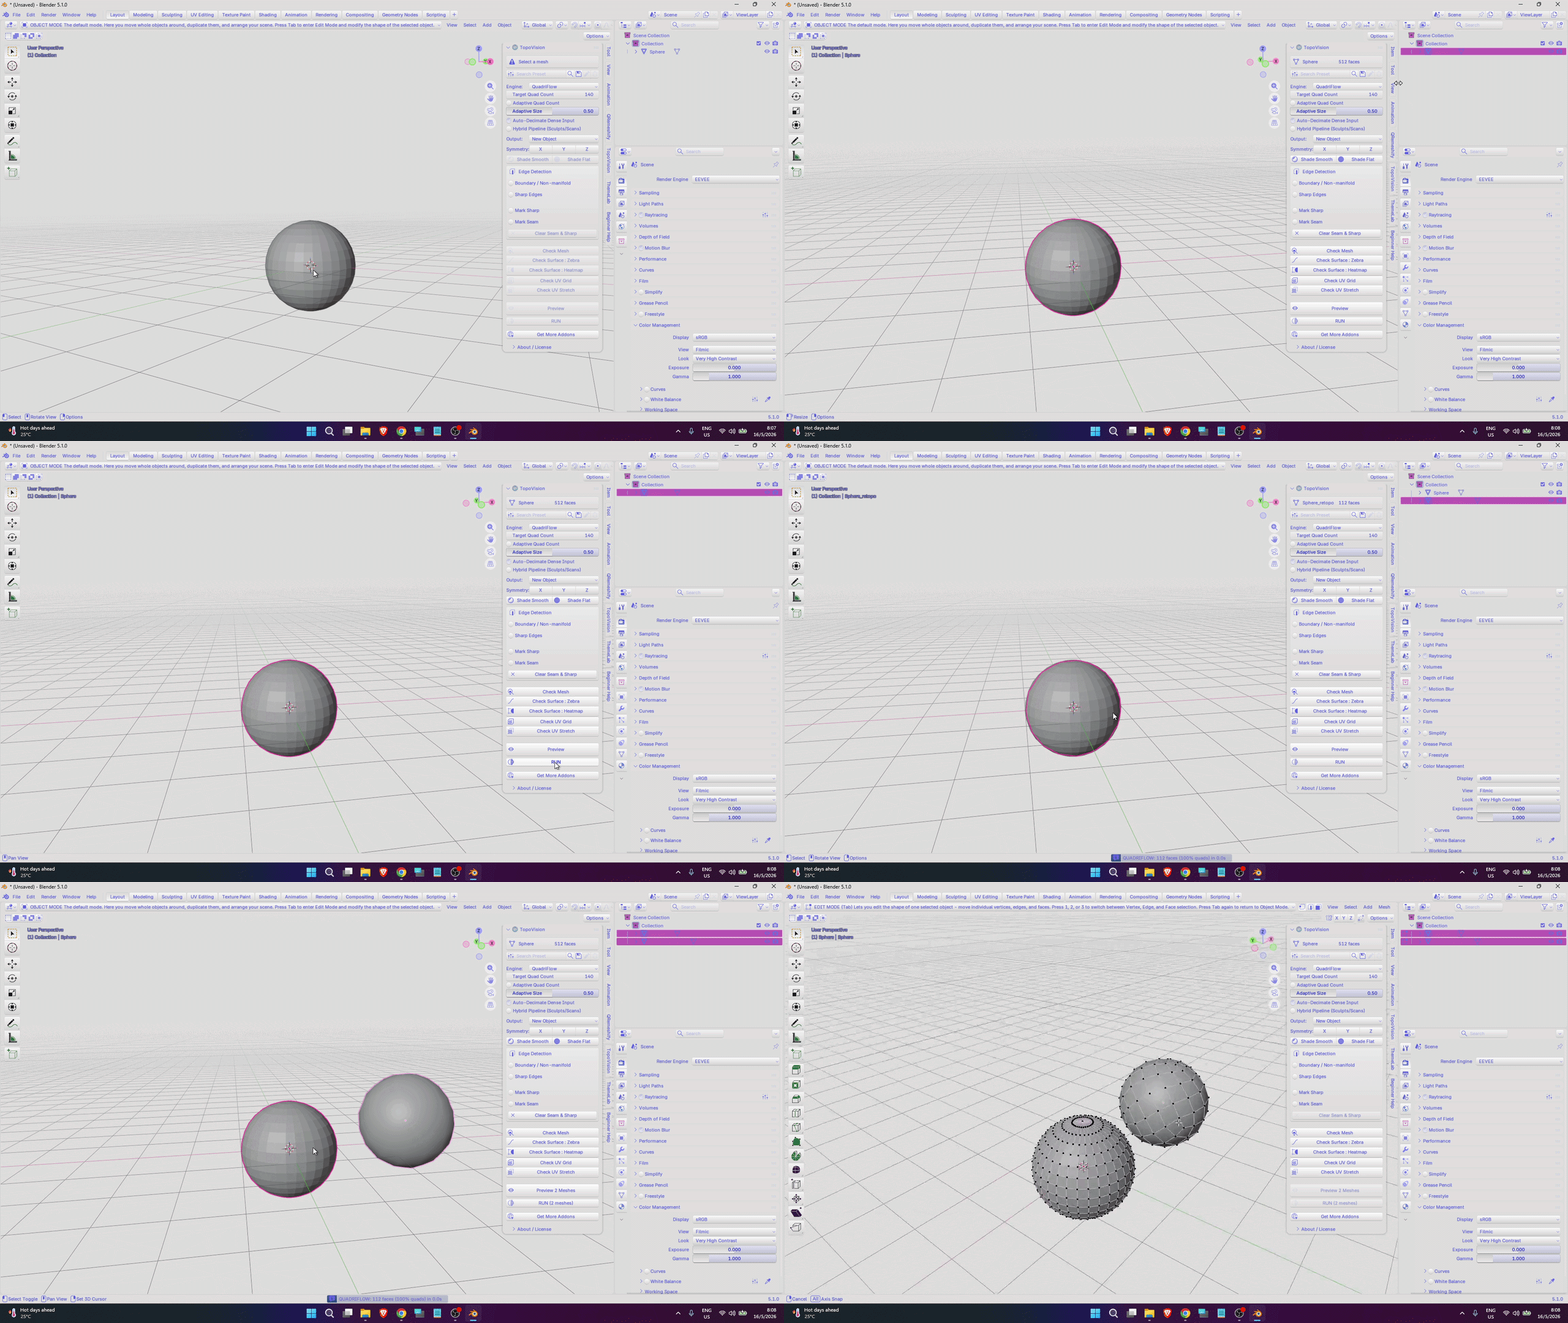
Simply click the RUN button — and your mesh is generated instantly.
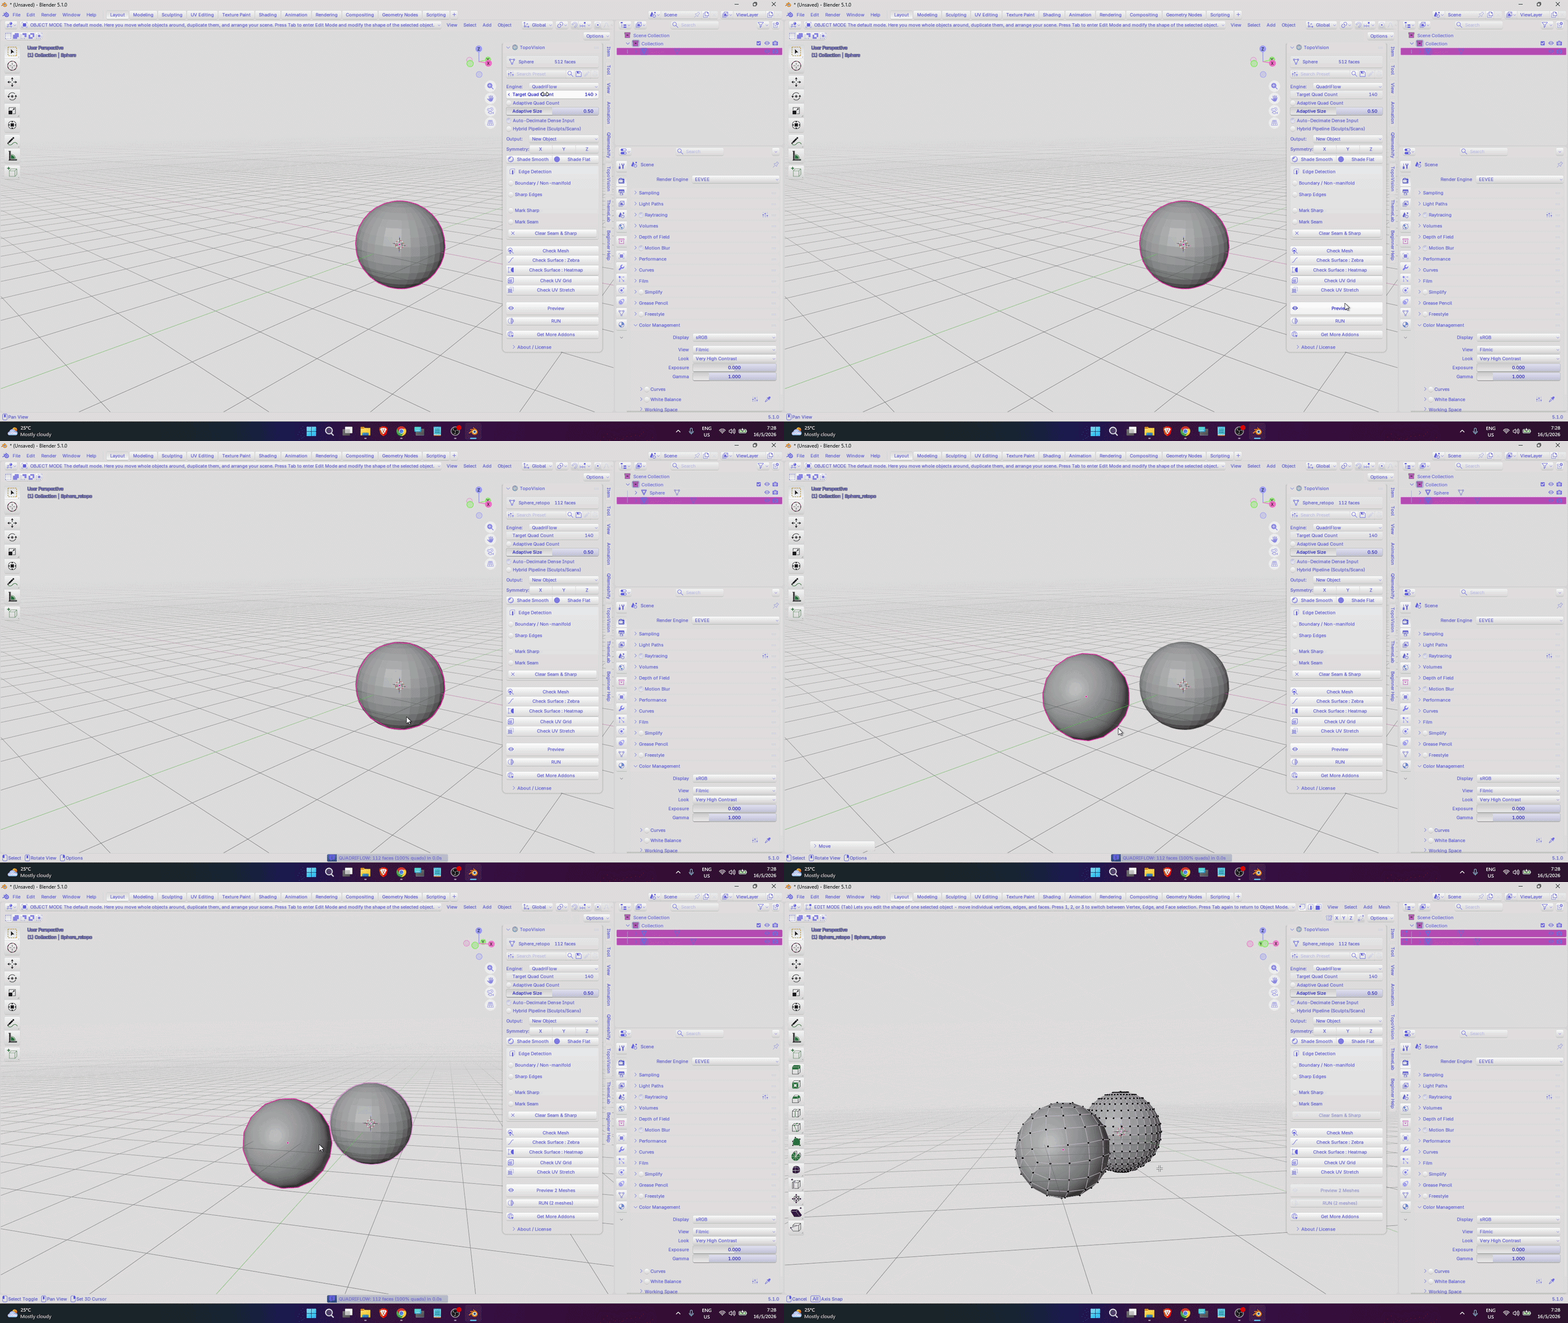
==============================================================
Well, that’s cool — can I know more about this addon?
ENGINE MODE
This addon also comes with a different engine — its own custom engine — while still keeping Blender’s default tools, but with the symmetry system modified and improved for better control and stability ( Except Voxel Engine ).
You can test what this engine addon can deliver and compare it with the Blender basic tools. I don’t want to claim that the results are better, but I can guarantee they are on par with Blender’s default tools — just simplified and enhanced with a built-in symmetry mode for more control.
That means you can experiment yourself, find the settings that work best for your needs, and see the results instantly through the live preview system this addon provides.
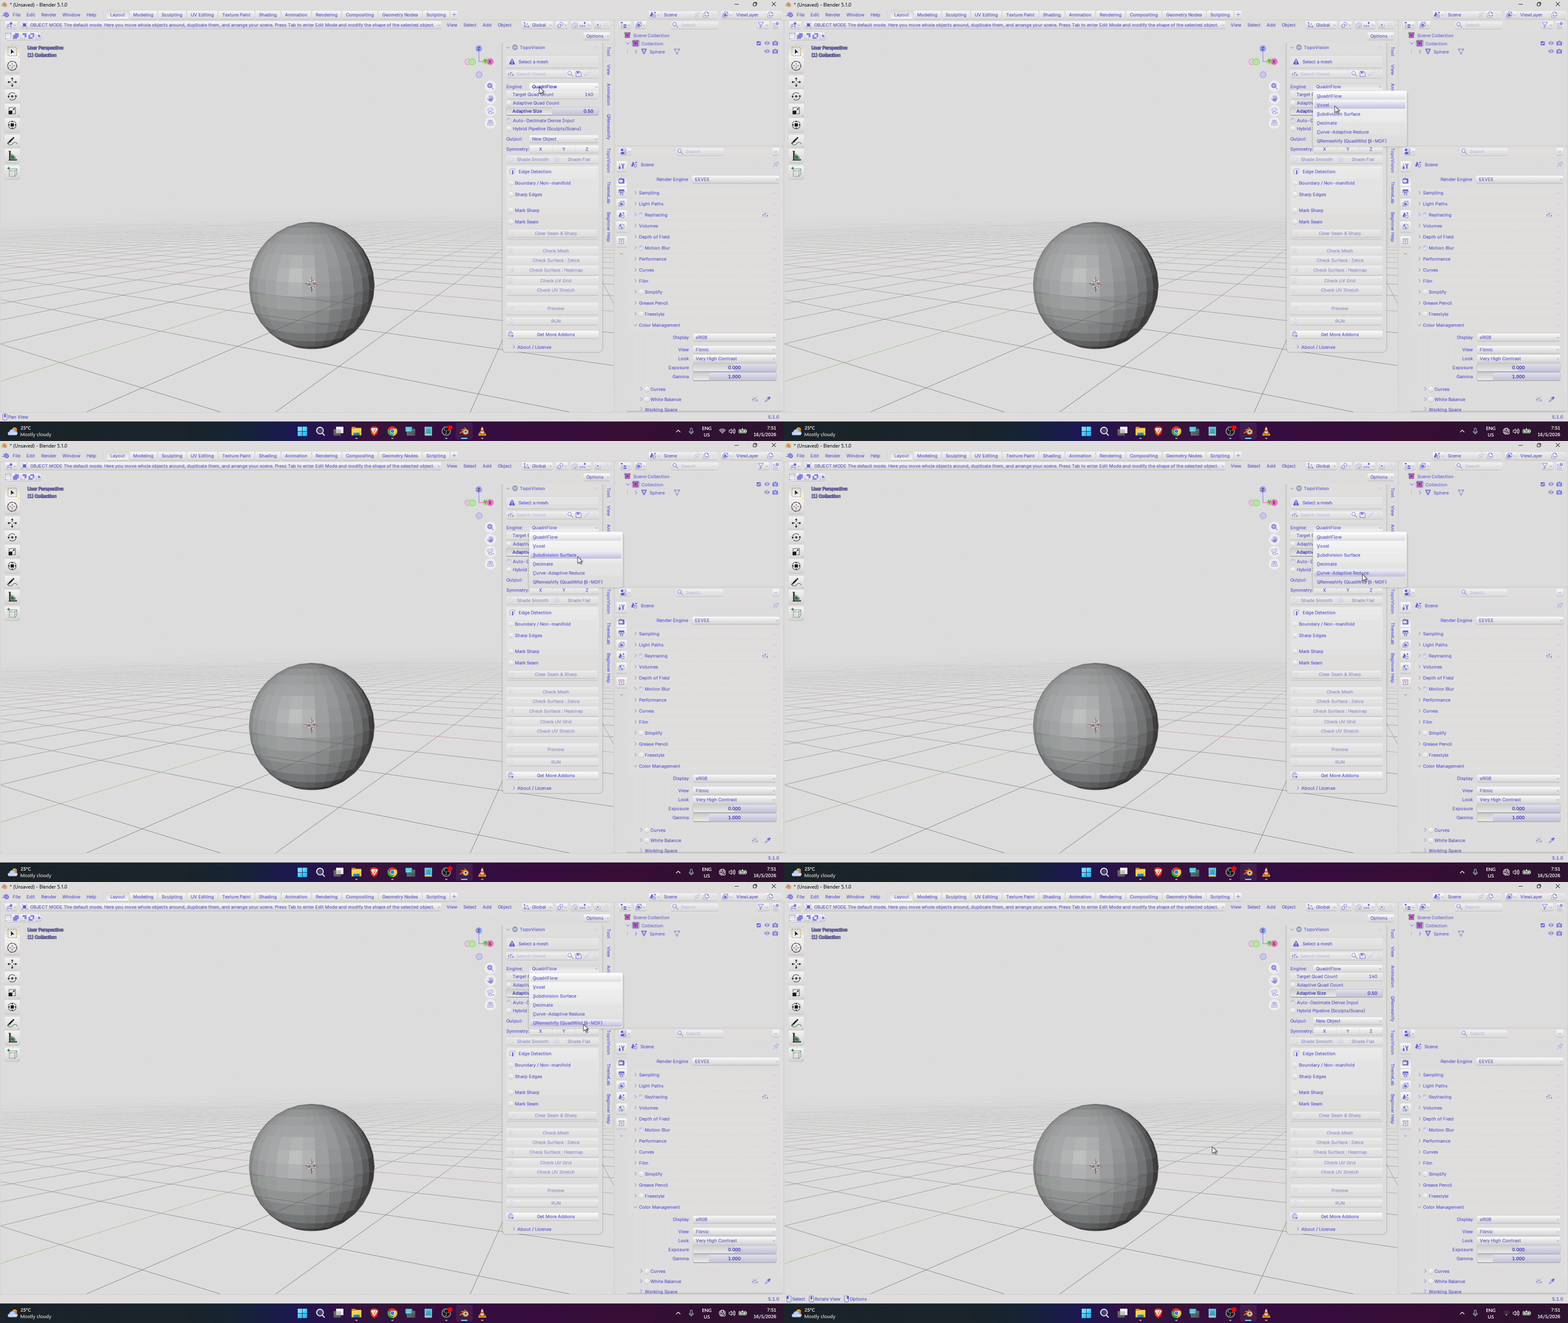
ENGINE for better results is currently available only through QRemeshify by Ksami. To use it, you need to install the addon first. Just install the addon — no additional setup or configuration is required. You can get it from this Link.
After installation, you can start using it immediately without any warnings. For the installation process, you just need to install it like any other Blender addon. After that, the engine called QRemeshify will appear as the TopoVision Engine.
I also want to note that I’m not claiming this addon is better. Before deciding to buy, you can check the full details on the product page, including the rating section. What you see there is exactly what you will get.
Please also be aware that some lag may occur when using this engine. You can try the addon first, then compare it with the engine mode in my addon to see which one works best for your workflow.
But the clear difference is that with my addon, you can adjust the settings and immediately see the effect in real time through live mode.
I’ve already optimized it as much as possible, but since it uses a separate engine, there are still some limitations in how much I can adjust the settings.
------------------
Will I add another engine (another automatic topology addon) in the future? Sure — why not?
If many clients request it and the developer agrees, I’m open to integrating it. I’d be happy to make it happen if it improves the workflow and adds value for my users.
But with the usage cost and development time involved, I would need to charge for this kind of improvement to keep it sustainable.
=============================================
NORMAL MODE AND PREVIEW MODE
This addon gives you the flexibility to either use Preview Mode or simply run Automatic Topology directly.
If you already know the settings you want, there’s no need to preview the result every time — just click Run, and you’re done.
This feature was added to give users a faster workflow and avoid being limited to Preview Mode only. Once you already know the perfect settings, there’s no reason to wait for a preview again, right?
=============================================
MULTI-MESH TOPOLOGY SUPPORT
There’s also another common situation: users often need to retopologize more than one mesh at the same time. From my experience, most automatic retopology tools do not provide the flexibility to process multiple meshes with a single click.
But TopoVision can do it.
Select multiple meshes and use Preview Mode to visualize the topology result before applying it, or click RUN instantly if your settings are already finalized. Each selected object generates its own unique topology result.
However, due to current Blender limitations — which I already tried to work around — live updating for multiple meshes is not fully supported. Because of that, when working with more than one mesh, you need to click Update Mesh to refresh and view the latest result. This is different from single-mesh topology, where the preview updates live automatically.
Maybe in the future, Blender developers will improve this system to allow full live updates for multiple meshes at once.
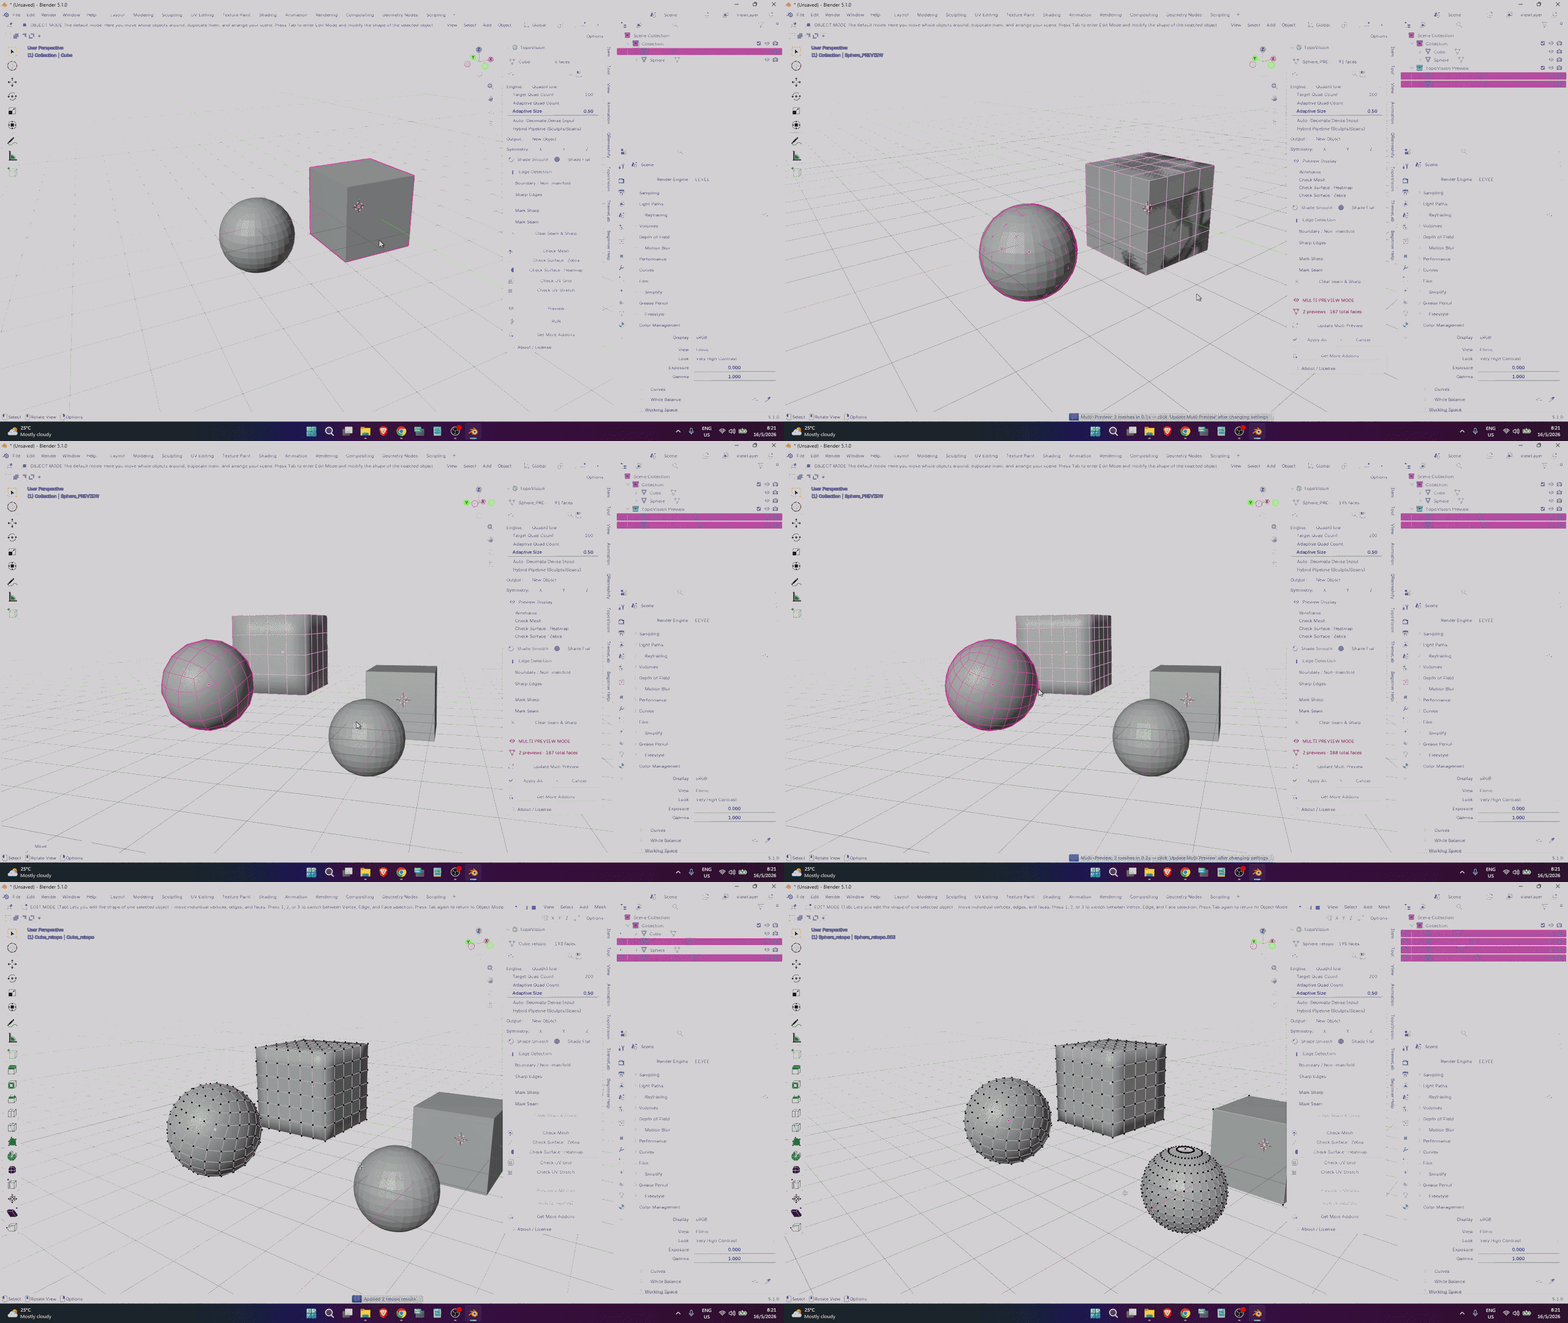
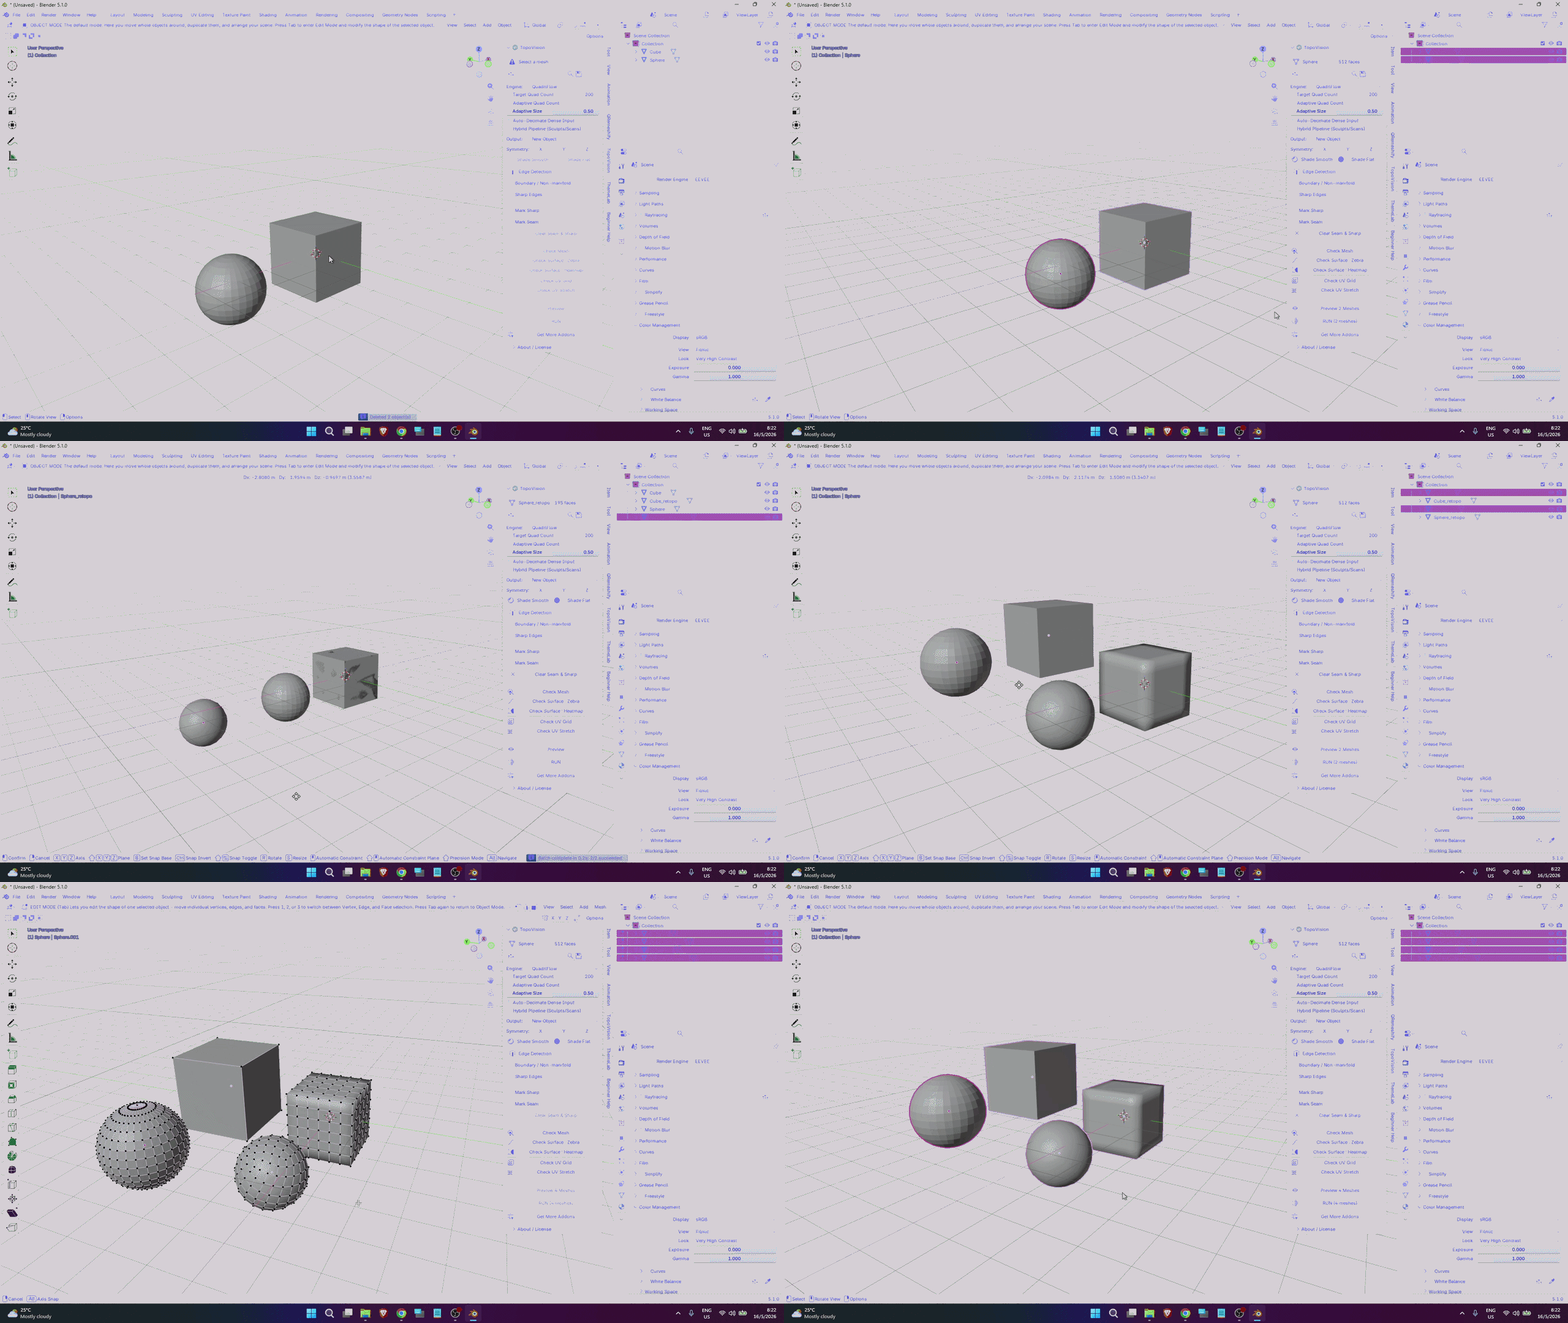
Even so, after comparing both workflows, I still personally prefer Preview Mode, even if it requires clicking Update Mesh, because it gives better visual control before generating the final topology.
=============================================
SMART EDGE ANGLE DETECTION
When working with edge angles during auto retopology, many artists don’t always know the exact angle values needed for their mesh. As 3D artists, we want to focus on creating — not spending time learning complex mathematical values just to determine the correct edge angles for our mesh.
TopoVision provides the solution. With Preview Mode, you can easily adjust edge angle values and instantly visualize the results directly on your mesh in real time.
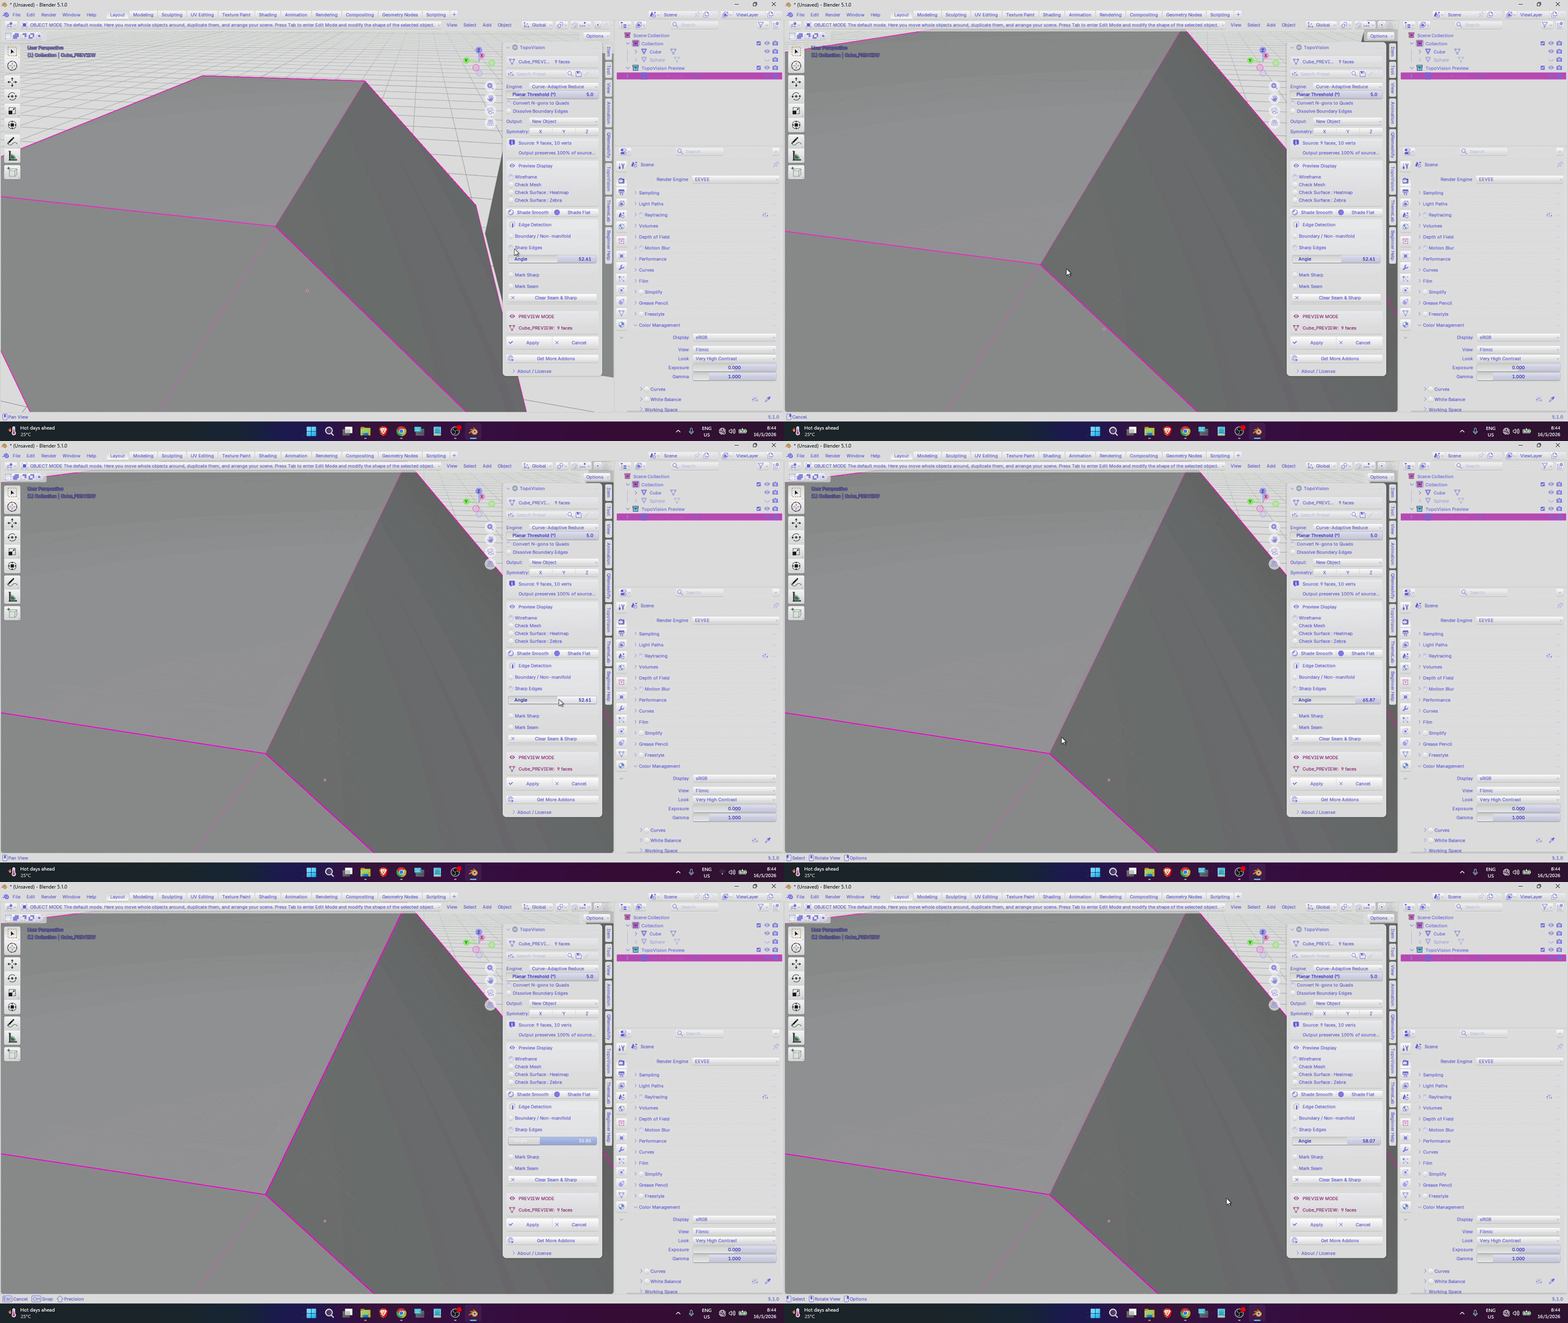
TopoVision provides the solution. With Preview Mode, you can easily adjust edge angle values and instantly visualize the results directly on your mesh in real time.
=============================================
PRESETS SAVE AND LOAD
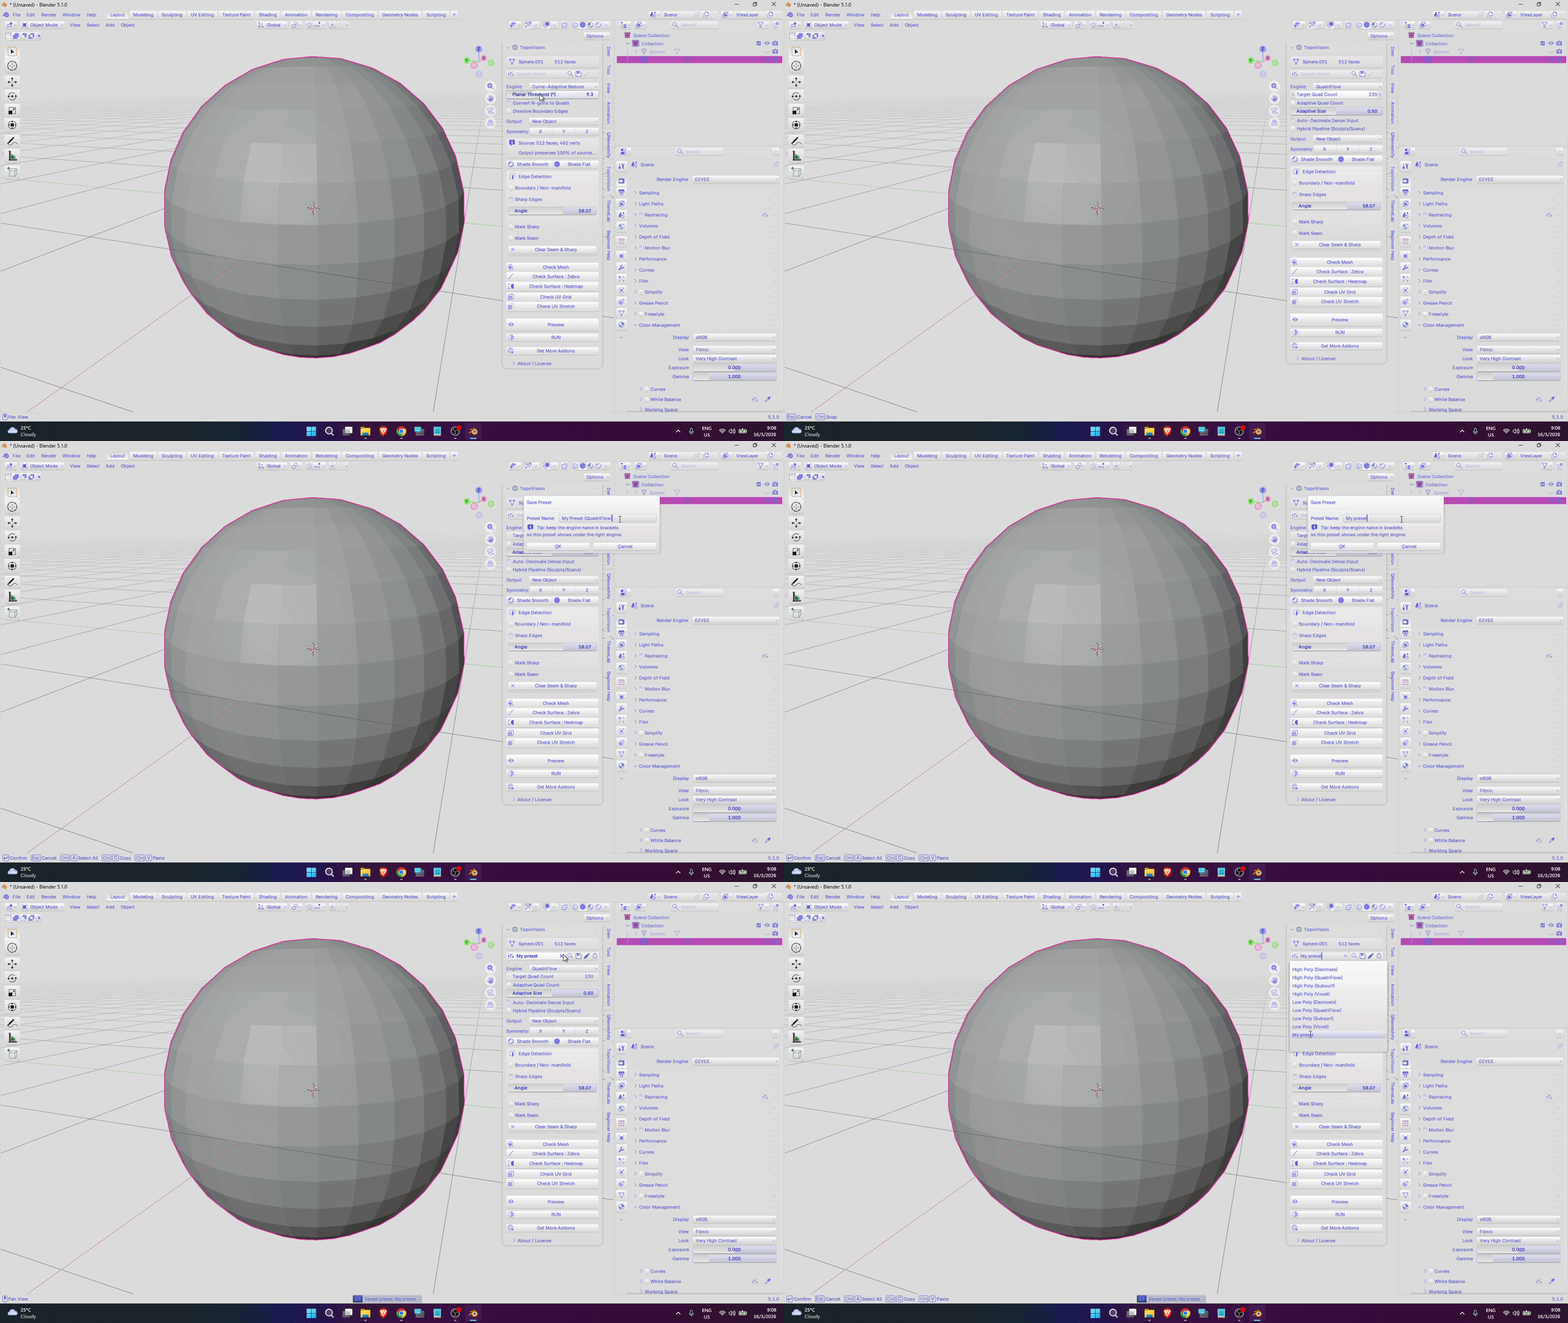
When you finally tune the best settings, I understand how frustrating it can be to start over again and try to recreate them.
To make this easier, I created a preset system where you can save your settings and reuse them anytime you want.
This way, you don’t need to keep re-adjusting values every time — just load your preset and continue working instantly.
=============================================
SYMMETRY CONTROL
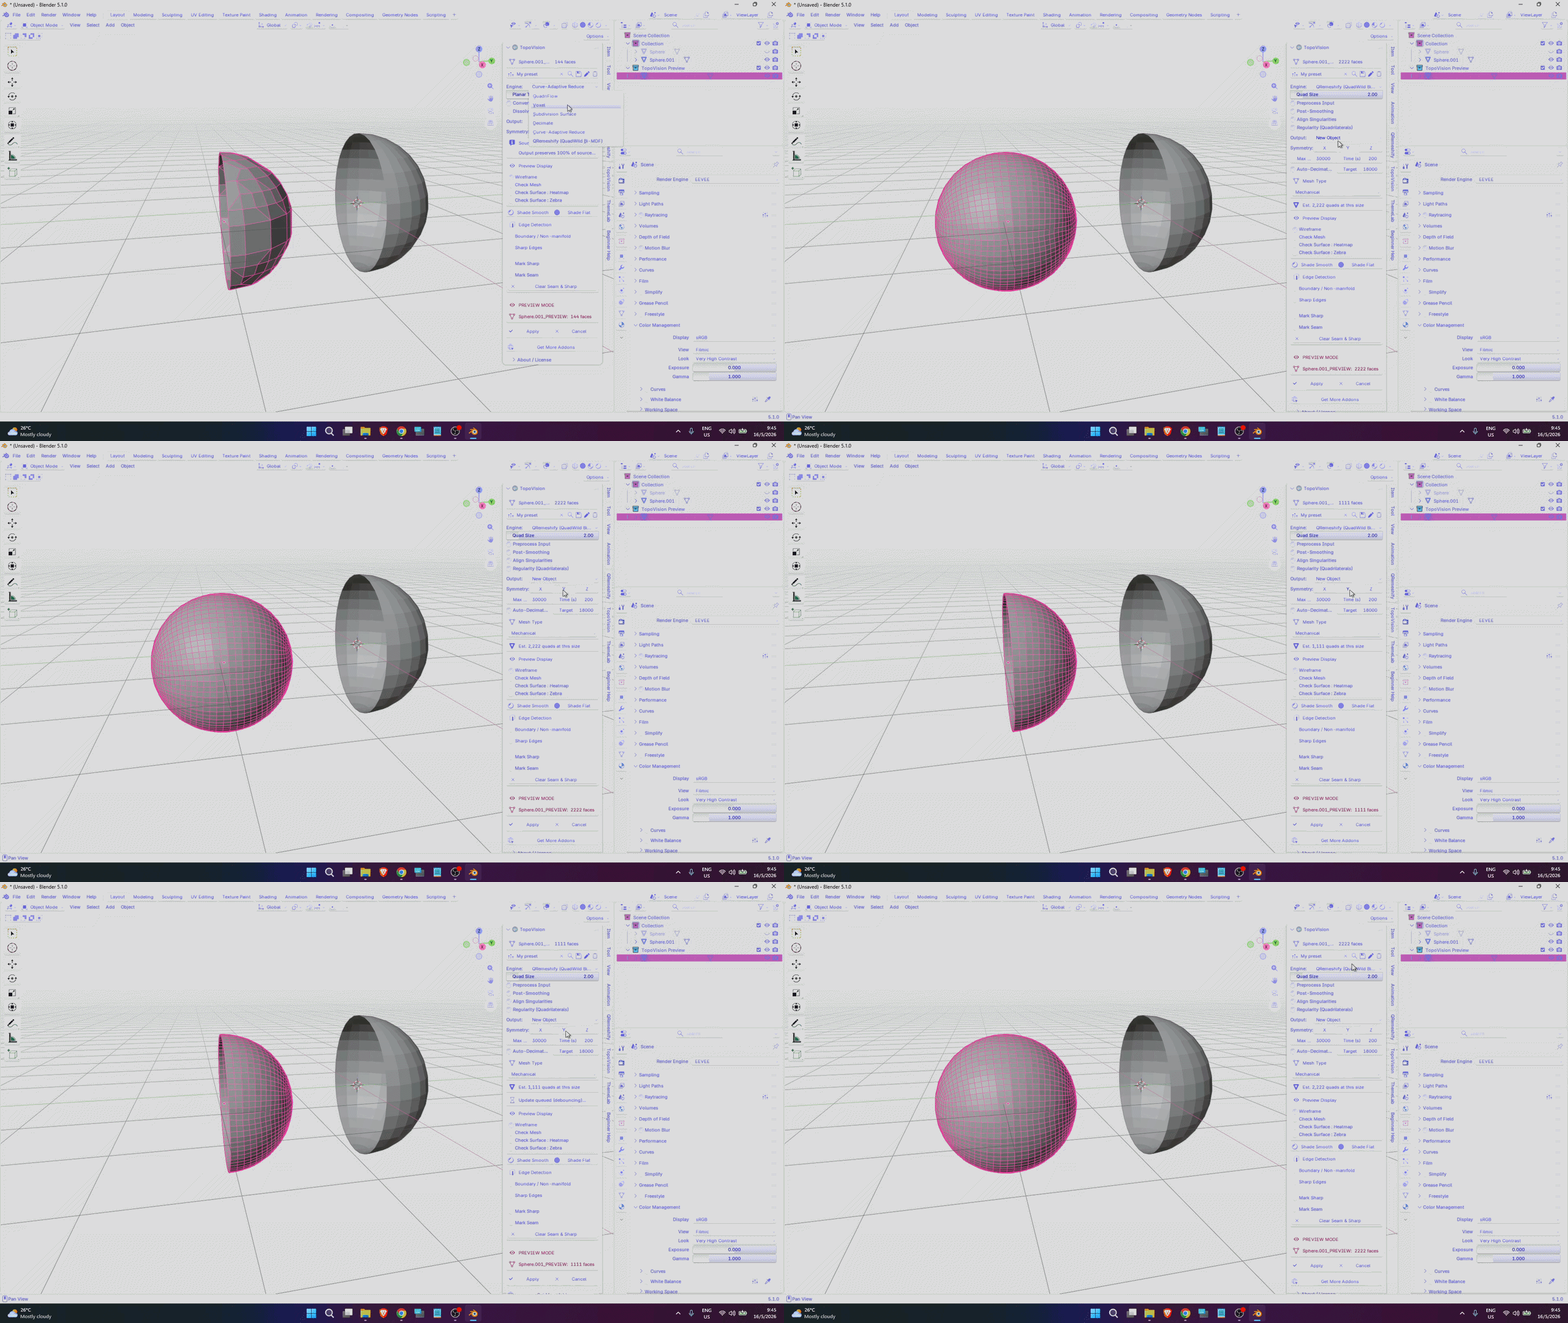
Symmetry is available across all tested engines and works reliably.
However, the VOXEL engine is not included, as it does not produce consistent results, and integrating symmetry with it is not a suitable option.
I understand — this is one of the ways to make the workflow faster, which is exactly why I implemented it.
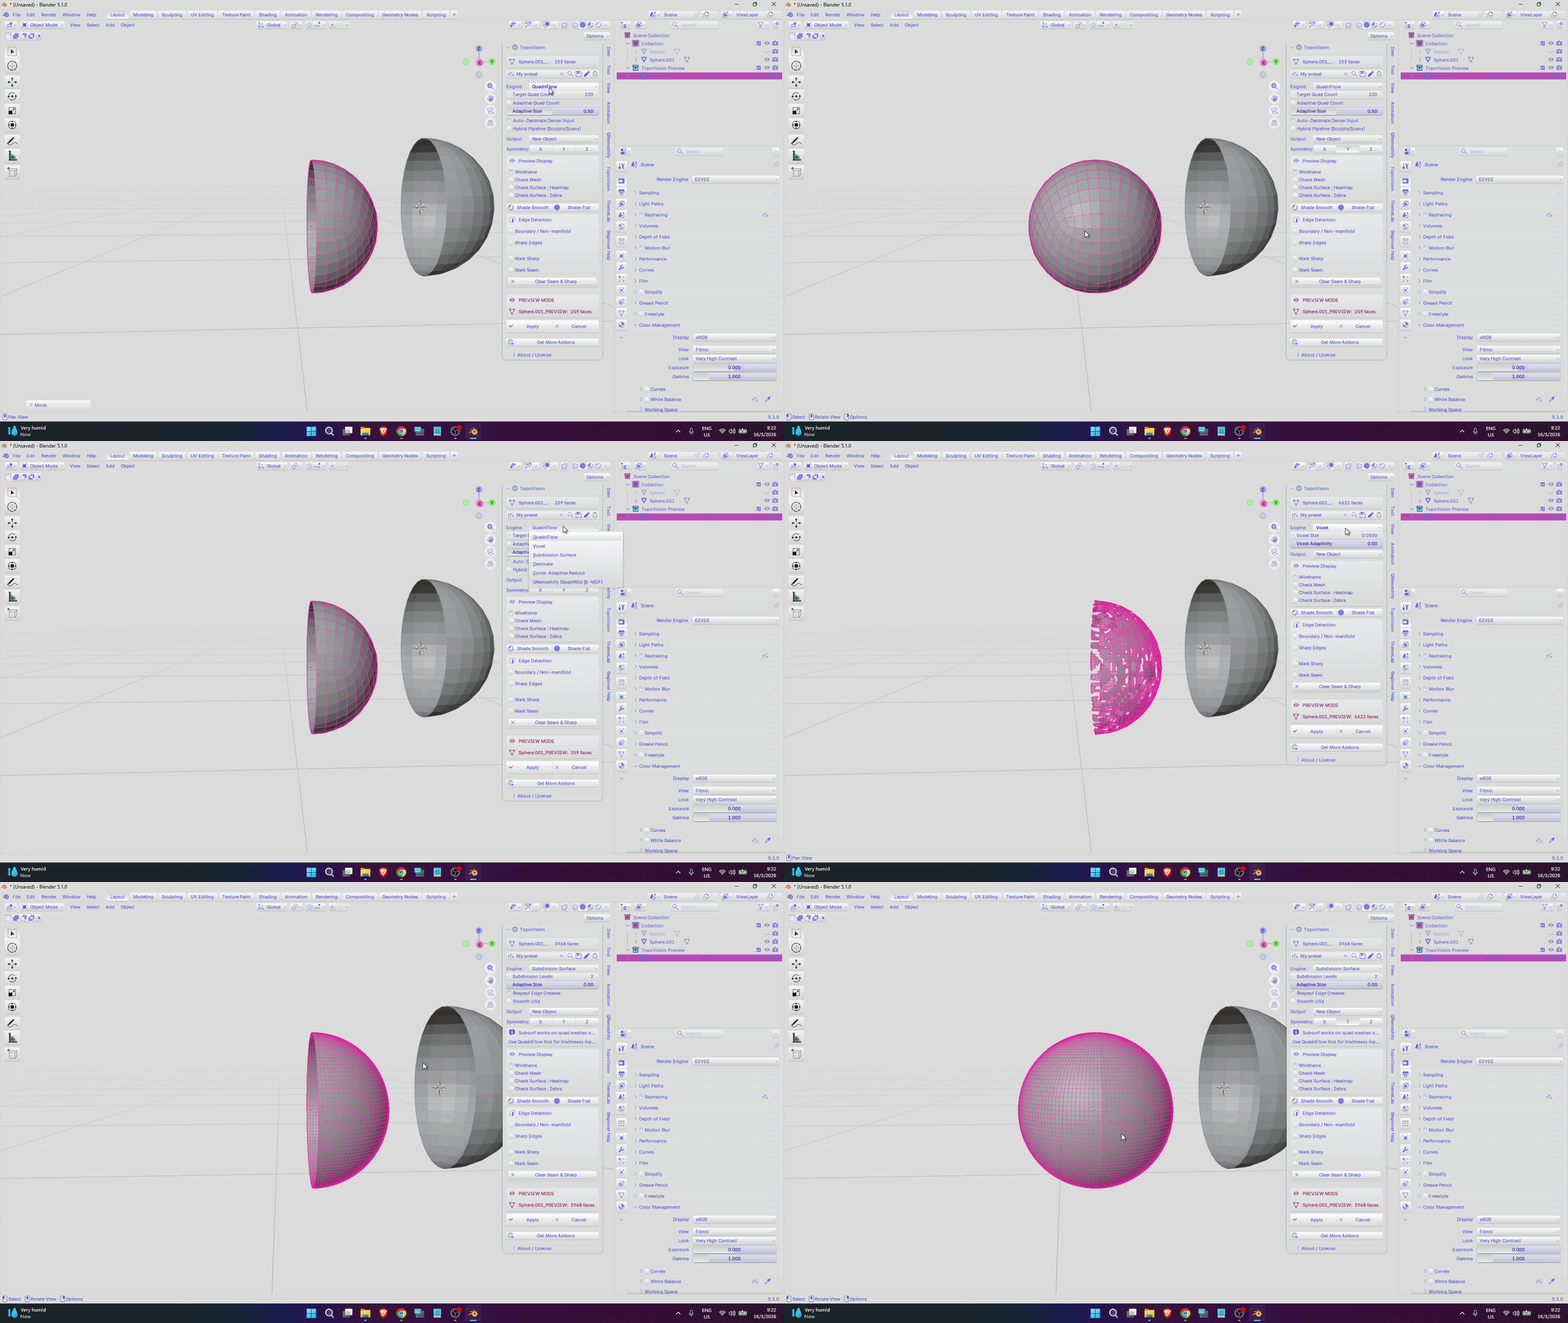
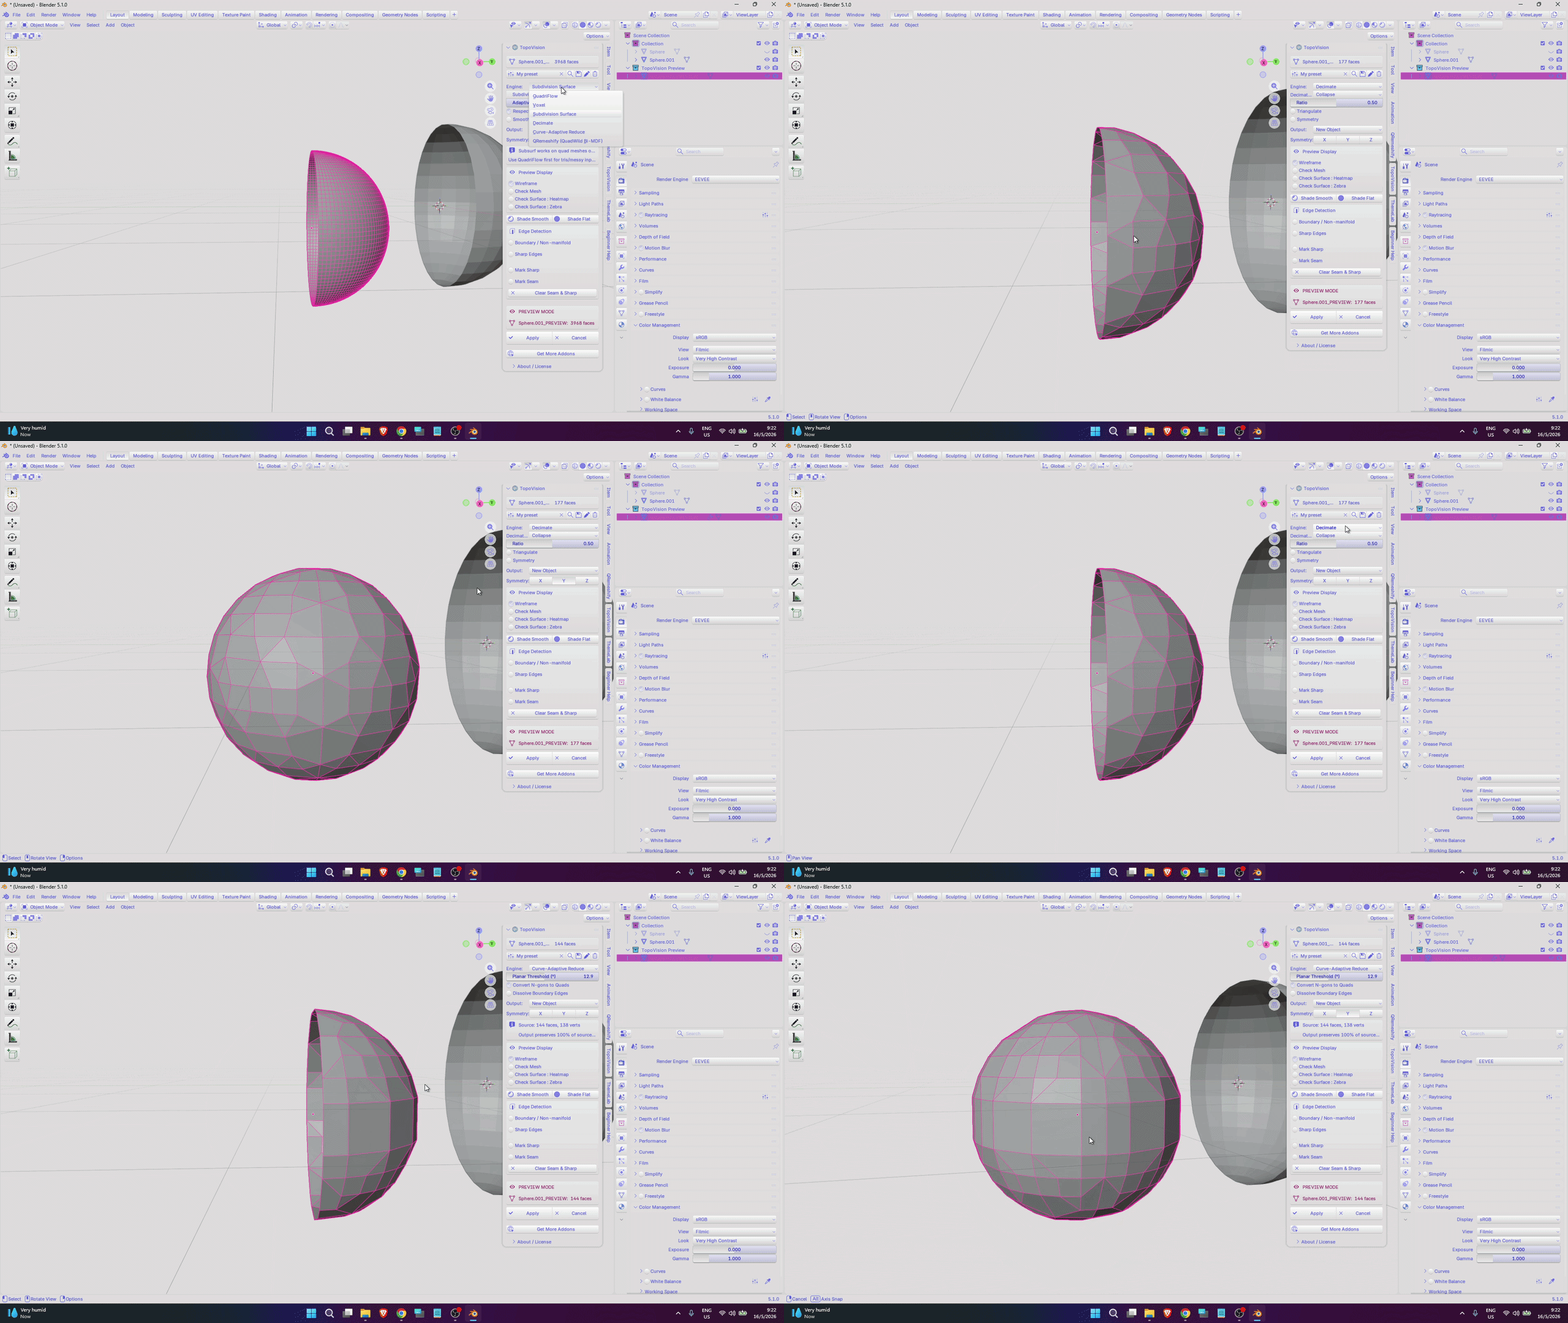
For QRemeshify, it uses its own built-in symmetry system, Works Seamlessly with TopoVision. Please note: Temporary lag may occur while using the QRemeshify Engine as it processes and analyzes the mesh to generate accurate topology results. This is expected behavior during processing.
=============================================
CHECK MESH MODE
- PREVIEW MODE CHECK
To make sure you can achieve your desired result, I provide tools that help you get more control over the outcome and improve your workflow.
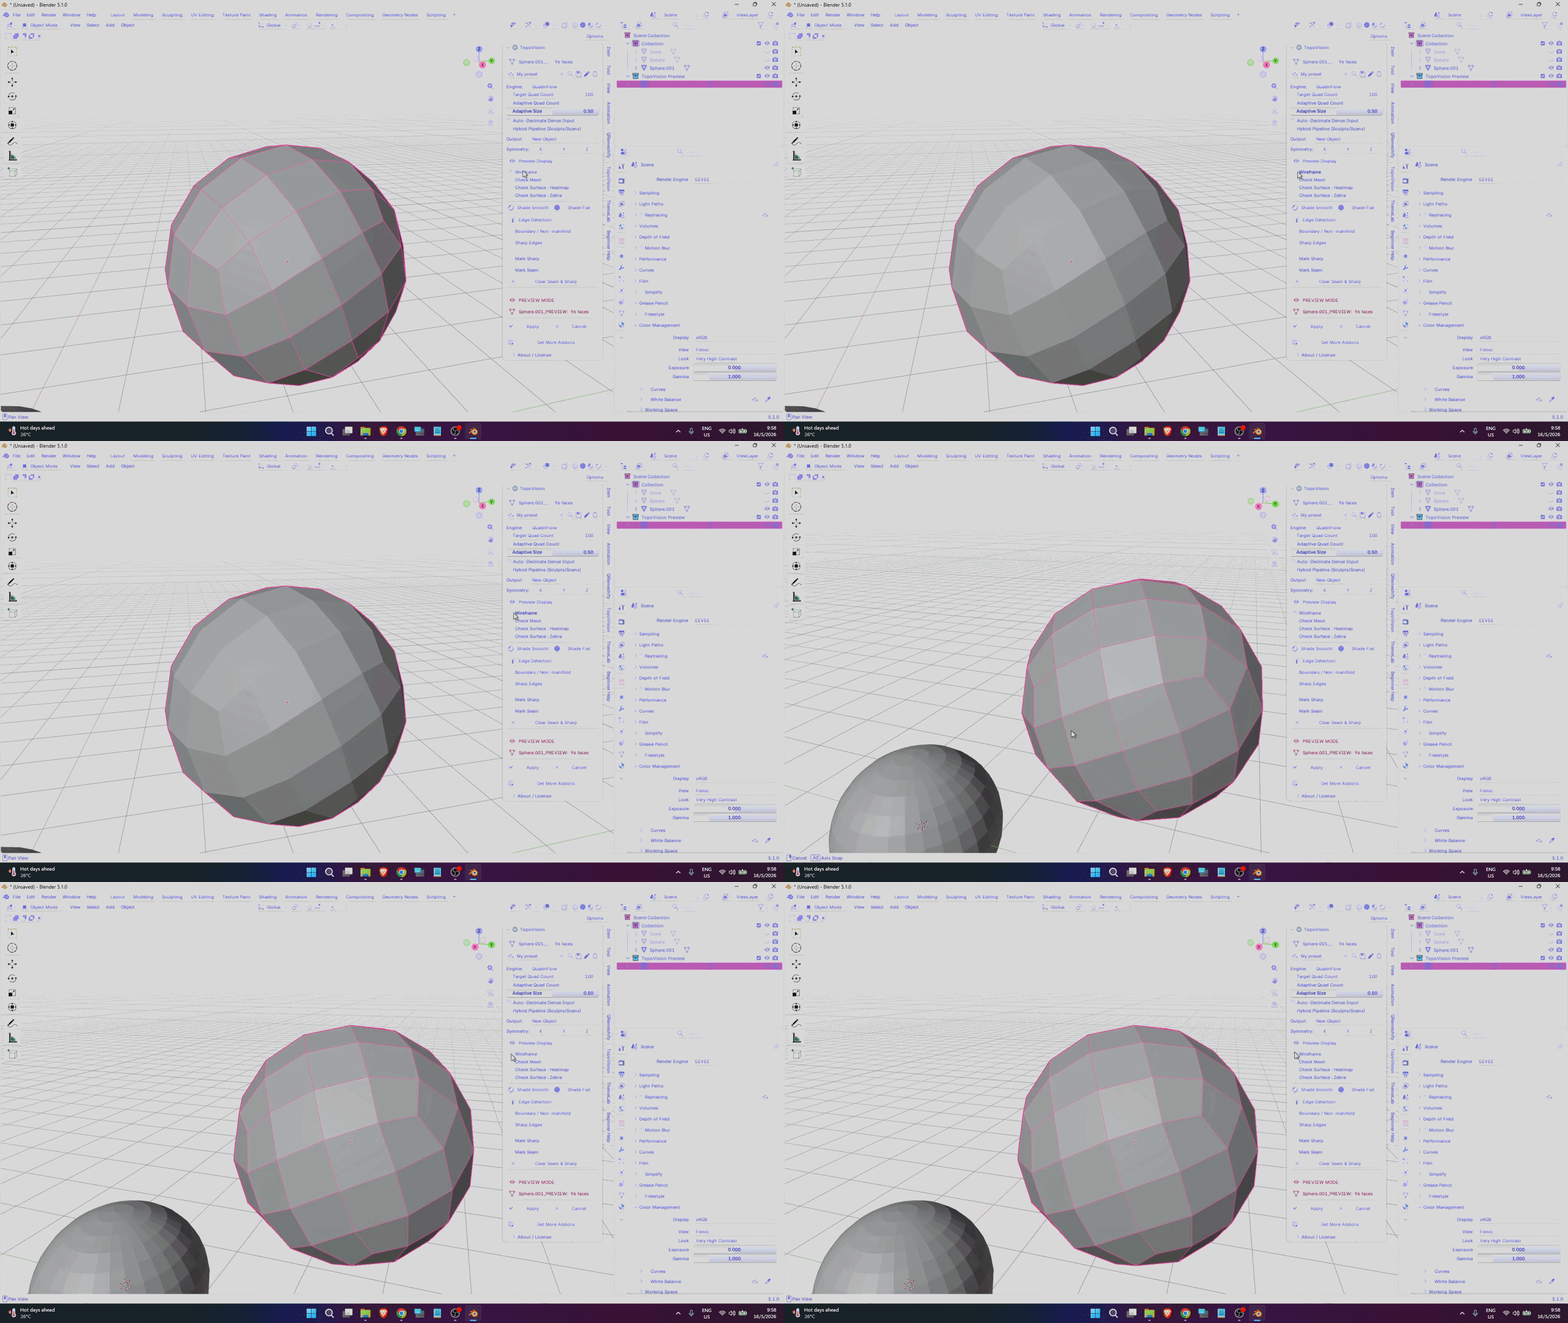
With Wireframe mode enabled, you can clearly see your topology preview without needing to go into settings provided by Blender’s default tools.
Want to check topology issues in live preview? I also provide a tool for that. Just enable Check Topology, and you will see the topology condition highlighted with color indicators.
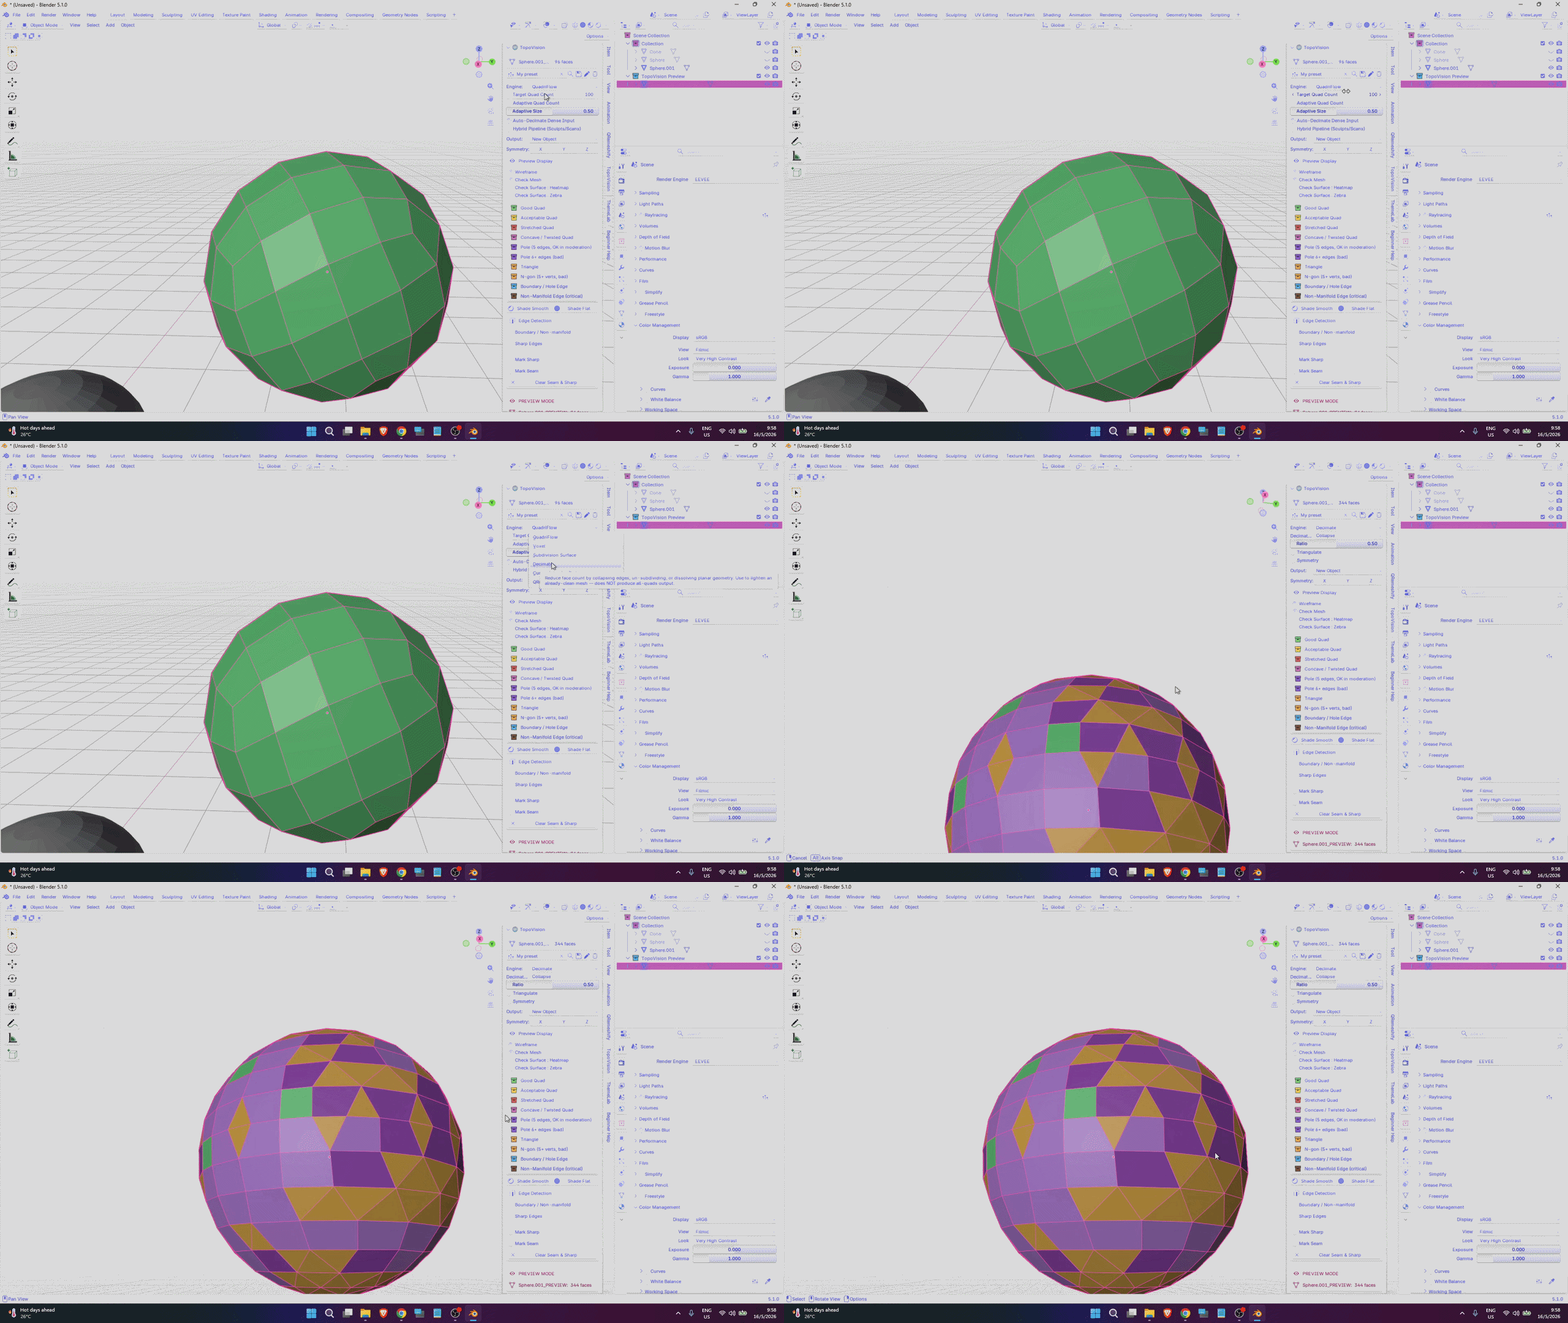
To provide a clearer visual representation, this image demonstrates how the result looks.
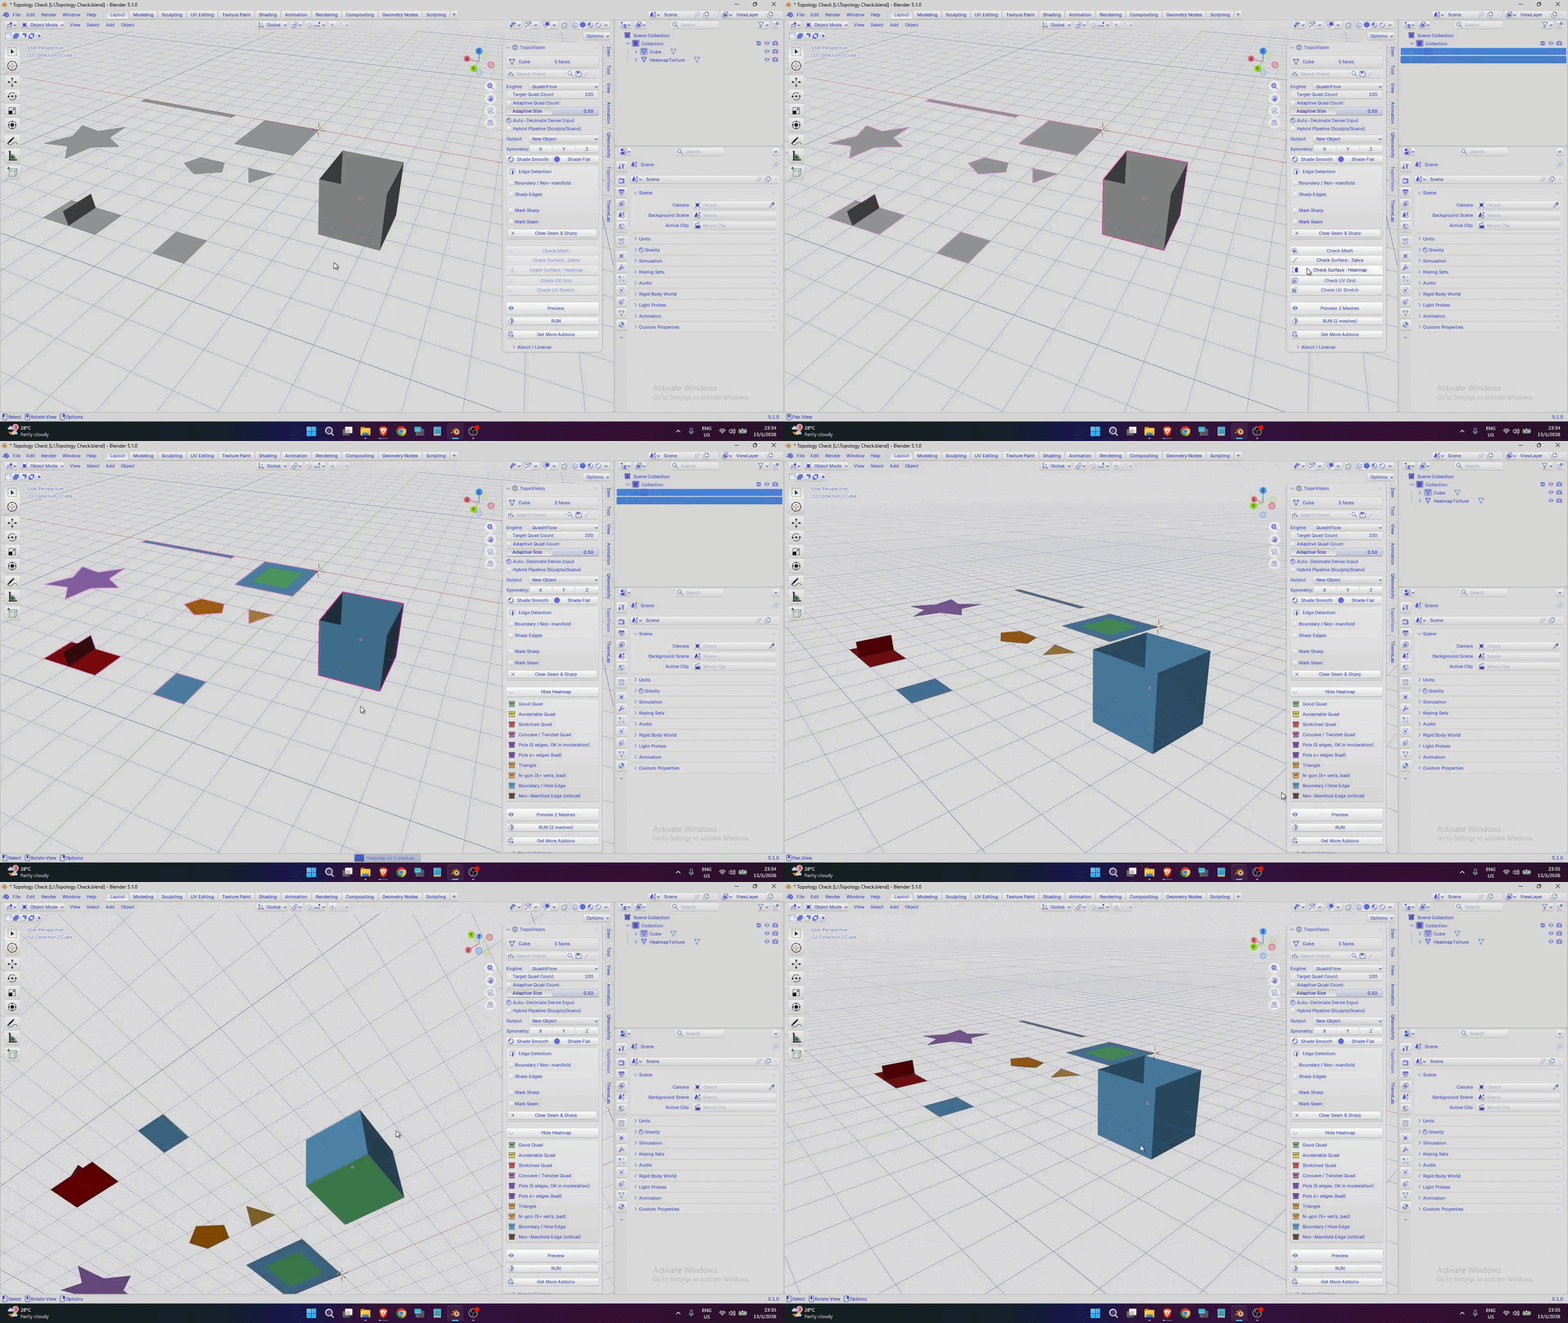
Want to check the mesh surface? I also provide a tool for that. You can choose to inspect it using Zebra or a Heat Map view. This lets you clearly see how the surface behaves and understand its quality in detail.
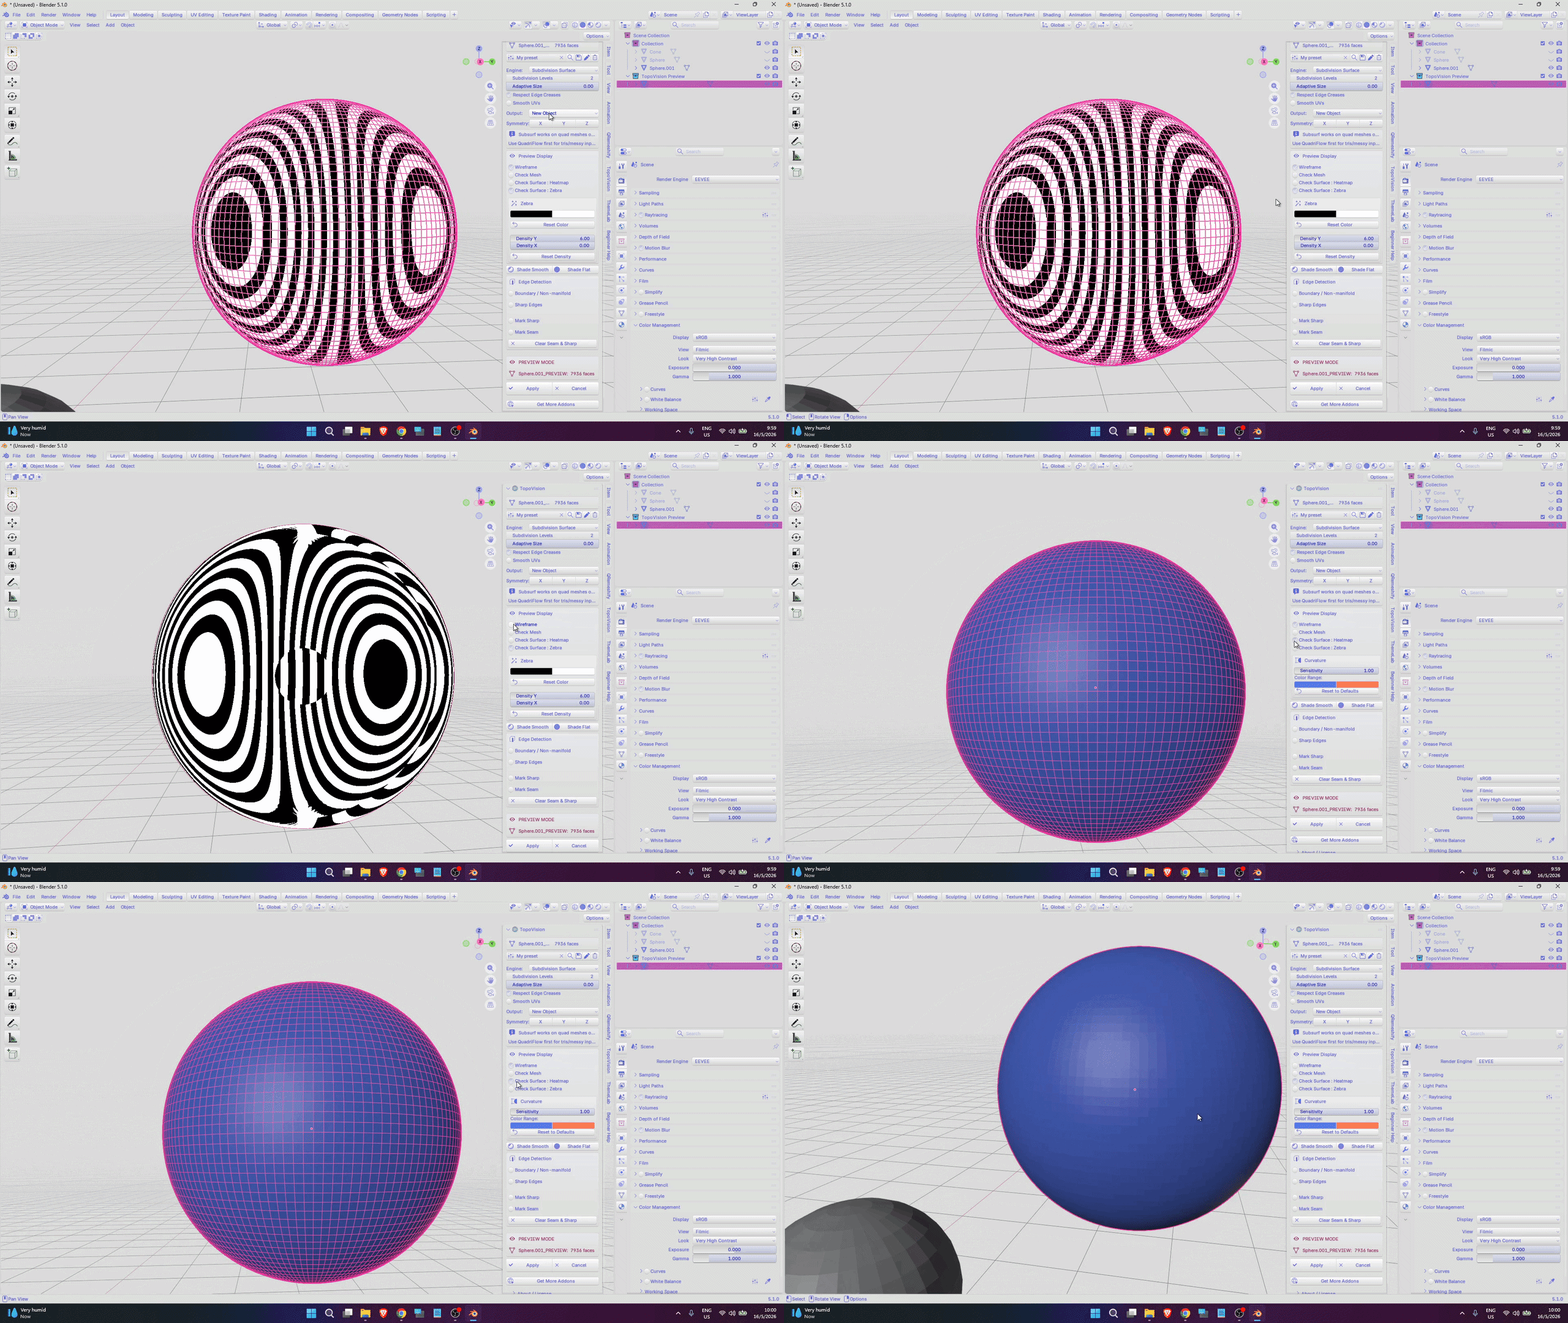
Please note: the mesh inspection tools will automatically switch off when you enable another check mode. Only Wireframe mode remains visible and must be turned off manually if you want to disable it. High-detail models may also cause temporary lag depending on your laptop or PC performance.
- NORMAL MODE CHECK
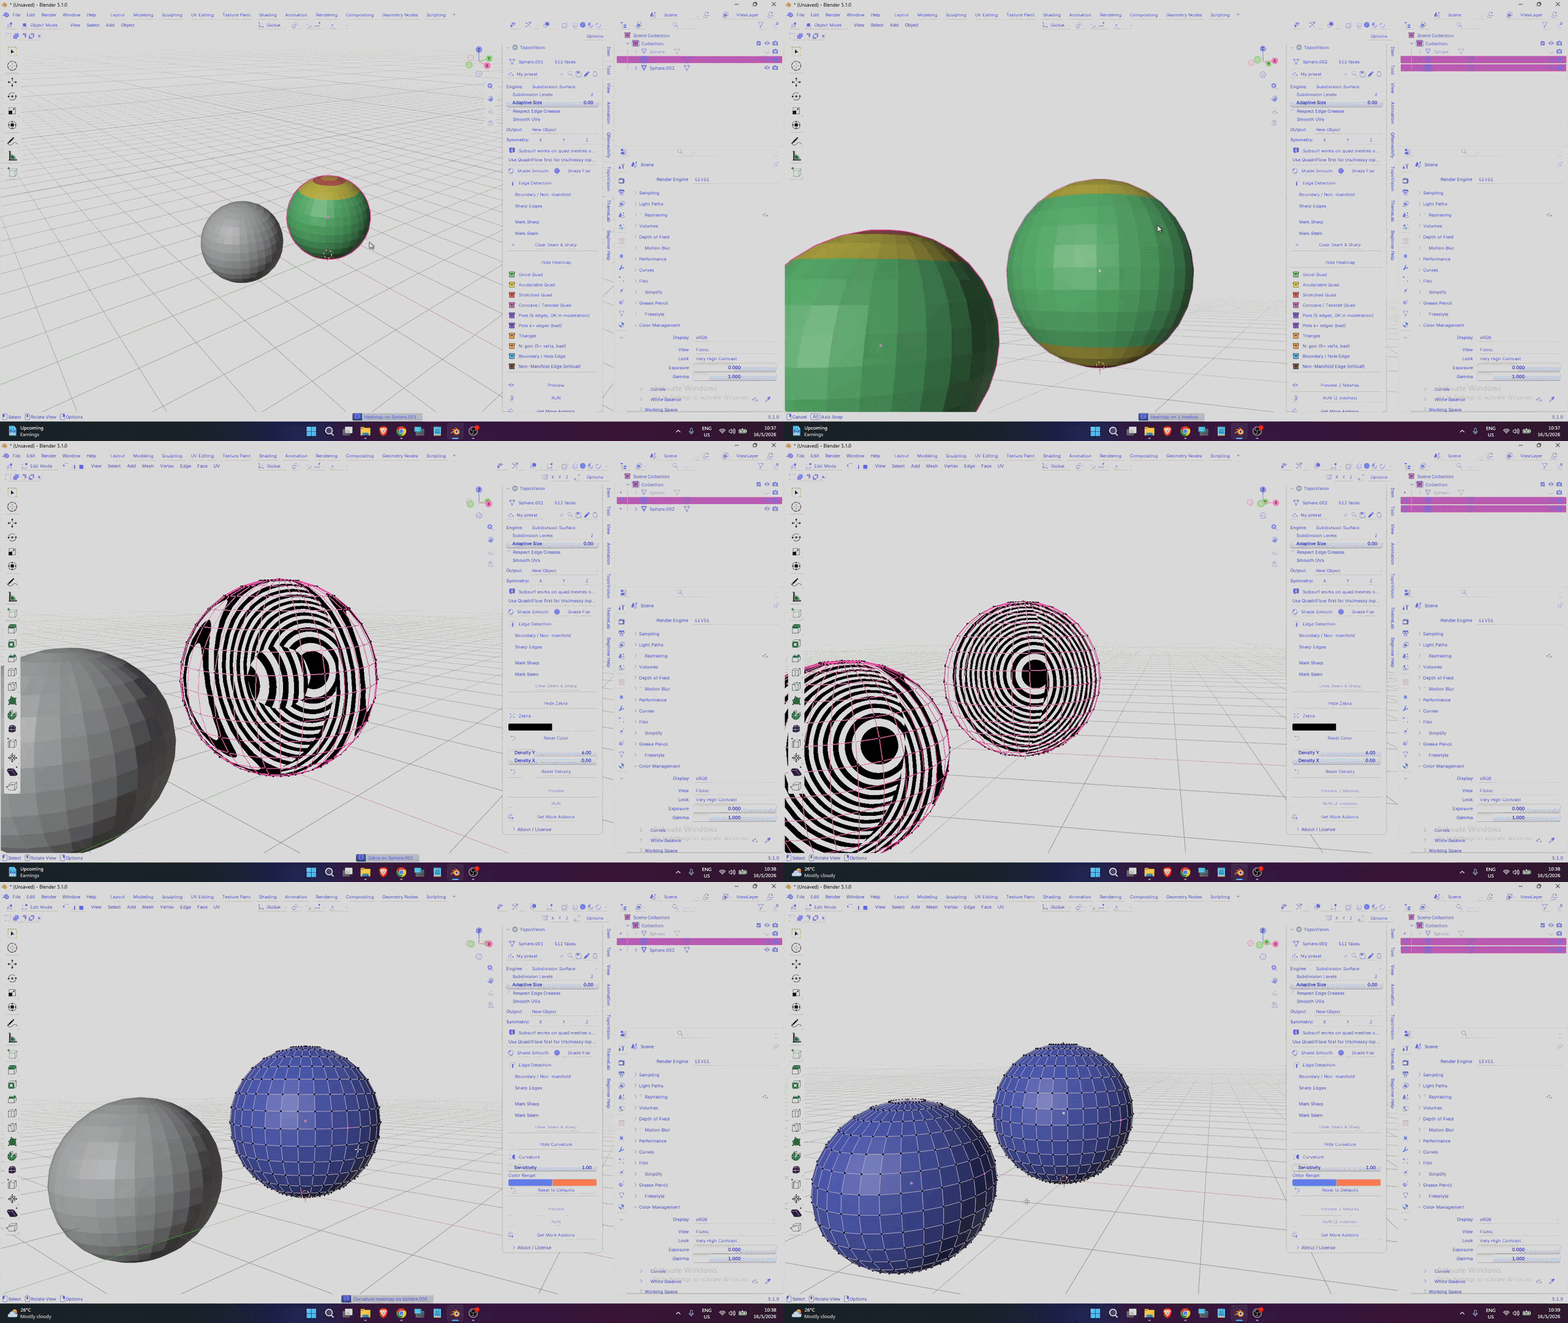
To make your workflow easier, this tool is also available in normal mode. You can compare both your retopology mesh and the original mesh directly.
The best part is that it also works in Edit Mode, Allowing you to adjust your mesh while instantly visualizing any topology issues in real time. Not only that, you can also select multiple meshes and enter this mode simultaneously. How cool is that?
For Check Topology and curve-based checking, both use the same function in Preview Mode.
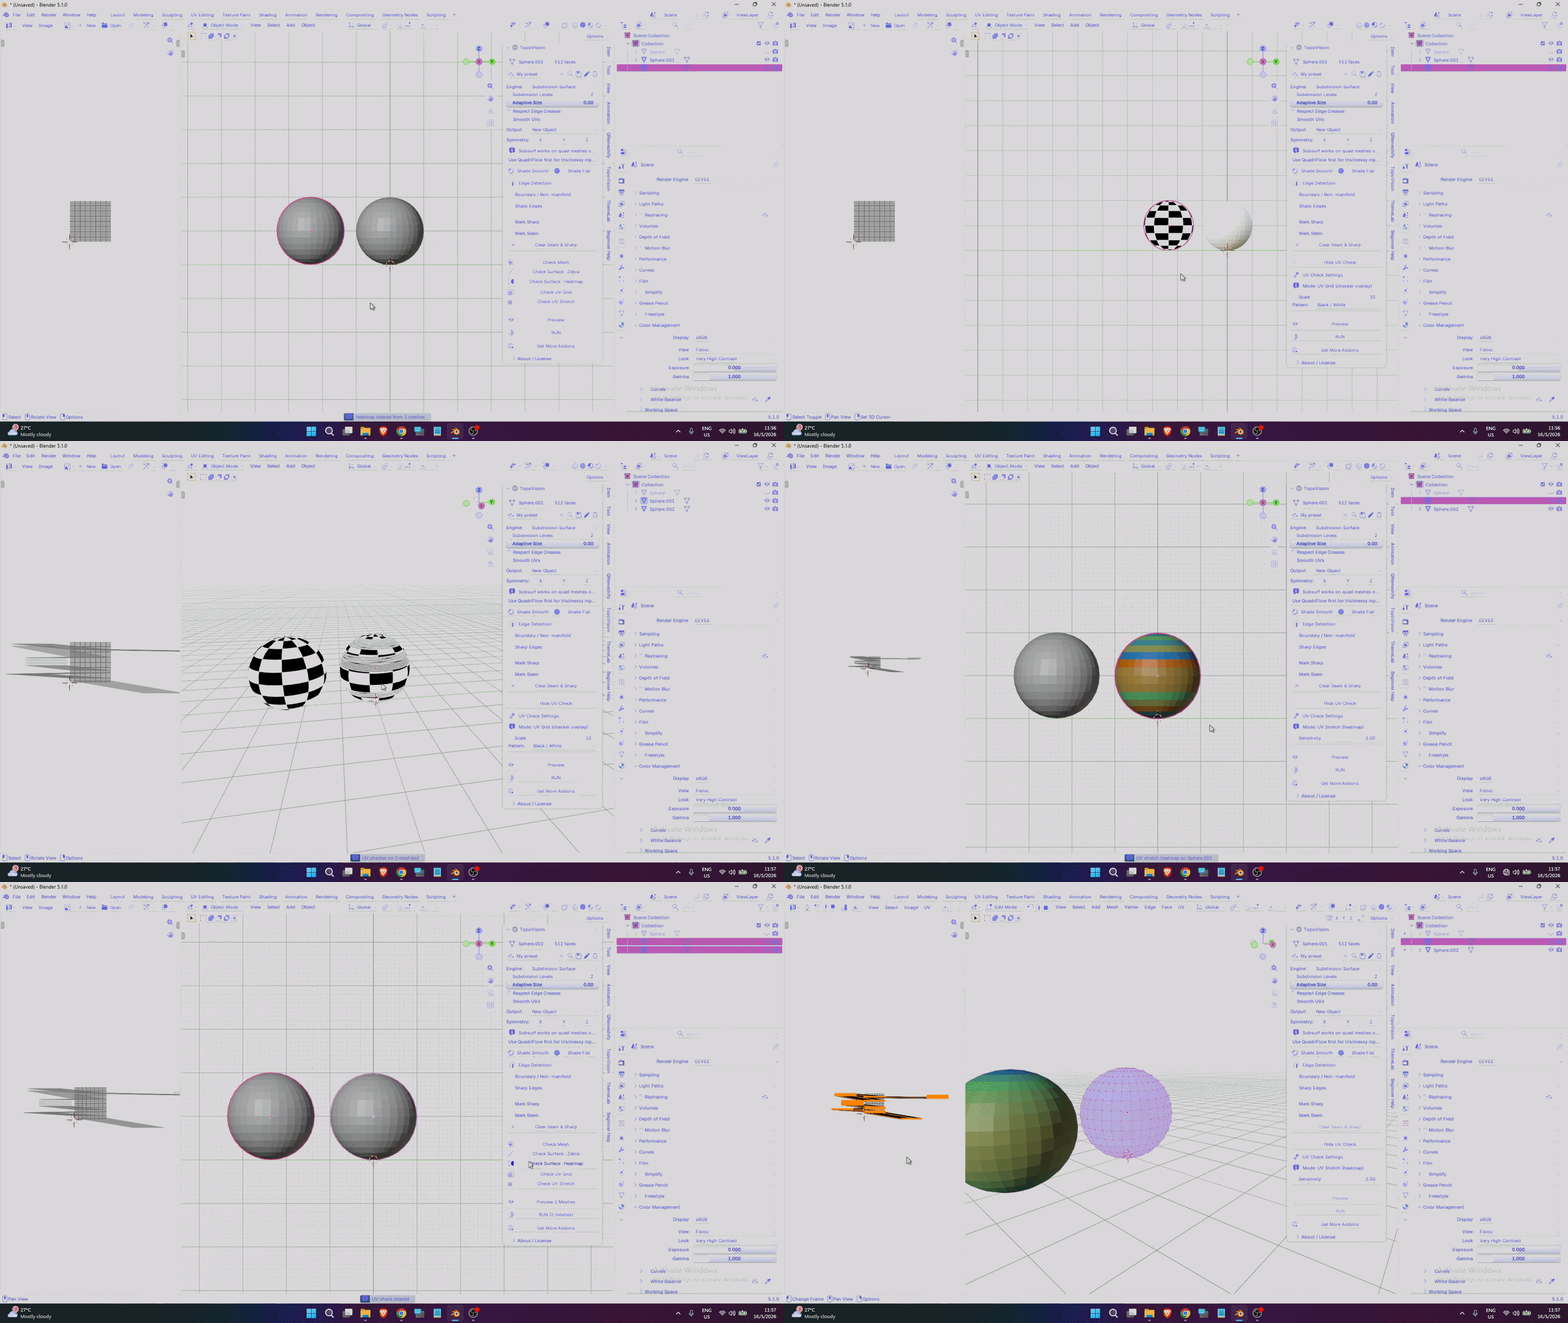
For UV Check, you can inspect the UV condition of your model and clearly see how the UV layout is behaving.
For UV Stretch, you can check how much your UVs are stretched across the model, helping you identify distortion areas in your UV layout.
=============================================
REAL-WORLD TESTING
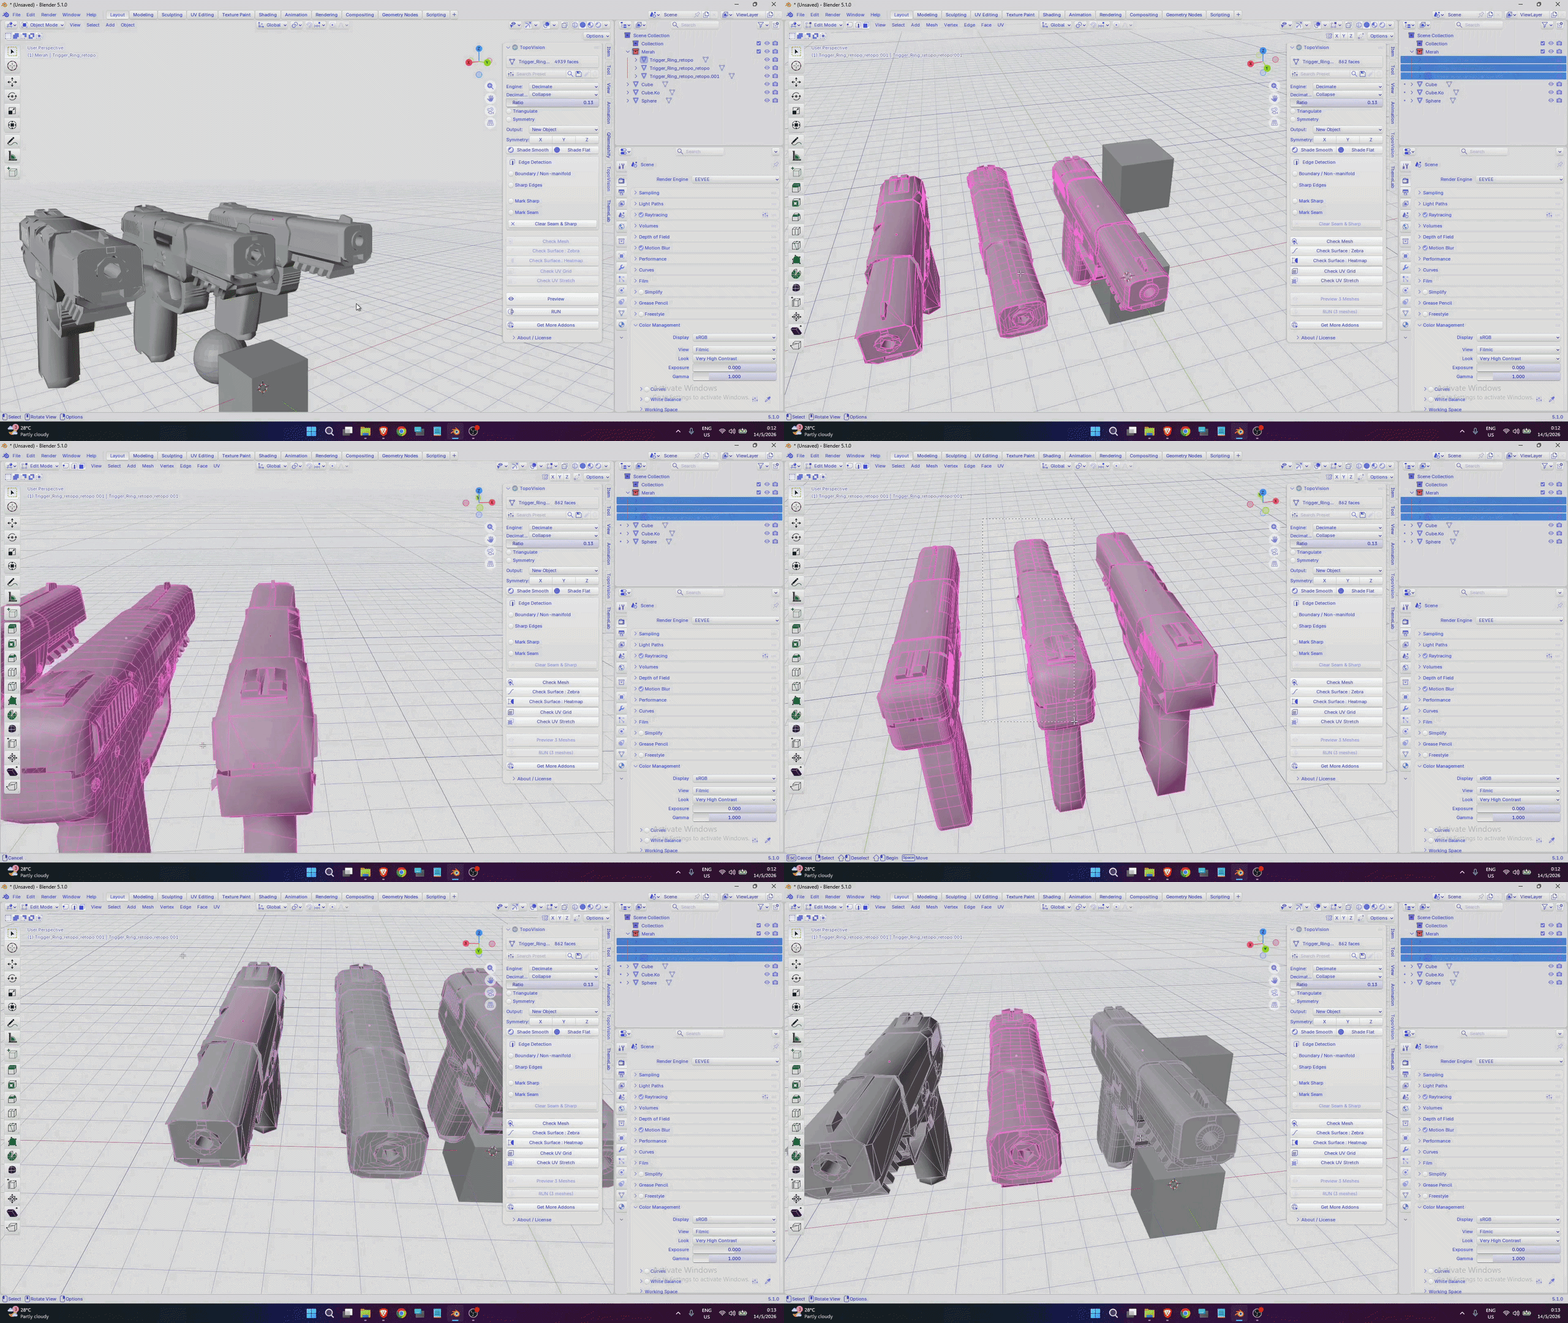
A tool is never truly complete without being tested in real-world scenarios. That’s why this demonstration uses actual production-ready 3D models instead of basic default Blender meshes. To ensure fair testing, both simple and high-poly scanned models are included. Full credit has also been given to the original creators in accordance with the asset license requirements.
This demonstration was performed using an NVIDIA GeForce GTX 1650 graphics card. I have not yet tested the addon on higher-end GPUs, so performance may vary depending on system specifications.
This demonstration was performed using an NVIDIA GeForce GTX 1650 graphics card. I have not yet tested the addon on higher-end GPUs, so performance may vary depending on system specifications.
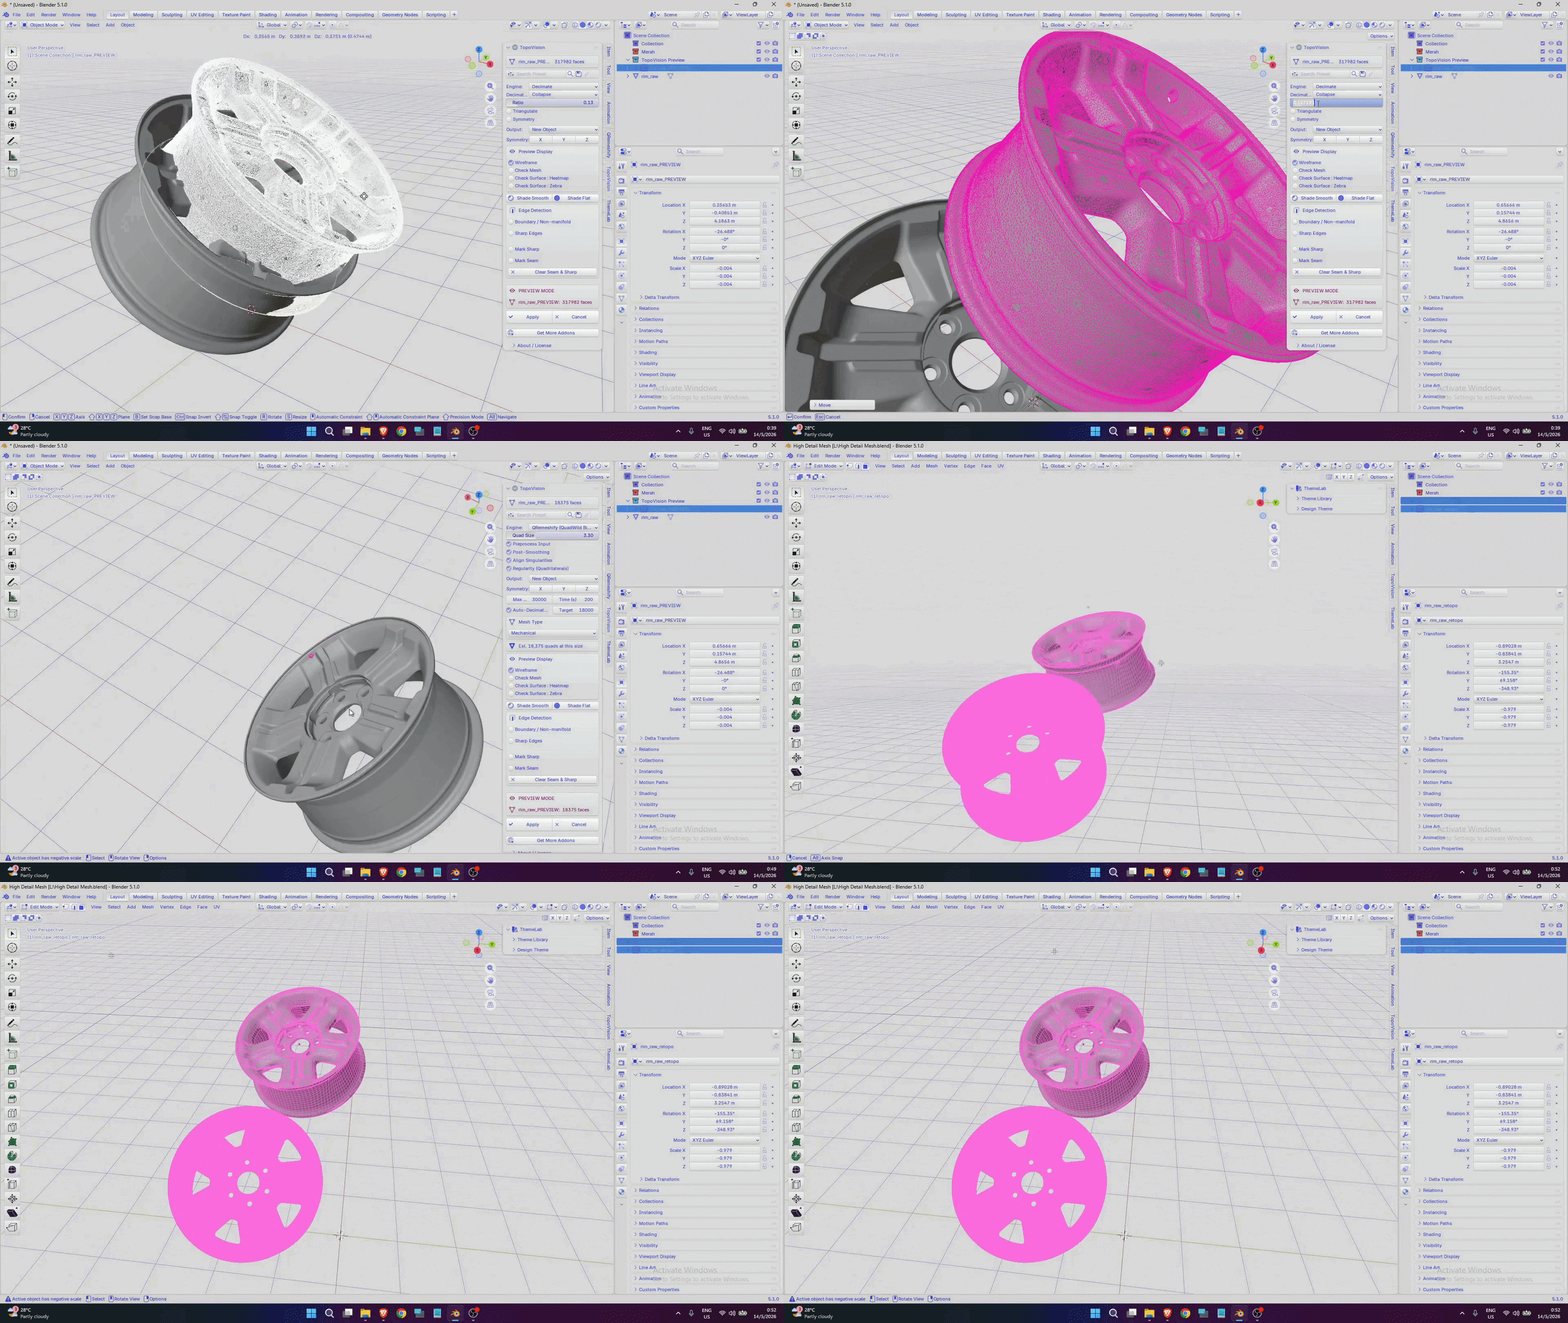
As mentioned earlier, QRemeshify is the best engine available in TopoVision. Now, let’s see what it’s truly capable of.
Please note that you may experience temporary lag while using QRemeshify. I have optimized the workflow as much as possible, but due to engine-level limitations outside of TopoVision’s direct control, optimization flexibility is limited.
In the center is the result generated using the QRemeshify Engine, while the left side shows the Decimate result and the right side displays the original mesh. In my opinion, QRemeshify delivers the best balance of topology quality and mesh preservation.
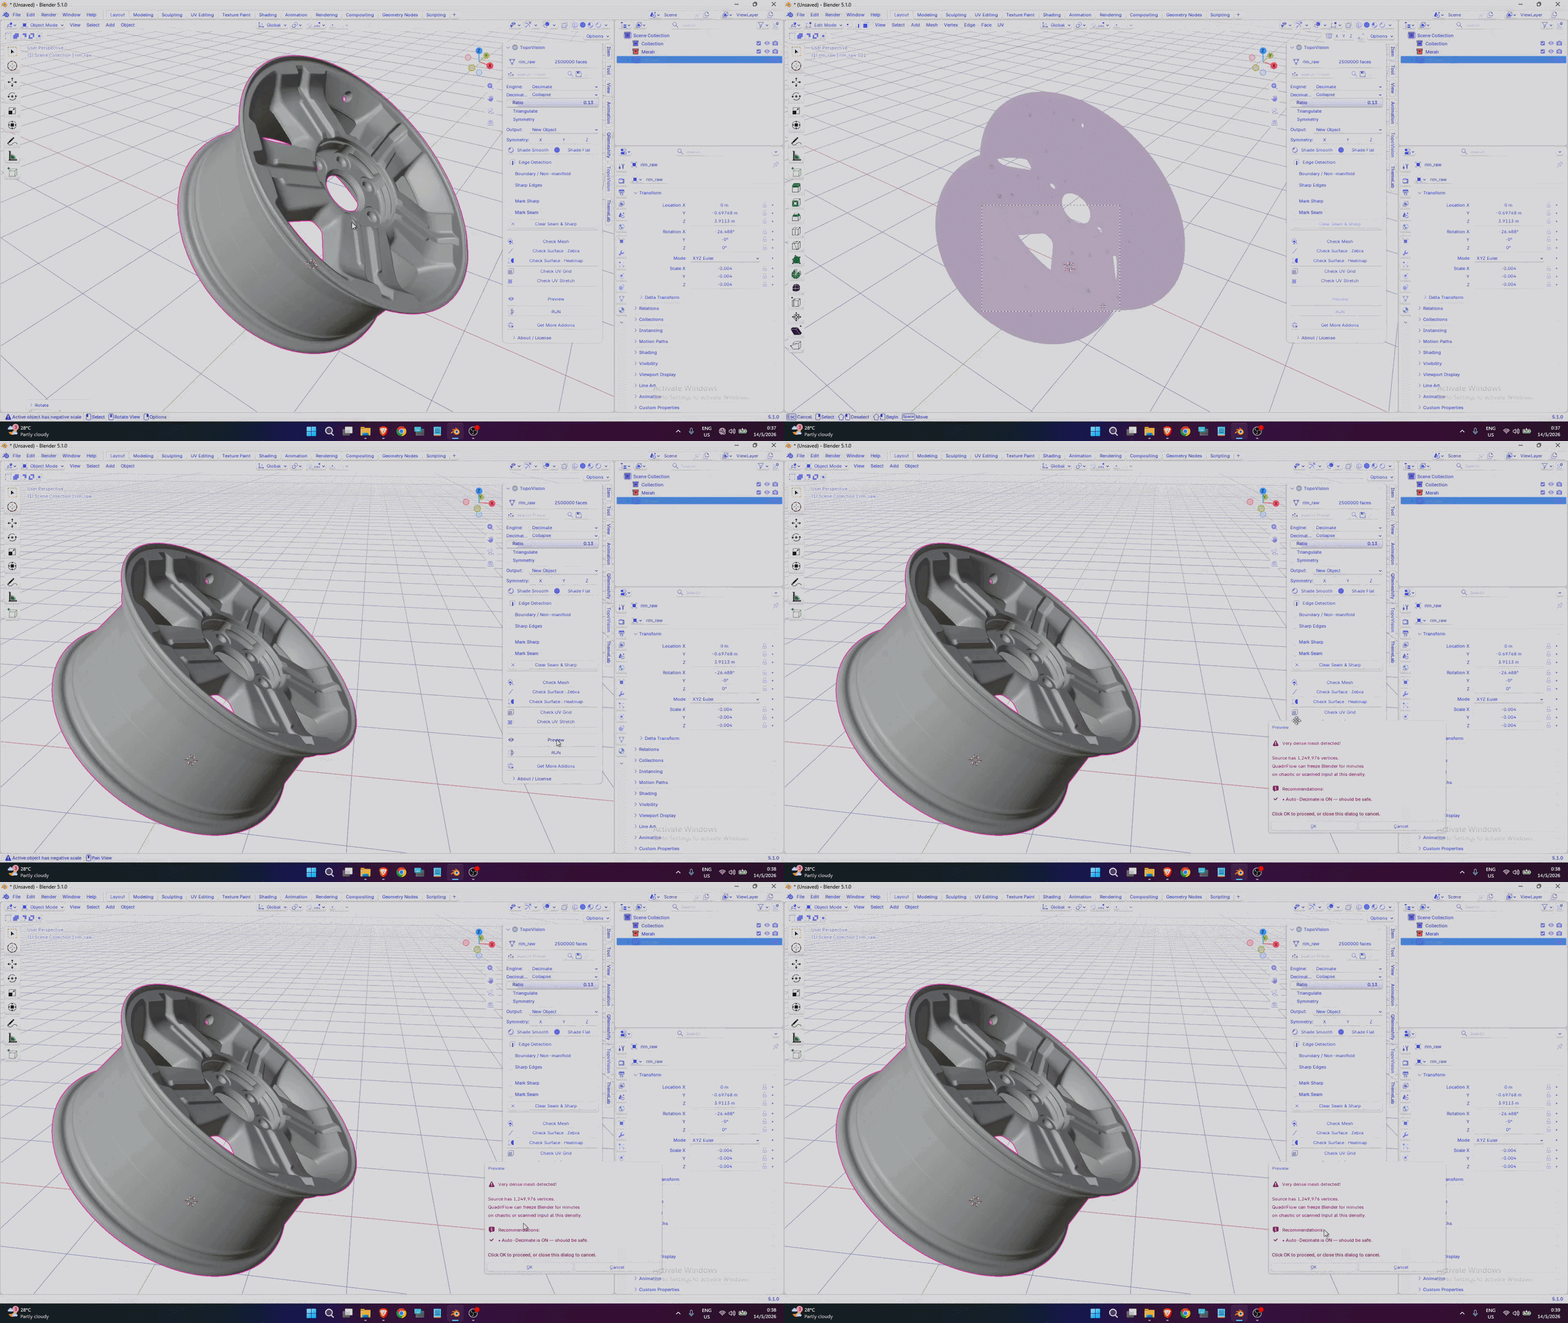
Now, let’s test it on a very high-detail 3D model.
When running the engines, temporary lag may occur during processing. Among all available engines, QRemeshify is the most performance-intensive, and a warning message will appear before execution. However, the final topology quality is well worth the wait.
=============================================
To better understand how TopoVision works, you can watch the demonstration video and adjust the playback speed according to your preference.
By now, you should have a clear understanding of how TopoVision works and the benefits it brings to your workflow.
By now, you should have a clear understanding of how TopoVision works and the benefits it brings to your workflow.
I believe I’ve shared everything you need to know about this addon. That’s all for now — have a great day, and happy Blendering. Thank you for your support!
=============================================