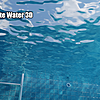
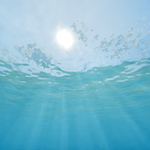
Ultimate Water Shader
 Cg Crafted


How to install: standard way of installing Blender addons see below:
Edit/preferences/Add-ons/install. After you installed it, enable the addon with the checkbox.
Addon will appear under “uShaders” tab (all ultimate shaders like Ultimate Sky etc. will appear here).
1. Addon UI:
1.1. Assign a water to active object.
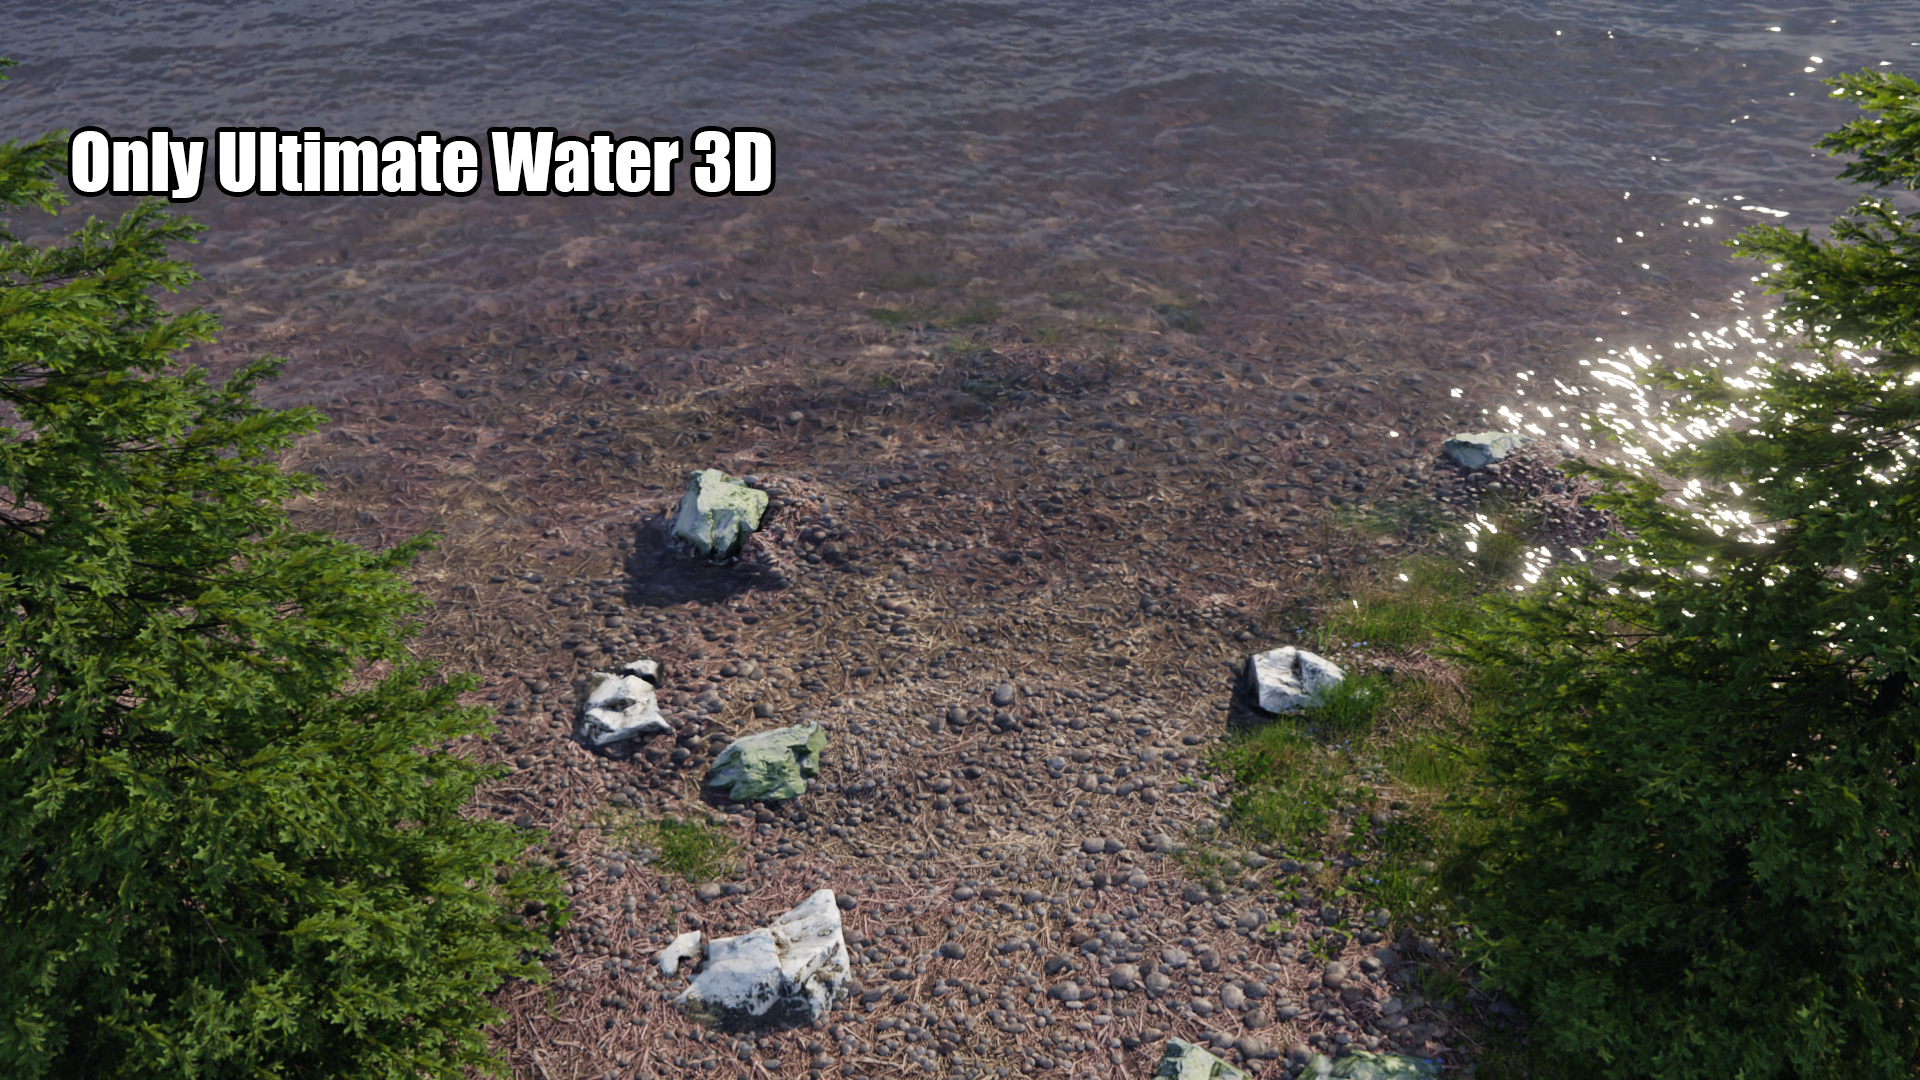
This tab contains the different types of water shaders bundled with the addon. “3D volumetric water” is only available in the Pro/v2.0+ versions as it is the newer version of the shader.
Legacy water = pre v2.0 older shaders now also called “Lite” shaders. They are available in the Pro version too.
1.2. Add a preset object for the water
The simplest way to use the addon. Use these preset objects especially if you are a beginner. Most of the time you don’t need to create or use other objects for the water manually.
3D volumetric water base = object to use with UWS3D (3D volumetric water)
Legacy water base = object to use with legacy water.
2. Basic functionality
First you’d need a water base (object) for your shader to work on like all materials and shaders in Blender. This means you’d want to add a preset object (detailed in 1.2) so the water shader can be assigned to it.
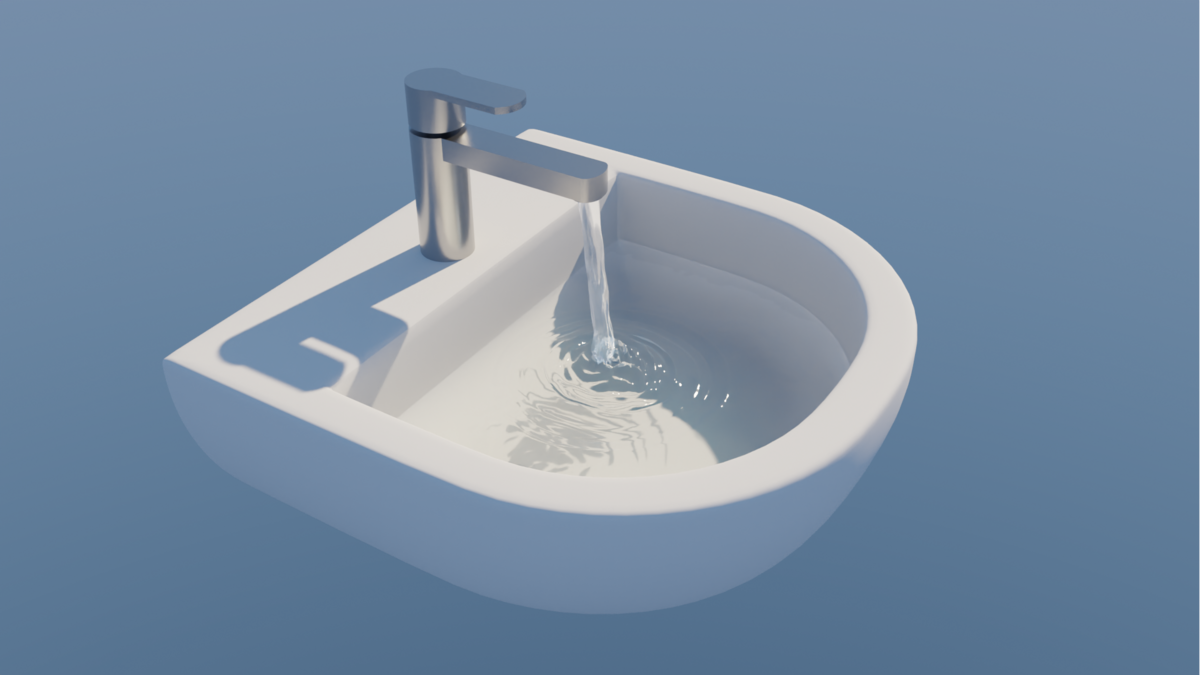
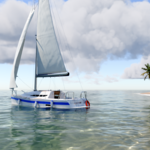
Example: Click on “3D volumetric water base” to add an untextured but pre-configured object. This object includes optimized subdivision settings and object topology for the UWS3D shader. After the object appears in the scene, click on it then click on the “3D volumetric water” button. The addon will automatically assign the material to the specified object.
TIPS: You can also apply the shader to a simple unsubdivided cube, but you need to go to material tab/settings/displacement and select "bump" instead of "displacement only". Scroll down for more info at 3.2, and wave special settings under 3.1.
As mentioned above this works with custom objects but then you need to manually add subdivision etc.
After this your scene will have the UWS3D ready to render.
You need to do the same in Ultimate Water Lite (or Legacy water) but with the appropriate object/material combo.
3.1 Shader UI (UWS3D/Pro)
To access the settings, go to material tab (select the object first that has the water material). The “Surface” dropdown menu shows the settings.
GENERAL
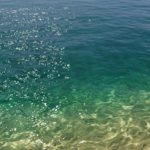
Surface color: change surface color
Density 1 deep: Change water density (layer 1)
Density 1 color: Color of the water volume
Density 2 shallow (introduced in v3.0.0): Density of water close to the surface. This gives a tint for underwater object.
Density 2 color: Shallow water volume color.
Reflection smoothness: 0 = sharp glass like, 1 = smooth matte surface
Transparency: 0 = fully transparent clean water, 1 = not transparent surface, more volumetric color
Dispersion ON: 1 = turn on. 0 = turn off. Default: off. Gives a chromatic-aberration-like effect to the water surface.
CAUSTICS
Caustics ON = 1
Type: There are two types of caustic patterns you can mix. 0 = type one, 1 = type two
Caustic distortion (introduced in v4.0.0): Distorts caustic effect making it more natural, less uniform. Best values between 0.2-0.3. Its animation speed is added on top of "calm animation speed", so on crazy values like 0.9 it will make the overal "calm animation" speed faster.
Caustic distortion amount (introduced in v4.0.0): Strenght of caustics. Called sharpness because if lower than 1, it can create a smoother caustic effect, can be combined with Caustics ON to produce different/lighter/darker caustics.
Scale x an y and rotation: Change the scale or stretch the ratio of caustics. You can also rotate caustics.
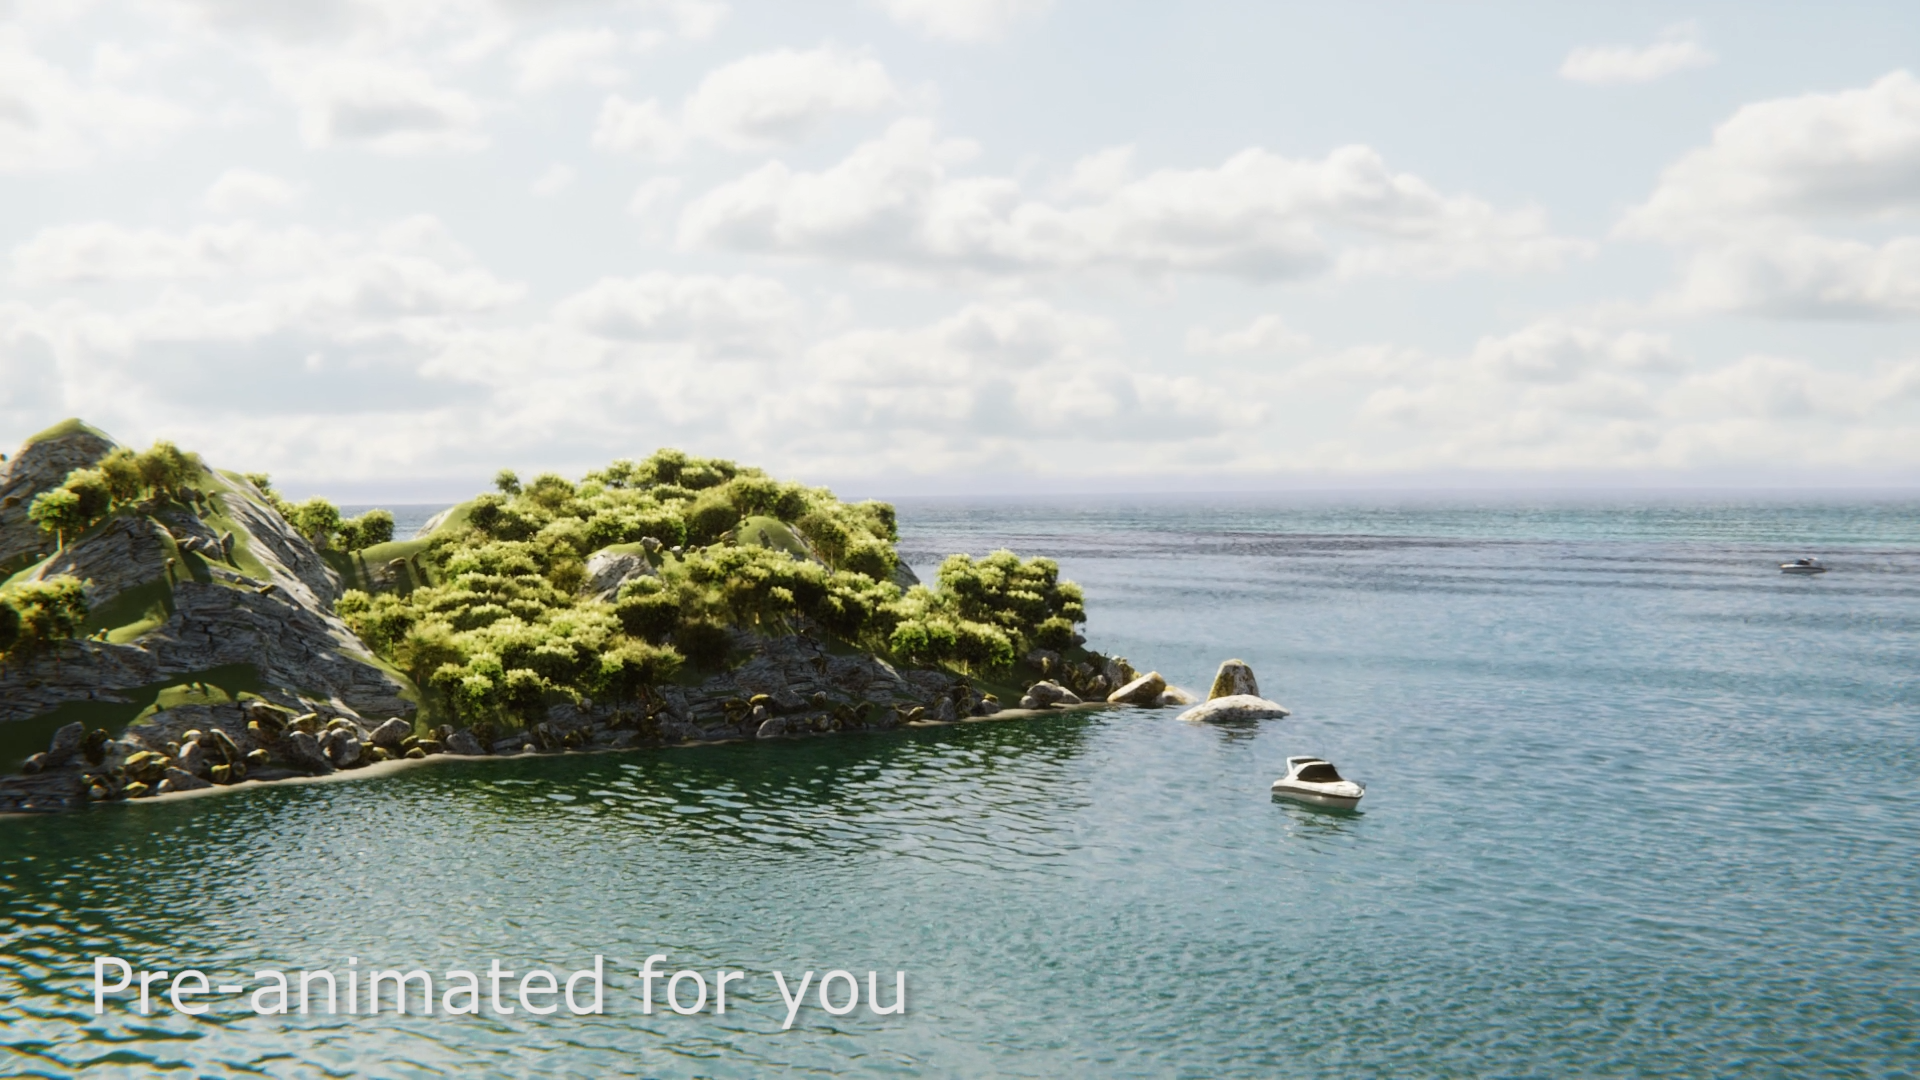
Flow animation speed (formerly "Animation speed" in pre-4.0.0 UWS3D): Flowing river-like directional animation. Minus values = reverse the direction. 0 = no animation.
Calm animation speed (introduced in v4.0.0): A non-directional animation great for pool, ocean, still water surface etc. For rivers or strong directional winds, combine this with "flow animation speed". 0 = no animation. Minus values reverse the speed. Recommended: always use for all animations.
WAVE GENERAL
Wave 1 to 2: Mix wave type 1 with wave type 2. 0 = Wave type 2 is turned off, only wave type 1 is visible, default look. Setting it to 1 = Wave type 2 is turned ON and only it is visible.
Wave 2 to 3: Mix wave type 1 or 2 (or their combination) with wave type 3. This is basically layering the wave types on top of each other in a cumulative manner.
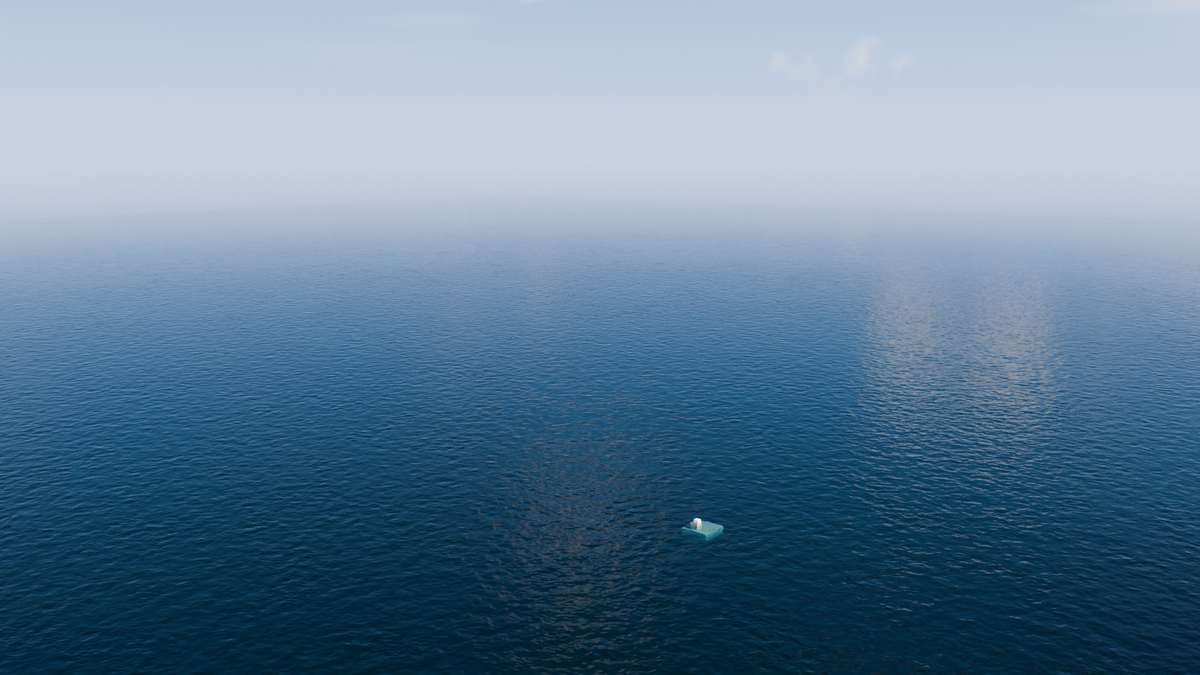
Wave 1 is most ideal for basic ponds, tap water, pool water. Wave 2 has sharper waves, looks a little like the ocean modifier in Blender. Wave 3 has two types of waves by default combined, making the water surface look un-even and more realistic. Best to use for big water surfaces like lakes, ocean, beach - sometimes mixed with wave type 2.
Smoothness: Wave sharpness or smoothness. Should le left on default 0.49 value.
Mini Waves ON (introduced in v4.0.0): Mini waves can add more details to the water surface without modifying the subdivision/bump mapped waves - they are an extra layer over any type of waves. Their animation is connected to "Flow animation speed", and layered over all waves.
Mini Waves distortion (introduced in v4.0.0): Can create automatic ripple-like waves on surface, good for big water surfaces (ripples don't react to environment objects, it's just a look). Best values: 0 = off, or between 0.2-0.3.
Wave to object surface ratio: Wave position relative to object surface.
Wave height to object ratio: Changind displacement value of waves to make them more prominent. Use extremely low values or the waves will turn into spikes*. *This also depends on the scale of your object that you use for the waves. Huge objects (with scale applied) will require bigger waves.
Scale x an y and rotation: Change or rotate the waves. It scales and rotates all type of waves at the same time, main "mapping node".
Flow animation speed (formerly "Animation speed" in pre-4.0.0 UWS3D): Flowing river-like directional animation. Minus values = reverse the direction. 0 = no animation.
Calm animation speed (introduced in v4.0.0): A non-directional animation great for pool, ocean, still water surface etc. For rivers or strong directional winds, combine this with "flow animation speed". 0 = no animation. Minus values reverse the speed. Recommended: always use for all animations.
WAVE SPECIAL
Wave 1, 2, 3 size (formerly "distribution" in pre-v4.0.0): Change size of different type of waves individually. Ideal when mixing multiple type of waves.
Wave 1, 2, 3 detail: Increase the detail of waves, not recommended to use values over 7-8.
Wave 3 small wave size: Wave 3 has two subtype of waves combined, and this changes the size of the "small wave" (of course making it bigger can turn it into the bigger wave).
Wave 3 patch separation: Blending the mask for the two subtypes of waves.
Wave 3 small wave smoother: Makes only the smaller waves less "spiky", mostly required for Adaptive-subdivision type water surfaces.
Wave 3 patch size: Change the size of the masked "patches" (masked areas) in the ocean.
HEIGHT FOAM: *Since v2.6.0 two types of foams are available. Height foam is the old method.
Height foam On: By default it is turned off. You need Blender’s built in wave or ocean modifier for this to work. Or you need manual sculpting for your water surface. The foam will be visible on the highest points relative to your object. Since the built in displacement’s highest points have a similar height foam doesn’t work too well with displacement option without the modifiers.
Sensitivity: Use this to set up from what height your foam will appear.
Sharpness: 0 = smooth, 1 = sharp. Trick: Use max sensitivity with smooth foam to create icy looking material.
Foam strength: Change the look of the foam.
EDGE FOAM: *A new type of foam after v2.6.0
ON: Turn edge foam ON
Reduce size: You have to turn up this value to "clip off" unnecessary foam. 0 = whole surface covered in foam. 1 = very small amount of foam on edges.
Caustic mapping = It is connected to UV by default. You can use generated or other methods.
Waves mapping = It is connected to UV by default. You can use generated or other methods.
3.2 SPECIAL SETTINGS, ADAPTIVE SUBDIVISION, WAVES BUMP MAPS:
The water supports adaptive subdivision if you manually enable it in Blender features. The water base objects work with this method too. Tip: for better RAM optimization it is advised to use basic subdivision and manually subdividing a part of the object in edit mode where the camera is closest - mostly for still objects.
Displacement: In the material settings it is possible to use the default “bump only” option which will turn the 3D waves into bump mapped waves. With this you can use the water on un-subdivided cubes saving RAM and render times on lower end hardware. Note: even if you manually displace the cube or use subdivision + wave or ocean modifier, foam can still work with otherwise fake waves.
3.3 Shader UI (UWS legacy/Lite)
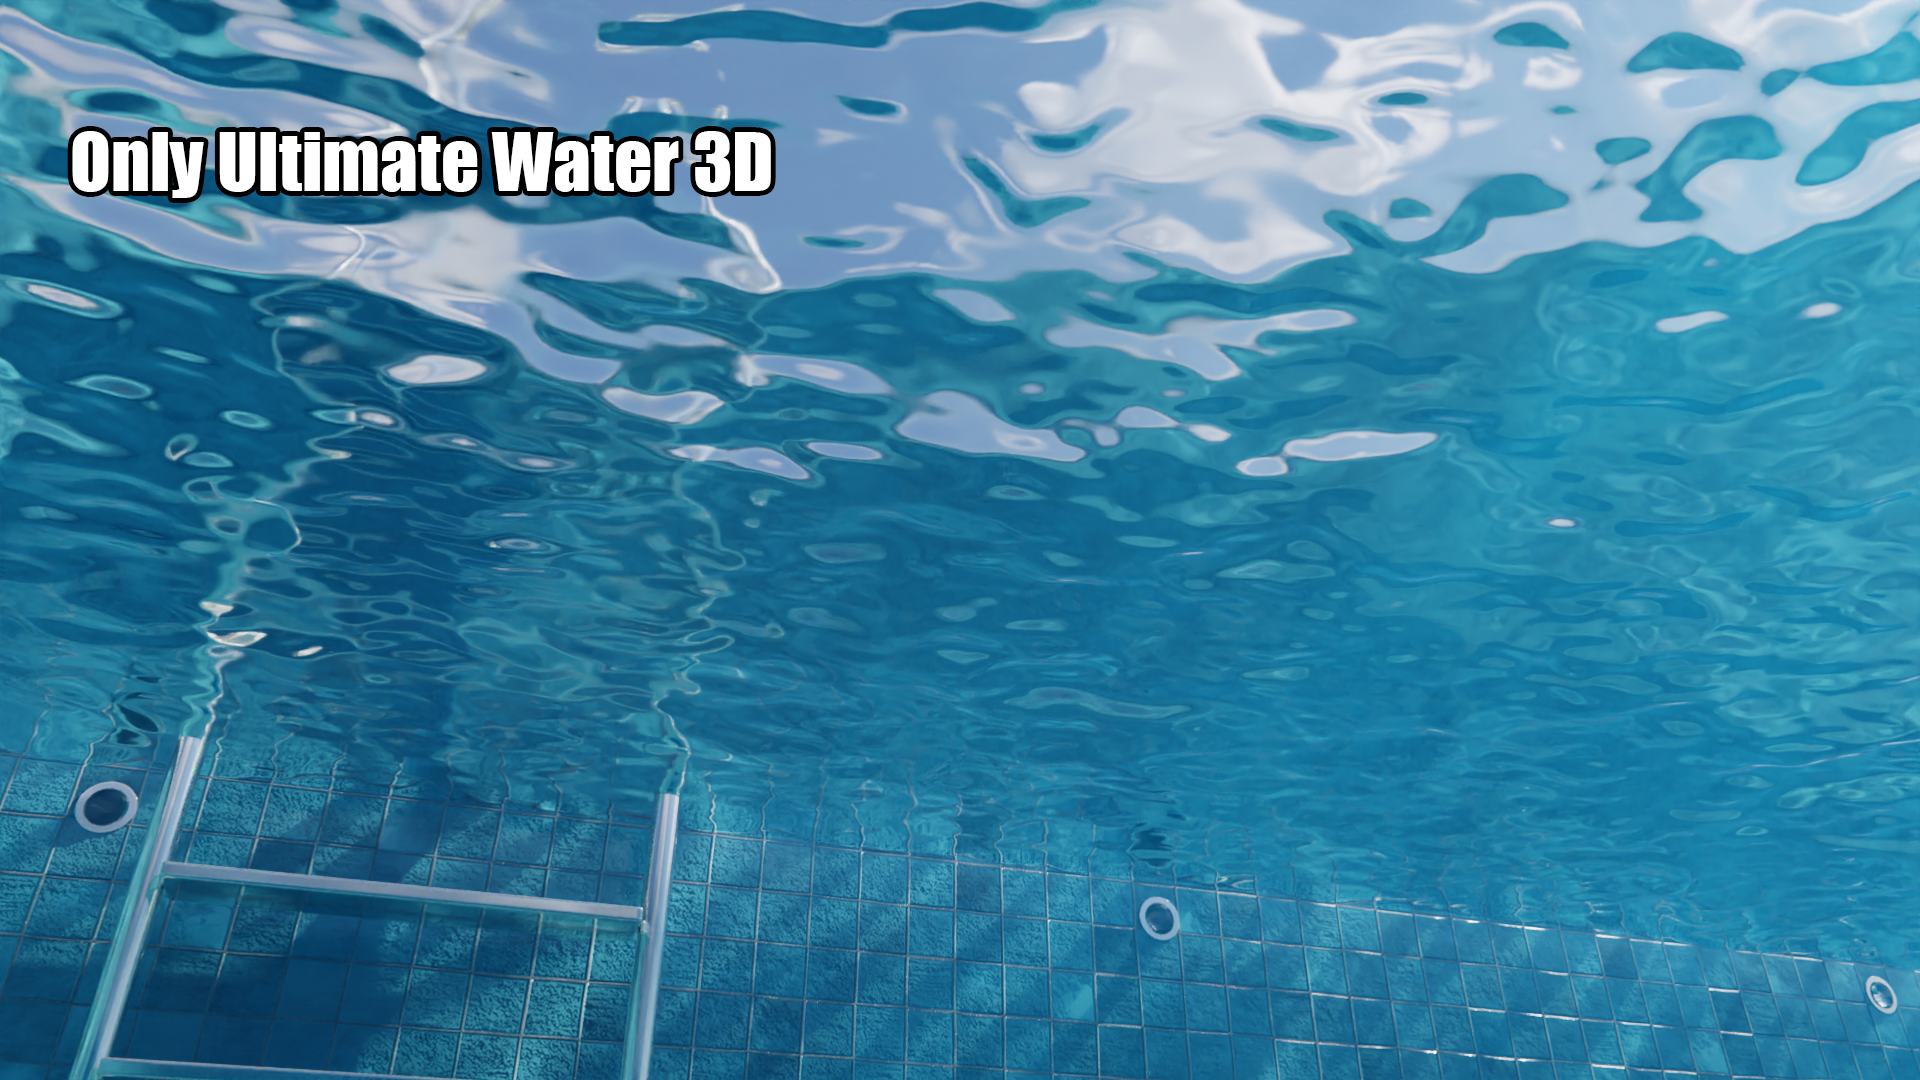
The older version of the shader or the one you get when you download the Lite version. This version supports Eevee but no major updates or features are planned for it. This is for very low end hardware cycles renders (1050 ti or 4-6 core CPU) or Eevee renders. No support for Eevee Next.
To access the settings, go to material tab (select the object first that has the water material). The “Surface” dropdown menu shows the settings.
This shader contains 5 types of fake volumetric, higher speed shaders combined with Eevee support. This only work on planes unlike UWS3D which requires cube objects to work.
First 1-4 settings: Mix water surfaces in a cumulative way. The best results come with this so: For OCEAN you need “Clean to dirty water” and “Dirty water to lake” settings to be = 1.
All types of water have their individual settings combined here. Pool/Dirty/Lake water surface = change surface color you see mostly around horizon. Pool/Dirty/etc. depth color = change the color of deeper parts of the water.
Lake Ocean/Tropical also have transparency values: This works as a fake volumetric control, the more transparent it is, the cleaner the water looks.
Animation speed:
Scale x an y and rotation: Change the scale or stretch the ratio of wave patterns. You can also rotate waves.
Animation speed: change the animation speed of the waves or reverse the direction if you use lower than 0 values.
Mapping = by default it is set to UV map but you can use generated or other coordinates.
Displacement: In the material settings it is possible to use the default “bump only” option which will turn the 3D waves into bump mapped waves.
Adaptive subdivision/normal subdivision both supported.
3.4 Legacy Shader performance
The same shader as the Legacy/Lite but with the option for you to manually mix the different waves and water effects with the node editor. This is for Eeevee and very low end hardware because the lot of wave types can significantly slow down Eevee on lower end hardware like GTX 1050 Ti.
4.1 Preset scenes
The preset scenes have a text "Skybox controls" only visible in viewport. Click on the text and go to the N panel/item/properties to configure the scene. Animation speed: change the animation speed of the waves or reverse the direction if you use lower than 0 values.
Cloud shadows move x and y: move the procedural cloud shadows cast on the scene and water surface.
Fog color: change the very fast fake "volumetric" fog's color. To reset the color that matches the default Ultimate Sky HDRI, copy the value from the "fog color default" to the hex in the color picker.
Fog distance: Increase visibility and reduce atmospheric fog effect. Max value: 5. Default: 0
Fog height: Increase horizon thickness of fog. Max value: 5, Default: 0
The preset scenes file has descriptions for each scene.
-
$32
Use UWS3D and the older UWS shaders according to your preferences. The new one for realism, underwater scenes and simulations, the old one for faster render times or Eevee.
Have questions about this product?
Login to message
| Sales | 400+ |
| Rating | 2 ratings |
| Dev Fund Contributor | |
| Published | about 5 years ago |
| Software Version | 4.4, 4.3, 4.2, 4.1, 4.0, 3.6, 3.3, 3.2, 3.1, 3.0, 2.93 |
| License | Royalty Free |
Discover more products like this
Shader Pack lake river Shader natural environment realistic Water #nature animated pool ocean ultimate water shader terrain