Uv Flex - Interactive Editing Tools
 AlbertoFX


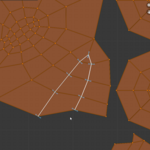
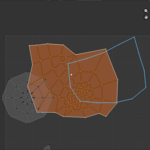
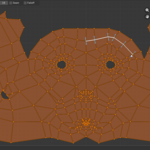
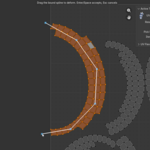
UV Flex Documentation(v0.3)
Overview
UV Flex is a Blender add-on that provides focused UV editing tools directly inside the UV Editor.
It enables:
- Splitting shared UV vertices
- Merging UV vertices or edges
- Reshaping UV islands by drawing a new outline
UV Flex is designed for fast UV cleanup, island adjustment, and hands-on workflows without constant menu navigation.
Installation
-
Download the
uvflex_v0_3.zipfile. - In Blender, go to Edit → Preferences → Add-ons.
- Click Install from Disk... and select the zip file.
- Enable the add-on by searching for UV Flex and checking the box.
- Open the UV Editor while editing a mesh object.
- The UV Flex tools will appear in the UV Editor toolbar.
- Additional settings are available in the UV Editor sidebar under the Tool tab.
Usage
UV Flex operates in the UV Editor while the active object is a mesh in Edit Mode.
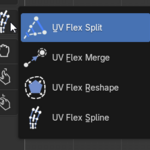
The add-on provides three tools:
- UV Flex Split
- UV Flex Merge
- UV Flex Reshape
- UV Flex Spline
Select a tool from the UV Editor toolbar and interact directly with the UV layout.
Split Tool
Separates shared UV vertices by dragging across them.
Useful for:
- Opening seams
- Separating connected UV regions
- Creating controlled spacing between overlapping UVs
How to Use
- Enter Edit Mode on a mesh object.
- Open the UV Editor.
- Select UV Flex Split.
- Click a shared UV vertex.
- Drag across additional vertices to define the split path.
- Release to apply.
A preview of the split is shown while dragging.
Settings
- Offset — Distance between split sides
- Radius — Cursor detection range
- Seam — Marks mesh edges as seams
- Falloff — Enables proportional movement
- Power — Falloff strength curve
- Falloff Radius — Range of influence
Notes
- Works best on shared UV vertices
- Increase Radius or zoom in if picking fails
Merge Tool
Merges UV vertices or edges by dragging from one element to another.
The result is positioned at the midpoint.
How to Use
- Enter Edit Mode on a mesh object.
- Open the UV Editor.
- Select UV Flex Merge.
- Click a source vertex or edge.
- Drag to a target.
- Release to merge.
A preview shows source, target, and connection line.
Settings
-
Element
- Auto — Closest valid element
- Vertex — Vertices only
- Edge — Edges only
- Radius — Cursor detection range
- Split Ends — Moves only edge loops instead of full welded endpoints
Notes
- Source and target must match type (vertex ↔ vertex, edge ↔ edge)
- Switch Element mode if incorrect picks occur
Reshape Tool
Reshapes a selected UV island by drawing a new boundary.
The tool remaps the island to the drawn outline while preserving internal structure.
How to Use
- Enter Edit Mode on a mesh object.
- Open the UV Editor.
- Select a UV island.
- Select UV Flex Reshape.
- Click and drag to draw a new outline.
- Release to apply.
Preview:
- Original outline → white
- New outline → blue
Settings
- Stroke Spacing — Distance between sampled stroke points
Lower values = more detail
Higher values = simpler outline
Notes
- Requires an island selection
- Displays a warning if none is selected
Spline Tool
Deforms a selected UV island using a drawn spline.The tool binds selected UVs to the spline, then lets you drag the spline to deform the island.
How to Use
1. Enter Edit Mode on a mesh object.2. Open the UV Editor.
3. Select a UV island.
4. Select `UV Flex Spline`.
5. Click and drag across the island to draw the bind spline.
6. Release to bind the selected UVs.
7. Drag the bound spline to deform the island.
8. Press `Enter` or `Space` to accept.
9. Press `Esc` or right-click to cancel.
Tool Sidebar Settings
- Open the UV Editor
- Press N to open the sidebar
- Go to the Tool tab
- Locate the UV Flex panel
Settings are grouped by tool.
Toolbar Integration
UV Flex adds tools to the UV Editor toolbar:
- UV Flex Split
- UV Flex Merge
- UV Flex Reshape
Each tool includes a custom icon (with fallback if unavailable).
Best Practices
- Work in Edit Mode within the UV Editor
- Zoom in for precision work
- Increase Radius for better detection
- Use Vertex/Edge mode if Auto mis-selects
- Always select the island before using Reshape
- Use moderate Stroke Spacing for clean results
- Use Ctrl + Z to undo unwanted results
Troubleshooting
Tools do not appear
- Ensure the add-on is enabled
- Confirm you are in the UV Editor
- Verify the object is a mesh in Edit Mode
Split cannot find a vertex
- Zoom in
- Increase Radius
- Ensure the cursor is over a visible vertex
Merge cannot find a vertex or edge
- Increase Radius
- Switch Element mode
- Click directly on a UV element
Reshape requires selection
- Select a UV island first
- Ensure UV selection is visible
- If UV Sync is enabled, select corresponding mesh elements
Reshape does not apply
- Draw at least 3 points
- Ensure the island has a valid boundary
- Increase Stroke Spacing if stroke is too dense
Limitations
- Works only in the UV Editor (Edit Mode, mesh objects)
- Reshape requires a selected island
- Dense UVs may require radius adjustment
- No automatic UV packing
- No automatic overlap resolution
- Not intended for precise CAD-style shaping
Version
Current Version: 0.3
Have questions about this product?
Login to message
| Sales | 200+ |
| Dev Fund Contributor | |
| Published | 5 months ago |
| Blender Version | 5.1 |
| Extension Type | N/A |
| License | GPL |